This site is supported by our readers. We may earn a commission, at no cost to you, if you purchase through links.
It’s great for bags, pouches, or even waterproof covers.
Unlike fabric, vinyl doesn’t fray, but it can stick to your sewing machine or tear if you’re not careful.
Use clips instead of pins to hold pieces together and a teflon foot to keep it moving smoothly.
A sharp needle and strong thread are must-haves to avoid skipped stitches.
Vinyl may seem tricky at first, but with a few tricks, you’ll be stitching it up like a pro in no time.
Table Of Contents
- Key Takeaways
- What is Vinyl Material and How to Prepare It for Sewing?
- Best Needles and Thread for Sewing With Vinyl
- My Sewing Projects With Vinyl
- Tips for Cutting Vinyl
- Tips for Sewing With Vinyl
- Troubleshooting Common Issues When Sewing With Vinyl
- How to Care for Vinyl Sewing Projects
- Frequently Asked Questions (FAQs)
- Conclusion
Key Takeaways
- You don’t need pins for vinyl—use clips to avoid permanent holes and a Teflon foot to stop sticking while sewing.
- Prep vinyl by rolling it to prevent creases and gently warming it or hanging it to remove wrinkles.
- Choose durable thread, a sharp needle like a leather one, and a stitch length of 3mm or more for strong, clean seams.
- Clean vinyl with mild soap and a soft cloth, store it rolled or flat, and keep it away from direct sunlight and heat to protect its quality.
What is Vinyl Material and How to Prepare It for Sewing?
Vinyl is a versatile plastic material that’s durable, water-resistant, and available in various textures and thicknesses, making it perfect for sewing projects like bags and covers.
Vinyl’s durability and water resistance make it a go-to material for crafting stylish, long-lasting projects like bags, covers, and more.
To prepare it, store it rolled to avoid creases and gently warm or hang it to remove any wrinkles before starting, which involves complete concepts like handling and preparation to ensure the vinyl is ready for use.
Where to Buy Vinyl Materials
When shopping for vinyl fabric, explore local shops, craft stores like JoAnn Fabrics, or online retailers such as Amazon.
Fabric wholesalers and vinyl suppliers often provide a wide range of options, including samples for testing thickness. Consider upcycling options like repurposing old shower curtains or tablecloths.
Gauge size indicates vinyl material properties—thicker gauges add durability. Clips or tape work better than pins to avoid permanent holes.
Many projects start with finding vinyl products. Whether online or in-store, selecting quality vinyl guarantees a smooth start to your project.
Store Vinyl Properly
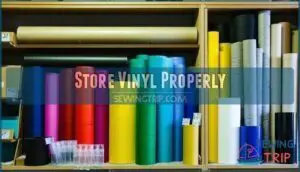
Storing vinyl fabric correctly makes projects much easier. Always roll, don’t fold, to avoid creases that can become permanent.
Use cardboard tubes or PVC pipes as support structures for long-term storage. Keep vinyl in a dry place, as humidity effects can cause warping.
Temperature control matters too; extreme heat or cold can damage the material. For vinyl sewing prep, store samples separately for testing tension or stitches.
Flatten and Remove Wrinkles
Flattening and removing wrinkles from vinyl fabric is essential to getting clean, professional results.
Flattening vinyl is key for smooth, professional results—prepare it with care to ensure your projects shine with perfection.
A great option is to use hanging techniques.
Hang your vinyl on a clothesline for a few hours, letting gravity work to relax creases.
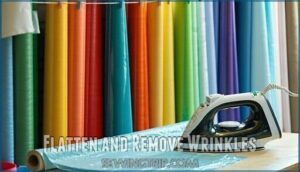
For stubborn wrinkles, try gentle heat application using a low-heat iron.
Place a pressing cloth or thick fabric between the iron and your vinyl to avoid damage while ironing vinyl.
Never use steam—it can melt your material.
Crease prevention starts with proper storage solutions.
Roll your vinyl onto cardboard tubes instead of folding it, as folds can create permanent lines.
If rolling isn’t an option, consider accordion-folding loosely and hanging it with skirt clips.
These vinyl sewing tips guarantee smooth surfaces, making sewing vinyl fabric easier.
A little preparation goes a long way!
Best Needles and Thread for Sewing With Vinyl
Choosing the right tools makes all the difference when sewing vinyl. Use needle types like leather or heavy-duty needles, such as sizes 90/14 or 100/16, for thick fabrics.
Nylon thread is the best thread type—its strength guarantees seam durability. Adjust your stitch length to at least 3mm and tweak tension adjustments to avoid skipped stitches.
Avoid pins; use clips to protect the material. For smooth sewing, try a non-stick or Teflon foot, and test everything on scrap vinyl first!
Many sewers also prefer using specialized needles for vinyl to prevent damage, which is a key factor in achieving professional results.
My Sewing Projects With Vinyl
When you’re starting with vinyl projects, it helps to try simple and practical items to build your skills.
From crafting an iPad cover to sewing clear zipper pouches, these ideas are perfect for learning while creating useful pieces.
DIY IPad Case / Cover
Give your iPad a stylish and durable home with this DIY iPad case using vinyl fabric! It’s a beginner-friendly sewing vinyl tutorial that results in a snug, protective case.
- Measure your iPad dimensions – Grab a tape and note width, height, and thickness.
- Cut two vinyl pieces – Choose quality vinyl fabric; precision is key.
- Add lining – Cut two thick fabric pieces for interior padding.
- Sew one side – With clips holding layers, stitch one edge securely.
- Attach Teflon foot – This tool guarantees smooth sewing vinyl projects.
- Finish assembly – Sew the remaining sides, consider edge finishing for a professional touch.
Experiment with pattern design or closure options like zippers or snaps. Store your case safely to avoid creases!
How to Sew With Cork Fabric: Fabric Bin Sewing Tutorial
After crafting your iPad case, why not try sewing a fabric bin with cork and vinyl fabric?
Cork’s durability and flexibility make it an excellent choice for stylish storage, while vinyl fabric adds water resistance—perfect for organizing items in damp spaces.
Start with proper sewing techniques: use leather needles, adjust your sewing machine tension, and choose a Teflon foot to prevent sticking.
Follow this sewing tutorial to cut your materials precisely and assemble them seamlessly. This bin is one of many creative project ideas to showcase your sewing vinyl skills with functional flair!
How to Sew a Zipper Pouch From Clear Vinyl
Making a clear vinyl zipper pouch is a fun way to hone your sewing skills.
Focus on these steps:
- Zipper Selection: Use a sturdy zipper that matches your pouch size.
- Vinyl Thickness: Choose a clear vinyl fabric, 10-20 gauge, for durability and easy handling.
- Cutting Straight: Use a rotary cutter for clean edges and precision.
- Seam Finishing: Secure seams using knots, as backstitching can damage vinyl.
- Corner Reinforcement: Add extra stitching for strength at corners.
This quick sewing tutorial is durable and versatile.
Remember to select suitable clear vinyl for your project.
DIY Fabric Coasters
When working on fabric coasters, mix absorbent cores with heat-resistant vinyl fabric for durability and charm.
Use unique coaster shapes or creative fabric combinations to match your style. Adjust your sewing machine settings for smooth stitching and finish edges neatly for a professional look.
These sewing projects are simple yet elevate any table setting effortlessly. Sewing vinyl makes coasters durable and modern!
Tips for Cutting Vinyl
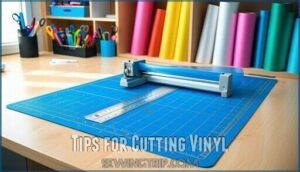
Cutting vinyl can be tricky, but using the right tools and techniques makes it manageable. Always measure carefully, and use a rotary cutter for smooth, precise edges.
Determine How Much Vinyl You Need
Before starting your vinyl sewing project, take accurate measurements of your project’s dimensions. Always add extra fabric for seam allowances and a little waste allowance—better safe than sorry!
Check the vinyl width to match your pattern layout. Remember to account for vinyl’s unique characteristics for best results.
Here’s a quick checklist:
- Measure your fabric needs twice—cut once.
- Include at least 1-2 inches for seams and adjustments.
- Use a rotary cutter for precise cuts on vinyl fabric.
- Test your sewing machine settings on scrap vinyl first.
Planning guarantees smoother vinyl sewing projects, and it is always better to be safe than sorry, and to have a little extra fabric for adjustments.
Determine Gauge Size of Vinyl
Choosing the right vinyl gauge size is key to a polished project.
When selecting vinyl, remember: the gauge measures thickness.
A higher number means thicker material, which adds durability but can be harder to sew.
Different types of vinyl have various thickness uses based on your project requirements.
For example, lightweight gauges (4-8) work well for linings, while medium gauges (8-12) suit pouches or table drapes.
You can also explore a detailed thickness guide for more information.
Markdown Table:
| Gauge Size | Typical Uses | Ease of Sewing | Flexibility |
|---|---|---|---|
| 4-8 | Cosmetic linings, ID sleeves | High | Very Flexible |
| 8-12 | Bags, luggage tags | Moderate | Balanced Flexibility |
| 12-20 | Upholstery, cushions | Challenging | Sturdy, Less Flexible |
| 40-80 | Desk pads, heavy-duty covers | Difficult | Rigid, Not Flexible |
Before sewing, match your vinyl thickness to your project’s needs—it saves headaches later!
Cutting Vinyl
Cutting vinyl fabric doesn’t have to be tricky if you’ve got the right tools and a clear plan in place.
Start with a rotary cutter and a cutting mat for super clean, straight edges.
These are lifesavers for precise cuts and help avoid scratches on your vinyl.
If scissors feel more your speed, use sharp ones and steady hands for smaller or less detailed cuts.
Gauge selection matters too—thinner vinyl (like 8-10 gauge) is easier to cut; thicker options might need a bit more elbow grease.
Make sure your pattern placement is spot-on to minimize waste and get the most out of your fabric.
For clean cuts, secure the fabric with sewing clips instead of pins (which can leave holes).
These steps will streamline your vinyl-cutting process and set you up for sewing success!
Tips for Sewing With Vinyl
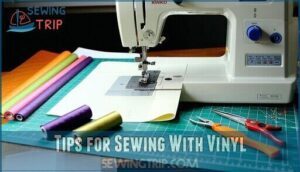
Sewing with vinyl can seem tricky, but the right tips make it manageable and even fun.
By adjusting your tools, setup, and techniques, you’ll avoid common issues and create beautiful, durable projects.
Use Tissue Paper When Sewing
Tissue paper can be your secret weapon when sewing vinyl.
By placing a sheet between the presser foot and vinyl, it prevents sticking, stabilizes seams, and keeps the material moving smoothly.
It’s especially helpful for feeding vinyl through the machine without snagging or tearing, and use lightweight Tissue Paper Types that are easy to remove after stitching.
This trick works wonders for sewing machine vinyl projects and guarantees cleaner, frustration-free results, making every project feel seamless—literally, and to avoid residue, gently tear away the tissue along the seam once you’re done, which is a key part of mastering vinyl sewing techniques.
Using Pins and Clips
For sewing vinyl, avoid using pins—they leave permanent holes.
Instead, try pin alternatives like sewing clips, Wonder Clips, or Olfa’s Craft Clips. These hold fabric securely without causing damage.
Place clips about every 3-4 inches for straight sections and closer together on curves to maintain accuracy.
This method works well for sewing vinyl for beginners or pros alike. A good sewing vinyl guide always emphasizes protecting your material while keeping your project neat and manageable, using tools like Wonder Clips and following best practices for sewing vinyl.
Sewing Machine Settings
Using clips instead of pins on vinyl keeps your material untarnished, but adjusting your sewing machine settings is just as important.
Vinyl needs careful attention to tension adjustment, stitch length, and needle pressure. Here’s how to get it right:
- Stitch Length: Set it longer—3 mm or more—to prevent perforation.
- Needles: Use heavier sewing machine needles like leather or vinyl-specific ones.
- Presser Foot: Swap in a Teflon-coated, roller, or walking foot to stop sticking.
- Tension Adjustment: Test lower settings on scrap vinyl for smooth, even stitches.
- Feed Dogs: Make certain they’re clean; they grip vinyl better.
Follow these tips, and vinyl projects will be worry-free!
Remember to take into account vinyl’s unique characteristics for superior results.
Lengthen Stitches
When sewing vinyl, adjusting your stitch length is a game-changer. Longer stitches—at least 3.0mm—help reduce perforation and keep your project durable. Short stitches can weaken the vinyl fabric, making it prone to tearing.
A longer stitch length preserves seam strength and enhances stitch visibility for a clean finish. Don’t forget to adjust your thread tension according to the vinyl thickness. Too much tension can cause puckering, while too little may create loose stitches.
Use the right needle, such as leather or denim, to handle thicker vinyl layers, and pair it with a Teflon-coated, walking, or roller foot to prevent sticking. Fine-tuning sewing machine settings guarantees smooth sewing and helps you tackle your vinyl projects successfully without damaging the material. It is crucial for achieving a clean finish and ensuring seam strength.
Troubleshooting Common Issues When Sewing With Vinyl
When sewing with vinyl, you might notice issues like sticking, skipped stitches, or uneven seams. Understanding these common problems and learning quick fixes can save you time and frustration.
Sticking to The Presser Foot
Uneven stitching? Your presser feet might be the problem. Friction from vinyl can cause sticking.
Try these tips to resolve the issue:
- Use a Teflon-coated foot, roller foot, or walking foot to glide smoothly.
- Place tissue paper under the fabric to reduce drag.
- Adjust the presser foot pressure for balanced stitching.
- Test a scrap first to perfect your setup.
Skipped Stitches
Skipped stitches can happen when the wrong tools or settings are used while sewing vinyl.
Here’s how to fix them:
- Choose the right needle type—a leather or denim needle (90/14 to 110/18) works best.
- Adjust sewing machine tension and test it on scrap vinyl to avoid tension issues.
- Use high-quality thread to prevent breakage and maintain smooth stitching.
- If feed problems persist, consider using a stabilizer or Teflon foot for smooth movement.
To address this, remember that incorrect needle setup often causes skipped stitches.
Test settings first, then sew confidently!
Uneven Stitches
Struggling with uneven stitches on vinyl? Start by adjusting your sewing machine tension—too tight or too loose can ruin your seams.
Use a suitable needle size, like 90/14 for medium vinyl, and pair it with high-quality thread. A Teflon or walking presser foot helps the material glide smoothly over the feed dogs.
Lengthen the stitch length to at least 3mm to avoid perforating the vinyl. Test settings on a scrap beforehand, as preparation is key to achieving clean, professional results.
How to Care for Vinyl Sewing Projects
Taking care of your vinyl projects keeps them looking great and lasting longer.
Clean them with mild soap and water, and store them flat or rolled to avoid creases or damage.
Cleaning Vinyl
Though vinyl fabric crafts are easy to clean, proper care guarantees they last.
Here’s how:
- Mild Solution: Use warm water with a drop of dish soap for stain removal. Gently wipe with a soft cloth.
- Mildew Prevention: For tough spots, mix equal parts vinegar and water, but test a hidden spot first.
- Surface Protection: Avoid harsh chemicals that may damage or discolor vinyl.
- Cleaning Frequency: For dirt buildup, clean weekly and rinse thoroughly. Air-dry or towel dry to protect your projects!
Storing Vinyl Projects
After cleaning your vinyl projects, it’s important to store them properly to keep them looking great for years.
Vinyl fabric doesn’t like direct sunlight or heat, so aim for a cool, dark spot like a drawer or closet.
Sunlight exposure can fade colors, while heat might warp or damage the material’s shape, so humidity control also matters.
Use a dry, well-ventilated area to avoid mold or stickiness.
If your project has a defined structure, like a vinyl purse or a pouch, stuff it lightly with tissue paper or fabric scraps to maintain its shape.
Flat items—like placemats—are best stored flat to avoid bending or creases.
Always make sure your project is clean before storage, as dust or stains might settle in over time.
Proper vinyl storage starts with careful vinyl preparation, and keeping your project in a cool, dark spot is essential to prevent damage, ensuring your project remains in good condition with minimal maintenance.
Frequently Asked Questions (FAQs)
What type of projects can vinyl fabric be used for?
You can use vinyl fabric for purses, tablecloths, upholstery, baby bibs, seat covers, and more.
It’s also perfect for outdoor furniture, placemats, passport holders, or crafting clear pouches with a durable finish.
Are there any special tools needed to work with vinyl fabric?
Over 85% of vinyl sewing projects succeed with the right tools—use a Teflon presser foot, rotary cutter, heavy-duty needles, and sewing clips.
These prevent sticking, tearing, or creasing, making your sewing smoother and frustration-free.
What is the best way to clean vinyl fabric?
Wipe vinyl fabric with a damp cloth and mild soap for everyday cleaning.
For tougher stains, try rubbing alcohol or a diluted vinegar solution.
Avoid harsh chemicals and always test cleaners on a small area.
What is the difference between upholstery vinyl and marine vinyl?
Upholstery vinyl is designed for indoor use, offering durability and style for furniture projects.
While marine vinyl excels outdoors with UV, mildew, and water resistance, making it perfect for boats, patio furniture, and other wet environments.
Can vinyl fabric be heat-transferred for designs?
Ever wonder if vinyl fabric can handle heat transfers?
Unfortunately, it can’t.
Heat can melt or warp most vinyl, so it’s better to use adhesive designs or sew on decorative elements instead.
What are the environmental impacts of using vinyl?
Using vinyl has environmental downsides since it’s made from PVC, a plastic that doesn’t easily decompose.
Its production releases harmful chemicals, and disposal often leads to landfill pollution or toxic incineration byproducts.
Consider alternatives thoughtfully.
How do you repair a tear in vinyl?
Tears in vinyl aren’t the apocalypse, but they can’t fix themselves.
Clean the area, apply vinyl adhesive, and press it firmly with a patch.
Let it cure for a durable, nearly invisible repair.
Is all vinyl waterproof or water-resistant?
Not all vinyl is fully waterproof, but most types are water-resistant.
Some, like marine or outdoor vinyl, repel water better and handle moisture effectively, while clear or thinner vinyl may need extra care in wet conditions.
What are the differences between faux leather and vinyl?
Faux leather mimics real leather with a softer, more supple feel, while vinyl is stiffer, shinier, and more plastic-like.
Faux leather suits fashion and upholstery, while vinyl excels in durability and moisture resistance for outdoor use.
Conclusion
Think of sewing with vinyl as opening a new creative door.
This versatile, durable material challenges you to grow your skills while offering endless possibilities for projects like bags, covers, and pouches.
With the right tools, like a Teflon foot, sharp needles, and strong thread, you’ll master techniques to sew confidently.
Remember to prepare vinyl properly and adjust your machine settings.
Now that you know what sewing with vinyl involves, you’re ready to create something amazing!

