This site is supported by our readers. We may earn a commission, at no cost to you, if you purchase through links.

This creates the perfect balance – tight enough to prevent fabric edges from stretching or distorting, but loose enough that you won’t create puckering or permanent marks.
You’ll use this shorter-than-normal stitch length when working with curved seams like necklines and armholes, or when handling stretchy fabrics that love to misbehave.
Think of it as your fabric’s security blanket – it holds everything in place while you work.
Getting this measurement right from the start prevents countless headaches during construction and guarantees your finished garment maintains its intended shape.
Table Of Contents
Key Takeaways
- You’ll set your stay stitching length between 2.0-2.5mm (12-15 stitches per inch) to create the perfect balance – tight enough to prevent stretching but loose enough to avoid puckering or permanent marks on your fabric.
- You should apply stay stitching immediately after cutting your pattern pieces, focusing on curved areas like necklines and armholes, plus any edges cut on bias or stretchy fabrics that tend to distort during handling.
- You’ll stitch from the widest part toward the narrowest point, following the fabric’s grainline – for necklines, start at each shoulder and work toward the center to prevent uneven stretching on either side.
- You can leave these stitches permanently in place since they’re sewn within the seam allowance and won’t show in your finished garment, providing long-term stabilization that maintains your fabric’s original shape throughout construction.
What is Stay Stitching?
Stay stitching is your fabric’s best friend in terms of keeping those tricky edges in line.
Stay stitching: the unsung hero that keeps your fabric behaving beautifully from cut to finish.
This sewing technique involves placing a single row of straight stitches along the raw edge of fabric pieces, right within the seam allowance.
Think of it as an invisible safety net that prevents your carefully cut pieces from stretching out of shape.
The stay stitching definition is simple: it’s fabric stabilization at its finest.
You’re creating a barrier that locks the original grain and shape in place before any construction begins.
This technique serves one clear stay stitching purpose – maintaining your fabric’s integrity from the moment you cut until your final seam.
Unlike temporary basting, stay stitching offers stitch permanence.
These stitches remain in your finished garment, working behind the scenes to keep everything properly aligned and professionally constructed.
When to Use Stay Stitches
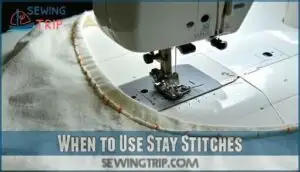
You’ll want to add stay stitches right after cutting your fabric pieces and before you start sewing them together.
Focus on curved areas like necklines and armholes, plus any edges cut on the bias or diagonal where the fabric likes to stretch out of shape.
Curved Edges
Curved edges demand your attention during stay stitching because they’re prone to stretching and distortion.
Use a 2mm stay stitching length on these tricky areas to maintain their original shape.
- Necklines – Both concave curves and V-necks need reinforcement
- Armholes – Prevent gaping with proper stay stitching curved seams
- Princess seams – Keep these fitted lines smooth
- Hiplines – Maintain waist definition through careful sewing
Stretchy Fabrics
Several stretchy fabrics demand extra attention when you’re stay stitching.
Knit fabric presents unique challenges because it naturally wants to curl and distort.
Use a 2mm stay stitching length for best results.
| Fabric Type | Stay Stitching Length | Special Considerations |
|---|---|---|
| Jersey Knits | 1.5-2mm | Use differential feed if available |
| Stretch Wovens | 2-2.5mm | Reduce tension adjustments slightly |
| Bias Stretch | 1.5mm | Stitch immediately after cutting |
| Ponte Knits | 2mm | Consider serger use for clean edges |
| Silk Charmeuse | 2mm | Handle gently to prevent fabric stretching |
These sewing techniques for knits will keep your projects looking professional and prevent frustrating fabric distortion, ensuring a successful outcome with proper care.
Stay Stitch Direction
Direction matters more than you might think when stay stitching. You’ll want to follow the fabric’s grainline and stitch from the widest part toward the narrowest point.
For neckline direction, start at each shoulder and stitch toward the center front or back. This symmetric stitching prevents one side from stretching more than the other.
When working with bias direction cuts or curve direction pieces, always stitch from top to bottom. Following this stay stitching direction keeps your fabric stable and prevents distortion.
Remember, consistent stitch direction creates professional results every time you stay stitch.
Stay Stitch Length
Perfect stay stitch sewing starts with choosing the right stitch length for your fabric. The ideal length sits around 2mm, creating tight control without causing puckering.
This measurement works like a goldilocks zone – not too long that fabric stretches, not too short that it bunches. Different fabric types need slight adjustments.
Perfect stay stitch length is like finding the sweet spot – just right for every fabric’s needs.
Lightweight materials like chiffon benefit from shorter stitches for maximum stability. Medium-weight cottons handle standard 2mm lengths perfectly.
When working within your seam allowance, remember that smaller stitches create stronger hold along curved edges. For dart stitching, many sewers drop to 1.5mm for extra security.
The tension impact matters too – proper stitch length prevents fabric distortion while maintaining the original grain. Stay stitching techniques rely on consistent length throughout each edge.
This approach keeps necklines, armholes, and bias cuts perfectly shaped during construction.
Stay Stitch by Hand?
Wondering if you can skip the machine and stay stitch by hand? Absolutely! Hand stitching gives you complete control over delicate fabrics and tricky curves. Your Stitch Length Control becomes more precise when you work at your own pace.
Here’s what makes hand stay stitching special:
- Perfect for silk and chiffon – no machine vibration to disturb delicate weaves
- Complete tension control – adjust pressure with each individual stitch
- Ideal for small pattern pieces – armholes and necklines become manageable
- Zero fabric stretching – your hands naturally prevent distortion
- Therapeutic rhythm – meditative stitching calms pre-sewing jitters
Use a 2mm stitch length for stay stitching techniques. Choose cotton thread for Best Thread Choice stability. Keep your Fabric Handling Tips gentle – never pull or tug. Hand stitching methods require patience, but your stay stitch tutorial results will be worth the extra time investment.
Leave Stitches In?
Should you leave your stay stitches in place permanently? Absolutely. Stay stitching remains within the seam allowance throughout your project’s lifetime, ensuring stitch permanence and fabric integrity.
These stabilizing stitches won’t show in your finished garment, maintaining perfect stitch visibility standards. Unlike temporary basting, stay stitching provides long-term effects that preserve your fabric’s original shape.
The stay stitch tutorial approach keeps these essential stitches hidden yet functional. Your stay stitching fabric benefits from this permanent reinforcement, creating professional results that last.
For a professional finish, consider how to sew a collar using crisp cotton or linen.
Prevent Stretching
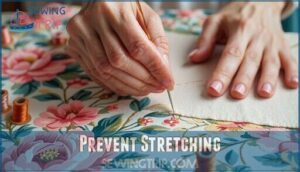
Beyond stay stitching basics, preventing fabric stretching requires careful handling from start to finish. Your fabric’s enemy isn’t just time—it’s careless movement during cutting and construction.
Handle cut pieces like delicate flowers. Don’t tug or pull bias areas when moving fabric around your workspace. Store pattern pieces flat instead of hanging them over chair backs.
- Reinforce problem areas with targeted techniques: Apply stay tape to armholes and necklines, use short hand stitches on tricky V-neck points, and clip into inward curves carefully.
Support loose weave fabrics with fusible interfacing along edges. Take extra precautions around curved seams where grainline stability matters most. These sewing techniques guarantee shape retention and edge control for professional results.
Other Stabilizing Options
While stay stitching works great for most projects, you’ll sometimes need extra support for tricky fabrics or challenging areas.
Interfacing and stay tape offer stronger stabilization when your fabric needs more help than basic stitching can provide, and they can be particularly useful for tricky fabrics.
Interfacing
Fusible interfacing acts like armor for your fabric, adding strength where stay stitching alone won’t cut it.
Choose lightweight options for delicate areas and heavier weights for structured pieces.
Sew-in interfacing works when heat-sensitive fabrics can’t handle fusion.
Consider its lightweight applications for delicate fabrics.
Apply interfacing before stay stitching to create the perfect foundation for fabric stabilization success, ensuring your project has the necessary strength.
Stay Tape
Stay tape gives you another weapon in your fabric stabilization arsenal when stay stitching isn’t enough.
This narrow strip works like a backstage hero, keeping problem areas perfectly behaved.
- Fusible stay tape bonds instantly with your iron’s heat
- Woven stay tape offers zero-stretch support for bias edges
- Knit stay tape flexes with stretchy fabrics without puckering
- Stay tape alternatives include twill tape or bias binding strips
You can easily find stay tape fusible online.
Checklist Before Sewing
Before you thread that needle, take a moment to check your prep work.
Pattern adjustments should be complete and your fabric preparation finished.
Choose the right thread selection for your project and match your needle type to your fabric weight.
Set your machine settings to a shorter stitch length for stay stitching – around 2.0 works perfectly.
Check that your pattern pieces haven’t shifted during cutting.
Mark your grainlines clearly so seams won’t go astray later.
This stay stitching tutorial emphasizes timing – stitch immediately after cutting to lock in your fabric’s shape.
Focus on curved areas like necklines and armholes first.
These stay stitching benefits include preventing stretching and maintaining your garment’s intended fit.
Remember, these stay stitching tips will save you headaches during construction.
Pressing Tips
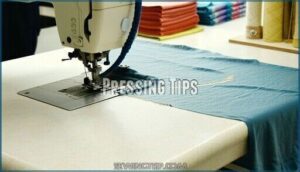
Your stay stitching deserves proper pressing to lock in those stabilized edges. Heat becomes your best friend when setting those curves permanently.
Specialized pressing tools like tailor’s hams are useful for maintaining these curves.
- Iron Temperature: Match your fabric type – cotton handles high heat while synthetics need lower settings to prevent melting
- Pressing Cloths: Use these protective barriers on delicate fabrics during seam pressing to avoid shine or scorching
- Curved Seams: Press from the center outward on necklines, letting fabric cool completely before handling
- Stay Stitching Benefits: Proper pressing amplifies sewing stability throughout your entire project
Frequently Asked Questions (FAQs)
How long should a stay stitch be?
Your stay stitch should be approximately 2mm long, which is shorter than regular seaming stitches.
This creates a tight line that prevents fabric from stretching while remaining strong enough to maintain shape.
What does stay stitch mean?
Think of stay stitching as your fabric’s safety net.
It’s a single row of straight stitches sewn along raw edges to prevent stretching and distortion, keeping your garment pieces in perfect shape during construction.
What does stay stitching look like?
You’ll see a single straight line of small stitches running about 1/8 inch from the fabric’s raw edge.
The stitches look neat and even, resembling regular machine stitching but positioned within your seam allowance area.
What are the different types of stay stitching?
There’s really just one main type of stay stitching – a straight line of regular stitches. You’ll use the same basic technique whether you’re working on necklines, armholes, or waistlines.
What does a stay stitch do for fabric?
When you’re cutting a stretchy knit for a fitted dress, stay stitching acts like a safety net.
It prevents your fabric from stretching out of shape while you’re handling it, keeping those curves exactly where they should be.
When should I use stay stitching?
Use stay stitching immediately after cutting pattern pieces, especially on curved edges like necklines and armholes.
Apply it when working with stretchy fabrics or bias-cut pieces to prevent distortion during construction.
What length should a stay stitch be?
You might think longer stitches work fine, but stay stitches should be 2mm or shorter.
Set your machine to 5-0 stitch length.
These tight, small stitches grip fabric securely and prevent stretching better than regular seam stitches.
What does staystitch mean in sewing?
Staystitch is a single row of straight stitches sewn along curved or bias-cut fabric edges to prevent stretching.
You’ll sew it within the seam allowance immediately after cutting your pattern pieces.
What is stay stitching in quilting?
Quilting stay stitching works differently than garment sewing.
You’ll stitch around quilt block edges to prevent fraying and stretching.
It’s typically done 1/8 inch from raw edges using regular stitch length before assembly.
What should my stitch length be?
Most sewers use a 0mm stitch length, but you’ll want 5mm for stronger hold on tricky curves.
Set your machine shorter than regular seaming – around 0 or less keeps those edges rock-solid without puckering.
Conclusion
Practice makes perfect when mastering what’s stay stitching length for your sewing projects.
You’ve learned that 2.0-2.5mm creates the ideal foundation for curved seams and stretchy fabrics.
Remember to adjust your machine settings before cutting fabric, work in the correct direction, and don’t skip this essential step.
Your garments will thank you with professional-looking results that maintain their shape.
Take time to master this technique – it’s the difference between amateur and polished sewing outcomes.


