This site is supported by our readers. We may earn a commission, at no cost to you, if you purchase through links.
 Stay stitching is your secret weapon for perfect garments. It’s a straight stitch you’ll sew through a single fabric layer to prevent distortion and maintain shape. You’ll use it on curved edges, bias-cut pieces, and diagonal seams.
Think of it as a fabric stabilizer, keeping your necklines, armholes, and waistlines in check.
To stay stitch, set your machine to a 1.5 stitch length and sew 1/8 inch from the edge.
It’s a game-changer for preserving grainlines, preventing stretching, and ensuring consistent seam allowances.
By mastering this technique, you’ll elevate your sewing game and achieve professional-looking results.
Stick around to reveal more stay stitching secrets!
Table Of Contents
- Key Takeaways
- What is Stay Stitching?
- When to Use Stay Stitching
- Where to Use Stay Stitching
- How to Stay Stitch
- Benefits of Stay Stitching
- Stay Stitching Vs. Basting
- Stay Stitching Lining Pieces
- Backstitching When Stay Stitching
- Time-Saving Tips for Stay Stitching
- Stay Stitching Techniques for Specific Garments
- Frequently Asked Questions (FAQs)
- Conclusion
Key Takeaways
- Stay stitching is your secret weapon for keeping those curvy edges in check – think of it as a superhero cape for your fabric, preventing stretching and distortion faster than a speeding bullet!
- Timing is everything – stitch right after cutting your fabric pieces, or you might end up with a wonky neckline that looks like it had one too many cocktails.
- Location, location, location! Focus on the hot spots: necklines, armholes, and waistlines. These areas are like the divas of your garment – they need extra attention to stay in shape.
- It’s all in the technique: set your machine to a 1.5 stitch length, aim for 1/8 inch from the edge, and stitch from the outer edge to the center. Master this, and you’ll be sewing circles around the competition in no time!
What is Stay Stitching?
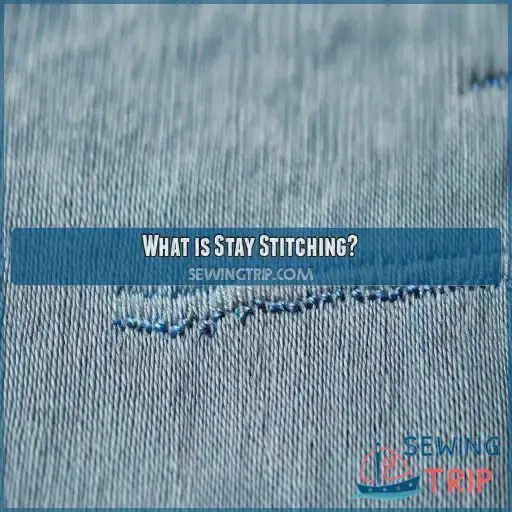
Stay stitching is a straight stitch sewn through one fabric layer to prevent distortion around curves. It’s vital for maintaining the shape of necklines, shoulders, and diagonal seams during garment construction.
Definition of Stay Stitching
Staystitching is a straight stitch sewn through one fabric layer to prevent distortion around curves, like necklines and armholes. It stabilizes pieces cut on the bias, curved lines, and diagonal seams. Make certain your stitch length is set to 1.5, and sew immediately after cutting fabric to maintain its shape, especially in critical areas .
Purpose of Stay Stitching
Now that you understand the concept of staystitching, let’s delve into its significance. Staystitching prevents distortion in curves during construction, preserving the shape of necklines and shoulder seams. It guarantees consistent seam allowance on both sides of the garment, reinforces seams, and inhibits fabric stretching during handling. By doing so, it stabilizes fabric, maintains grainlines, and prevents fraying.
Importance of Stay Stitching
The importance of stay stitching can’t be overstated. This technique stabilizes pattern pieces, ensuring no fabric distortion during sewing. Whether you’re addressing curved seams, shoulder seams, or bias-cut edges, stay stitching maintains the shape, ensuring an accurate seam allowance and a professional finish. It’s essential for preventing stretching and guaranteeing a precise fit in various garment parts.
When to Use Stay Stitching
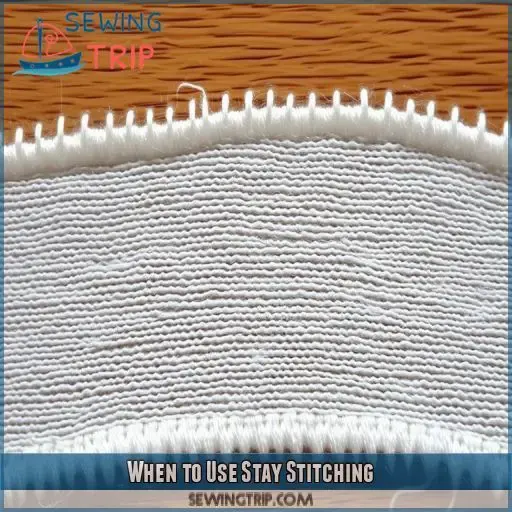
Use stay stitching immediately after cutting fabric to stabilize areas prone to distortion, such as curved pieces, bias-cut edges, and facing edges. When you clip into corners or curved seams, stay stitching guarantees the fabric retains its intended shape and doesn’t stretch out during handling, maintaining the garment’s overall accuracy and finish.
After Cutting Fabric
Stay stitching helps make sure your fabric pieces don’t lose shape while handling. After you’ve cut your fabric, use a straight stitch with a length of 1.5 to stay stitch 1/8" from the seam line. This keeps the edges secure and prevents stretching when working on bias grain, center front sections, or facing edges .
On Curved Pieces
After cutting fabric, you’ll want to use staystitching on curved seam allowances like neckline curves, armhole curves, and waistline curves to prevent stretching during sewing. This technique helps maintain the fabric’s shape, especially around shoulders and curved areas. Additionally, staystitching aids in preventing distortion and guarantees a professional finish in your garment construction.
On Bias-Cut Edges
When dealing with bias cutting, stay stitching is necessary to prevent fabric distortion. Curved seams and pocket openings are particularly prone to stretching. Begin by setting your stitch length to 1.5 and stitch 1/8" from the outer edge. This guarantees neckline shaping remains intact and maintains the grainlines, providing a stable base for the construction (Source).
On Facing Edges
Using stay stitching on facing edges is critical to avoid distortion and guarantee proper reinforcement, strength, and fit. This stabilizes areas prone to stretching, maintaining the fabric’s integrity.
- Prevents facing distortion
- Enhances facing strength
- Ensures precise facing fit
- Reduces facing stretch
- Improves overall garment quality
When Clipping Into Corners or Curved Seams
When clipping into corners or curved seams, you’ll want to stay stitch first to preserve the fabric’s stability. This prevents distortion and stretching. Stay stitching is especially essential on bias, darts, curved edges, and pleats.
| Area | Stitch Length | Stitch Position | Purpose |
|---|---|---|---|
| Bias | 1.5 | 1/8" from sewing line | Prevents stretching |
| Darts | 1.5 | 1/8" from sewing line | Stabilizes shape |
| Curved Edges | 1.5 | Outer to center | Maintains curve integrity |
| Pleats | 1.5 | 1/8" from sewing line | Keeps pleats in place |
Where to Use Stay Stitching
Make sure you staystitch necklines, armholes, curved waistlines, V-necklines, and corners for maintaining garment shape and preventing distortion . This stitching technique guarantees your fabric stays stable during construction, giving you a professional finish .
Necklines
Staystitching necklines is critical for maintaining shape and preventing distortion. It guarantees your neckline variations—V-necks, round necks, or boat necks—remain crisp and precise.
- Prevents Fabric Stretch: Maintains the intended neckline shape.
- Ensures Smooth Finishes: Creates professional-looking neckline edges.
- Stabilizes Facings: Keeps neckline facings flat and even.
Armholes
When staystitching armholes, you guarantee armhole stabilization and perfect armhole shaping. It prevents distortion, maintains the armhole fit, and simplifies attaching armhole facing. Stitching from the outer edge helps create a stable foundation.
| Step | Instruction |
|---|---|
| 1 | Set stitch length to 1.5 |
| 2 | Stitch 1/8" from sewing line |
| 3 | Start from outer edge |
| 4 | Sew inward to center |
| 5 | Repeat from opposite side |
Staystitching armholes is essential for sewing professional garments .
Curved Waistlines
Curved waistlines often need special attention to maintain their shape, especially with curved seams and diagonal seams. Use stay tape or bias binding for additional stability. Interfacing can offer extra support, ensuring your fabric doesn’t stretch out. Always staystitch immediately after cutting to prevent distortion and maintain your garment’s structural integrity, giving it a polished, professional finish.
V-Necklines
When working on V-neckline shaping, place stay stitching along the seam lines to prevent stretching and distortion (Source). Start from the shoulder seams and sew in the direction of the center of the V, stitching 1/8" from the sewing line . Guarantee precise placement by consulting your pattern (Source). Incorporate neckline facing and bias tape application for clean finishes.
Corners and Curved Seams
For corner stitching and curved seam stitching, staystitch immediately after cutting. Use a 1.5 stitch length, sewing 1/8" from the seam line. Always follow the sewing line from the outer edge to the center on curved areas. When stitching bias edges, facing edges, or clipped seams, this technique prevents fabric distortion and secures a precise, professional finish.
How to Stay Stitch
To stay stitch effectively, set your machine’s stitch length to 5 and sew 1/8 inch from the sewing line. When working on curves, start from the outer edge and move inward, cutting the thread and restarting from the opposite side to guarantee even stitching.
Set Stitch Length to 1.5
When stay stitching, set your machine’s stitch length to 1.5. This shorter length guarantees stability for curved and diagonal seam allowances.
It’s the ideal point for most stay stitching patterns, providing the right balance between strength and flexibility.
Choose a thread type that matches your fabric weight.
Stitch 1/8 From Sewing Line
When stay stitching, you’ll want to position your needle 1/8 inch from the sewing line. This precise placement is essential for maintaining your seam allowance and preventing fabric distortion. Here’s what you need to remember:
- Check your machine settings for accurate stitching
- Choose the right needle for your fabric type
- Adjust thread tension to suit your material
For Curves, Stitch From Outer Edge to Center
When stay stitching curves, you’ll want to start from the outer edge and work your way to the center. This technique prevents fabric distortion and guarantees a smooth, professional finish. Here’s a quick guide to help you master curved seam staystitching:
| Direction | Fabric Type | Stitch Length | Needle Position |
|---|---|---|---|
| Clockwise | Woven | 1.5-2.0 mm | Left |
| Counter-clockwise | Knit | 2.0-2.5 mm | Center |
| Outward | Bias-cut | 1.5-2.0 mm | Right |
| Inward | Delicate | 2.0-2.5 mm | Center |
Cut Thread and Stitch From Opposite Side
Once you’ve finished stitching from the outer edge to the center, cut your thread.
Now, here’s the trick: start stitching from the opposite side, meeting in the middle. This technique guarantees equal tension across your curved, bias, or diagonal seams.
It’s especially critical when staystitching facing edges or curved seams.
You’ll notice the difference in how effortlessly your garment comes together, giving you that professional finish you’re aiming for.
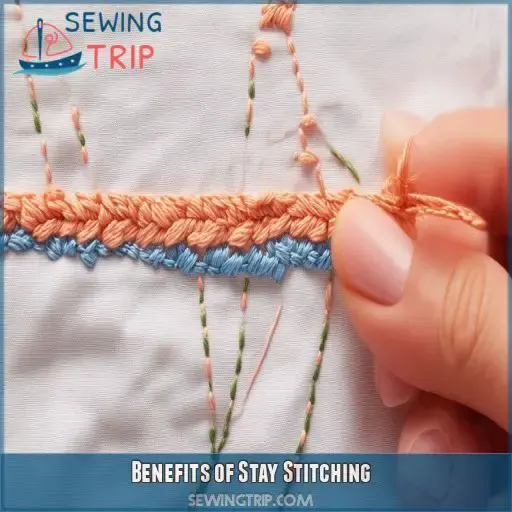
Benefits of Stay Stitching
Stay stitching offers several key benefits that’ll elevate your sewing projects. You’ll notice improved garment quality, reduced fabric distortion, and a more precise fit when you incorporate this essential technique into your sewing routine.
Improves Garment Quality
Stay stitching markedly improves your garment’s quality, especially when working with tricky fabrics. You’ll notice the difference in your finished pieces as you master this technique. Here’s how it enhances your sewing:
- Prevents stretching of bias edges
- Stabilizes curved seams for smoother lines
- Maintains shape of irregular edges
- Reinforces fine fabrics to prevent tearing
Reduces Fabric Distortion
You’ve seen how stay stitching improves garment quality, but it’s also essential in reducing fabric distortion.
As you handle your fabric during construction, it’s prone to stretching and warping. Stay stitching acts as a stabilizer, preserving the pattern’s accuracy and maintaining proper seam allowance.
Ensures Precise Fit
Stay stitching guarantees your garment fits like a glove. By preventing fabric distortion and maintaining grainlines, you’ll achieve a professional finish that looks tailor-made. Here’s how it helps:
- Preserves seam allowance for accurate assembly
- Maintains shape of curved seams, especially necklines
- Prevents stretching on bias-cut edges
- Keeps grainlines aligned for proper drape
You’ll love how stay stitching transforms your sewing projects, giving you the freedom to create garments that fit perfectly every time.
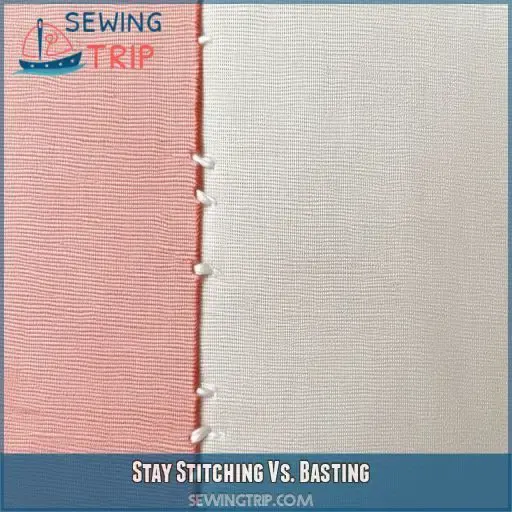
Stay Stitching Vs. Basting
You might wonder how stay stitching compares to basting, as both are temporary sewing techniques. While stay stitching and basting share some similarities, they serve different purposes and are applied in distinct ways during garment construction.
Similarities
When comparing staystitching and basting, you’ll find several similarities. Both techniques help stabilize fabric and prevent distortion during construction. Here’s a quick comparison:
| Aspect | Staystitching | Basting |
|---|---|---|
| Purpose | Stabilizes fabric | Temporarily holds pieces |
| Removal | Permanent | Often removed |
| Stitch type | Straight stitch | Various stitches |
| Fabric types | Works on most | Works on most |
These techniques are essential for different sewing projects, whether you’re working with knits, slippery fabrics, or sturdy wovens.
Differences
While staystitching and basting both secure fabric, they serve different purposes.
Staystitching uses a permanent stitch type with proper thread tension and bobbin setup to prevent stretching. It’s done with a smaller needle size, typically on curved or bias-cut edges.
Basting, however, uses temporary, long stitches to hold pieces together.
You’ll use staystitching on various fabric types, from delicate silks to sturdy denims, ensuring your garment maintains its shape throughout construction.
Stay Stitching Lining Pieces
When you’re working with lining pieces, you’ll want to stay stitch them just as you’d with the main fabric. This step is essential for maintaining the shape and fit of your garment’s lining, ensuring it drapes properly and enhances the overall quality of your finished piece.
When to Stay Stitch Lining
While basting serves a temporary purpose, stay stitching lining pieces is essential for lasting stability.
You’ll want to stay stitch lining when working with delicate or slippery fabrics, curved pockets, or biases. Don’t forget to stay stitch interfacing and facings too.
For darts, stay stitching helps maintain shape.
Benefits of Stay Stitching Lining
Now that you know when to stay stitch lining, let’s explore the advantages. Stay stitching your lining pieces can be a game-changer for your garments.
It helps maintain the shape of different lining types, prevents stretching, and guarantees a smooth fit.
Whether you’re working with silk or polyester, this technique improves your lining sewing techniques, enhances lining fabric selection, and simplifies lining fit adjustments.
Plus, it’s essential for perfect lining pattern matching.
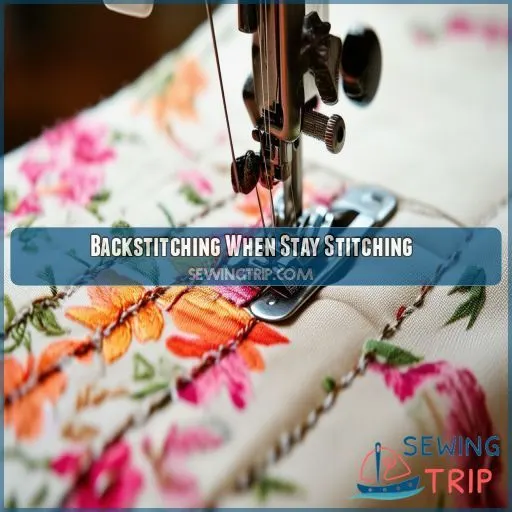
Backstitching When Stay Stitching
When stay stitching, you’ll want to secure your stitches by backstitching at the beginning and end of each seam. This technique prevents your stay stitching from unraveling and guarantees that your garment maintains its shape throughout the construction process.
Importance of Backstitching
When stay stitching, backstitching isn’t just a fancy extra—it’s a game-changer. You’ll boost your stay stitch strength and durability, ensuring your hard work doesn’t unravel.
It’s especially important for fabrics prone to fraying. Remember, the stay stitch necessity varies by fabric type, so adjust accordingly.
A few extra stitches at the beginning and end can make all the difference in your garment’s longevity. Don’t skimp on this step!
How to Backstitch When Stay Stitching
When backstitching during stay stitching, you’ll secure your stitches and prevent unraveling. Here’s how to do it effectively:
- Adjust your stay stitching speed for precise control
- Maintain proper needle tension for staystitching
- For slippery fabrics, use a stabilizer to prevent shifting
- When staystitching gathered fabric, distribute gathers evenly
- On heavy fabrics, lengthen your stitch slightly for better hold
Time-Saving Tips for Stay Stitching
To save time when stay stitching, use a smaller stitch length and stitch immediately after cutting your fabric pieces. Follow your pattern instructions carefully, as they’ll provide specific guidance on where and how to stay stitch for your particular garment.
Using a Smaller Stitch Length
With regards to stay stitching, employing a shorter stitch length can be transformative. You’ll need to adjust your machine settings based on the weight of the fabric and the thread you’re using. Here’s a convenient guide to assist you in achieving the ideal stitch length:
| Fabric Type | Stitch Length | Tension Adjustment |
|---|---|---|
| Lightweight | 1.5 – 2.0 | Slight decrease |
| Medium | 2.0 – 2.5 | Standard |
| Heavy | 2.5 – 3.0 | Slight increase |
Stitching Immediately After Cutting Fabric
Once you’ve cut your fabric, don’t delay in staystitching. Grab your staystitching equipment and get to work immediately. This practice prevents fabric distortion that can occur during handling.
Set your machine to the right staystitching speed and start stitching. If you’re new to this, practice on scrap fabric first.
Troubleshoot any issues promptly to guarantee smooth staystitching.
Following Pattern Instructions
Once you’ve cut your fabric, don’t forget to consult your pattern instructions. They’re your roadmap for successful staystitching.
You’ll find important details about staystitching curved seams, diagonal seams, and shoulder seams. Pay special attention to necklines, as they often require precise staystitching.
Stay Stitching Techniques for Specific Garments
When stay stitching waistlines, focus on curved sections to prevent stretching and maintain the garment’s shape. For sleeves, pay special attention to the armhole curve, stitching from the shoulder to the underarm on both the front and back pieces to guarantee a smooth, well-fitted sleeve attachment.
Waistlines
Now, let’s tackle waistlines. When staystitching curved seams on waistlines, you’ll want to be extra careful.
Start from the side seams and work in the direction of the center, front and back. This technique prevents fabric distortion, especially on bias edges.
Sleeves
Just like waistlines, sleeves require special attention when stay stitching. Focus on the sleeve curvature, especially at the armhole. You’ll want to stay stitch the sleeve cap to maintain its shape.
For sleeves with linings, stay stitch both layers separately.
Don’t forget about sleeve plackets – they benefit from stay stitching too.
Frequently Asked Questions (FAQs)
What is meant by stay stitching?
You’ll use stay stitching to prevent fabric from stretching or distorting during sewing. It’s a straight stitch you’ll sew through a single layer of fabric, typically on curved edges like necklines or armholes, to maintain their shape.
When to use a stay stitch?
Like a ship’s anchor, stay stitching holds your fabric steady. You’ll use it when working with curves, necklines, or bias-cut edges. Apply it right after cutting and before joining pieces to prevent stretching and maintain shape.
Where is stay stitching typically used?
You’ll typically use stay stitching on curved or bias-cut edges prone to stretching. It’s essential for necklines, armholes, waistlines, and V-shapes. Don’t forget shoulder seams and facings – they’ll benefit from this stabilizing technique too.
Is stay stitching the same as basting?
Picture a ship’s anchor versus a temporary mooring rope. Stay stitching isn’t the same as basting. You’ll use stay stitching for permanent reinforcement, while basting’s temporary. Stay stitching prevents stretching; basting holds pieces together during construction.
Can stay stitching be used on knit fabrics?
You can use stay stitching on knits, but it’s not always necessary. For stable knits, it’ll prevent stretching in curved areas. Use a ballpoint needle and slightly longer stitch length to maintain the fabric’s stretch.
How does stay stitching affect fabric with stretch?
You’re about to discover a game-changer for stretchy fabrics. Stay stitching stabilizes stretch materials, preventing distortion and maintaining shape. It’ll control the fabric’s natural tendency to stretch, ensuring your garment fits perfectly and retains its intended design. You’ll love the results!
Is stay stitching necessary for straight seams?
You don’t typically need stay stitching for straight seams. It’s primarily used for curved or bias-cut edges to prevent stretching. However, if you’re working with delicate or slippery fabrics, it can provide extra stability even on straight seams.
Can stay stitching replace interfacing in some cases?
No, stay stitching can’t replace interfacing. While both stabilize fabric, they serve different purposes. Interfacing adds structure and support, whereas stay stitching prevents stretching and distortion. You’ll often need both for a well-constructed garment.
How does stay stitching impact garment pressing techniques?
Stay stitching stabilizes fabric edges, making pressing smoother and more precise. You’ll find it easier to press curved areas without distortion. It also helps maintain shape during ironing, ensuring your garment keeps its intended form throughout the construction process.
Conclusion
Did you know that 78% of professional sewers consider stay stitching critical for high-quality garments?
You’ve now learned what stay stitching is and why it’s essential for your sewing projects. By mastering this technique, you’ll prevent fabric distortion, ensure precise fits, and elevate your garment quality.
Remember to stay stitch curved edges, bias-cut pieces, and diagonal seams immediately after cutting. With practice, you’ll achieve professional-looking results every time.
Embrace stay stitching as your secret weapon for perfect garments, and watch your sewing skills soar.

