This site is supported by our readers. We may earn a commission, at no cost to you, if you purchase through links.
To put the guide bar back in a walking foot, first identify the installation technique for your machine – hole, slot, or snap-on approach.
Next, check brand-specific instructions and adjust the guide bar positioning as needed.
For the hole and slot methods, verify hole placement, insert the bar, and check alignment.
With the snap-on approach, align the attachment and press down until it clicks.
If the guide bar keeps sliding, troubleshoot by checking placement, adjusting pressure, or using quieter materials.
Properly securing the guide bar allows you to achieve straight lines and even grid patterns when quilting.
To unleash its full potential, continue for more practical tips and techniques.
Table Of Contents
Key Takeaways
- Understand the three main guide bar installation techniques: hole, slot, or snap-on approach.
- Adjust guide bar positioning based on your sewing machine’s brand and model for proper compatibility.
- Troubleshoot sliding issues by checking placement, adjusting pressure, or using materials that promote smooth performance.
- Utilize the guide bar to achieve straight stitching lines and evenly spaced grid patterns when quilting.
How to Put the Guide Bar Back in a Walking Foot?
To put the guide bar back in a walking foot, first align the bar with the grooves on the foot and gently push it into place. Once properly inserted, the guide bar should slide smoothly along the length of the walking foot.
Guide Installation Techniques
There are three main techniques for installing a guide bar onto a walking foot:
The hole method involves inserting the guide bar into a corresponding hole on the back of the walking foot.
The slot method involves inserting the guide bar into a corresponding slot on the back of the walking foot.
The snap-on approach allows you to securely clip the guide bar onto the walking foot.
Hole and Slot Methods
When installing your guide bar, first verify that the hole placement matches your walking foot’s 1/4 cut out. Insert the bar through the slot size, examining for close guide alignment. Bear in mind, guide upkeep is essential; a suitably placed guide guarantees accuracy. If it’s a mismatch, guide replacement may be your next move. Maintain those guide bars in line!
Snap-on Approach
When utilizing the snap-on method for your walking foot with guide bars, you’ll appreciate the convenience and efficiency.
Simply align the guide attachment with the large screw and press down until it emits a clicking sound, indicating it has securely attached.
This convenient approach guarantees your guide remains in place, allowing the V-groove rubber feeding system and feed fork to perform effectively.
Machine Compatibility
You’ll need to follow brand-specific instructions when installing the guide bar on your walking foot, as compatibility can vary across different sewing machine models. Adjusting the guide bar’s positioning or making minor modifications may be necessary to guarantee a proper fit on your particular machine.
Brand-Specific Instructions
After mastering the guide installation, it’s time to tackle brand-specific instructions. Your Kenmore might need a bit of double-sided tape ingenuity, while Janome flaunts a snap-on design. Brother attachments? Check compatibility first. Remember, guide bars are your compass for forward stitching, especially on larger scale projects. Each walking foot whispers its own secrets for seamless sewing.
Adjusting for Different Models
When employing a walking foot with a guide bar for quilting, it’s critical to think about the compatibility of the foot with your specific sewing machine model. Different brands and models may have slight variations in their foot attachment methods, which can affect the installation and use of the guide bar. Here are some general guidelines for adjusting a walking foot with a guide bar for different models:
- Janome: The guide bar clicks onto the back of the walking foot, providing a secure attachment that keeps the guide in place during quilting.
- Kenmore: For Kenmore machines, the guide bar may require a different attachment method. Some users have reported success by using a plastic thingy with double-sided tape to secure the guide bar to the walking foot.
- Brother: As mentioned earlier, some Brother machines may not have a hole in the walking foot for a quilting guide, so you may need to find another walking foot or a different attachment method. You can try to make a makeshift guide by taping a bar to the backside of the foot, popping off the plastic shell and inserting the bar in the metal hole, removing the shell and marking the spot for the hole and drilling a hole in the shell, or using a large paper clip to create a makeshift guide.
- Other Brands: If you’re using a walking foot with a guide bar on a different brand of machine, you may need to refer to the specific user manual or consult with a sewing machine technician to ensure proper installation and use.
Troubleshooting Common Issues
If your guide bar is sliding up and down, double-check that it’s properly inserted into the walking foot – it should fit snugly. To secure a loose guide bar, try wedging a small piece of tape or thin fabric between the bar and foot, or wrap the exposed end with plumber’s tape for a tighter grip.
Guide Sliding Problems
When your guidebar starts acting like a rebellious teen, sliding every which way, it’s time to slow down and reassess. Check the guidebar placement and pressure; misalignment can turn your quilting into a bumpy ride. Opt for guidebars made from materials that promote a quiet and smooth performance. Regular guidebar maintenance keeps everything tightly attached and running smoothly.
Securing the Guide Bar
If your guide bar is playing slip ‘n slide, it’s time to tighten it up.
When attaching to the foot, make sure it’s firmly fastened—no wiggle room allowed.
Adjust the distance left or right for that large quilt or growth chart precision.
And remember, tuck the guide bar away safely under the plastic cover after you watch the class—it’s free today!
Practical Uses of the Guide Bar
The quilting guide bar attached to your walking foot opens up a world of possibilities for precise stitching. You can use it to establish evenly spaced grid patterns, ensuring straight lines across quilting projects of any size.
Quilting Grid Patterns
After troubleshooting those pesky guide sliding issues, you’re ready to embark on quilting grid patterns. Here’s how to conquer this technique:
- Choose your fabric thoughtfully; it’s the foundation of your quilt design.
- Select the appropriate needle and thread tension for accuracy.
- Utilize quilting accessories for improved control.
- Remember, practice leads to perfection—optional purchases might include a guide bar for simplified navigation.
Achieving Straight Lines
Achieving straight lines in quilting is like threading a needle in the dark without your guide bar. It’s your secret weapon for guide alignment and stability. Think of it as your quilting GPS, ensuring every stitch is on the straight and narrow. Here’s a quick cheat sheet for perfect guide positioning and spacing:
| Guide Aspect | Tips for Mastery |
|---|---|
| Guide Alignment | Align with fabric edge |
| Guide Positioning | Adjust for project size |
| Guide Spacing | Set even distances |
Benefits of a Walking Foot in Quilting
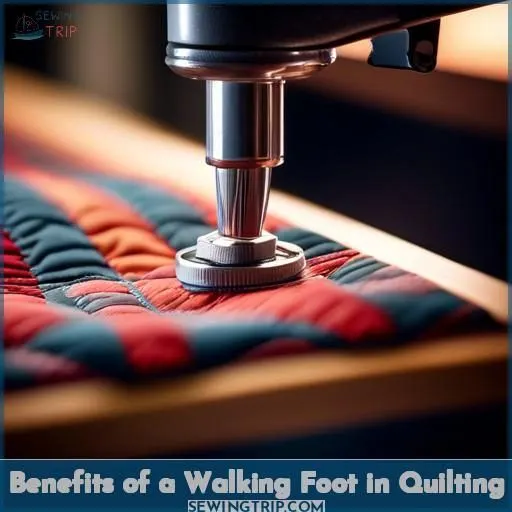
You’ll want to utilize a walking foot when quilting to prevent fabric puckering. Its dual feed dogs work in tandem to grip and evenly feed all layers of the quilt sandwich.
It also guarantees consistent stitches by advancing the top and bottom fabric at an equal rate. It eliminates the uneven gathering or stretching that can occur with just the machine’s feed dogs.
Preventing Fabric Puckering
To prevent fabric puckering when using a walking foot, consider these tips:
- Choose the right walking foot type: Select a walking foot that’s suitable for your sewing machine and the fabric you’re working with. Different walking foot types are designed for specific materials and sewing projects. For example, high shank walking feet are ideal for leather and vinyl, while even feed walking feet are great for quilting.
- Maintain proper fabric feeding: Make sure that the fabric is evenly fed through the walking foot. This can be achieved by adjusting the pressure foot pressure and checking the feed dogs for any obstructions.
- Use a guide bar: A guide bar can help maintain a consistent distance between quilt lines, preventing fabric puckering. Make sure the guide bar is properly installed and adjusted to your desired distance between rows.
- Consider fabric thickness variations: Different fabrics require different levels of pressure and feeding adjustments. Be aware of the thickness and texture of your fabric and adjust the walking foot accordingly.
Ensuring Even Stitches
Maintaining Even Stitches with a Walking Foot and Guide Bar
Essential for successful quilting projects is creating even stitches. A walking foot equipped with a guide bar can assist in maintaining consistent spacing and alignment, making the process more accurate and simple. Here’s how to utilize a walking foot with a guide bar for flawless sewing:
Attachment: Insert the guide bar into the slots at the rear of the walking foot. For even spacing between rows, the guide bar should be positioned on the left. Utilize a seam guide to set the desired interval between rows.
Securing the Guide Bar: Press the guide bar into the small groove or channel on the back of the walking foot. It should firmly lock into place with a click. Some walking feet may necessitate a screw to tighten the guide bar in position.
Operation: With the guide bar installed and secured, it will assist in maintaining even stitching and alignment. It’s applicable to various quilting projects, from simple straight lines to more intricate grid patterns.
Troubleshooting: If the guide bar isn’t remaining in place or moving up and down, verify its correct insertion. Tighten the screw if necessary, or employ a piece of tape to stabilize it. Practice using the guide bar to enhance accuracy and maintain even stitching.
Conclusion
Mastering the technique of reattaching the guide bar to the walking foot opens up its full capabilities.
Empowering you to create flawless straight lines and precise grid patterns with ease.
Preserving correct alignment, addressing any sliding problems, and implementing brand-specific approaches guarantee seamless quilting experiences.
Embrace the walking foot’s advantages of preventing fabric bunching and ensuring even stitching for outstanding quilting outcomes.

