This site is supported by our readers. We may earn a commission, at no cost to you, if you purchase through links.
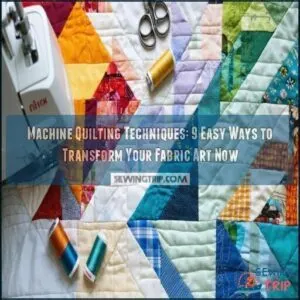
Start with the basics: layer your quilt sandwich (that’s the top, batting, and backing), and secure it with safety pins or spray basting.
Use a walking foot for straight lines or free-motion quilting for flowing designs like stipples or loops.
Always test on scraps to adjust thread tension and stitch length.
Stitch from the center out to avoid puckers—it’s like ironing a shirt, but way more fun!
Whether you’re stitching in the ditch or tackling big, bold patterns, there’s always room to experiment. Ready to make your quilt shine?
Table Of Contents
- Key Takeaways
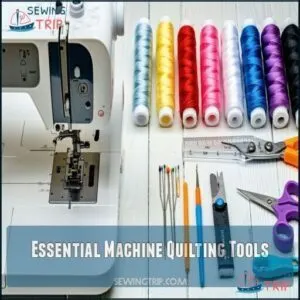
- Essential Machine Quilting Tools
- Creating The Quilt Sandwich
- Basic Machine Quilting Techniques
- Quilting With a Walking Foot
- Marking Quilting Lines and Designs
- All Over Quilting Designs and Techniques
- Tips for Successful Machine Quilting
- Troubleshooting Common Machine Quilting Issues
- Finishing Your Quilt With Binding
- Frequently Asked Questions (FAQs)
- Conclusion
Key Takeaways
- Always start quilting from the center and work outward to avoid puckering and keep your layers aligned.
- Use a walking foot for smooth and even stitching, especially for straight lines and quilting layers evenly.
- Secure your quilt sandwich with proper basting techniques, like pin basting or spray adhesive, to prevent layer shifting.
- Adjust your machine settings like tension and stitch length carefully, and test on scraps before quilting to ensure clean, consistent results.
Essential Machine Quilting Tools
You’ll need the right tools in your quilting arsenal before tackling any machine quilting project, just like a chef needs good knives before creating a masterpiece.
Having the right tools is like giving an artist their best brush—essential for creating quilting masterpieces.
With a reliable sewing machine, walking foot, quality thread, and proper needles at your fingertips, you’re ready to transform your fabric sandwich into something truly spectacular.
Sewing Machine With Needle-Down Function
A sewing machine with needle-down function is the cornerstone of precision quilting.
When activated, this feature automatically stops with the needle embedded in your fabric whenever you pause—giving you enhanced control during your quilting journey.
Why needle-down benefits transform your quilting:
- Consistent stitching around corners and curves without fabric shifting
- Perfect tension maintenance when you need to reposition your hands
- Seamless pivoting for intricate patterns without thread bunching
Think of needle-down as your quilting co-pilot! It’s like having an extra pair of hands holding your fabric in place. Most modern machines include this feature, but it’s worth upgrading if yours doesn’t. Consider various product options for your quilting needs. You’ll cut your frustration in half and double your accuracy—making those complex designs suddenly feel manageable, even for beginners.
Quilt Sandwich and Safety Pins
Now that you have a sewing machine ready, it’s time to build your quilt sandwich! Think of it as making a fabric layer cake – with each layer needing proper attention.
Your quilt sandwich consists of three essential layers: backing fabric on the bottom, batting in the middle, and your beautiful quilt top on top. Safety pins keep everything perfectly aligned during quilting.
For successful pin basting:
- Space pins 4-6 inches apart in a grid pattern
- Start from the center and work outward for wrinkle prevention
- Use curved safety pins designed specifically for quilting
- Remove pins as you quilt to avoid damaging your machine
Layer alignment matters! Try these basting methods based on your project:
- Pin basting: Reliable but time-consuming
- Basting sprays: Quick but can gum up needles
- Fusible tape: Easy setup but limited repositioning
- Hand basting: Traditional and budget-friendly
Proper quilt sandwich preparation prevents frustrating shifts while quilting! Many quilters source their specialized quilting supplies online.
Walking Foot and Quilting Needle
Two essential tools transform ordinary quilting into professional-looking projects: the walking foot and quilting needle. Your walking foot acts like an extra pair of hands, guiding all three quilt layers through your machine evenly while preventing puckering.
Here’s how to make these tools work for you:
- Match your Needle Size to your project—thicker batting needs larger needles (90/14) while delicate work requires smaller ones (75/11).
- Explore Walking Foot Types for your machine—some offer better Fabric Feed Control on curves.
- Practice Tension Troubleshooting on scrap fabric before tackling your main project.
- Try Decorative Stitch Options with your walking foot for unique texture patterns—zigzags can create surprising dimension!
Think of your walking foot as your quilting co-pilot—it’ll keep things smooth while you steer. Many vendors supply various needle sizes for different quilting needs.
100% Cotton Thread and Quilting Needles
I’ll rewrite the content about thread and needles for your quilting article, including a table and maintaining the specified word count.
Now that you’ve got your walking foot ready, let’s talk thread and needles.
100% cotton thread works like a charm for quilting projects. It’s strong yet gentle on fabric—just what you need!
| Thread Weight | Needle Size | Best For |
|---|---|---|
| 40-50 wt | 90/14 | Everyday quilting |
| 30 wt | 100/16 | Decorative stitching |
| 50-60 wt | 80/12 | Fine detail work |
| 100 wt | 70/10 | Invisible quilting |
Using the right combo prevents tension issues and broken threads. Trust me, your bobbin will thank you!
Creating The Quilt Sandwich
You’ll need to create a proper quilt sandwich before your machine quilting magic can begin.
Just like making your favorite sandwich, you’ll layer your backing fabric, batting, and quilt top together.
Securing them with safety pins or spray basting to prevent shifting while you work is a crucial step to ensure your quilt turns out as desired, and this process involves complete concepts of preparation.
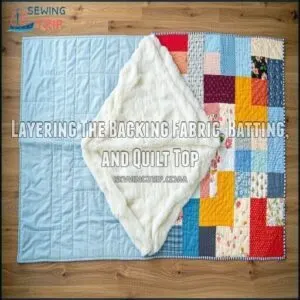
Layering The Backing Fabric, Batting, and Quilt Top
Creating your quilt sandwich’s perfect layers sets the foundation for beautiful machine quilting. Start with your backing fabric flat and smooth, right side down, extending 2-3 inches beyond your quilt top on all sides.
For best results, consider the following steps to ensure a well-crafted quilt sandwich:
- Choose batting that matches your project’s desired warmth and drape
- Position backing on a clean, flat surface
- Smooth batting atop backing, removing any wrinkles
- Center your completed quilt top face-up
- Gently smooth from center outward to eliminate air pockets
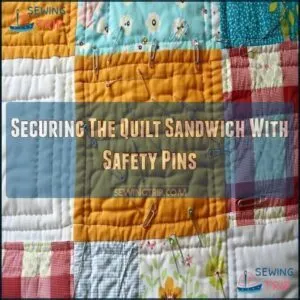
Securing The Quilt Sandwich With Safety Pins
Now that your layers are aligned, let’s lock them together with safety pins – your quilt’s best friend during this process.
Good pin placement transforms your floppy fabric sandwich into a stable canvas. Start from the center and work outward, creating a grid with pins spaced about 4-5 inches apart. Curved or bent pins slide through layers more easily than straight ones.
When pinning your quilt sandwich:
- Feel that satisfaction when all three layers stay perfectly aligned
- Experience the confidence of knowing your masterpiece won’t shift while sewing
- Enjoy the peace of mind that comes from proper preparation
Remember to remove pins as you quilt – your machine needle will thank you! For dense quilting areas, consider adding extra pins for maximum stability.
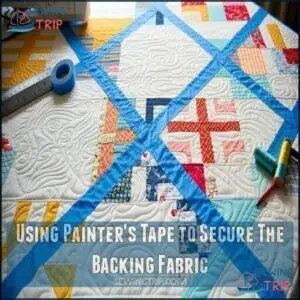
Using Painter’s Tape to Secure The Backing Fabric
Painter’s tape provides a foolproof method for anchoring your quilt backing.
After smoothing down your safety pins, reach for blue painter’s tape to secure those stubborn edges.
Start by taping down the center of each side, then work your way to the corners.
Unlike masking tape, painter’s tape won’t leave sticky residue on your fabric. Apply it directly to your table surface—not your backing fabric—to maintain proper tension.
For those tricky corners, use an X-pattern with two tape strips for maximum stability.
This simple technique prevents shifting during machine quilting and makes basting infinitely easier, giving you the solid foundation every beautiful quilt deserves.
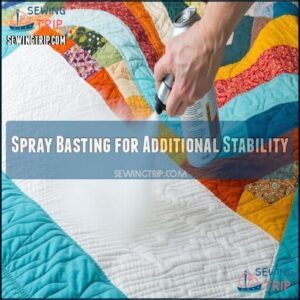
Spray Basting for Additional Stability
After securing your backing fabric, spray basting offers exceptional stability for your quilt sandwich. With the right spray adhesive type, you’ll experience worry-free machine quilting.
For perfect fabric compatibility, follow these steps:
- Apply a thin, even mist of basting spray in a gentle S-pattern
- Press layers together from center outward to prevent bubbles
- Wait 2-3 minutes for adhesive to set before handling
No pins necessary—just smooth sailing!
Basic Machine Quilting Techniques
You’ll transform your quilt projects from flat to fabulous by mastering a few key machine quilting techniques that build your confidence with every stitch.
Starting from the center and working outward will help you manage the fabric bulk.
Your walking foot becomes your new best friend, guiding those layers smoothly like a dance partner who actually knows the steps.
While your walking foot is crucial, the technique of starting from the center is also key to a successful quilt, making it a dance.
Starting in The Middle and Working Outwards
Your quilting journey’s most important rule? Always start from the middle and work your way outward. This simple technique prevents fabric bunching and keeps your quilt sandwich layers perfectly aligned during machine quilting.
Start in the middle and quilt outward—it’s the secret to avoiding puckers and keeping your layers perfectly aligned.
Begin by finding your quilt’s center and place your first stitches there. As you work outward in sections, you’ll naturally distribute tension evenly across your project.
- Center Stability creates a solid foundation that prevents shifting and puckering
- Even Distribution of stitches helps manage bulk in larger quilts
- Design Expansion flows naturally, avoiding distortion in your patterns
For beginner quilters trying freemotion quilting, this middle-out approach gives you better control. Think of it like ripples in a pond – start at the center and let your creativity expand outward, creating a solid foundation for your quilt.
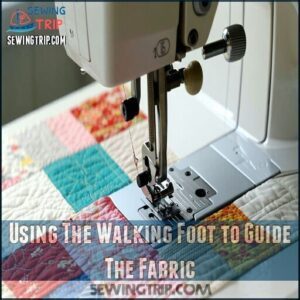
Using The Walking Foot to Guide The Fabric
The humble walking foot becomes your faithful guardian against fabric shifting during machine quilting.
This handy attachment evenly feeds all layers together, preventing puckers and uneven stitches.
| Feature | Function | Tips |
|---|---|---|
| Foot pressure | Controls fabric feeding | Adjust for thickness |
| Edge guidance | Creates straight line squares | Use with seam guide |
| Even stitches | Prevents drag | Maintain consistent speed |
| Consistent seams | Aligns multiple layers | Keep fabric taut |
You’ll love how this tool transforms frustrating quilting into smooth sailing, making it easier to achieve consistent seams and even stitches with the help of its edge guidance.
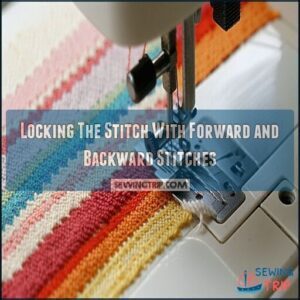
Locking The Stitch With Forward and Backward Stitches
Properly locking your stitches is the foundation of quilt durability and Stitch Security. When you begin and end quilting lines, use forward and backward stitches to prevent unraveling.
Here’s your foolproof technique:
- Take 3-4 tiny stitches in place before continuing with your regular stitch length
- Maintain consistent thread tension to avoid loops or Skipped Stitches
- Trim Thread Tails to about 1/4 inch after securing
- Practice on scrap fabric first to perfect your technique
Don’t rush this step—those few seconds of backstitching save hours of future repairs, ensuring the durability of your quilt.
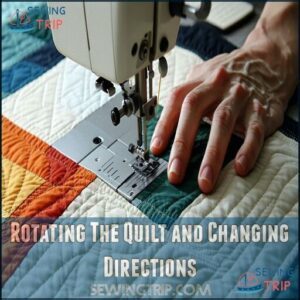
Rotating The Quilt and Changing Directions
Mastering the art of rotating your quilt can make or break your design.
When changing directions, always drop your needle into the fabric first, then lift the presser foot to pivot smoothly. Keep one hand at the pivot point while guiding fabric with the other for smooth turns.
Adjust your stitch length before tackling curves. For smooth stitches, consider using a walking foot technique.
With practice, directional stitching becomes second nature—even on complex free motion quilting projects, which require smooth turns.
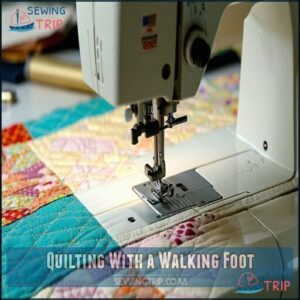
Quilting With a Walking Foot
You’ll love how a walking foot evenly feeds all layers of your quilt sandwich through your machine, making your quilting look professional without the frustration of puckered fabric.
Just attach this handy foot to your sewing machine, use good cotton thread, and you’re ready to create beautiful straight-line quilting that’ll make your quilting friends wonder if you secretly hired a pro.
Attaching The Walking Foot to The Sewing Machine
Now that you’ve got the basics down, let’s get your walking foot attached properly. Your sewing machine’s walking foot is like a superhero sidekick for machine quilting.
Here’s how to mount this game-changer:
- Raise your needle fully and lift the presser foot lever
- Unscrew and remove your regular presser foot
- Position the walking foot so its fork sits over the needle clamp screw
- Tighten the attachment screw firmly but don’t over-tighten
Check foot compatibility with your machine model first. When properly installed, the feed dogs work in harmony with the walking foot’s upper feed system, preventing layers from shifting during quilting.
Threading The Machine With 100% Cotton Thread
With your walking foot in place, it’s time to choose the right thread for your quilting project.
Quality 100% cotton thread shines in machine quilting—it’s strong yet soft with minimal lint buildup.
Thread both your needle and bobbin with the same cotton thread to maintain balanced thread tension.
Your thread’s weight should match your needle size—thicker threads need larger needles.
Follow your machine’s threading order carefully:
- Wind the bobbin evenly
- Place the thread spool on the pin
- Guide thread through all tension discs
- Thread the needle from front to back
To begin, consider gathering necessary tools for efficient threading.
Check your tension by stitching on a scrap piece.
The stitches should look identical on both sides—no loops or puckers!
This ensures a professional finish and prevents thread breakage.
Proper threading is key to a successful quilting project.
Adjusting Machine Settings for Quilting
With your thread in place, it’s time to dial in your machine’s sweet spot for quilting perfection.
Your machine settings make or break your quilting results:
- Tension Adjustments: Balance top and bobbin thread tension until stitches lock perfectly in the middle of your quilt sandwich
- Stitch Length: Set between 2.5-3.0mm for clean, defined lines
- Feed Dogs: Keep them up when using your walking foot
Test these settings on a scrap sandwich first!
Stitching in One Direction to Prevent Fabric Bunching
When you stitch in one direction across your quilt, you’ll prevent those frustrating fabric bunches that can ruin your hard work. This simple technique keeps your Tension Control consistent and minimizes Fabric Drag as you move forward with your machine quilting.
Your layers will thank you for maintaining a Consistent Direction instead of zigzagging back and forth, which often leads to puckering. Set your Stitch Length slightly longer than normal (2.5-3.0) for smoother Layer Movement.
- Always quilt from the center outward to push air bubbles away
- Keep your sewing machine at a slower speed for better control
- Use straight lines or stitch in the ditch techniques for beginners
- Support the quilt’s weight on a table to reduce pulling
- Relax your shoulders and hands—tension transfers to your fabric!
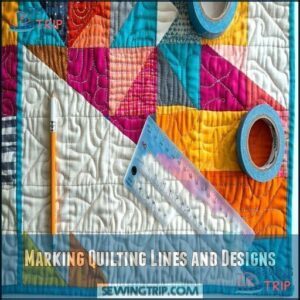
Marking Quilting Lines and Designs
You’ll never achieve those perfect quilting patterns without first marking your quilting lines, so grab your Hera marker or masking tape to map out your design.
Even the most experienced quilters know that good marking is like having a GPS for your needle, guiding you through the fabric landscape and helping you avoid those dreaded "what was I thinking" moments, which makes perfect quilting patterns achievable.
Choosing a Quilting Design and Stencil
With your walking foot attached, you’re ready to tackle design selection! Choosing the right quilting design transforms your quilt from flat fabric to textured artwork.
When selecting stencils, consider your fabric’s personality—busier prints need simpler designs, while solids can showcase intricate patterns. Match stencil scale to your quilt blocks and overall size.
For beginners, continuous-line designs minimize stops and starts. Traditional quilters might love feather patterns, while modern quilters can play with geometric shapes that reflect their personal style.
Always test marking tools first—you’ll want them to disappear completely after quilting! Some prefer using water erasable pens for light fabrics.
Using a Hera Tool or Masking Tape for Marking
Release your quilting precision with smart marking tools that make complex designs manageable.
When transferring patterns to your quilt top, you’ll need reliable methods that won’t damage your fabric. The Hera tool glides across fabric creating temporary creases that guide your stitching without leaving marks—perfect for light-colored fabrics where pen marks might show.
Masking tape creates instant straight-line guides you can remove without residue. Fabric chalk markers offer excellent visibility that disappears after washing.
Here’s why these marking methods work wonders:
- They help maintain consistent spacing in your machine quilting designs
- They prevent the heartbreak of permanent marks ruining your finished quilt
- They boost your confidence with clearly visible guidelines
For intricate design transfer methods, try layering tracing paper over your quilt top and using the Hera tool to press along the lines. Your fingers will thank you, and your quilting precision will jump to professional levels!
Stitching in The Ditch for a Simple Quilting Technique
After you’ve marked your quilting lines, it’s time to try stitching in the ditch—the perfect simple quilting technique for beginners.
Stitching in the ditch means quilting directly in the seam lines where fabric pieces meet. It’s nearly invisible but effectively secures your quilt layers.
| Aspect | Benefit | Technique | Result | Tip |
|---|---|---|---|---|
| Seam Concealment | Hidden stitches | Follow exact seam line | Professional look | Use matching thread |
| Stabilizing Seams | Strengthens quilt | Slow, steady pace | Durable finish | Check ditch depth |
| Fabric Choice | Shows texture | Cotton works best | Enhanced pattern | Pre-wash fabrics |
| Thread Matching | Invisible work | Match to background | Clean appearance | Use thin thread |
| Machine Settings | Prevents puckers | Medium stitch length | Even tension | Test on scraps first |
Your walking foot will guide fabric layers evenly through your machine, which is crucial for achieving a professional look and ensuring even tension. This technique, when done correctly, results in a durable finish and an enhanced pattern, making it a great choice for beginners who want to create a clean appearance.
Considering a Dual Feed Foot for Fabric Movement
While stitch-in-the-ditch provides a starting point, upgrading to a dual feed foot revolutionizes your machine quilting experience through superior Even Fabric Feed.
This specialized foot works like having an extra set of hands, gripping both top and bottom fabric layers simultaneously for perfect control.
Unlike standard walking foot quilting, you’ll enjoy:
- Seamless Movement – Complex Fabric Layers glide together without shifting or puckering
- Customizable Foot Pressure Settings – Adjust for delicate or bulky projects
- Enhanced Decorative Stitch Options – Create intricate patterns without fabric distortion
- Perfect Seam Alignment – Kiss those mismatched patterns goodbye!
You’ll laugh at how you once struggled with fabric slippage during quilting techniques. Trust me, once you’ve tried a dual feed foot, you’ll wonder how you ever managed without it!
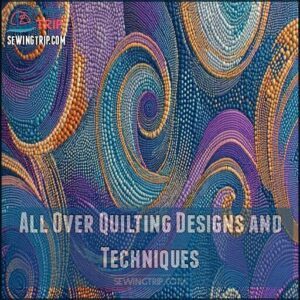
All Over Quilting Designs and Techniques
You’ll transform your quilts with all-over designs that add texture and interest across your entire project.
Whether you’re using stippling patterns with your walking foot or trying free-motion techniques that make busy fabrics shine, these methods will take your quilting from flat to fabulous.
Stippling and Paisley Designs for All Over Quilting
Now that you’ve marked your quilting lines, let’s explore stippling and paisley designs to elevate your quilt’s appearance.
These allover quilting patterns add stunning texture to your projects. You can adjust stippling variations from tight to loose, depending on your desired effect.
Paisley fillers bring elegant movement, while design scale impacts the overall look. Choose thread colors that either blend or contrast with your fabric—it’s your chance to make each quilt truly one-of-a-kind!
Free Motion Quilting and Walking Foot Techniques
Today, you can master the two pillars of machine quilting: walking foot for precise straight lines and free motion quilting (FMQ) for unlimited creativity.
- Practice consistent speed control to maintain even stitch length in your FMQ motifs
- Position your hands like gentle guides, not controllers, when moving your fabric
- Adjust thread tension slightly looser for smooth echo quilting
- Start with simple meandering patterns before attempting complex thread painting
Both techniques complement each other perfectly—your walking foot designs provide structure while FMQ adds personality. With patience, you’ll transform from nervous beginner to confident quilter faster than you’d think!
Quilting on a Large Scale for Texture and Interest
Moving beyond standard stitching, large-scale quilting transforms flat fabric into a three-dimensional masterpiece with incredible texture and visual punch.
When quilting bigger projects, your scale stitch density choices matter. On solid fabrics, intricate patterns shine, while busy prints often need simpler designs that won’t compete visually.
You’ve got options! Tackle large areas with your walking foot for controlled patterns, or try free motion quilting for flowing designs. If you’re feeling fancy, longarm quilting lets you create sweeping movements across wide spaces.
The magic of dimensional quilting comes from varying your approach – alternate between dense filler designs and open spaces to create shadow effects through fabric manipulation. Many crafters enjoy downloading free designs for their quilting projects.
"I love how a simple change in quilting techniques completely transforms my quilts," says one machine quilter. "The texture depth catches light in ways that make the piece look alive.
Ideal for Scrappy Quilts and Busy Printed Fabrics
Scrappy quilts and busy prints can be tricky to quilt—too much quilting gets lost, too little doesn’t hold things together. Your machine quilting strategy needs a thoughtful touch.
Try these filler designs for busy fabric hiding success:
- Choose simple meander stitches where prints dominate; they add texture without competing
- Use contrasting thread on solid areas for visual pop
- Apply denser freemotion designs in negative spaces
- Select an allover design that complements your print mixing
Your quilt’s personality shines when the quilting respects the fabric.
Tips for Successful Machine Quilting
You’ll boost your quilting confidence by starting with small projects like pillows or table runners instead of jumping straight into a king-sized masterpiece.
Properly basting your quilt sandwich is the secret weapon that prevents fabric shifting and puckering, much like how a good breakfast prevents mid-morning meltdowns.
Starting Small With Pillows or Table Runners
After exploring complex all-over designs, let’s scale things down. Why wrestle with a queen-sized quilt when you can perfect your machine quilting on smaller canvases first?
Pillowcases and table runners make ideal practice pieces for beginner quilting. These compact projects help you master quilting stitches without fighting yards of fabric through your sewing machine.
You’ll build confidence as you try different motifs without the commitment of a larger project. Play with small project motifs like gentle waves or simple grid patterns.
Try different fabric choices to see how prints and solids respond to quilting. Many quilters find these bite-sized projects addictive!
Complete a runner in an afternoon, then switch to a pillowcase technique the next day. Before you know it, you’ll be quilting like a pro.
Basting The Quilt Sandwich Securely for Stability
Three essentials make a stable quilt sandwich: proper layering, even tension, and secure basting.
Your quilt won’t budge during machine quilting with these top methods:
- Pin basting: Place curved safety pins 4" apart in a grid pattern
- Spray adhesive: Mist layers lightly for quick, even coverage
- Thread basting: Use long running stitches for detailed control
- Fusible batting: Iron layers together for pin-free quilting
- Glue basting: Dab washable school glue along seams for targeted hold
Smooth your backing first—wrinkles basted in now will haunt your finished quilt!
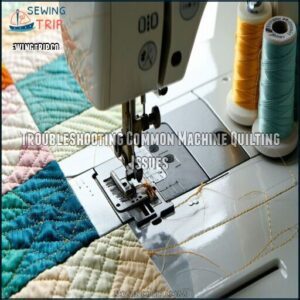
Troubleshooting Common Machine Quilting Issues
You’ll fix those pesky quilting problems with just a few simple tweaks to your technique and machine settings.
Even experienced quilters face tangled threads and puckered fabric, but don’t worry—these common issues won’t stand between you and your beautiful finished quilt.
Preventing Fabric Bunching and Puckering
Fabric bunching and puckering can quickly turn your quilting project into a wrinkled mess if you don’t take preventive measures.
Start with proper Tension Adjustment on your machine—too tight or too loose will cause puckering. Your Walking Foot is your best friend here, as it feeds all quilt layers evenly through the machine.
Thorough Basting Techniques are essential; pin every 4-5 inches or use spray adhesive for a secure sandwich. Choose the right Fabric Choice and Stitch Length for your project—lightweight fabrics need shorter stitches.
Remember, good Machine quilting requires patience; rushing creates uneven seams that no amount of pressing can fix.
Dealing With Thread Breakage and Tangles
Thread breakage can stop you mid-quilt like a bad movie cliffhanger.
Taming tension issues and tangles starts with the right tools and habits.
- Ensure thread quality: Cheap thread frays and breaks more often—invest in good spools.
- Match needle type to thread: A dull needle or the wrong size causes snags.
- Follow the thread path: Improper threading disrupts tension flow.
- Keep up machine cleaning: Lint buildup messes up smooth stitching.
Clean threads and a strong needle keep your machine happy—and your quilt stress-free.
Smooth sewing is just some maintenance away!
Adjusting Machine Settings for Smooth Stitching
Smooth stitching starts with tweaking your sewing machine.
Check the tension first—too tight or loose, and you’ll see wobbly stitches. Adjust stitch length for design finesse.
Don’t forget feed dogs—they guide fabric smoothly. Use a sharp needle and the right presser foot for steady progress.
And yes, machine cleaning makes a difference. Test on scraps, then quilt like a pro.
Using a Walking Foot to Guide The Fabric
Tired of wrinkles and puckering ruining your quilt? A walking foot is your answer! It’s like having an extra set of hands gently pulling your quilt layers evenly.
This nifty attachment syncs perfectly with your machine’s feed dogs, giving you smooth, even fabric feed every time. Say goodbye to frustrating bunching during straight line quilting or stitch-in-the-ditch.
Here’s how to make the most of it:
- Set your stitch length to 2.5–3.0 for smoother, stronger seams.
- Keep your hands steady—guide the fabric, don’t shove it.
- Use the extra grip for thick quilts or layered seams.
- Experiment with design versatility—straight line mastery transforms any project!
With the walking foot, machine quilting becomes a breeze, allowing for smooth and even fabric feed.
Finishing Your Quilt With Binding
Binding gives your quilt a clean, polished finish while protecting the edges from wear and tear.
With the right fabric and a little patience, you’ll wrap up your masterpiece beautifully.
Trimming The Edges of The Quilt for Binding
You’ve tackled quilting challenges, and now it’s time to give your quilt the polished edge it deserves. Squaring the quilt guarantees everything looks tidy and professional.
Grab accurate trimming tools like a rotary cutter and a quilting ruler. These are your best friends for clean, precise edges.
Start by cutting excess batting and backing fabric evenly. Take your time—no one wants wobbly, uneven edges undermining their binding.
Pay special attention to mitering corners, as crisp 90-degree angles create a truly handcrafted look. Preventing distortion is key here.
Keep your layers flat and steady as you trim. This simple step sets the stage for a stunning finish. Remember, cutting well now means smoother binding later, elevating your complete machine quilting masterpiece.
Sewing Binding to The Edges of The Quilt
Sewing the binding to your freshly trimmed quilt edges is the final sprint to the finish line. Align the raw binding edges with the quilt’s edge and secure them with pins. A walking foot is your best friend here—it keeps layers steady. Aim for a consistent 1/4" seam as you sew.
Here are key tips to follow:
- Tackle corners using the mitered corner technique. Slow down for precision.
- Overlap binding ends by 2.5 inches—measure carefully.
- Set your machine to a stitch length of 3.0-3.5.
- Backstitch at the start and end for durability.
- Decorative binding edges can add flair, so experiment freely!
You’ve got this—your quilt’s almost ready to shine!
Choosing a Binding Fabric That Complements The Quilt
Picking the right binding fabric is like choosing the perfect frame for a painting—it truly completes your quilt.
The binding frames your quilt designs, adding that final touch of personality and polish.
Here’s how to make it shine:
- Color Harmony: Pick colors that blend seamlessly or create bold contrast.
- Fabric Texture: Mix textures for an eye-catching or subtle effect.
- Binding Width: Consider if a narrow or wide binding fits your design better.
- Pattern Scale: Small patterns often work best, complementing without overpowering.
- Fiber Content: Confirm your binding fabric complements your quilt’s durability and feel.
Trust your instincts! Sometimes, an unexpected pick elevates your edges into something truly unforgettable for quilt finishing.
Ironing The Binding Flat for a Professional Finish
With your binding fabric chosen, it’s time to press for perfection.
Set your iron to the right ironing temperature based on your fabric type—hot enough to smooth but not scorch.
Use steady, pressing techniques to flatten seams and create clean edges.
Take your time; cutting corners here can mess up your quilt finishing.
Keep the seam allowance neat and consistent as you go.
Think of this step as the rehearsal before your quilt’s grand debut—it’s all about achieving true binding perfection with sharp, polished lines!
Frequently Asked Questions (FAQs)
What is the golden rule in quilting?
Think of quilting like storytelling—your golden rule is consistency.
Keep stitches even, seams accurate, and layers smooth.
A little patience and care go a long way in creating a quilt that truly shines!
What are the 3 different techniques used in quilting?
You’ve got three main quilting techniques: hand quilting for a classic personal touch, machine quilting for speed and precision, and longarm quilting—perfect for handling large quilts with intricate designs.
Each has its charm!
What is the best machine setting for quilting?
Set your machine to a straight stitch, lower the feed dogs for free-motion quilting, and adjust tension carefully.
Use a walking foot for even layers.
Slow speed guarantees control—quilting isn’t a race, right?
Do you start in the middle when machine quilting?
Starting in the middle prevents puckering and keeps your layers smooth.
It’s like untangling a knotted necklace—work outward for control.
Trust me, your quilt will thank you with flawless stitches!
The Quilting Is finished…?
You’re done quilting—congrats!
Now, focus on trimming the edges neatly and attaching the binding.
Hand-stitch the back for a polished finish.
Don’t forget to admire your work; you’ve earned that celebratory moment!
Do you backstitch when machine quilting?
Think of backstitching like tying a knot at the start and end of your quilting.
You don’t need it for decorative stitching but for durability, especially in heavy-use quilts, it’s a life-saver!
How to keep fabric from puckering when machine quilting?
Keep fabric smooth by basting layers securely with pins or spray adhesive.
Use a walking foot to prevent shifting.
Start quilting from the center, moving outward, and don’t pull or stretch the material, using techniques like basting layers to ensure a smooth finish.
What tension should I use for machine quilting?
Set your tension around mid-range to start, usually between 4-5 on most machines.
Then test on scraps.
Adjust if stitches look too tight or loose.
Remember, every machine has its quirks—tweak until it’s perfect!
What are the methods of machine quilting?
Machine quilting blends precision and creativity through methods like straight-line quilting, free-motion designs, stitch-in-the-ditch, or crosshatch patterns.
Each technique helps you finish quilts with unique flair, turning your ideas into cozy, artful masterpieces.
What is the best stitch for machine quilting?
The best stitch for machine quilting depends on your design.
A straight stitch is the go-to for clean lines, while free-motion stitches give room for creativity.
Use short, even stitches for durable, eye-catching results.
Conclusion
Picture finishing your first quilt, beaming as you smooth it out, every stitch showcasing your hard work.
Machine quilting techniques make this possible, turning plain fabric into personal art. From layering your quilt sandwich to using a walking foot or experimenting with free-motion quilting, each step builds your skills.
Mistakes will happen, but they’re part of your growth as a quilter. Keep practicing, stay patient, and let creativity lead.
You’ll create quilts that truly shine.
- https://www.polkadotchair.com/machine-quilting-basics-sewing-lesson/
- https://www.youtube.com/watch?v=_7ak-rIgXsw
- https://shannonfraserdesigns.com/blogs/quilty-blog/top-10-tips-to-improve-your-quilting-on-a-domestic-sewing-machine?srsltid=AfmBOoqhUqerHai6CaLUX1LeG48zevOjhLNN6uGZYdZE61rDuRWfdweQ
- https://www.quiltingboard.com/main-f1/machine-quilting-t57991.html

