This site is supported by our readers. We may earn a commission, at no cost to you, if you purchase through links.
Start with the right tools: a good machine, topstitching needle, and heavier thread. Adjust your settings for longer stitches and higher tension.
Practice makes perfect, so don’t be afraid to experiment on scrap fabric first. Keep your lines straight using guide markers or an edge-stitch foot.
When you’re ready to tackle your project, begin with less visible areas to build confidence. Remember, even seasoned pros occasionally unpick a wonky line!
As you master these topstitching tips for beginners, you’ll soon be adding that extra polish to collars, pockets, and hems like a pro, using your newfound skills to create a professional-looking finish with the help of a good machine and a sewing skills boost.
Table Of Contents
- Key Takeaways
- What is Topstitching and Why Use It?
- Essential Tools for Beginner Topstitchers
- Setting Up Your Machine for Topstitching
- Mastering Basic Topstitching Techniques
- Topstitching Different Fabric Types
- Troubleshooting Common Topstitching Problems
- Creative Topstitching Ideas for Beginners
- Frequently Asked Questions (FAQs)
- Conclusion
Key Takeaways
- You’ll want to gear up with the right tools: a good machine, a topstitching needle, and heavier thread. It’s like preparing for battle but with a needle instead of a sword!
- Don’t be afraid to experiment with your machine settings. Longer stitches and higher tension will be your allies in this endeavor. Think of it as letting your stitches strut their stuff on the fabric catwalk.
- Practice makes perfect, so start with scrap fabric before embarking on your masterpiece. Just like an athlete warms up before a big game, you wouldn’t run a marathon without stretching first.
- Remember, even professionals sometimes have to undo wobbly lines. So if your first attempt resembles a rollercoaster rather than a straight line, don’t fret! Persevere, and you’ll soon be topstitching like a pro.
What is Topstitching and Why Use It?
Ready to take your sewing skills to the next level?
Topstitching is your secret weapon for creating professional-looking garments.
Adding both style and function to your creations with visible stitches that outline seams and edges, professional-looking garments are the result.
Definition of Topstitching
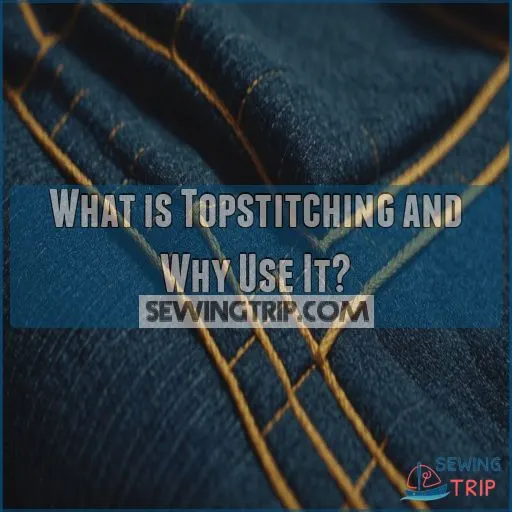
Topstitching is your ticket to pro-level sewing! It’s a variant of the straight stitch that appears on the right side of your fabric, typically 1/4 to 1/2 inch from the edge or seam . This versatile technique can:
- Add a polished, professional look to your projects
- Reinforce seams for durability
- Create decorative patterns and textures
Whether you’re a budding fashionista or a DIY enthusiast, mastering topstitching will elevate your creations from homemade to handcrafted!
Decorative Vs Functional Purposes
Beyond its eye-catching allure, topstitching serves a dual purpose in your sewing projects.
You’ll find it’s not just about adding a decorative flair to your garments. While it certainly enhances aesthetics with bold, visible stitches , topstitching also plays a functional role.
It can flatten seam allowances, provide structure, and increase durability (Source). Whether you’re aiming for a polished look or reinforcing high-stress areas, mastering this technique will elevate your sewing game!
Common Applications in Garment Construction
You’ll find topstitching holding down the fort in countless garment areas.
It’s the unsung hero of pockets, collars, and waistbands, keeping everything in line .
Seams and hems get a boost of stability and style with this technique.
Whether you’re using a walking foot on your sewing machine or embracing the art of hand sewing with a saddle stitch, topstitching adds that pro-level finish to your creations, often relying on precise sewing machine stitch length
.
Benefits of Topstitching for Beginners
Beginners, get ready to level up your sewing game.
Topstitching isn’t just for the pros – it’s your secret weapon for creating garments that look store-bought.
You’ll love how it reinforces seams, adds a professional finish, and lets you express your creativity, whether you’re working with delicate fabrics or stretchy materials.
Plus, with nearly 80% of ready-to-wear garments featuring topstitching, mastering this skill will boost your confidence as you tackle more complex projects.
It’s like adding a designer touch to everything you make.
Essential Tools for Beginner Topstitchers
Ready to take your sewing skills to the next level?
Having the right tools for topstitching can make all the difference.
Turning those wobbly lines into crisp, professional-looking seams that’ll make your friends think you’ve been secretly moonlighting as a fashion designer.
Choosing the Right Sewing Machine
Picking the right sewing machine for topstitching can feel like finding a needle in a haystack, especially when comparing best mechanical sewing machines for beginners
.
But don’t worry, we’ve got your back! Look for a machine with adjustable stitch length and presser foot pressure.
These features will be your secret weapons for achieving pro-level topstitching.
Consider models with a speed control slider too – it’s like having training wheels for your stitching adventures.
Selecting Appropriate Needles and Thread
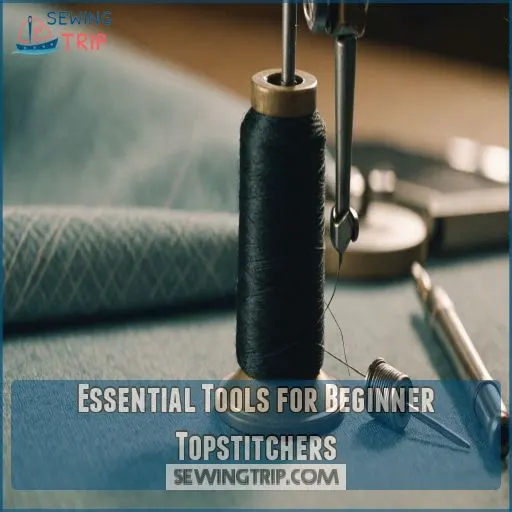
Now that you’ve got your sewing machine ready, let’s talk thread and needles – the dynamic duo of topstitching! Think of them as your trusty sidekicks in this sewing adventure.
The right combo can make your stitches pop like a fireworks display or blend in smoother than butter on hot toast.
- Needle with an eye wider than your grandma’s stories
- Thread thicker than your last slice of birthday cake
- Stitch length longer than a Monday morning
Presser Foot Options for Topstitching
After choosing the right needles and thread, let’s talk about your secret weapon: presser feet.
The right foot can make topstitching a breeze! An edgestitch foot with a center guide is your new best friend.
It’ll keep your stitches perfectly parallel to the fabric edge. For heavier fabrics, consider a walking foot to prevent layers from shifting.
Remember, the right foot can turn you into a topstitching pro in no time!
Marking Tools for Precise Stitching Lines
While precise topstitching can make your projects look professional, it all starts with accurate marking.
You’ll want to stock up on a few key tools to make sure those stitching lines are spot-on. Tailors chalk, marking pencils, and fabric markers are your new best friends for creating crisp, visible guidelines.
Don’t forget a trusty sewing gauge to measure those perfect seam allowances consistently.
With these tools in your arsenal, you’ll be topstitching like a pro in no time!
Setting Up Your Machine for Topstitching
Ready to take your topstitching game to the next level?
Let’s get your sewing machine primed and ready for pro-quality results with these easy-to-follow setup tips that’ll have you stitching like a seasoned pro in no time.
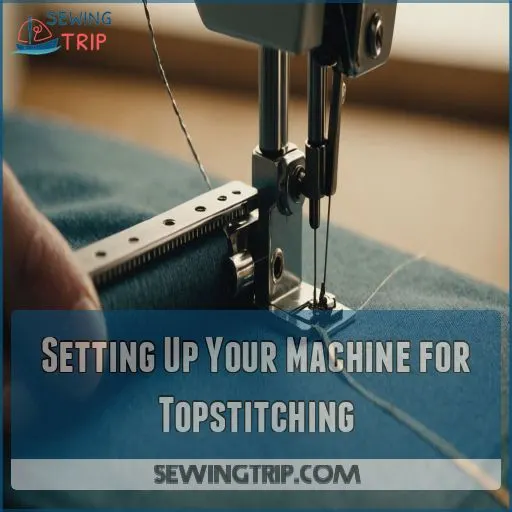
Adjusting Thread Tension for Balanced Stitches
Three key factors influence your thread tension: fabric weight, thread type, and needle size.
You’ll want to strike a balance where neither the top nor bobbin thread shows on the opposite side.
Start with your machine’s default setting, then make small adjustments.
Test on scrap fabric, increasing tension if you see loops underneath or decreasing if the bobbin thread peeks through on top (Source).
Selecting the Optimal Stitch Length
The secret to pro-level topstitching? It’s all in the stitch length! You’ll want to dial in the perfect setting for your project.
- Go longer for boldness: Aim for 3.5 to 4 on your machine for eye-catching results
- Match fabric weight: Heavier fabrics call for longer stitches
- Test and adjust: Always practice on scraps to find your machine’s sweet spot
Remember, longer stitches are your topstitching superpower!
Fine-tuning Presser Foot Pressure
Adjusting your presser foot pressure is like finding Goldilocks’ perfect porridge – not too heavy, not too light. You’ll want to fine-tune it based on your fabric thickness and desired stitch quality.
| Fabric Type | Pressure Setting | Expected Result |
|---|---|---|
| Lightweight | Low | Even feed |
| Medium | Medium | Balanced stitch |
| Heavy | High | Smooth seams |
Remember, the right pressure prevents puckering and makes sure your topstitching looks pro-level. Don’t be afraid to experiment – your perfect setting might be hiding just a dial turn away!
Testing Settings on Scrap Fabric
Crafting perfect topstitches is like baking the perfect cake – it takes practice and experimentation.
Before diving into your project, test your machine settings on scrap fabric. This important step helps you:
- Fine-tune thread tension
- Adjust stitch length
- Determine best needle size
- Perfect presser foot pressure
Remember, "Using some scrap fabric folded in half, practice your stitching—not only to test your stitch setting but also to improve your skill" . You’ll be stitching like a pro in no time!
Mastering Basic Topstitching Techniques
You’ve got your machine set up and your tools ready – now it’s time to make those stitches shine!
Let’s explore some essential techniques that’ll have you topstitching like a pro in no time.
From keeping your lines straight to conquering those tricky curves.
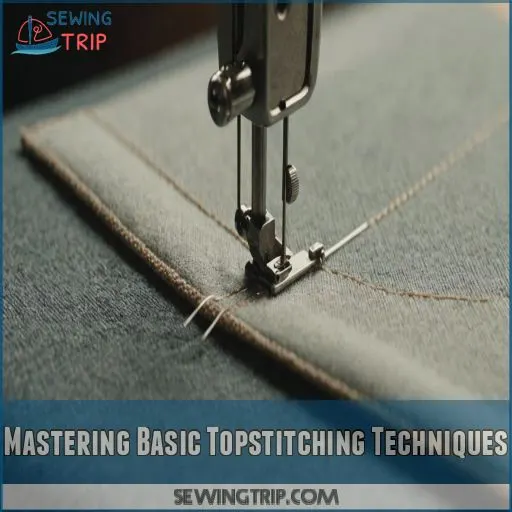
Maintaining Consistent Seam Allowances
Consistency is the secret sauce of professional-looking topstitching.
You’ll want to keep your seam allowances as steady as a surgeon’s hand. Trim those allowances down to about 1/8" on the sides you’ve just sewn.
For a clean finish, aim for a 1/4" (6mm) topstitch – it’s close enough to look neat without disappearing.
Practice makes perfect, so don’t be afraid to experiment on scrap fabric first!
Stitching Straight Lines With Guide Markers
Three simple guide markers can transform your topstitching game:
- Masking tape for instant, removable lines
- Walking foot guides for consistent spacing
- Hera markers for invisible, temporary marks
You’ll be stitching straight lines like a pro in no time! Remember, practice makes perfect. Start with scrap fabric to get a feel for your chosen marker. Soon, you’ll be confidently creating those crisp, professional-looking seams that’ll make your projects pop!
Navigating Curves and Corners
Curves and corners can be your topstitching’s Achilles’ heel, but fear not.
You’ll conquer them like a pro with these tips. For smooth curves, ease up on the pedal and let your fabric guide you.
When tackling corners, be generous with your stitching allowance.
Remember, it’s all about finesse – imagine you’re painting delicate brushstrokes rather than racing to the finish line.
Your patience will pay off in beautifully sculpted results!
Backstitching Alternatives for Securing Threads
While curves and corners might make you sweat, securing thread ends doesn’t have to! Say goodbye to bulky backstitching and hello to these sleek alternatives:
- Thread knotting: Pull the top thread to the back and tie it with the bobbin thread
- Locking stitch: Create a loop on the underside and pull the top thread through
- Slight tension adjustment: Loosen top tension so the thread sits nicely on the fabric
These techniques will have you stitching like a pro in no time!
Topstitching Different Fabric Types
You’ve mastered the basics, now it’s time to tackle different fabrics like a pro!
From delicate silks to sturdy denim, we’ll show you how to adapt your topstitching techniques for any material you’re working with.
Tips for Topstitching Lightweight Fabrics
Lightweight fabrics can be tricky, but don’t let that scare you! You’ve got this. When topstitching delicate materials, it’s all about finding the right balance. Let’s look at some game-changing tips that’ll have you stitching like a pro in no time.
| Fabric Type | Thread Tension | Stitch Length |
|---|---|---|
| Silk | 3-4 | 2.0-2.5 mm |
| Chiffon | 2-3 | 1.5-2.0 mm |
| Voile | 3-4 | 2.0-2.5 mm |
| Lawn | 4-5 | 2.5-3.0 mm |
Remember, these are just starting points. Your fabric’s your dance partner – you might need to tweak things a bit to find your perfect rhythm.
Techniques for Heavy Fabrics Like Denim
Denim’s a whole different story when it comes to topstitching.
You’ll need to bring out the big guns: heavy-duty needles and thicker thread. Crank up your stitch length to around 3.5-4 for that classic jeans look.
Don’t forget to use a topstitching foot with a guide for those perfectly parallel lines.
And here’s a pro tip: start on scrap fabric to avoid thread tangles, you’ve got this, denim warrior!
Working With Stretchy Knit Materials
Knits can be tricky, but don’t let them stretch your patience!
When topstitching these fabrics, you’ll want to:
- Use a walking foot to prevent fabric from stretching
- Opt for a stretch stitch or twin needle for flexibility
- Loosen your top tension slightly
- Increase stitch length to 6-8 per inch
Remember, steam is your secret weapon! It’ll help relax those fibers and keep your stitches looking pro. Just think of it as giving your knits a spa day before their big debut!
Topstitching Challenging Fabrics (leather, Vinyl)
Leather and vinyl can be tricky customers, but don’t let them intimidate you!
Arm yourself with a Teflon foot and heavyweight needles to conquer these challenging fabrics.
You’ll want to lengthen your stitch to at least 3.5 or 4.0 for a polished look.
Mistakes are permanent here, so take a deep breath and sew carefully.
With practice, you’ll be topstitching like a pro in no time!
Troubleshooting Common Topstitching Problems
Even the most seasoned sewers encounter hiccups when topstitching, but don’t let that discourage you!
In this section, we’ll tackle common topstitching troubles head-on, equipping you with the know-how to transform frustrating mishaps into picture-perfect seams.
Dealing With Skipped Stitches
Skipped stitches can turn your topstitching dreams into a nightmare, but don’t throw in the towel just yet!
First, give your machine a mini spa day by cleaning out lint and rethreading everything.
Then, swap in a fresh topstitch needle – they’ve got a bigger eye that helps threads play nice together.
If you’re still seeing gaps, try bumping up your needle size to match your fabric’s thickness (Source).
Fixing Puckered or Wavy Topstitching
Occasionally, your topstitching might resemble a roller coaster ride – wavy and unpredictable.
Don’t fret! To smooth things out, try adjusting your fabric tension and presser foot pressure. Lengthen your stitch to 3 or 3.5 for a more relaxed look .
Remember, Rome wasn’t built in a day, and perfect topstitching takes practice.
Experiment with different needle sizes and thread tensions until you find your sweet spot. You’ve got this, future topstitching pro!
Preventing Thread Breakage and Tangling
Thread breakage and tangling can turn your topstitching dreams into a nightmare. Fear not! You’ve got this. Here’s how to nip these pesky problems in the bud:
- Keep it clean: Give your machine a good brush-down to banish lint and dust. Regular cleaning and oiling can keep your machine running smoothly, preventing frustration and extending its lifespan, as mentioned in the best sewing machine beginner tips.
- Choose wisely: Match your needle and thread to your fabric type.
- Thread with care: Double-check your threading path – sometimes a little hiccup here causes big trouble.
Remember, even seasoned pros face these challenges. You’re not alone in this stitching adventure!
Addressing Uneven Stitch Tension
Struggling with uneven stitch tension? Don’t sweat it!
First, check your machine’s thread tension settings and adjust as needed to ensure balanced stitching
.
Try using different colored threads for top and bobbin to easily spot imbalances . Remember, proper tension means the top thread appears on top, and bobbin thread on the bottom.
If you’re still stumped, experiment with needle size and thread weight to match your fabric.
Creative Topstitching Ideas for Beginners
Ready to take your topstitching skills to the next level?
Let’s explore some fun and creative ways to use topstitching that’ll make your projects pop, even if you’re just starting out.
Experimenting With Contrasting Thread Colors
Ready to spice up your sewing?
Let’s play with contrasting thread colors! It’s like adding a dash of personality to your projects.
You’ve got options galore – match your bobbin to the underside fabric for a pro look , or go bold with a totally different hue on top.
Darker threads often work better.
Don’t be afraid to experiment – you might surprise yourself with an eye-catching combo!
Double Topstitching for Added Emphasis
Double-needle dazzle awaits! Elevate your sewing game with double topstitching for eye-catching emphasis. This technique isn’t just for jeans anymore – it’s your ticket to pro-level creations.
- Creates a polished, RTW look
- Adds strength to high-stress seams
- Perfect for showcasing color contrast
- Increases stitch density for durability
- Allows for creative seam allowance play
Ready to give it a try? Grab your twin needle and let’s make some sewing magic happen!
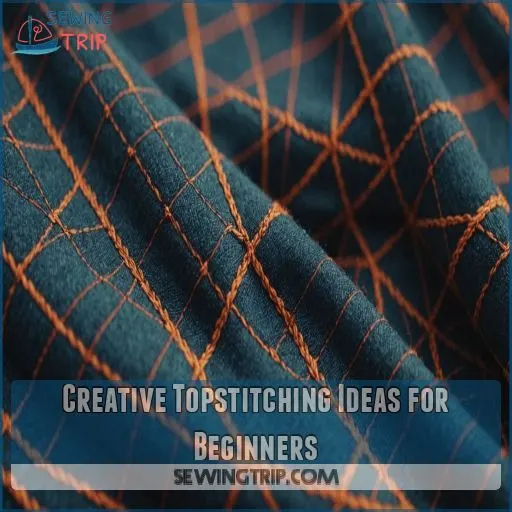
Decorative Topstitching Patterns
Dozens of decorative topstitching patterns can elevate your sewing game from basic to brilliant.
You’ll love experimenting with geometric designs, playing with stitch density, and trying out different thread weights.
Channel vintage styles or create modern looks with color blocking techniques.
Remember, the key is to start simple and gradually increase complexity.
Before you know it, you’ll be stitching up a storm with eye-catching patterns that’ll make your projects pop!
Incorporating Topstitching in Simple Projects
Now that you’ve mastered decorative patterns, let’s put your skills to work!
Topstitching shines in simple projects.
Try jazzing up DIY tote bags with bold stitching along the straps . Give plain pillow covers a designer touch with contrasting thread.
For a rockstar look, add topstitching to denim jacket pockets. Even beginner-friendly garments like wrap skirts can benefit from a crisp topstitched edge.
Ready to stitch your way to style?
Frequently Asked Questions (FAQs)
How to make a good topstitch?
Isn’t it funny how a simple stitch can make or break your project?
To nail that perfect topstitch, use a sharp needle, lengthen your stitches, and press well beforehand.
Don’t forget to stabilize lightweight fabrics for pro results!
Do you want to topstitch all the things?
You might find yourself itching to topstitch everything in sight.
It’s a versatile technique that adds polish and structure to your projects.
From bags to garments, topstitching can elevate your sewing game and give a professional finish.
How to topstitch a quilt?
Ready to transform your quilt into a masterpiece? Topstitching’s your secret weapon!
Start in the center, use a walking foot, and sew edge-to-edge lines.
Keep that needle down for smooth pivots. You’ll be stitching like a pro in no time!
How do you secure a topstitch?
To secure a topstitch, start by lowering the needle into the fabric before sewing.
Use a slightly longer stitch length and loosen the top tension for better results.
Finish by pulling threads to the back and tying off securely.
What is the best stitch length for topstitching?
Threading the needle of perfection, aim for a stitch length between 5 to 4 on your machine.
It’s like taking longer strides – your topstitching should stand out from the default setting.
Experiment to find your machine’s sweet spot.
How do you start a top stitch?
Start your topstitch journey with confidence!
Position your fabric right side up, increase stitch length to 5-4, and begin on scrap fabric to prevent thread jams.
You’ll be stitching like a pro in no time!
What is the best thread for topstitching?
Ever wondered what gives your stitches that professional edge?
For topstitching that pops, you’ll want to use a heavier thread.
Jeans or buttonhole thread are top choices .
You can even double up regular thread for added oomph!
Do you need a special needle for topstitching?
You’ll want to grab a special needle for topstitching.
Opt for needles with larger eyes, like Schmetz Topstitching or Jeans/Denim needles.
They’re designed to handle thicker threads and glide through hefty fabrics like a hot knife through butter.
How do I choose the right topstitching thread color?
Choosing the right topstitching thread color can make or break your project.
Match it to your fabric for a subtle look, or go bold with contrasting colors for a pop.
Don’t be afraid to experiment with different shades.
Can I use a twin needle for topstitching?
Twin needles are perfect for topstitching.
They create two parallel lines on top and a stretchy zigzag underneath.
Just remember to use stretch needles, adjust your tension, and avoid pulling the fabric as you sew.
Should I distress denim before or after topstitching?
Distress your denim before topstitching for that authentic worn look.
It’s essential to sand seams and edges prior to stitching to avoid damaging your handiwork.
You’ll end up with a mound of blue fuzz, but it’s worth it!
What stitch length is best for topstitching knits?
Did you know 80% of sewists struggle with knit topstitching?
You’ll want to increase your stitch length to 6-8 stitches per inch for knits.
It’s like giving your fabric room to breathe. Don’t forget to loosen that top tension slightly!
How many spools of topstitching thread should I have?
For topstitching jeans, you’ll need a strong, special thread—usually thicker than regular sewing thread.
One jeans project may use up to 5 spools of topstitching thread in various colors, so it’s good to have options!
Conclusion
You’ve just discovered the secret to elevating your sewing game. With these topstitching tips for beginners, you’re well on your way to creating garments that look like they’ve stepped off a runway.
Remember, practice makes perfect, so don’t be discouraged if your first attempts aren’t flawless. Embrace the learning process, experiment with different techniques, and soon you’ll be adding that professional touch to everything you sew.
So thread up your machine, adjust those settings, and get ready to stitch your way to sewing stardom!

