This site is supported by our readers. We may earn a commission, at no cost to you, if you purchase through links.
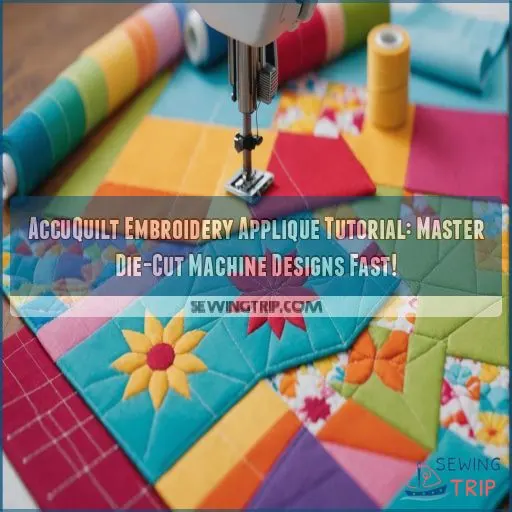
Start by choosing the right dies and fabrics, then prep your workspace like a pro. Cut your shapes with the AccuQuilt machine – it’s so satisfying to watch those perfect pieces emerge!
Set up your embroidery machine, stitch the placement line, and tack down those appliques with confidence. The real magic happens when you add those eye-catching border stitches.
You’ll be amazed at how quickly you can create stunning designs that look like they took hours. But wait, there’s more to learn about taking your projects from good to jaw-dropping.
Precision and creativity will set your projects apart and make them truly unique.
Table Of Contents
- Key Takeaways
- Getting Started With AccuQuilt Embroidery Applique
- Preparing Fabrics for AccuQuilt Embroidery Applique
- Setting Up Your Embroidery Machine
- Stitching the Placement Line
- Embroidering the Tacking Stitch
- Completing the Applique With Border Stitches
- Finalizing Your AccuQuilt Embroidery Applique Project
- Frequently Asked Questions (FAQs)
- Conclusion
Key Takeaways
- You’ll breeze through complex designs with AccuQuilt’s precision cutting. It’s like having a fabric-cutting superpower – say goodbye to wonky edges and hello to perfect shapes every time.
- Don’t skimp on fabric prep. Applying fusible web and starching your fabric may feel tedious, but it’s the secret sauce for crisp, professional-looking appliqués that will make your quilting buddies green with envy, especially when using the right fusible interfacing techniques
.
- Mastering the tacking stitch will take you halfway to appliqué nirvana. It’s your trusty sidekick, holding everything in place while you work your embroidery magic. Remember, finding the right stitch density is like Goldilocks – not too sparse, not too thick.
- Let your creativity soar with border stitches and embellishments. You’re the boss of your borders, so play around with stitch styles, lengths, and colors. It’s like adding the cherry on top of your fabric sundae – go wild and make it uniquely yours!
Getting Started With AccuQuilt Embroidery Applique
You’re about to start a fabric-cutting adventure that’ll make your embroidery projects a breeze.
Grab your AccuQuilt machine, pick out some fun dies, and let’s turn those fabric scraps into stunning appliqué designs faster than you can say "bobbin thread.
Essential Tools and Materials
Ready to start with AccuQuilt embroidery applique? Let’s gear up!
You’ll need your trusty AccuQuilt cutter, a selection of GO! dies , and fabrics that make your heart sing.
Don’t forget your embroidery hoop and stabilizer – they’re your project’s backbone.
Set up a comfy workspace where you can spread out and let creativity flow.
With these tools at your fingertips, you’ll be cutting and stitching like a pro in no time!
Choosing the Right AccuQuilt Dies
The key to AccuQuilt mastery? It’s all in the dies you choose!
Consider your project’s complexity and design style when picking dies.
Smaller dies are perfect for intricate details, while larger ones speed up big projects.
Don’t break the bank – start with versatile shapes like circles and squares . As you gain confidence, branch out to specialty dies that match your style.
Remember, the right die can turn fabric cutting from a chore into a breeze, especially when you have a machine like the AccuQuilt Fabric Cutting System on your side
!
Selecting Fabrics for Applique
How do you choose the perfect fabric for your AccuQuilt embroidery applique?
Start with lightweight, tightly woven cottons that’ll play nice with your die-cutter.
For a pop of personality, mix prints and solids in complementary color schemes.
Don’t shy away from starchy fabrics; they’ll hold their shape better during cutting.
Your fabric choice can make or break your design, so let your creativity shine!
Preparing Your Workspace
Your embroidery haven awaits! Transform a corner of your space into a creative oasis.
Set up your AccuQuilt machine and embroidery tools on a wheeled cart for easy access (Source). Make sure you have plenty of lighting to prevent eye strain.
Organize supplies in nearby cubbies or pegboards . Don’t forget comfort – a supportive chair can be a game-changer during long stitching sessions.
Remember, a tidy workspace is the secret ingredient to mastering those die-cut designs!
Preparing Fabrics for AccuQuilt Embroidery Applique
You’re about to turn your fabric stash into perfectly cut applique shapes with AccuQuilt’s magic touch, using a clever technique that relies on reusable fabric templates
.
Get ready to fuse, press, and snip your way to applique perfection as we walk through prepping your fabrics for embroidery success.
Applying Fusible Web to Fabric
Ready to fuse like a pro? Let’s get started applying fusible web to fabric for your AccuQuilt embroidery applique projects. Grab your iron and favorite fusible web, like Lite-Steam-a-Seam-2 or AccuQuilt Fuse ‘N Stick . These game-changers make applique a breeze!
- Feel the excitement of crisp, precise shapes
- Revel in the satisfaction of perfectly fused fabric
- Imagine the creative possibilities at your fingertips
Remember, fusible web is your secret weapon for stress-free applique mastery!
Starching and Pressing Techniques
Starched to perfection, your fabric’s ready for AccuQuilt magic! Let’s iron out the details of fabric prep.
You’ll be pressing like a pro in no time, avoiding those pesky wrinkles that can throw off your embroidery game.
| Starch Type | Best For | Pro Tip |
|---|---|---|
| Spray Starch | Quick jobs | Light misting |
| Liquid Starch | Heavy fabrics | Dip and press |
| Starch Alternative | Delicates | Test first |
| Fabric Folding Pen | Precision work | Starch seams |
Remember, a well-pressed fabric is your ticket to appliqué paradise!
Cutting Applique Shapes With AccuQuilt Dies
Now that your fabric’s crisp and ready, let’s cut those shapes like a pro!
Choose your AccuQuilt die based on your project’s needs. Place your prepped fabric on the die, right side up, and run it through the machine.
Voilà! Perfect appliqué shapes every time. It’s like having a fabric-cutting superpower – no more wonky edges or hand cramps from scissors.
You’ll be churning out shapes faster than you can say "quilt"!
Organizing Cut Pieces for Efficient Workflow
With your die-cut pieces in hand, it’s time to tame the fabric chaos! You’ll feel like a quilting superhero when you implement these organization strategies. Don’t let those tiny shapes slip through your fingers!
- Create project kits: Group shapes for each block in labeled sandwich bags.
- Embrace color coding: Use different colored containers for various fabric types.
- Batch cut and store: Cut multiple shapes at once, then organize by size or design.
Remember, a place for everything and everything in its place – your future self will thank you!
Setting Up Your Embroidery Machine
You’re about to turn your embroidery machine into an applique powerhouse.
Get ready to pick the perfect hoop.
Load those snazzy AccuQuilt designs, and thread your machine like a pro – it’s easier than untangling your earbuds, we promise!
Choosing the Right Embroidery Hoop
Selecting the perfect embroidery hoop can make or break your AccuQuilt appliqué project. You’ll want to think about both size and material to achieve pro-level results.
Let’s break it down:
| Hoop Feature | Small Projects | Large Projects |
|---|---|---|
| Size | 4" x 4" | 7" x 12" |
| Material | Plastic | Metal |
| Tension | Moderate | High |
| Compatibility | Universal | Machine-specific |
Remember, a well-chosen hoop is like a good dance partner – it’ll keep your fabric in step and your stitches on point!
Selecting Appropriate Stabilizers
Three cheers for stabilizers – your embroidery’s unsung heroes! Let’s navigate this fabric foundation together:
- Match stabilizer weight to your fabric’s personality
- Consider cut-away for knits and tear-away for wovens
- Size your stabilizer slightly larger than your hoop
- Layer up for dense designs – it’s like a stabilizer sandwich!
Remember, choosing the right stabilizer is like finding the perfect dance partner. It’ll support your fabric’s moves without stealing the spotlight!
Threading the Machine for Applique
Let’s thread that machine like a pro! You’re about to become the conductor of your embroidery orchestra.
| Thread Type | Needle Size | Tension Tips |
|---|---|---|
| 30 wt | 75/11 | Start at 4 |
| 40 wt | 80/12 | Start at 3.5 |
| 50 wt | 90/14 | Start at 3 |
| Metallic | 90/14 | Loosen up! |
Remember, your bobbin’s the backup singer – keep it in tune with your top thread.
Now, let’s make some appliqué magic!
Loading AccuQuilt Embroidery Designs
Now that you’ve threaded your machine, it’s time to bring your AccuQuilt designs to life!
You’ll feel like a digital wizard as you transfer those intricate patterns onto your embroidery machine.
Whether you’re using USB, Wi-Fi, or direct connection, make sure your file format matches your machine’s requirements.
Having trouble? Don’t sweat it—most software options offer design customization and troubleshooting tips to keep you stitching smoothly.
Stitching the Placement Line
You’re about to stitch the magic line that’ll guide your applique into place.
Think of it as drawing a treasure map on your fabric – X marks the spot where your beautiful design will go.
Understanding the Placement Stitch Function
You’ll often start your AccuQuilt embroidery appliqué journey with the placement stitch. This important first step acts like a roadmap, guiding you where to place your fabric pieces.
It’s the secret sauce that makes sure your appliqué sits pretty exactly where it should. Think of it as drawing an outline before coloring – it keeps everything in check.
Once stitched, you’ll remove the hoop to position your fabric precisely. It’s your ticket to appliqué perfection and achieving the desired look with your fabric pieces.
Adjusting Stitch Settings for Optimal Results
The secret sauce to perfect placement lines lies in fine-tuning your stitch settings. Adjust your machine’s parameters to create crisp, visible lines that’ll make positioning a breeze. Don’t be afraid to experiment – you’re the captain of this embroidery ship!
- Feel the thrill of precision as you dial in the perfect stitch density
- Experience the zen-like focus of adjusting thread tension just right
- Revel in the satisfying click of selecting the ideal needle type
- Savor the moment you nail the perfect stitch length
- Bask in the glow of mastery as you tweak that stitch width
Removing the Hoop After Placement Stitching
Once you’ve dialed in those perfect stitch settings, it’s time to free your fabric from its hoopy prison! Carefully unhook your embroidery module, keeping an eagle eye on that hoop placement. You’re the captain now, steering your project to appliqué victory.
Gently remove the hoop, making sure your stabilizer tension stays taut as a drum. Remember, no fabric shifting allowed – we’re not doing the cha-cha here!
Troubleshooting Common Placement Stitch Issues
Stitches gone wild? Don’t fret! When placement lines misbehave, check your hoop tension first. Loose fabric can cause puckering faster than a teenager’s mood swings.
If thread keeps breaking, adjust your stitch density – think Goldilocks, not too sparse, not too thick.
For stubborn fabric issues, try starching before cutting . Remember, even pros hit snags sometimes – it’s all part of the quilting adventure!
Embroidering the Tacking Stitch
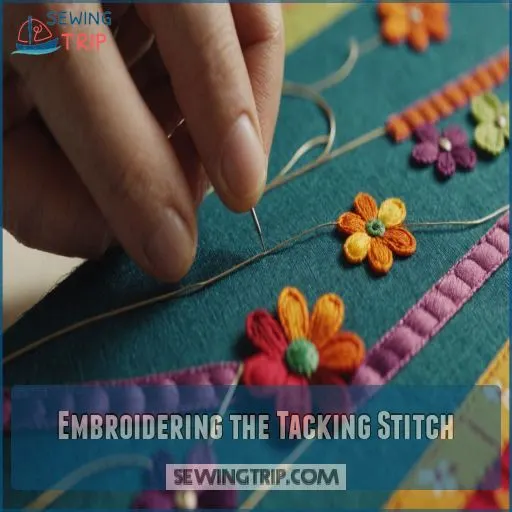
Ready to tackle the tacking stitch? This key step secures your applique shapes in place, ensuring they stay put while you work your embroidery magic.
Understanding the Purpose of Tacking Stitches
Tacking stitches are your secret weapon in the embroidery appliqué process. They’ll hold your fabric pieces in place like a trusty sidekick, ensuring everything stays put while you work your magic.
- They prevent fabric shifting, giving you ultimate control
- They allow for easy repositioning if needed, offering creative freedom
- They create a clean foundation for your border stitches, mastering that professional look
You’ll love how these little stitches make your AccuQuilt designs pop!
Adjusting Stitch Density for Different Fabrics
Now that you’ve nailed the tacking stitch’s purpose, let’s fine-tune your stitch density game. It’s like finding the perfect porridge – not too thick, not too thin. You’ll want to adjust based on your fabric’s personality.
| Fabric Type | Stitch Density | Thread Type | Needle Size |
|---|---|---|---|
| Lightweight | Low | Fine | 70/10 |
| Medium | Medium | All-Purpose | 80/12 |
| Heavy | High | Heavy-Duty | 90/14 |
| Stretchy | Low-Medium | Polyester | 75/11 |
Remember, these are just starting points. You’re the boss here – feel free to experiment!
Reattaching Hoop and Continuing Embroidery Process
You’ve made it past the stitch density adjustment – great job.
Now, carefully reattach the hoop, ensuring proper alignment and tension.
Double-check your design’s stitch settings and make any necessary adjustments before continuing with the embroidery process.
Checking for Proper Shape Adhesion
With your hoop back in place, let’s make sure those shapes are sticking like glue!
Run your fingers gently over each appliqué piece. Feel any loose edges?
No worries! Just give ’em a quick press with your iron. Heat is your best friend here – it’ll secure those shapes faster than you can say "AccuQuilt."
Once everything’s snug as a bug, you’re ready to rock that tacking stitch!
Completing the Applique With Border Stitches
You’re in the home stretch of your AccuQuilt embroidery applique project.
It’s time to add those eye-catching border stitches.
With just a few tweaks to your stitch settings and some creative color choices, you’ll transform your applique from flat to fabulous in no time, giving it a home stretch boost.
Selecting Appropriate Border Stitch Styles
The tacking stitch is down, and it’s time to jazz up your appliqué with some snazzy border stitches.
Picking the right style can make or break your design. Let’s explore some options that’ll have you stitching like a pro in no time:
- Blanket stitch for a classic, homey feel
- Satin stitch for a sleek, polished look
- Free-form appliqué for a whimsical touch
- Candlewick stitch to add texture and depth
Remember, your fabric’s texture and design complexity play a huge role in choosing the perfect border stitch.
Adjusting Stitch Length and Width
Now that you’ve chosen your border style, let’s fine-tune those stitches!
Adjusting stitch length and width is like finding the perfect fit for your favorite jeans. For dense borders, shorten your stitch length to create a tight, polished look.
Widen your satin stitch for a bold statement, or keep it narrow for delicate designs. Remember, stitch density is your secret weapon for eye-catching appliqués.
Play around – you’re the boss of your borders! You have the power to make a bold statement with your stitching choices.
Changing Thread Colors for Multi-color Designs
Ready to jazz up your design? Let’s get into thread color magic! You’re the artist here, so pick colors that make your heart sing.
Swap threads between elements for eye-popping contrast . Feeling bold? Try unexpected color schemes to really make your appliqué pop.
Remember, matching thread to fabric isn’t a rule – it’s just a suggestion. Go wild and create a color palette that’s uniquely you, and make it uniquely you!
Finishing Touches and Embellishments
Once you’ve mastered the basics, it’s time to jazz up your embroidery applique with some dazzling finishing touches.
Add sparkle with beading or hand-stitching for that extra pop.
Feeling fancy? Try metallic threads to make your designs shine.
Remember, quilting over your applique can create stunning texture. It’s like adding the cherry on top of your fabric sundae – go wild and let your creativity soar!
Finalizing Your AccuQuilt Embroidery Applique Project
You’re in the home stretch of your AccuQuilt embroidery applique project.
It’s time to make it shine.
Let’s polish off your masterpiece with some pro tips that’ll have your friends wondering if you’ve secretly become a textile wizard overnight.
Removing Excess Stabilizer
Your embroidery’s beauty shouldn’t be overshadowed by pesky stabilizer remnants!
Tackle tearaway types with a gentle tug, working from the edges inward.
For cutaway stabilizers, carefully trim excess with sharp scissors, leaving a small margin.
Got stubborn bits? A pair of tweezers can be your best friend. Remember, slow and steady wins the race – you don’t want to accidentally snip your masterpiece!
Pressing and Blocking the Finished Piece
Perfection awaits as you put the finishing touches on your AccuQuilt masterpiece!
Grab your trusty iron and let’s work some magic. For best results, use a dry iron on medium heat (Source). Start from the back, pressing gently to avoid flattening your beautiful stitches.
Then flip it over and give the front a once over. Remember, patience is key – you’re not just pressing, you’re sculpting fabric perfection! It’s all about putting the finishing touches.
Incorporating Applique Into Larger Projects
Let’s talk about incorporating your AccuQuilt appliqué masterpiece into larger projects.
Think beyond standalone pieces – your die-cut designs can become the stars of quilts, tote bags, or even home decor.
Try adding leaf appliqués to a seasonal table runner , or create a charming goldfish bowl skirt .
Mix and match fabrics to complement your main project, and don’t be afraid to go bold with placement, because the sky’s the limit when you’re armed with perfectly cut shapes.
Tips for Professional-looking Results
Now that you’ve stitched your masterpiece, it’s time to put the cherry on top! For a professional finish that’ll make your quilting buddies green with envy, follow these three game-changing tips:
- Trim excess stabilizer with surgical precision
- Press your applique like you’re ironing the Queen’s curtains
- Choose thread colors that sing in harmony with your fabric
Remember, the devil’s in the details. With these tricks up your sleeve, you’ll be the talk of the quilting circle in no time!
Frequently Asked Questions (FAQs)
How to combine multiple AccuQuilt dies for complex designs?
Boost your creativity by mixing and matching AccuQuilt dies.
Start with a base shape, then layer complementary dies to build intricate designs.
Experiment with different combinations, rotating pieces for unique patterns.
You’ll be crafting complex quilts in no time!
Can I use AccuQuilt embroidery designs with non-AccuQuilt fabrics?
AccuQuilt embroidery designs work great with various fabrics.
From cotton to fleece, you’re not limited to AccuQuilt-branded materials.
Just remember to test-cut one shape first to make sure you have the right fabric orientation (Source).
Happy crafting!
Whats the best way to reduce bulk in seams?
Trim seam allowances to different lengths, grading them for a smooth finish . Use pinking shears to reduce bulk and clip curves.
For appliqué, cut feathers on the bias for easier turning under.
Twirl seams to distribute bulk evenly, using a technique to reduce bulk and create a smoother finish, which is also known as grading them .
How to adapt AccuQuilt patterns for different holidays?
Wondering if holiday patterns are set in stone? Think again!
Switch up fabrics, colors, and motifs to transform AccuQuilt designs.
Mix seasonal dies, play with layouts, and add personal touches.
You’ll be whipping up festive creations faster than Santa’s sleigh!
Are there AccuQuilt-specific embroidery file formats to know?
AccuQuilt embroidery files come in standard formats like pes, jef, shv, vip, vp3, hus, exp, machine embroidery file, and art
.
These versatile formats work with various machines, giving you the freedom to stitch your designs effortlessly.
Conclusion
Imagine this: you’ve just finished your first AccuQuilt embroidery applique project, a stunning quilt block with perfectly cut shapes and crisp border stitches.
That’s the magic of mastering this technique! With your newfound skills, you’re ready to tackle any project with confidence.
Remember, practice makes perfect, so keep experimenting with different dies, fabrics, and designs. Soon, you’ll be creating professional-looking appliques in no time.
The AccuQuilt embroidery applique tutorial has opened up a world of precision and creativity – now go make something amazing!

