This site is supported by our readers. We may earn a commission, at no cost to you, if you purchase through links.
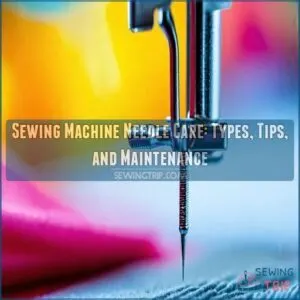 Caring for your sewing machine needles is essential for keeping your projects stitch-perfect.
Think of it like maintaining a car—change your needle every 8-10 hours of sewing to prevent issues like broken threads or uneven stitches.
Use compressed air to gently blow away lint, and apply a few drops of sewing machine oil on the machine’s parts to keep things running smoothly.
Store needles in a dry, safe place to avoid annoying needle hunts mid-project.
Wiping the machine down after each use prevents residue buildup.
With these tips, you’re ready to sew like a pro—more insights on needle care await!
Table Of Contents
- Key Takeaways
- What Are Sewing Machine Needles
- Choosing The Right Sewing Machine Needle
- Needle Size and Fabric Weight Explained
- Sewing Machine Needle Care and Handling
- Signs It’s Time to Replace a Sewing Machine Needle
- How to Check a Sewing Machine Needle Before Sewing
- Cleaning and Maintaining Sewing Machine Needles
- Changing a Sewing Machine Needle
- Specialty Sewing Machine Needles Explained
- Essential Sewing Machine Needles to Keep on Hand
- Frequently Asked Questions (FAQs)
- Conclusion
Key Takeaways
- Change your sewing machine needle every 8-10 hours of use to avoid issues like broken threads and uneven stitches.
- Store needles in a dry, organized container with labels to prevent mix-ups and maintain their sharpness and effectiveness.
- Regularly clean the needle with a soft cloth to remove fabric residue and lint, ensuring smooth sewing performance.
- Match the needle size and type to your fabric and thread to ensure perfect stitches and avoid damage.
What Are Sewing Machine Needles
When you think of sewing machine needles, imagine them as the unsung heroes silently orchestrating every stitch in your fabric adventures.
They come in different shapes and sizes, each designed to tackle specific materials and sewing challenges with precision and ease.
Needle Anatomy and Point Types
Let’s explore sewing machine needle anatomy!
You’ll find three key parts: the butt, the shank, and the blade.
The butt‘s the pointy end, the shank’s the wider part that fits in your machine, and the blade holds the groove and point.
Different needle points—like round or sharp—are designed for specific fabrics.
Understanding needle sizes is key for success!
The groove’s function is to guide the thread smoothly to the eye.
Mastering this improves your sewing game.
Types of Sewing Machine Needles
Choosing the right sewing machine needles can feel like threading a needle in low light, but it’s simpler than it seems.
Knowing the Right Needle for Your Sewing Machine, such as Klasse or Singer needles, can make a big difference.
Universal, ballpoint, stretch, and sharps each have their unique groove.
Needle sizes and types guarantee compatibility, influence longevity, and affect your project’s finish.
So, stash a variety with proper storage, and you’ll sew like a pro!
Choosing The Right Sewing Machine Needle
Picking the right sewing machine needle might seem trivial, but it can make or break your project, much like trying to eat soup with a fork!
With the right needle, you’ll sew effortlessly through fabrics of varying weights and textures, matching the needle size and type to your thread and material for perfect stitches every time.
Consider Fabric Weight When Selecting Needle Size
You’ve got your needle anatomy straight—now think about fabric weight.
A fabric weight chart is your best friend here.
Use a needle size guide based on fabric density, and for cotton fabrics, refer to the ultimate fabric guide to choose the right size, such as 70/10 for lightweight cotton. opt for 65/11 to 75/11 for lightweight fabrics like chiffon, and 100/16 for heavyweight fabrics like denim.
This needle selection keeps your stitches smooth and consistent.
Consider Thread Weight and Type When Choosing Needle
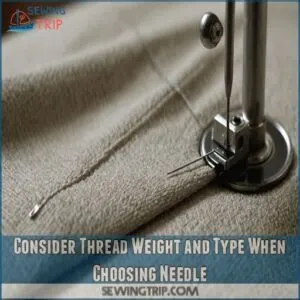
Thread weight impact is important when picking a sewing machine needle.
Light threads glide through finer needles, while heavier ones demand sturdier companions.
Picture a fragile needle struggling with thick thread—it isn’t pretty!
Match thread type to needle size: cotton threads prefer finer needles, synthetic threads like thicker ones.
Keep your thread-needle combo aligned with fabric compatibility for smooth sailing.
Needle Size Recommendations by Fabric Type
With thread weight sorted, let’s chat about needle sizes by fabric type.
A light needle like 70/10 works wonders for delicate silk, avoiding unwanted snags.
Pick a sturdy 90/14 for knits, ensuring smooth stitches.
Tackling denim? Grab a 100/16 needle from your kit for that fabric thickness.
A needle size chart simplifies these choices!
Needle Size and Fabric Weight Explained
Choosing the correct needle size for your sewing machine can feel like a puzzle, but understanding that Sewing Machine Needles are not universally interchangeable helps, as it’s actually about matching the needle’s thickness to the fabric weight.
Imagine trying to pierce through denim with a tiny needle—it’s like using a toothpick to eat steak, so always consider fabric density to avoid frustrating snags and skipped stitches.
Determining Fabric Weight
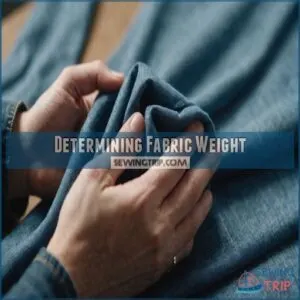
So, you’ve picked your needle type. Now, let’s talk fabric weight! It’s all about how heavy the material feels in your hand. Think of a feather versus a denim jacket—big difference!
Consider the fabric drape; does it hang loosely or stiffly? A heavier fabric, like canvas, needs a sturdier needle. Lighter fabrics, like silk, need a finer one.
Remember, the right needle size makes all the difference in your sewing success! This impacts your needle size recommendations.
Matching Needle Size to Fabric Weight
Once you’ve sized up your fabric weight using a fabric weight chart like the one provided by fabric weight resources online, grab the right needle size.
Light fabrics, like chiffon, need a fine 65/9 needle, while hefty denim demands a thick 110/18.
The needle size impacts stitch quality and fabric tension.
Trust this needle size guide—metal needs a perfect match to waltz through fabric smoothly!
Sewing Machine Needle Care and Handling
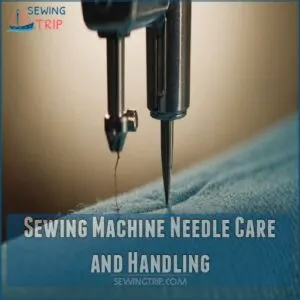
Taking care of your sewing machine needles is essential for smooth stitching, and proper handling guarantees they last longer.
By storing them safely and inspecting them regularly, you’ll avoid those frustrating mid-seam hiccups that can, quite literally, unthread your patience.
Proper Storage of Sewing Machine Needles
Curious how to keep those sewing needles sharp and rust-free?
Store them properly!
Use a needle organizer or a small container with dividers to prevent mix-ups.
Toss in a silica gel packet to absorb moisture and prevent rust.
Label each section clearly to make finding the right needle a breeze.
It’s all about easy access and protection!
How to Handle Sewing Machine Needles
Handling sewing machine needles is important for safe and effective sewing. Treat them with care, like cherished heirlooms!
Store needles in labeled containers to avoid mix-ups.
Always handle with caution to prevent injuries and extend their lifespan.
Refer to a sewing machine needle chart to ensure the correct needle type and size for the fabric being sewn.
When dealing with damaged needles, it is crucial to discard any bent needles for safety. Dispose of dull or bent needles responsibly to maintain a safe sewing space.
- Needle storage is important for safety.
- Proper needle disposal prevents accidents.
- Needle identification simplifies projects.
Signs It’s Time to Replace a Sewing Machine Needle
You know it’s time to replace your sewing machine needle when threads start breaking or you hear those annoying popping sounds, just like when your vacuum eats up a stray sock.
Skipped or uneven stitches and large fabric punctures are also telltale signs that your trusty needle needs a swap.
Threads Breaking or Popping Sounds
When that familiar hum morphs into an ominous popping sound, it’s a red flag.
Threads breaking might mean your needle’s past its prime, suffering from poor Needle Condition or incompatible Needle Size.
Consider checking Needle Tension, Thread Quality, and Fabric Type—problems lurking there could turn your sewing joy into a tangled nightmare fast.
Keep your sewing machine needle care savvy high!
Skipped or Uneven Stitches
Besides thread breakage, uneven or skipped stitches are a big clue your needle’s had enough.
A bent or dull needle can’t pierce fabric cleanly, leading to those frustrating gaps.
Check your needle; even a tiny bend impacts stitch quality.
Consider your needle size, thread tension, and fabric type—all play a role!
Replacing your needle is often the simplest fix for these common needle problems.
You’ll be stitching like a pro in no time!
Large Punctures in Fabric
Why on earth are there large punctures in your fabric?
It’s like the universe telling you to check your needle.
A dull needle can cause these oversized holes, especially with delicate fabrics.
Always match needle size to fabric type and thread weight.
If your material looks like Swiss cheese, it’s high time to replace that worn needle.
How to Check a Sewing Machine Needle Before Sewing
Before you start sewing, it’s important to make sure your needle is in top shape, as a bent or dull needle can lead to stitching disasters.
A quick check can save you time and frustration, letting you enjoy your project from the first stitch.
Checking for Bent or Dull Needles
Before starting your next sewing project, checking for bent or dull needles can save you from frustration later.
You’ll want to do a quick needle inspection.
Look for visual cues like a shiny, worn tip indicating needle wear.
A sharpness test makes sure stitch quality isn’t compromised.
Regular needle care and maintenance keeps your creations looking fabulous, avoiding potential needle problems.
Methods for Inspecting Needle Condition
Ever wondered if your needle’s condition affects your sewing magic?
Conduct a visual inspection before you sew.
If you’re unsure about the type of needle to use, you can find a wide selection of sewing machine needles online.
Hold the needle up to light, checking for bends, dull tips, or needle wear.
A smooth needle guarantees stitch quality and prevents thread wear, while catching potential needle damage early avoids sewing machine needle breakage.
It’s maintenance that speaks volumes!
Cleaning and Maintaining Sewing Machine Needles
Keeping your sewing machine needles clean and in good shape is essential for smooth sewing, just like a chef keeps knives sharp for easy slicing.
A bit of regular cleaning and a wipe with a cloth can prevent fabric snags and improve your machine’s overall performance!
Cleaning Methods for Sewing Machine Needles
To keep your sewing machine running smoothly, regular needle cleaning is a must.
For effective cleaning, consider using a needle cleaning tool.
Use a soft cloth or specialized needle cleaning tools to wipe away fabric residue and lint.
Do this after every sewing project to prevent needle problems.
Remember, consistent cleaning is key to maintaining needle performance and avoiding pesky sewing snags!
Disinfecting and Sanitizing Needles
After cleaning your needles, consider sanitizing them for extra needle safety.
A quick wipe with rubbing alcohol works wonders for needle disinfecting.
Regularly changing sewing machine needles can also help maintain proper needle care and prevent infection.
For more thorough needle sterilization, soak them in a diluted bleach solution (always following the instructions).
Remember, proper needle care prevents infection.
Don’t let them air dry completely before storing; this makes sure your sanitizing tools are effective and prevents rust.
Happy sewing!
Changing a Sewing Machine Needle
Changing your sewing machine needle might seem straightforward, but it’s important to avoid those dreaded fabric snags or broken threads.
With a few simple steps and a little patience, you’ll switch out that needle like a pro, ensuring every stitch is as smooth as your favorite seam.
Steps for Replacing a Sewing Machine Needle
Switching a sewing machine needle isn’t rocket science, but it’s essential for smooth stitches.
First, turn off your machine for needle replacement safety.
Then, loosen the needle clamp screw, and slide out the old needle.
Insert the new needle with the flat side facing back, ensuring needle alignment.
Tighten the screw, adjusting for proper needle depth.
Voilà, you’re back in action!
Troubleshooting Common Issues During Needle Replacement
You’ve tackled the steps for replacing your sewing machine needle, but sometimes things go pear-shaped, right?
If your stitch quality suddenly hits a snag or thread jams occur, double-check for needle insertion errors.
Needle breakage causes havoc too—make sure it’s snugly fastened.
Needle replacement problems are common, yet with care, you can solve most needle-related headaches effortlessly.
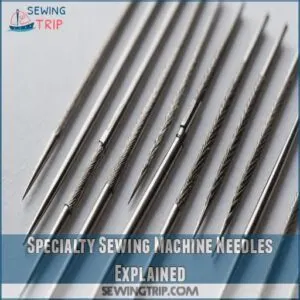
Specialty Sewing Machine Needles Explained
When it’s time to tackle a specific sewing project, specialty needles can be your best friend, ensuring flawless results.
From embroidery to denim work, each needle type is designed to handle unique challenges, adding precision and ease to your stitching adventures.
Machine Embroidery Needles and Their Uses
Machine embroidery needles are a stitch saver! Their special design helps your embroidery look its best.
When picking the right needle, consider these:
- Embroidery Needle Types: Use the right shape and size for your project. Choosing the correct embroidery needle size and type, such as Schmetz machine embroidery needles, can greatly impact the quality of your embroidery.
- Needle Care for Embroidery: Regularly check and replace worn needles.
- Embroidery Needle Threading: Make sure threading is smooth for flawless designs.
Stay sharp!
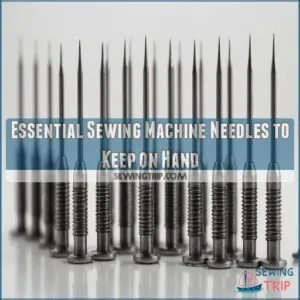
Essential Sewing Machine Needles to Keep on Hand
To tackle any sewing project with confidence, keep essential needles like universal, ballpoint, sharp, and quilting needles on hand.
Building a basic needle collection makes sure you’re ready for everything from everyday repairs to creative quilting adventures, sparing you from those frustrating "I can’t believe I forgot the right needle!" moments.
Universal, Ballpoint, Sharp, and Quilting Needles
Now that you’re familiar with specialty needles, let’s talk basics.
You’ll want universal needles—they’re your all-around workhorses.
When choosing the right needle, consider that needle sizes vary widely, ranging from 8 to 19 in American sizes.
Ballpoint needles are perfect for knits; their rounded tips prevent snags.
For thicker fabrics like denim, grab sharps.
And for quilting? Quilting needles are your best friend!
Remember, needle care is key—replace dull or bent needles immediately.
Proper needle selection makes all the difference!
Building a Basic Sewing Machine Needle Collection
Crafting your starter kit of sewing machine needles can feel like a walk in the park when you know which types to choose.
Keep universal, ballpoint, and sharp needles on hand for versatility.
Don’t forget quilting needles for layering projects.
Organize these essentials using savvy storage tips, balancing quality with budget options to guarantee smooth stitching adventures.
Frequently Asked Questions (FAQs)
How do I care for my sewing machine needles?
Treat your needles well so they last.
Regularly check for bent or dull ones, as this can cause thread breakage.
Always replace them when switching fabrics or when you notice skipped stitches or unusual sounds.
What are sewing needles?
Sewing needles aren’t just tiny tools; they’re essential for stitching fabrics together, whether by hand or machine.
Sewing needles come in various sizes and types, perfect for different materials and tasks, with options like universal needles for various fabrics.
With sharp tips and eyes for threading, they’re essential for stitching fabrics together, whether by hand or machine.
How do I choose a sewing machine needle?
You should match your needle to the fabric’s weight and type.
Lightweight materials need finer needles, like 65/9, while thicker fabrics require a 100/
Choosing the right type of needle, such as universal needles for versatility, is crucial for perfect stitches. Check compatibility with your sewing machine for perfect stitches.
How do you change a sewing machine needle?
First, loosen the needle clamp screw. Then, gently pull out the old needle. Insert the new needle, pointy end down, tightening the screw firmly. That’s it! You’re ready to sew.
When should I change my sewing machine needle?
Feeling a popping sound or threads breaking mid-project?
That’s the universe whispering to change your needle.
Swap it with a fresh one when switching thread types or fabrics to avoid skipped stitches and fabric damage.
What happens if a sewing machine has a bad needle?
A bad needle causes skipped stitches, thread breaking, and uneven seams—it’s like trying to sew with a crooked toothpick!
If your machine starts acting up, check the needle first to make sure you have smooth, trouble-free sewing.
How do you care for sewing needles?
Eighty percent of sewing issues stem from neglected needles.
Swap needles every 8 hours of sewing to avoid dullness.
Store them in a dry place, and check for bends to maintain your machine’s harmony with fabrics.
How often should a sewing machine needle be changed?
To keep your sewing smooth, change your needle every 8-10 hours of sewing or with each new project.
Notice signs like skipped stitches or fabric snags?
It’s your needle’s way of asking for a change!
How to clean sewing machine needles?
Did you know 75% of sewists overlook needle care?
To clean your sewing machine needle, gently wipe with a soft cloth, avoiding water to prevent rust.
Regularly inspecting and cleaning helps guarantee smooth, trouble-free stitching adventures.
Can I use alcohol to clean my sewing machine?
You bet you can use alcohol to clean a sewing machine!
It helps remove gunk and grime, keeping parts smooth and rust-free.
Just dab a cloth in alcohol, wipe gently, and avoid electrical components.
Can sewing needles be sharpened and reused?
Imagine tiny, dull swords!
No, you can’t sharpen sewing needles.
They’re delicate.
Bent or dull needles cause skipped stitches and broken threads.
It’s best to replace them; it’s cheaper than frustration!
How to store sewing machine needles safely?
Store your sewing machine needles in a small labeled container or organizer with compartments.
This prevents them from getting mixed up, dull, or bent.
Keep them in a dry, dust-free drawer to maintain their longevity and effectiveness.
What is the difference between titanium and regular needles?
Think of titanium needles as the superheroes of sewing tools.
They’re tougher and last longer than regular ones, resisting heat and wear.
This durability boosts your sewing efficiency, especially when you’re tackling tough fabrics or long projects.
Are there needles for sewing metallic threads?
You’re in luck! For sewing metallic threads, use metallic needles.
These have a larger eye to prevent shredding and a specially designed groove to guide the thread smoothly, ensuring even stitches without the frustration of breakage.
How often should one clean the needle bar?
Did you know 45% of sewing errors come from poor maintenance?
Clean your needle bar monthly to keep your machine running smoothly.
It stops lint buildup, prevents thread snags, and guarantees consistent stitching, so you’re always sewing flawlessly.
Conclusion
Picture your sewing machine gliding smoothly, its needle piercing fabric like butter—it’s that satisfying when your sewing machine needle care is spot-on.
By choosing the right needles for your fabric and thread, storing them properly, and swapping them out regularly, you’ll avoid frustrating breakages and uneven stitches that can throw off your groove.
Embracing the habit of changing your sewing machine needle every 8 hours of sewing is key to preventing skipped stitches and fabric damage. Embrace these tips to maintain your sewing machine’s harmony and tackle each project with confidence, knowing your needles are up to the task.


