This site is supported by our readers. We may earn a commission, at no cost to you, if you purchase through links.
Your first finished seam feels like a small miracle. The fabric holds together, the stitches line up, and something that was two separate pieces is now one.
That moment hooks people—and it’s closer than most beginners think. A sewing machine does the heavy lifting once you understand a handful of basics: the right tools, a tidy workspace, and a project sized to match your current skills.
Start with something small and satisfying, like a pillowcase or a drawstring bag, and the machine stops feeling intimidating.
These beginner sewing machine projects with step-by-step instructions will take you from threading your needle to finishing real, usable things you’ll actually want to keep.
Table Of Contents
- Key Takeaways
- Essential Tools and Materials
- Getting Started With Sewing Machine Projects
- Beginner-Friendly Sewing Projects
- Useful Beginner Sewing Projects
- Easy Home Decor Sewing Projects
- Beginner Sewing Projects to Wear
- Essential Sewing Tips for Beginners
- Easy Seasonal Sewing Projects
- Troubleshooting Common Sewing Machine Issues
- Next Steps for Improving Your Sewing Skills
- Frequently Asked Questions (FAQs)
- Conclusion
Key Takeaways
- Starting with small, straight-seam projects like a pillowcase or drawstring bag builds real skills fast and keeps the learning curve from feeling overwhelming.
- Your fabric choice matters more than you think — cotton is forgiving, easy to press, and the safest pick for anyone just getting started.
- Most beginner frustrations (broken thread, uneven stitches, tension issues) come down to a few fixable habits: clean your bobbin case, replace your needle regularly, and rethread carefully.
- Mistakes aren’t setbacks — every crooked seam teaches your hands something a tutorial can’t, so finishing projects matters more than finishing them perfectly.
Essential Tools and Materials
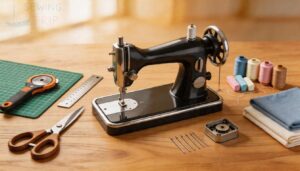
A few good tools make all the difference when you’re just starting out. Build your kit around the essentials: sharp fabric scissors for clean cuts, a rotary cutter (45mm works great for most fabrics), tailor’s chalk for temporary markings, and a seam gauge for precise hems.
Once you’ve got the basics covered, this beginner’s guide to sewing your own clothes walks you through putting each tool to real use.
Keep bobbin cases lint-free and your thread tension consistent — these two things alone prevent most beginner headaches.
Selecting the proper needle size ranges(https://blog.bernina.com/en/2023/02/sewing-needle-and-thread/) helps avoid skipped stitches.
Choose cotton fabric to start. It’s easy to handle, widely available, and very forgiving.
Getting Started With Sewing Machine Projects
Before your first stitch, it helps to get comfortable with the machine itself. Think of it less like a scary piece of equipment and more like a new kitchen appliance — once you know where everything is, it all starts to make sense.
Here’s what you need to know to get up and running.
Familiarizing Yourself With Your Sewing Machine
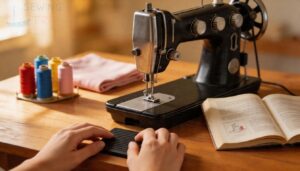
Before you sew a single stitch, take a few minutes to just get to know your machine. Run your hand over the controls, press the foot pedal gently, and notice how it responds. It’s one of the most important sewing machine basics you’ll learn early on.
- Follow the Threading Guide carefully — a smooth thread path prevents most skipped stitches.
- Practice Foot Pedal Control with light, steady pressure on scrap fabric.
- Keep up with Machine Cleaning to avoid lint buildup and tension issues.
You’ve got this.
Basic Sewing Machine Parts and Functions
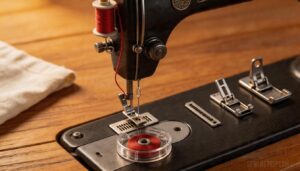
Now that you’re comfortable touching the controls, let’s name what you’re actually looking at. Your machine’s parts each have a job.
The spool pin path guides thread from the top down to the needle — keep it aligned or you’ll fight tangles all day. The needle bar mechanics move the needle up and down in rhythm with every stitch.
Below, your bobbin case tension controls how the lower thread meets the upper one. Your presser foot types vary for different tasks, and the feed dog operation is what actually moves your fabric forward — stitch by stitch.
Setting Up Your Workspace for Sewing
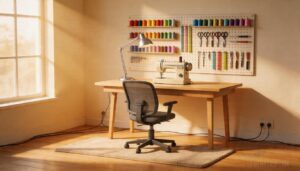
Once you know your machine’s parts, where you sit matters just as much as how you stitch. Setting up a sewing workspace the right way saves your back, your eyes, and your sanity.
Start with lighting placement — position your machine near a window, then add a movable lamp for detailed work. A well-lit workspace is a big help for catching mistakes early.
Then focus on:
- ergonomic chair that keeps your posture supported during long sessions
- Vertical storage for thread, tools, and notions so everything stays within reach
- anti-fatigue mat at your cutting or pressing station
Tuck away cords with basic cable management, and you’ve built a space that provides real sewing safety and crafting ergonomics.
Beginner-Friendly Sewing Projects
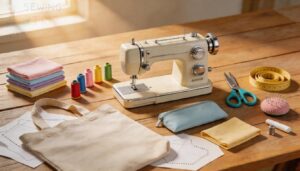
The best way to learn sewing is to actually make something you’ll use. These three projects are perfect for that — they’re simple, quick, and build real skills without overwhelming you.
Pick one and let’s get started.
Simple Pillowcase
A pillowcase might just be the perfect first sewing win. It’s practical, it’s pretty, and it teaches you almost everything you need — measuring, straight stitching, hemming, and fabric selection — all in one go.
For fabric choices, stick with quilting cotton or soft cotton prints. They’re easy to handle and come in endless patterns. A standard pillowcase fits a 20 by 26 inch pillow, but size variations for queen and king beds are just as beginner-friendly.
Match your thread colors to your fabric, press your hems flat with an iron, and try a simple cuff style at the opening for a polished touch. Hem techniques like a folded edge take minutes, but make your finished piece look genuinely professional.
Drawstring Bag Sewing Tutorial
Once you’ve nailed the pillowcase, a drawstring bag is your natural next move — and honestly, it’s one of the most satisfying beginner sewing projects you’ll tackle.
Cut two fabric rectangles, roughly 14 by 18 inches, from 100% cotton for clean pressing and easy handling.
Here’s the simple process:
- Seam Finishing — Sew right sides together with a 1 cm seam allowance, then zigzag raw edges to prevent fraying.
- Casing Construction — Fold the top edge over about one inch and stitch close to the fold, creating a clean tunnel.
- Cord Insertion — Thread ribbon through using a safety pin, then knot both ends securely.
Your sewing machine does the heavy lifting. Size adjustments are easy — just resize your rectangles.
Zipper Pencil Pouch
A zipper pencil pouch is one of those beginner sewing projects that feels like a real achievement. You’re working with a zipper — and that’s exciting.
Use a 9-inch zipper and medium-weight cotton for the exterior, with quilting cotton as your lining fabric.
Understanding your Zipper Types helps too — a two-way zipper makes grabbing supplies much easier.
Want more room? Go for a Boxy Shape with deeper corners.
Topstitch Techniques near the zipper give it that clean, store-bought finish.
Add Interior Slots inside your DIY fabric pouch to keep pens organized.
| Feature | Flat Pouch | Boxy Shape |
|---|---|---|
| Zipper Types | 9-inch standard | 12-inch, trimmed |
| Lining Fabric | Quilting cotton | Quilting cotton |
| Topstitch Techniques | Along zipper edge | Zipper + corners |
Useful Beginner Sewing Projects
Once you’ve got the basics down, it’s time to make things you’ll actually use every day. These next projects go beyond pretty — they solve real problems and make great gifts too.
Here are three beginner-friendly makes worth adding to your list.
Phone-Charging Station Tutorial
Think a phone charging station is a woodworking project? Surprise — your sewing machine can build one too. With basic sewing tools, sewing notions, and smart cable routing, you’ll create a desk organizer that actually earns its spot.
Follow these assembly steps:
- Choose your wood selection and cut fabric panels to match
- Apply interfacing for structure and shape
- Plan cable routing so cords stay hidden
- Sew elastic bands to hold devices securely
- Add finishing touches — and don’t skip safety precautions like securing all layers tightly
Portable First-Aid Kit Pattern
A portable first-aid kit might be the most useful thing your sewing machine ever makes. Cut two outer rectangles and two lining rectangles — about 8 by 6 inches finished — then press every fold before you sew. Your interfacing choice stiffens the pouch so supplies stay upright. Elastic channels keep tweezers and ointment tubes in place. Clip those rounded corners for a smooth turn, and nail your zipper placement so nothing spills.
| Step | What You Do | Why It Matters |
|---|---|---|
| Cut pieces | Two outer + two lining rectangles | Keeps assembly simple |
| Fuse interfacing | Iron to outer fabric | Holds portable sizing and shape |
| Build pockets | Stitch elastic channels and slip pockets | Organizes bandages and wipes |
| Clip corners | Trim rounded corners after sewing | Reduces bulk, smooth finish |
| Close with zipper | Center zipper placement at top | Prevents spills on the go |
Follow step-by-step tutorials, and this DIY fabric pouch project is done in under an hour.
Pattern Weights for Beginners
Pattern weights are your secret weapon for cleaner cuts. Instead of pinning every edge, you just set these small weighted shapes on top of your pattern pieces and cut freely.
Make your own using fabric scraps filled with rice, beans, or metal washers — all easy DIY weight fillers.
Weight shape selection matters too: triangles hug corners, squares cover flat areas.
Follow step-by-step tutorials to customize size, fabric cover options, and placement tips for your projects.
Easy Home Decor Sewing Projects
Your home doesn’t have to look like a furniture catalog to feel pulled together. A few handmade touches — think table runners and fabric napkins — can change the whole vibe of a room.
Here are three beginner projects that’ll have your space looking intentional without taking up your whole weekend.
Quick and Easy Table Runner Tutorial
A table runner is one of those beginner sewing projects that punches way above its weight — it’s fast, useful, and looks genuinely impressive. Start with your Runner Length Calculation: measure your table, then add 12 to 24 inches for overhang on both ends. For fabric selection, cotton is easiest to press and sew cleanly, though linen gives a slightly more elegant drape. This Cotton vs Linen choice shapes the whole look.
- Cut two fabric rectangles to your calculated length
- Sew right sides together using straight stitching, leaving a small turning gap
- Trim corners to reduce bulk, then press seams flat
- Finish with Edge Finishing topstitching, Mitered Corners, or Decorative Trim
These quick and easy sewing tutorials make home decor sewing projects genuinely enjoyable.
Fabric Napkins for Beginners
Cloth napkins are one of those easy home sewing projects that feel almost too simple — until you hold your finished set and wonder why you ever bought paper ones.
Fabric Selection matters here: cotton is your best friend.
It presses flat, washes well, and lasts for years.
Size Variations, cut 18×18-inch squares for standard settings or go smaller at 14×14 for kids.
Fold each edge twice, press, pin, then stitch — that double hem is one of the most satisfying simple stitch techniques you’ll practice.
bold Color Pairings, and these beginner sewing projects make stunning gifts, especially with thoughtful Gift Wrapping.
Fringed Table Runner Pattern
Ready to take your table from plain to polished? A fringed runner is one of those beginner sewing projects and tutorials that looks far fancier than it actually is.
Start with burlap preparation — dampen the fabric, then iron it flat so your cuts stay true. Cut your runner 13 inches wide, then sew a ¼-inch seam allowance around all edges before fringing begins.
what you’ll need:
- Burlap or 100% cotton for easy thread-pulling
- Quilting cotton for a reversible backing layer
- Lace reinforcement stitched along the fringe base
- Bias tape binding to finish raw edges cleanly
- straight stitch and zigzag for durability
Pull weft threads from each edge using fringe techniques to create a clean 2-inch fringe on all sides. Miter your lace at the corners and topstitch the bias tape close to the edge. The result? A stunning, handmade centerpiece.
Beginner Sewing Projects to Wear
Ready to actually wear what you make? These beginner projects are simple enough to finish in one sitting, yet impressive enough to show off. Here’s where to start.
Pillowcase Dresses and Tops Tutorial
Making something you can actually wear feels like a big leap — but a pillowcase dress proves it isn’t. This pull‑on design skips zippers, buttons, and complicated closures entirely. It’s one of the best basic sewing projects for true beginners.
Start with lightweight quilting cotton — it presses cleanly and gathers without fuss. Most step‑by‑step tutorials call for two fabric rectangles cut to your desired length, making adjustable length, simple to customize. Here’s what to focus on:
- Casing depth — fold the top edge twice, about ¾ to 1½ inches, for smooth ribbon threading.
- Armhole finishing — use double‑fold bias tape for a neat, strong, simple hem around each opening.
- Fabric selection — stick to soft, breathable cotton for beginner sewing projects and tutorials.
Your first wearable is closer than you think.
Easy Clutch Pattern for Beginners
A simple clutch is one of those beginner sewing projects that feels impressive but is surprisingly easy to pull off.
Cut your exterior fabric, lining, and fusible fleece stabilizer, then press them together for structure. Magnetic snap installation takes two minutes and gives your bag a clean, professional closure.
Stitch your lining pocket design, turn right side out, and press flat. Add a wrist strap attachment, and you’re done.
Simple stitch techniques, fabric selection that suits your style — quick and easy sewing at its best.
30. Minute Apron Tutorial
If you’ve got half a yard of fabric and 30 minutes to spare, this quick apron tutorial is your next win. Fabric choice matters here — bold prints shine on aprons because the shape is small enough to show them off.
Hem techniques are simple: fold, press, stitch. Pocket placement comes after hemming, so everything lies flat.
Add ribbon or pom-pom trim options for personality. No zippers, no fitting stress — just beginner sewing projects that actually feel good to finish.
Essential Sewing Tips for Beginners
Good technique makes all the difference between a project you’re proud of and one that ends up in a drawer. A simple habits — practiced early — will save you hours of frustration down the road.
Here are the essential tips every beginner should know before picking up the scissors.
Precise Cutting and Pressing Techniques
Sharp scissors and rotary cutting accuracy go hand in hand with great results. Before any fabric cutting, square your edges and align pieces to the grain — grain alignment keeps everything stable and prevents stretch.
Hold your ruler firmly for ruler stabilization, letting the blade glide in one smooth motion across a well-lit workspace. Use fabric chalk to mark your seam allowance clearly.
Then press, don’t iron — lift and lower with steam management to keep seams flat. Pressing seams open reduces bulk beautifully, giving your finished project that clean, polished look.
Choosing Forgiving Fabrics for Beginners
Fabric choice can make or break your first project. Start with these four beginner‑friendly options:
- Light-weight Cotton — easy to handle and feeds smoothly under the presser foot
- Stable Woven Fabrics like cotton poplin — they stay square while cutting and sewing
- Low Stretch Materials — minimal give means cleaner seams and accurate corners
- Easy-to-Press Fabrics — they respond beautifully to your iron, hiding small mistakes
For beginner sewing projects, machine‑washable textiles in cotton fabric are ideal. Choosing fabric and thread for beginners comes down to control — and these fabric types for beginners give you plenty of it.
Avoiding Synthetic Fabrics for Sewing
Synthetic fabrics are the quiet troublemakers of the beginner sewing world. They melt under a hot iron, slip around while you cut, and shed microplastics every time they’re washed — the European Environment Agency found synthetic textiles released thousands of tonnes of microplastics into the EU environment in a single year.
Synthetic fabrics melt, slip, and silently shed microplastics — nature’s reminder to sew with natural fibers
That’s a big reason natural fiber benefits matter beyond just comfort.
For fabric types for beginners, stick with cotton fabric, linen, or hemp. Linen breathability keeps projects comfortable and workable. Hemp sustainability makes it a smart, eco-friendly, and budget sewing ideas choice.
Choosing fabric and thread for beginners gets easier when you start natural.
Easy Seasonal Sewing Projects
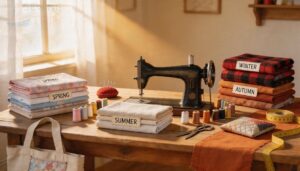
Sewing with the seasons is one of the best ways to stay inspired all year long.
Whether you’re stitching something light and breezy or cozy and warm, there’s always a project that fits the moment.
Here are some easy ideas to get you started, sorted by season and occasion.
Summer Sewing Projects for Beginners
Summer is basically an open invitation to sew. Lightweight fabric is your best friend this season — it’s easy to handle, forgiving for beginners, and perfect for quick DIY sewing crafts you’ll actually use.
Here are 5 beginner sewing projects to try:
- Beach Tote Bag — Use 20×30-inch canvas panels with vinyl mesh for sandy days.
- Summer Tank Top — Cut jersey fabric with simple straight seams and bias-tape edges.
- Flowy Skirt — An elastic waistband and two side seams. That’s it.
- Swim Cover Up — Two fabric rectangles joined at the shoulders for easy beach coverage.
- Produce Drawstring Bag — A lightweight, eco-friendly easy tote sewn in minutes.
Winter Sewing Projects for Beginners
When the cold settles in, your sewing machine becomes your best cozy companion. Winter is honestly one of the best seasons for beginner sewing projects — the materials are forgiving, and everything you make feels immediately useful.
Here are three quick wins to start with:
- Fleece Mittens — fleece doesn’t fray, so no hemming required
- Rice Hand Warmers — fill a small fabric pouch with rice, microwave, and go
- Mug Cozies — perfect scrap-busters that sew up in minutes
You can also try a DIY Winter Blanket or Faux Fur Scarves for easy home decor, a seasonal sewing projects approach for all weather that everyone will love.
Holiday-Themed Sewing Projects
Holiday sewing projects are where scraps become treasures.
felt ornaments first — just two fabric pieces, a little stuffing, and a ribbon loop. Mini stockings hold gift cards and sew up fast from leftover holiday fabric.
Holiday gift bags replace wrapping paper and feel personal. Festive pillow covers slip over existing inserts in an afternoon.
Seasonal coasters and Christmas coasters make sweet holiday gift ideas made by sewing. These seasonal and holiday sewing patterns are genuinely beginner-proof.
Troubleshooting Common Sewing Machine Issues
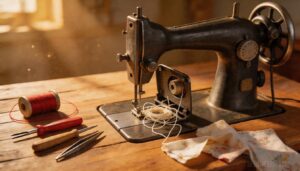
Even the best machines have bad days — and when yours starts acting up, it doesn’t mean you did something wrong. Beginner frustrations come down to a handful of fixable issues.
Here’s what to check when things go sideways.
Dealing With Thread Breakage
Thread breakage is one of the most common frustrations beginners hit — but it’s almost always fixable. Before you panic, work through these five checks:
- Upper Tension Tuning — Loosen tension gradually; start around 4 on most machines.
- Bobbin Threading — Rewind it slowly and seat it correctly in the case.
- Needle Condition — Replace it every 8 sewing hours; a dull needle shreds thread.
- Thread Path Cleanliness — Clear lint from guides and tension discs.
- Spool Storage — Old, brittle thread snaps easily; use fresh, quality thread.
Fixing Uneven Stitches
Uneven stitches usually come down to three things: needle size, your bobbin, and fabric feed control. Match your machine needle sizes to your fabric weight — a mismatched needle skips and puckers.
Rewind the bobbin slowly for stitch consistency. Then let the feed dogs do their job; don’t push or pull. A quick lint removal from the bobbin case helps too.
Solving Tension Problems
Tension problems are honestly, one of the most common frustrations in beginner sewing techniques — but they’re also very fixable. When your stitches look loopy or puckered, that’s your machine asking for a little attention.
Start with these three checks:
- Upper Tension Adjustment: Turn the dial in small increments, then do a Test Stitch Evaluation on scrap fabric. Big jumps make it harder to track what’s working.
- Bobbin Tension Balance: Reseat your bobbin and confirm it’s threaded correctly. Even a slightly off bobbin can unravel your whole seam.
- Thread Path Cleaning: "Floss" the tension discs to clear hidden lint — debris blocks even thread flow.
Fabric Thread Pairing matters too. Heavier fabric needs a looser upper tension. Matching your top and bobbin thread simplifies the whole balancing act. Sewing Machine Maintenance and Troubleshooting get easier every time you practice.
Next Steps for Improving Your Sewing Skills
You’ve made it through your first projects — now it’s time to keep that momentum going.
There are a few solid ways to sharpen your skills and grow as a sewer. Here’s where to focus next.
Practicing New Techniques and Projects
Once you’ve got the basics down, it’s time to stretch your skills with purpose. Start with Stitch Length Drills on folded cotton scraps — Fabric Layer Practice builds the muscle memory you’ll need for real projects.
Then try Zigzag Control on stretch fabric, or tackle Elastic Insertion with a scrunchie. Each small win builds confidence fast.
| Technique | Starter Project |
|---|---|
| Stitch Length Drills | Drawstring bag |
| Zigzag Control | Scrunchie or waistband |
| Elastic Insertion | Pillowcase or pouch |
| Fabric Layer Practice | Simple tote bag |
Exploring Advanced Sewing Topics
Mastering the basics opens a door — and behind it’s some seriously satisfying territory. Once straight seams feel natural, try French seams for a clean, professional finish inside your garments.
Practice dart manipulation to shape fitted bodices, or experiment with bias piping to add a polished edge to totes and cushions.
Invisible zippers are easier than they look with the right foot. Pattern grading helps you resize commercial patterns to your exact measurements.
Here’s where to focus next:
- French seams and flat-felled seams
- Dart manipulation for fitted garments
- Bias piping on bags and pillows
- Invisible zipper installation
- Basic pattern grading techniques
Joining Sewing Communities for Support
Finding your people makes a real difference. Local sewing meetups let you get hands-on feedback fast — on fitting, machine quirks, or that seam that just won’t lie flat.
Online sewing courses, sewing community forums, and beginner sewing community and support groups keep you connected even when life gets busy.
group project challenges, browse skill sharing workshops, or explore online fabric swaps for fresh inspiration.
sewing tutorials and online resources always a click away, you’re never stuck for long.
Frequently Asked Questions (FAQs)
What is the easiest thing to sew as a beginner?
The easiest beginner sewing projects use straight seams and minimal piece design.
A pillowcase or drawstring bag is perfect—both rely on straight seam practice, simple edge hems, and fabric scrap utilization to build real confidence fast.
What to make with a sewing machine for beginners?
Think of your sewing machine as a creative superpower waiting to be unlocked.
Start with a pillowcase, drawstring bag, or simple tote bag — beginner sewing projects that build real skills fast.
What can I sew in 30 minutes?
In 30 minutes, you can finish Quick Scrunchies, Easy Hair Bows, Dog Bow Ties, Fabric Bookmarks, or Hand Warmers.
These quick sewing projects use small fabric scraps, straight seams, and zero stress.
Can I teach myself to use a sewing machine?
Yes, you can absolutely teach yourself. Start with your machine’s manual, practice threading, and sew straight lines on scrap fabric. Most beginners pick up the basics faster than they expect.
What is the easiest thing to sew for beginners?
Pillowcases are your best starting point. They use only straight seams, need about a yard of fabric, and finish in roughly 15 minutes.
One piece, zero fitting, instant results — that’s the perfect beginner win.
What is the easiest sewing machine to learn on?
Brother CS7000X and Singer Start 1304 are both great choices.
Simple Controls, a Drop-in Bobbin, and an Automatic Needle Threader make setup stress‑free so you can focus on actually sewing.
How to choose a beginner-friendly sewing pattern?
Pick patterns with few pieces, straight seams, and no closures. Clear instructions, photos, a size chart, and fabric recommendations make everything easier. That’s the heart of beginner-friendly sewing patterns.
What type of fabric is easiest for beginners?
Cotton poplin, quilting cotton, and linen fabric are your best starting points.
Their smooth surface, stable weave, and non-stretch materials make fabric handling and grain alignment simple — perfect for beginner-friendly sewing patterns.
How do I set up a sewing machine?
Start with a sturdy, level table near an outlet — that’s your foundation.
Install the needle, attach the presser foot, wind your bobbin, thread following the manual’s order, then test on scrap fabric first.
Best lighting setup for sewing projects?
Good lighting is your secret weapon.
A daylight LED task light (5000K–6500K) positioned slightly above and to the side eliminates shadows. Pair it with diffused ambient lighting for a well-lit workspace that protects your eyes.
Conclusion
The more mistakes you make, the faster you actually improve—that’s the quiet truth behind every skilled sewist you admire. Each crooked seam teaches your hands something a tutorial can’t.
These sewing machine projects for beginners with instructions gave you a real starting point, but the machine on your table is what moves you forward.
Keep threading, keep stitching, and keep finishing things.
Every completed project builds the confidence that makes the next one easier.