This site is supported by our readers. We may earn a commission, at no cost to you, if you purchase through links.
 Using a sewing machine might feel tricky at first, but it’s simpler than it looks!
Start by familiarizing yourself with the basics: find the power switch, hand wheel, foot pedal, and presser foot.
Thread the machine carefully, wind the bobbin, and insert it into the bobbin case.
Place your fabric under the presser foot, lower it, and hold the thread ends as you gently press the pedal to start sewing.
Guide the fabric—don’t pull it—and backstitch at the beginning and end to lock your stitches. Practice straight lines first, testing tension on scrap fabric.
Ready to sew something amazing? Stay tuned.
Table Of Contents
- Key Takeaways
- Getting Started With Sewing Machines
- How to Use a Sewing Machine for Dummies
- Threading and Winding The Bobbin
- Mastering Basic Sewing Techniques
- Working With Different Stitches
- Setting Up Your Sewing Machine
- Troubleshooting Common Issues
- Mastering Sewing Machine Settings
- Practicing on Scrap Fabric
- Advanced Techniques and Decorative Stitches
- Frequently Asked Questions (FAQs)
- Conclusion
Key Takeaways
- Get familiar with your sewing machine’s parts like the spool pin, presser foot, and bobbin case to make setup and troubleshooting easier.
- Always thread the machine and wind the bobbin correctly to prevent tangles and ensure smooth operation.
- Start sewing by placing the fabric under the presser foot, lowering it, and using the feed dogs to guide it naturally—don’t push or pull.
- Practice on scrap fabric to master stitching straight lines, adjusting thread tension, and testing different stitch types.
Getting Started With Sewing Machines
Before you get sewing, it’s important to know your machine inside and out, from the foot pedal to the bobbin case.
Don’t worry—it might look like a lot of parts, but with a little practice, it all starts to make sense!
Locating Machine Parts
Before sewing magic happens, get comfy with the machine.
Start by identifying key parts.
- Power switch: It’s your on/off button, usually on the side.
- Spool pin: Holds your thread spool.
- Bobbin winder: Helps prep bobbins.
- Thread guide: Directs thread flow.
- Stitch selector: Chooses stitch styles.
Understanding these simplifies sewing machine basics.
Identifying Foot Pedal and Hand Wheel
The foot pedal controls your sewing machine’s speed—think of it like a gas pedal for stitching. Press gently to start, and adjust pressure for smooth pedal speed control.
The hand wheel, on the side, moves the needle manually. Turn it toward you for precise control during basic machine operation.
Mastering these sewing machine parts simplifies the basics in no time!
Understanding Presser Foot Function
Understanding the presser foot is key to sewing basics. It keeps fabric steady as stitches form.
You’ll adjust presser foot pressure for tough or delicate fabrics.
Know your foot types, from zipper to buttonhole options. Attach or switch feet as projects demand.
Master raising/lowering the foot smoothly for frustration-free stitching. These tips prevent sewing machine troubleshooting headaches!
- Keeps fabric steady
- Adjusts pressure for thick/thin fabrics
- Has interchangeable attachments
- Includes specialty feet (zipper, buttonhole)
- Raising/lowering required for fabric handling
Familiarizing With Feed Dogs and Bobbin Case
Think of feed dogs as the “paws” pulling fabric smoothly under the needle—they control stitch quality by moving it along.
Meanwhile, the bobbin case secures the bobbin, ensuring thread tension is even.
Together, they’re a dynamic duo in sewing!
| Part | Purpose | Tip |
|---|---|---|
| Feed Dogs | Move fabric under the needle | Always clean for smooth operation. |
| Bobbin Case | Holds bobbin thread securely | Check orientation before sewing. |
| Thread Tension | Balances upper and lower thread | Adjust for consistent stitch quality. |
How to Use a Sewing Machine for Dummies

Using a sewing machine for the first time can feel like you’re taming a wild beast, but it’s simpler than it looks. Start with sewing machine basics—you’ve already located the parts, so now you’ll actually sew. Place your fabric under the presser foot, keeping bulk on the left, and lower the foot. Hold both thread ends, press the foot pedal gently, and guide the fabric. Don’t push or pull; let the feed dogs do the work. For a smooth start, you need to understand thread tension basics.
For common mistakes, don’t sew over pins or force thick layers.
Start with simple projects like a pillowcase or tote bag to build confidence.
- Keep stitches straight by watching the seam guide, not the needle.
- Don’t skip backstitching to secure seams.
- Learn to sew on scrap fabric.
- Follow manuals for proper machine maintenance.
Threading and Winding The Bobbin
Threading your machine and winding the bobbin might seem tricky, but it’s easier than it looks once you know the basics.
Follow the steps carefully,
and you’ll avoid tangles and get your machine ready to sew smoothly.
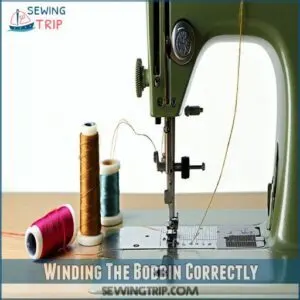
Winding The Bobbin Correctly
Always use the correct bobbin size for your sewing machine to achieve even winding.
Place the thread spool on the pin, guiding the thread toward the bobbin winder. Secure the thread on the bobbin, and set it to wind. Adjust winding speed for smooth results, and watch bobbin tension.
Troubleshooting bobbins starts here—uneven winding causes stitches to snag.
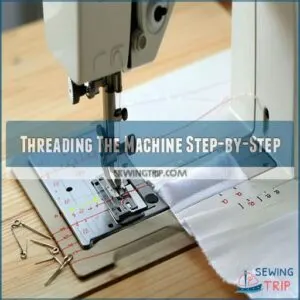
Threading The Machine Step-by-Step
Threading a sewing machine feels tricky at first, but don’t worry—it’s all in the details. Follow the thread path carefully, ensuring smooth tension control along the way. Use your machine’s guides and numbering system.
- Raise the needle and presser foot.
- Follow the arrows for threading the top thread.
- Insert into the needle’s eye.
- Double-check alignment for smooth stitching.
Smooth stitching is key for a successful project.
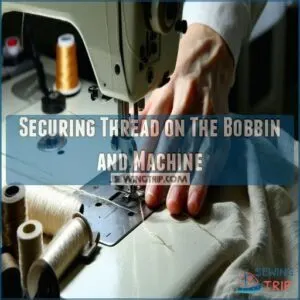
Securing Thread on The Bobbin and Machine
Once your bobbin is wound, drop it into the bobbin case, ensuring the thread tail follows the guide.
Pull the top thread tail through the needle and hold both tails gently. Lower the needle with the hand wheel, then raise it to pull the bobbin thread up. Tug both tails to prevent tangles or knot issues.
It’s also essential to check the bobbin tension, as proper bobbin winding is key for preventing common issues like incorrect threading or poor tension.
| Step | Action | Tip |
|---|---|---|
| 1. Insert Bobbin | Place bobbin in the case | Check bobbin tension |
| 2. Thread Path | Pull thread into guides | Avoid tangled thread |
| 3. Lower Needle | Turn hand wheel once | Catch bobbin thread |
| 4. Pull Thread Tails | Hold both tails | Prevent thread breakage |
Choosing The Right Thread for Fabric Type
Picking the right thread makes your project smoother than butter on toast.
Understanding thread basics is key, and learning about thread weight explained can help you choose the right thread.
Match thread weight to fabric weight—light cotton for delicate sewing fabric and sturdy nylon for heavy-duty jobs.
Polyester thread type works on most materials, while dark shades blend beautifully.
Test thread and sewing threads on scrap fabric before stitching for perfect results. Your sewing machine for dummies journey just got easier!
Mastering Basic Sewing Techniques
You’ll build confidence with your sewing machine when you master a few basic techniques, like setting stitches and turning corners.
These skills are the foundation for creating clean, professional seams and tackling more complex projects.
Setting Stitch Length and Type
Understanding stitch length and type is key in any sewing machine guide. The stitch length impacts seam strength and design, while stitch type choices depend on your fabric and project. Adjust tension for smooth stitching.
- Straight stitches work for most fabrics; adjust length from 2.5-3.5mm.
- Short stitches suit delicate fabrics.
- Decorative stitches add flair to projects.
Positioning Fabric for Straight and Zig-Zag Stitches
Start by placing the fabric under the presser foot, with bulk to the left for easier handling.
Align the edge with the seam allowance markings on the throat plate.
Use pins perpendicular to the seam line to secure layers, but remove them before sewing.
Guide the fabric gently—don’t pull—letting the sewing machine feed it naturally. This ensures a smooth sewing process.
Backstitching for Secure Seams
Backstitching locks your seams, making them sturdy and long-lasting—think of it as tying a knot in your stitches.
Use a ½-inch seam allowance, set your stitch length between 2.5–3.5 mm, and follow these steps:
- Sew forward for an inch, reverse, then go forward again.
- Always backstitch at seam starts and ends.
- Avoid tugging fabric—let the machine guide you.
Turning Corners and Curves
After securing seams, let’s tackle turning corners and stitching curves.
For sharp corners, stop with the needle down, lift the presser foot, pivot the fabric, and resume sewing.
For curved seams, slow down and guide the fabric gently, letting the feed dogs help.
Master these pivoting techniques, and your sewing projects will handle tricky shapes like a breeze!
Working With Different Stitches
Learning about different stitches helps you tackle a variety of fabrics and projects with confidence. You’ll see how simple adjustments can make your sewing more versatile and professional.
Using Straight Stitch for Versatility
The straight stitch is your bread and butter—perfect for sewing seams, hems, and basic repairs.
Set your sewing machine’s stitch length between 2.5–3.5 mm, depending on fabric type. Position your fabric, align seam allowances, and guide it steadily under the presser foot.
This stitch type is ideal for construction sewing techniques, allowing for strong seams and versatility in different projects.
Practice on scrap fabric to master consistent lines, and don’t forget to press seams for a polished finish.
Zigzag Stitch for Stretch and Durability
Zigzag stitches are your go-to for stretch and durability, especially on knit fabrics. They’re perfect for seam finishing, giving edges a clean look.
- Set your sewing machine to zigzag mode.
- Adjust stitch width and length for fabric needs.
- Place fabric under the presser foot.
- Guide it gently—don’t force it.
- Backstitch to secure stitching.
Zigzag stitches and seam finishing are described here.
Selecting Stitch Options for Specific Fabrics
Different fabrics need different stitch options. Lightweight fabrics work best with shorter stitches, while thicker fabrics need longer ones.
Stretchy fabrics? Use zigzag or stretch stitches for give.
Adjust tension to avoid puckering or loose seams. Pair the right needle with the fabric to prevent skipped stitches.
Testing on scraps can save headaches later.
Refer to a sewing machine stitch guide for detailed information. Happy sewing!
Setting Up Your Sewing Machine
Setting up your sewing machine might seem tricky at first.
but with a little patience, you’ve got this!
Learning to locate key parts and adjust basic settings will make the whole process much easier.
Choosing The Right Thread Color
Picking thread color feels like matching shoes to an outfit—it can make or break the look.
For thread color matching, go a shade darker than your fabric for blending or pick bold accent color choices to stand out.
Using color theory basics, keep tones harmonious.
Coordinating threads simplify sewing techniques and make seamless stitching more likely, even on sewing machines for dummies.
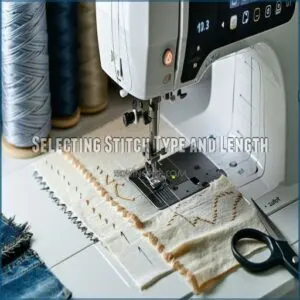
Selecting Stitch Type and Length
Now that you’ve picked the perfect thread color, let’s focus on stitch selection and length.
Straight stitches work for most projects, while zigzag adds stretch for knits.
Adjust the length—shorter for delicate fabrics, longer for thicker ones. Experiment with decorative stitches on scrap fabric.
It’s like telling your sewing machine exactly how to dance with your fabric!
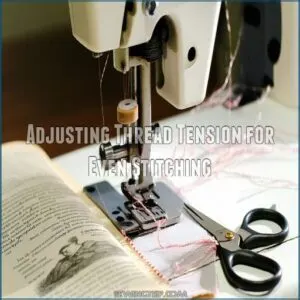
Adjusting Thread Tension for Even Stitching
Adjusting thread tension fixes many sewing machine issues. If stitches loop underneath, tighten the top thread. Top thread snagging or puckering? Loosen it slightly.
Always thread with the presser foot up and test on scrap fabric to troubleshoot tension problems.
Different fabric types and needle choices affect tension, so adjust carefully. For sewing tips, start small, tweak gradually.
To avoid common mistakes, consult a guide on troubleshooting sewing machine tension for step-by-step instructions.
Troubleshooting Common Issues
Sometimes, your sewing machine will have a mind of its own, but don’t worry—most problems are easy to fix.
From skipped stitches to thread tension troubles, a few simple tweaks can get you back to sewing in no time.
Identifying Machine Parts
Understanding sewing machine parts helps with troubleshooting. Locate the presser foot—it holds fabric steady. Identify the bobbin case, where your lower thread lives. Spot the needle types, suited for different fabrics.
For a wide range of sewing machine parts, Next time your machine stalls, it’s probably a part issue.
- Learn your machine’s manual.
- Note each part’s function.
- Keep basics handy for fixes!
Adjusting Tension and Stitch Setting
Sometimes your sewing machine feels like it’s got a mind of its own, but tension troubleshooting and setting stitch length can fix most hiccups. Use the guide below for quick fixes:
| Issue | Cause | Solution | Tools Needed | Stitch Impact |
|---|---|---|---|---|
| Thread puckering | Too tight tension | Loosen tension dial | Manual | Smooth lines |
| Loose stitches | Tension too loose | Tighten tension | Manual | Secure seams |
| Skipped stitches | Incorrect stitch width | Adjust width | Scrap fabric | Consistent stitching |
| Uneven fabric feed | Poor tension match | Test different tension | Patience | Even sewing |
| Stiff stitching | Long stitch length | Shorten length | Stitch guide | Flexible finishes |
Perfecting tension takes practice—test on scrap, keep stitching!
Mastering Sewing Machine Settings
Mastering sewing machine settings is similar to adjusting the gears for a smooth ride.
Start by setting the stitch tension—too tight, and your fabric puckers; too loose, and the stitches won’t hold.
Next, choose the right needle. Lightweight fabrics need fine needles, while heavier ones need sturdier options.
Adjust the foot pressure so your fabric moves evenly under the presser foot, avoiding skips or snags.
Speed control is key—start slow, then find your rhythm as you gain confidence.
To achieve a professional finish, consider practicing seam finishing techniques.
Explore decorative stitches by trying a few, giving your projects a personal touch.
Keep experimenting, and remember: every sewing machine tutorial is a step closer to conquering “how to sew” like a pro!
Practicing on Scrap Fabric
Practicing on scrap fabric is like warming up before a workout—it’s essential. Grab different scrap fabric types, like cotton or denim, to mimic materials for your first sewing project. This lets you test stitch practice without fear of messing up. You can also purchase sewing machine practice fabric online from various retailers, such as sewing practice fabric.
Here’s how to start:
- Test stitch settings: Adjust stitch length, width, and tension to see what works best.
- Use the right needle: A needle suited for your fabric prevents issues like skipped stitches.
- Sew straight lines: Practice simple sewing techniques, focusing on keeping lines even.
- Explore zigzag stitches: Great for finishing edges or prepping easy sewing projects.
- Reduce waste: Repurpose old clothes or scraps for real sewing 101 experience.
Building confidence here sets you up for smooth projects later.
Advanced Techniques and Decorative Stitches
Once you’re confident practicing simple sewing techniques on scrap fabric, it’s time to experiment with advanced techniques and decorative stitches. Your sewing machine offers plenty of options to elevate your projects, making them uniquely yours. To truly master your sewing machine, familiarize yourself with various stitch types, such as the straight stitch and others.
Try free-motion embroidery for creative designs—think swirling patterns or a doodled look right on your fabric. Appliqué techniques are perfect for adding custom touches like fabric shapes or patches, while monogramming basics let you personalize with stylish initials.
- Use quilting stitches to create dimensional textures for blankets or wall hangings.
- Explore buttonhole variations for cleaner finishes on clothing or home décor projects.
These decorative stitches will expand your skills and creativity. Test on scrap fabric first, adjust your tension, and embrace the possibilities!
Frequently Asked Questions (FAQs)
Can a beginner use a sewing machine?
You can start sewing as a beginner.
Just take it slow, follow your manual, and practice on simple fabrics.
It’s like learning to ride a bike; a little patience gets you there!
What parts of a sewing machine should a beginner learn?
Practice makes perfect.
Learn essentials like the spool pin, thread guide, bobbin winder, presser foot, feed dogs, and stitch selector.
These parts help you thread, control fabric, and choose stitches effectively.
How to use a sewing machine?
Start by threading the machine and winding the bobbin correctly.
Then select the stitch type.
Position your fabric under the presser foot, lower it, and gently press the pedal to sew.
How do you take up a sewing machine?
Think of setting up a sewing machine like preparing a bike for a smooth ride.
Plug it in.
Thread the machine carefully, wind and insert the bobbin.
Adjust settings, and test on scrap fabric.
Can anyone use a sewing machine?
Yes, anyone can use a sewing machine with a little patience and practice.
Follow your machine’s manual, start with simple projects, and take it slow.
It’s like learning to ride a bike—fun and rewarding!
How do you set up a sewing machine?
Ever feel like sewing machines are confusing beasts?
Start by plugging it in, locate the power switch, spool pin, and thread guide.
Follow your manual to wind the bobbin, thread the machine, and you’re ready!
Can I teach myself to use a sewing machine?
You can absolutely teach yourself to use a sewing machine.
Start with the manual, practice threading, and sew straight lines on scrap fabric.
Patience and practice are key—soon, you’ll be stitching confidently!
How to use a sewing machine step by step?
Did you know 58% of beginners struggle with threading?
Start with the manual, wind the bobbin, thread the machine.
Set the stitch, position fabric, lower the presser foot.
sew slowly, and backstitch seams.
How do you sew step by step for beginners?
Start by threading the machine and winding the bobbin.
Adjust settings, place fabric under the presser foot, and lower it.
Gently press the pedal, guide the fabric, and backstitch to secure seams.
Do you lower the needle before sewing?
Lowering the needle before sewing gives you control right from the start.
It keeps the thread secure and prevents skipped stitches.
Think of it as setting a strong foundation before the machine takes over.
Conclusion
Learning how to use a sewing machine for dummies is like discovering a new creative superpower.
With each step—threading the machine, winding the bobbin, and stitching straight lines—you’ll build confidence.
Practice makes perfect, so start small, keep testing on scrap fabric, and don’t stress over mistakes. Soon, guiding fabric under the presser foot will feel second nature.
Stick with it, experiment, and before you know it, you’ll be sewing projects you’re proud of! sewing projects you’re proud of!
- https://www.wikihow.com/Use-a-Sewing-Machine
- https://northshorecrafts.com/how-to-use-a-sewing-machine/
- https://www.theartscrafts.com/how-to-use-a-sewing-machine-for-dummies/
- https://www.sewingpartsonline.com/blogs/education/ultimate-thread-reference-guide-2
- https://www.marthastewart.com/1536346/thread-guide-sewing

