This site is supported by our readers. We may earn a commission, at no cost to you, if you purchase through links.
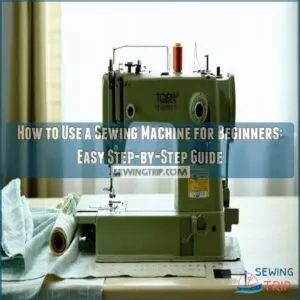 Using a sewing machine for beginners is like learning to ride a bike—once you get the hang of it, you’re off!
Start by positioning your machine with the needle end on the left.
Place the spool and bobbin in their spots, then thread your machine, guiding the thread through all the little loops like threading a needle at a fun house mirror.
Adjust the stitch settings, and test on scrap fabric to avoid sewing disasters.
Remember, it’s all about controlling that foot pedal—steady as she goes.
Soon, you’ll be sewing straight lines like a pro!
Ready to tackle the zigzag next?
Table Of Contents
- Key Takeaways
- Getting Started With Your Sewing Machine
- Threading The Sewing Machine
- Understanding Stitch Types and Adjustments
- Preparing Your Fabric
- Starting to Sew
- Securing Seams
- Mastering Sewing Techniques
- Troubleshooting Common Sewing Issues
- Maintaining Your Sewing Machine
- Sewing Projects for Beginners
- Frequently Asked Questions (FAQs)
- Conclusion
Key Takeaways
- Start by familiarizing yourself with the sewing machine parts and their functions to ensure smooth operation and setup.
- Properly thread your machine and adjust the tension for the upper thread and bobbin to avoid common sewing issues like skipped stitches or thread bunching.
- Practice guiding the fabric with gentle hands while using the foot pedal to maintain control over sewing speed and stitch quality.
- Begin your sewing journey with simple projects like pillowcases or tote bags to build confidence and hone basic sewing skills.
Getting Started With Your Sewing Machine
Before you start stitching up a storm, you need to identify the parts of your sewing machine and set it up properly.
Don’t forget to plug in the power and adjust both the needle and presser foot to get ready for your sewing adventure.
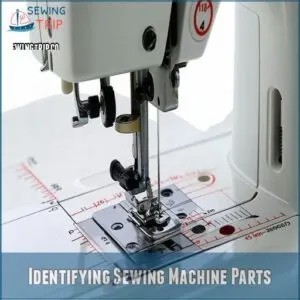
Identifying Sewing Machine Parts
Before you sew, get to know your machine.
Spot the needle—it’s the pointy part.
See that presser foot? It holds your fabric steady.
The bobbin case holds the bottom thread.
If you need a replacement or upgrade, you can find various sewing machine parts.
Find the feed dog—it moves the fabric.
Knowing these sewing machine parts is step one to sewing success!
You’ve got this!
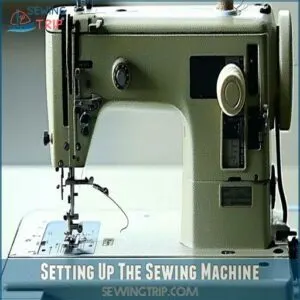
Setting Up The Sewing Machine
Starting with your sewing machine setup, position it with the needle end on the left.
Carefully place the spool pin and bobbin in their spots.
Choose the right needle for your fabric—this is essential for smooth stitching.
With the needle securely inserted, threading will soon follow.
Master these basics, and you’re well on your way to sewing success!
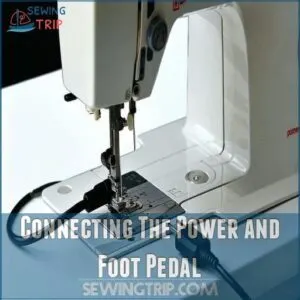
Connecting The Power and Foot Pedal
You’ve got your sewing machine positioned just right.
Now, plug it in safely—check the power cord length and make sure your outlet’s compatible.
Connect the foot pedal, adjusting to your preferred pedal sensitivity.
It’s like finding the sweet spot in a new pair of shoes.
Remember, mastering foot pedal pressure is key to smooth sewing operation.
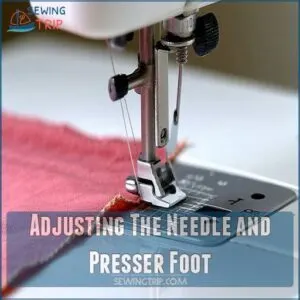
Adjusting The Needle and Presser Foot
Alright, with your sewing machine plugged in, let’s switch gears to adjusting the needle and presser foot.
Selecting the right needle type for your fabric’s thickness is key, and don’t forget to check the presser foot tension as improper tension can lead to issues with thread bunching and fabric drift.
Tighten it into the needle plate, facing back.
Then, adjust your presser foot—this simple move controls fabric flow, granting you mastery over your creative projects.
It’s basic, yet powerful sewing stuff!
Threading The Sewing Machine
Threading your sewing machine might seem tricky at first, but it just takes a bit of practice to master.
Threading your sewing machine might seem tricky at first, but it just takes a bit of practice to master.
By the end of this section, you’ll confidently thread your machine, making you ready to start stitching in no time.
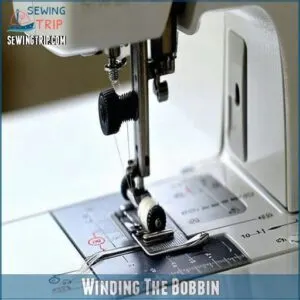
Winding The Bobbin
Handling sewing machine bobbins can be tricky, but don’t worry—you’ve got this!
Place your thread spool on the pin, guiding the thread through the guide.
Wrap it snugly around the bobbin winder, and give the foot pedal a gentle press.
Watch the bobbin fill up smoothly, avoiding common bobbin tension problems.
Now, you’re ready to thread!
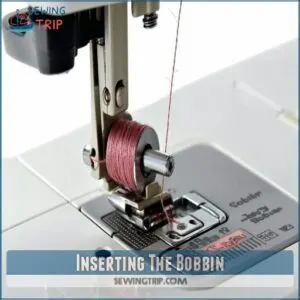
Inserting The Bobbin
Once your bobbin is filled, pop it into the bobbin case. Make sure it rotates clockwise as you draw the thread through the notch. But don’t stress if it doesn’t fit right away—just adjust the tension or try another. Here’s a quick breakdown:
- Check bobbin tension
- Ensure proper winding
- Use compatible bobbins
- Watch for thread issues
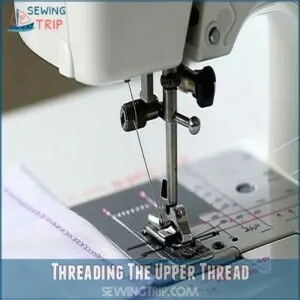
Threading The Upper Thread
Let’s get this thread threaded! First, find the thread guide—it’s usually near the top.
Then, follow the path of the thread, carefully guiding it through each tiny loop and channel.
Remember, patience is key, especially with those tricky little guides.
Finally, thread your sewing machine needle from front to back.
You’re almost ready to sew!
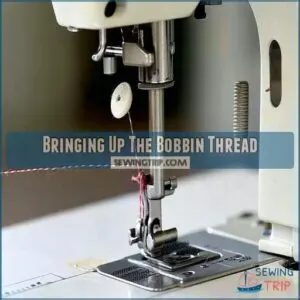
Bringing Up The Bobbin Thread
You’ve threaded the upper part, now it’s time to bring up the bobbin thread.
Turn the hand wheel toward you until the needle dips and returns.
Gently pull the upper thread to reveal the bobbin thread loop.
Tug both threads under the presser foot.
You’re now mastering sewing machine basics without snagging a stitch!
Understanding Stitch Types and Adjustments
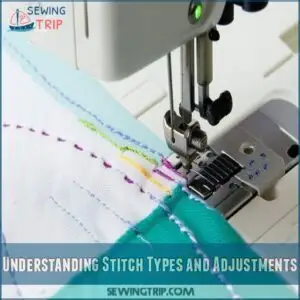
Learning the different stitch types and adjustments is like discovering how many toppings you can put on a pizza, each one adding a unique flavor to your sewing projects.
You’ll soon see how a straight stitch and zigzag stitch can create magic with just a few simple adjustments.
Straight Stitch
When diving into straight stitch basics, think of it as the bread and butter of sewing—simple yet essential.
Start by setting your machine’s tension control correctly to avoid bunching or loose stitches.
Your fabric choice and needle selection can also play a significant role in the final look.
Here are some quick tips to make sure you get smooth stitching:
- Check tension to prevent uneven stitching.
- Select the right needle for your fabric.
- Use consistent pressure on the foot pedal for steady speed.
- Guide fabric gently to maintain straight seams.
Mastering the straight stitch on your sewing machine is the first step into crafting perfect seams and hems.
With patience, you’ll soon sew like a pro!
Zigzag Stitch
Meet the zigzag stitch—your trusty ally in sewing.
This versatile stitch isn’t just for reinforcing seams, it’s also great for adding decorative flair.
Try different zigzag stitch widths to suit your project, whether it’s appliqué or topstitching.
Play around with variations to explore creative possibilities.
Remember, it’s a powerful tool, not just a sewing trick.
Adjusting Stitch Length and Width
Adjusting stitch length and width can feel like gaining a new level of sewing mastery.
Longer stitch lengths suit woven fabrics, while shorter ones handle delicate materials.
Need a stronger zigzag? Increase the width for thicker fabrics.
This tailoring enhances stitch quality and also improves your project’s overall look.
Embrace these tweaks to get the best out of your sewing machine.
Selecting The Appropriate Needle and Thread
Choosing the right needle and thread is like finding a good dance partner for your fabric.
Match needle size to fabric weight; thin fabrics need fine needles, while thicker materials require sturdy ones.
Pair thread type with both fabric and stitch length for best results.
Remember, sewing machine needles and threads come in various kinds for every sewing machine type.
Preparing Your Fabric
Before you start sewing, you’ll need to prep your fabric! This involves cutting, pressing, and pinning your material—think of it as getting your fabric ready for its close-up.
Cutting and Marking The Fabric
Grabbing fabric scissors or a rotary cutter is your first move.
Measure carefully and make sure your seam allowance is spot on.
With fabric types in mind, transferring patterns becomes a breeze.
Use chalk or fabric pens to mark the lines—just like drawing inside the lines when you were a kid.
It’s the perfect set-up for sewing success!
Pinning and Basting
Before you start sewing, pinning and basting your fabric secures it in place. Here’s how:
- Choose Your Tools: Use fine pins for delicate fabrics and sturdy ones for thicker materials.
- Think Like a Planner: Strategically place pins perpendicular to seams.
- Try Basting Stitches: These temporary stitches hold layers together.
- Pin with Confidence: It’s like painting with precision before sewing.
Ironing The Fabric
You’ve pinned and basted; now iron the fabric like a pro.
Use an ironing board, adjusting your iron’s temperature based on fabric types.
Decide between steam vs dry for best results.
Pressing techniques matter—lightly glide over seams to avoid creating unwanted creases.
Remember, these sewing tips help get your fabric ready for the sewing machine adventure ahead!
| Fabric Type | Ironing Temperature | Steam vs Dry |
|---|---|---|
| Cotton | High | Steam |
| Linen | High | Steam |
| Silk | Low | Dry |
| Wool | Medium | Steam |
Starting to Sew
Now that you’re ready to sew, it’s time to guide your fabric smoothly and control your speed like a pro.
Remember, keeping straight stitches and mastering those corners will save you from stitching in circles—unless that’s your plan!
Guiding The Fabric
Once your fabric is pinned and ironed, it’s time to guide it under the presser foot.
Let the feed dog handle most of the fabric feeding, but use your hands gently to maintain tension and alignment.
Keep an eye on your seam allowance to make sure you have even stitches and straight lines.
For curves, a steady hand ensures smooth sewing machine operation.
Controlling The Sewing Speed
Controlling your sewing speed is like playing a gentle waltz with your machine.
Adjust foot pedal pressure for a smooth flow—think of it as whispering rather than shouting.
Different fabrics and stitch lengths need their own pace; wool dances slowly, while cotton sprints.
Find the sweet spot for each project, feeling like a maestro with every stitch.
Maintaining Straight Stitches
With a steady hand, keeping your foot pressure even is key to straight stitches.
Too much pressure, and your fabric puckers!
Gently guide your fabric; don’t pull.
The right needle and proper needle tension are also essential for neat, even stitching.
Consistent speed and focus on the needle itself will help you create those perfect straight stitches.
Pivoting and Turning Corners
Tackling sharp corners on your sewing journey is like taming a wild horse.
Lower the needle into the fabric; it’s your anchor.
Raise the presser foot gently, and use seam guides for alignment, and rotate the fabric with finesse.
Keep an eye on stitch direction and even stitch length—think of it as steering your ride around a tight bend.
Practice makes perfect!
Securing Seams
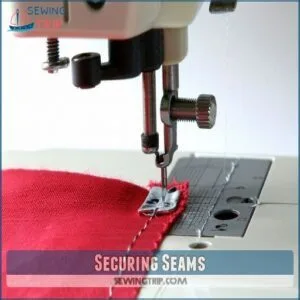
When you’re securing seams, mastering the basics like backstitching, locking stitches, and reinforcing stress points is essential for creating a sturdy project.
It might sound like a lot, but with a few simple steps and a bit of patience, you’ll have those seams holding together tighter than your favorite childhood stuffed animal.
Backstitching
Now, as you near the seam’s end, it’s time to backstitch—your sewing project’s insurance policy. Use the reverse button to secure your stitches. Why backstitch? It keeps your seams from unraveling and adds durability.
Remember:
- Backstitch at the start and end of seams.
- Aim for a few backward stitches.
- Choose suitable backstitch length.
- Explore backstitch alternatives.
Locking Stitches
Locking stitches are your sewing safety net, ensuring seams stay put.
Reverse stitching—just a few backward stitches at the beginning and the end of your seam—keeps everything from unraveling.
Try different stitch lengths, and master the basics like backstitching for added seam security.
Your projects will look professional and last longer.
Reinforcing Stress Points
Amazing job locking in those seams!
Next, let’s stop stress points from acting up like an old car.
Try backstitching at seam ends to avoid seam ripping.
At corners, throw in extra stitching or bar tacks.
Adjust tension for secure, balanced stitches.
Dull needle? Swap it out!
These sewing techniques make your projects last longer.
Sew on!
Mastering Sewing Techniques
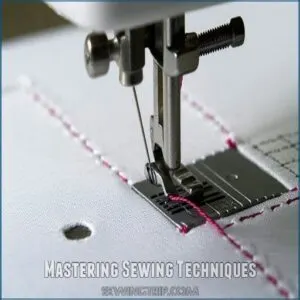
You’re ready to take your sewing to the next level by mastering techniques like sewing curves and circles, topstitching, and edgestitching.
These skills will help you add polish to your projects and finish seams like a pro.
Sewing Curves and Circles
Conquering curves and circles on your sewing machine is easier than you think!
It’s all about control.
Here are three tips for smooth curves: choose the right fabric, adjust your machine’s tension, and practice slow, steady movements.
Use a guide for perfect circles.
With practice, you’ll sew beautiful curves and circles!
Topstitching and Edgestitching
Once you’ve got curves down, it’s time to jazz up your projects with topstitching and edgestitching—like adding frosting to a cake.
These sewing techniques enhance strength but also add style too.
Experiment with different stitch types and widths using your sewing machine.
If needles break, just ease your hold.
Keep practicing, and embrace those learning curves!
Seam Finishing Techniques
Elevate your sewing projects with stylish seam finishing techniques.
Ever wondered how to keep those edges looking neat?
Try Serging for a crisp edge, or Overcasting and Hong Kong finishes for anti-fray control.
Zigzag stitches can encase raw edges like a pro.
These techniques, from binding to managing seam allowance, will boost your sewing prowess and give your creations a polished look.
Troubleshooting Common Sewing Issues
When your sewing isn’t going as planned, it might feel like your machine has a mind of its own.
Don’t worry, tackling thread tension troubles and those pesky skipped stitches is easier than you think,
and a touch of humor can help unravel the frustration!
Thread Tension Problems
Thread tension issues in your sewing machine can feel like taming a wild beast.
Uneven stitches or fabric puckering might indicate imbalance.
Are threads snapping? Loosen that tension.
If fabric crinkles, it’s dialing down time.
Here’s a quick guide:
| Problem | Possible Cause | Fix |
|---|---|---|
| Thread breaking | Too tight | Loosen tension |
| Uneven stitches | Wrong needle | Match needle to fabric |
| Fabric puckering | High tension | Lower tension |
Adjust and smooth your sewing journey!
Skipped Stitches
Skipped stitches can throw you off your sewing groove.
First things first, check the needle type—sharp and fit for the fabric thickness.
Use quality thread, such as Sewing Machine Thread, to avoid trouble similar to spaghetti gone rogue.
If issues persist, eyeball the thread tension and make sure the threading is correct.
Regular machine maintenance and bobbin winding practices keep things running smooth and steady.
Fabric Puckering
When your fabric puckers, it’s like watching a clumsy dance unfold.
Smooth things out by checking thread tension, adjusting stitch length, and choosing the right thread and needle size for your project.
Sometimes even a gentle touch with your iron helps.
A little patience and these sewing tips and tricks will ease those wrinkles away.
Needle Breaks
Snapped needles? Don’t panic! Use the right needle size for your fabric type.
Tension issues and rushing can also cause breaks, so make sure the bobbin tension is balanced with the upper thread and refer to sewing machine needle guides for selecting the right needle size for your project understanding needle compatibility.
A blunt needle’s a common culprit. Slow your sewing speed, and keep extra sewing needles handy.
Regular maintenance prevents many sewing machine troubleshooting headaches.
Maintaining Your Sewing Machine
Keeping your sewing machine in tip-top shape isn’t as tricky as you might think, and a little care goes a long way.
Regularly cleaning, oiling, adjusting the tension, and replacing the needle help guarantee smooth stitching every time.
Cleaning and Oiling
Every so often, give your sewing machine some love to keep it running like a champ. To keep your machine in top shape, establish a regular cleaning schedule, including weekly cleaning of the bobbin case and hook area, and take it in for service annually to prevent costly repairs and extend its lifespan, as outlined in this detailed guide on how to clean and maintain a sewing machine.
- Clear dust and lint: Use a small brush or mini vacuum to sweep away fabric bits.
- Oil it up: Add a drop of sewing machine oil in designated spots.
Regular maintenance prevents common problems.
- Stick to a schedule:
- Use the right tools: Look for specialized cleaning brushes and oils.
Adjusting The Tension
Now that your machine’s clean and oiled, let’s tackle thread tension.
Balancing the upper thread and bobbin tension is key to smooth stitch quality.
Picture it like adjusting the strings on a guitar—too tight, and it snaps; too loose, and it buzzes.
Troubleshoot with different fabrics to find that sweet spot, ensuring your sewing machine tension matches your project needs perfectly.
Replacing The Needle
After adjusting the tension, it’s time to swap your needle.
Think of it as changing tires—necessary for a smooth ride.
Always turn off your sewing machine first!
Loosen the screw holding the needle, pull it out, and insert a new one, flat side to the back.
Tighten it up, and you’re ready to tackle any project with ease.
Storing The Machine
You’ve just mastered replacing the needle; now it’s time to store your sewing machine.
First, clean it and unplug it for off-season care.
Cover with a dust cover or machine cover.
Find a dry, safe storage space.
Check your sewing machine manual for specific tips.
Proper storage keeps your machine in top shape, ready for your next project.
Sewing Projects for Beginners
You’ll quickly discover that beginner sewing projects like simple hems, pillowcases, or tote bags are both fun and satisfying.
As you tackle these projects, you’ll build confidence and skill, proving that even the smallest stitches have a big impact.
Simple Hem or Seam
Ready for your first project? Let’s sew a simple hem!
Grab some lightweight cotton or linen.
Choose a straight stitch on your machine.
Measure your hem length, sew slowly, backstitching at the start and end.
Iron it flat—you’ve got this!
That’s a perfectly pressed, finished hem.
Tote Bag or Pouch
Creating a tote bag or pouch is a fun way to explore fabric choices, such as those found on websites offering a variety of tote bag fabrics online, handle styles, and closure types.
Whether you prefer sleek leather straps or eco-friendly canvas handles, your options are endless.
Just follow your sewing machine instructions: sew straight stitches, add embellishments, and watch your skills grow.
Perfect for anyone using a sewing machine for beginners!
Pillowcase or Placemats
Crafting a pillowcase or placemat is like a cozy DIY adventure.
Get creative with your design—it’s your chance to add a touch of flair to your home decor.
Pick vibrant fabric choices that pop, explore easy projects like sewing patterns, and practice those straight and reverse stitches.
Keep it simple and let your sewing machine for beginners guide you!
Quick Clothing Alterations
Got those pillowcases done? Now, let’s tackle quick clothing alterations.
With your sewing machine, hem pants, shorten sleeves, and take in seams using trusty straight stitches.
For a professional finish, check out these quick dress hemming techniques quick hemming tips.
Fix zippers and patch holes with zigzag stitches for flexibility.
Check out this handy table for stitch choices:
| Task | Stitch |
|---|---|
| Hemming pants | Straight |
| Shortening sleeves | Straight |
| Taking in seams | Straight |
| Fixing zippers | Zigzag |
| Replacing buttons | Straight/Zigzag |
Keep it smooth, avoid puckering, and make sure every stitch adds flair!
Frequently Asked Questions (FAQs)
Can a beginner use a sewing machine?
A sewing machine might look like a rocket ship with all its buttons.
beginner can use it by following simple steps, practicing regularly, and embracing mistakes as part of the learning curve.
How to use a sewing machine?
Ready to sew? It’s easier than you think! Thread the machine, place your fabric, and gently press the pedal. Practice makes perfect—soon you’ll be creating amazing things!
Can a beginner sew at a faster speed?
Imagine speeding through your first sewing project.
Beginners can sew faster with time and practice.
Start slow to build confidence, then gradually increase speed.
Like driving, you’ll get more control and precision with experience.
What is the best beginner sewing machine?
The Brother CS7000X is a great beginner sewing machine, offering user-friendly features like an automatic needle threader and adjustable speed control.
It’s affordable, durable, and suitable for a variety of projects, making your sewing journey enjoyable.
Can I teach myself to use a sewing machine?
Absolutely, you can teach yourself to use a sewing machine.
Start with the basics, watch tutorials, and practice projects.
It’s like learning to ride a bike—awkward at first, but soon you’ll sew confidently.
How do you use a sewing machine step by step?
Start by setting up your machine and inserting the bobbin.
Thread the machine, choose the right stitch, and adjust stitch length.
Lower the presser foot, press the pedal, and guide the fabric.
Happy sewing!
What is the first thing a beginner should sew?
Did you know that 80% of sewing projects start with a pillowcase?
It’s simple, practical, and lets you practice straight stitching and corners.
Plus, you’ll have something cozy to show for your efforts!
What can you make with a sewing machine for beginners?
You can whip up simple projects like pillowcases, tote bags, aprons, and scrunchies.
These beginner-friendly items help you practice straight stitches and basic techniques, gaining confidence without diving into complex patterns right away.
How do you sew on a sewing machine?
Thread your machine, following the manual.
Place fabric under the presser foot.
Gently press the pedal to begin stitching.
Practice makes perfect! You’ll be sewing like a pro in no time.
Which sewing machine is best for beginners?
Picture sewing as a dance with your machine—begin with the Brother CS7000X.
It’s got simple, user-friendly features like automatic needle threading and a variety of stitches.
Perfect for beginners learning their first steps.
Conclusion
Ready to start sewing like a pro?
With the steps outlined in this guide on how to use a sewing machine for beginners, you’re equipped to tackle your first projects with confidence.
From setting up your machine to mastering basic stitches, each stage builds your skills.
Don’t worry about mistakes—they’re part of the learning journey.
Soon, you’ll be creating beautiful pieces and handling the sewing machine like a natural.
Happy sewing, and enjoy your creative adventures!

