This site is supported by our readers. We may earn a commission, at no cost to you, if you purchase through links.
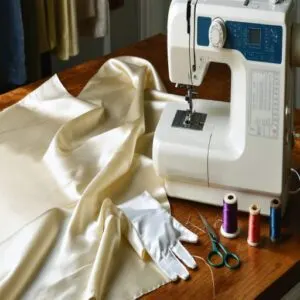
 Ready to master the art of French seams? You’ll love how this professional finish keeps your fabric edges neat and hidden, just like a magic trick in your sewing box.
Start by placing wrong sides together and sew a ¼-inch seam. Trim it close, then flip and press so right sides meet. Now sew again with a ⅜-inch allowance to trap those raw edges inside.
It’s perfect for delicate fabrics like silk and chiffon, giving your garments that high-end boutique look. Once you’ve got the hang of it, you’ll discover how this technique transforms even the simplest projects into something special.
Table Of Contents
Key Takeaways
- You’ll start by placing wrong sides together for a 1/4-inch seam, then trim it to 1/8-inch before flipping the fabric right sides together for a 3/8-inch final seam that encases all raw edges.
- You’ll get the best results with lightweight fabrics like silk and chiffon, while thick or stretchy materials aren’t suitable for French seams.
- You’ll need to press your seams after each step using medium heat first, then high heat with steam for the final press to achieve crisp, professional-looking edges.
- You’ll want to add an extra 1/2 inch to your standard seam allowance since you’re stitching twice, ensuring enough fabric for a clean finish without exposed raw edges.
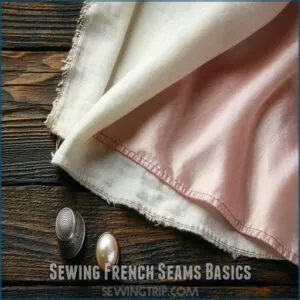
Sewing French Seams Basics
French seams are a clever way to hide raw fabric edges, leaving your garments looking neat and professional inside and out.
They might sound fancy, but they’re simple to master with just a little patience and the right steps!
Definition and Advantages
A French seam is a sewing technique that encloses raw fabric edges for a neat, durable finish. This seam finish is perfect for extending garment longevity.
Here’s why they’re great:
- Prevent fraying while washing items.
- Deliver professional results for sheer or lightweight fabrics.
- Create clean, double-stitched seams.
- Elevate your sewing techniques with a polished, classic look.
Fabric Suitability and Applications
Wondering where French seams work best? They’re ideal for lightweight fabrics like silk or chiffon and woven fabrics needing a polished look.
Avoid thick or stretchy textiles—they don’t pair well with French techniques.
For sheer fabrics, these seams hide raw edges beautifully.
A perfect choice for garment construction when you want a clean, professional finish with minimal fraying.
Learn the proper French seam technique to create durable and elegant seams.
Seam Construction Steps and Calculations
Let’s talk seam allowance calculations. For a French seam, sew the fabric wrong sides out, using a ¼-inch stitch length first. A French seam tutorial provides detailed guidance.
Trim it to ⅛ inch, then fold fabric right sides together. Stitch again with a 3/8-inch allowance, encasing raw edges. This step-by-step tutorial provides neat, durable edge finishing.
Seam construction’s all about precision, so measure twice!
Preparing Fabric for Seams
Getting your fabric ready is the key to smooth seams and a tidy finish. Pre-wash, iron, and cut everything carefully—it’ll save you headaches (and wonky seams) later!
Pre-Washing and Ironing Fabric
Fabric preparation starts with pre-washing to handle shrinkage control and soften fibers. Use warm water for most fabrics, but check care labels first.
Once dry, grab your iron and ironing board. Press the fabric flat, using steaming techniques to erase wrinkles.
Proper ironing tips include moving the iron smoothly and avoiding scorching—your fabric’s future seams will thank you!
Measuring and Cutting Fabric Pieces
When measuring fabric for sewing French seams, accuracy is key. Lay your fabric flat, smooth out wrinkles, and double-check measurements with a ruler or tape.
Proper fabric cutting techniques are essential for achieving professional results. Use sharp cutting tools for clean edges, and remember to include seam allowance for the French seam technique.
Precise cuts make sure pattern pieces match perfectly, making your french seam tutorial for beginners a breeze!
Pinning Fabric Edges Together
Now that you’ve got your pieces cut, you’ll want to pin those edges together like you’re lining up dancers for a perfect performance.
Using quality fabric pins is essential for accurate seams.
Place your fabric wrong sides facing out (yes, that’s right – it’s the opposite of what you’d expect for a french seam technique).
Align the raw edges carefully, and insert pins perpendicular to the edge every few inches for spot-on seam accuracy.
Sewing First Seam Allowance
You’ll start your French seam by placing your fabric wrong sides together and stitching a neat 1/4-inch seam along the edge.
After you’ve sewn this first seam, you’ll want to press it flat with your iron to create a crisp edge that’ll make the next steps much easier.
Stitching Seam Allowance Together
Now it’s time to tackle the heart of your french seam construction – stitching that first seam allowance. You’ll want to focus on maintaining perfect seam alignment throughout this process.
Specialty tools can help achieve a precise seam allowance. Set your stitch tension to medium and use matching thread for a professional look.
Sew slowly, preventing fabric shifting as you go. Keep your seam allowance consistent at 1/4 inch from the edge. Guide fabric gently – don’t pull or push.
Check for even stitching as you progress for proper **
Pressing Seam Allowance Open
Now that you’ve stitched your first seam, let’s master the pressing technique that’ll make your French seams look like a pro made them. Press the seam allowance open with your iron on medium heat, using gentle pressure to create crisp edges.
| Pressing Step | Temperature | Technique |
|---|---|---|
| Initial Press | Medium Heat | Light Touch |
| Final Press | High Heat | Firm Pressure |
| Edge Setting | Steam Burst | Quick Taps |
Always test your iron’s temperature on a scrap piece first – trust me, I’ve learned this the hard way! Use smooth, steady movements to make sure even fabric smoothing throughout the seam.
Trimming Seam Allowance to Size
After your first stitching line, you’ll need to trim that seam allowance down to about 1/8 inch.
Grab your fabric scissors and carefully cut along the stitched edge, making sure you don’t snip into the seam itself.
Think of it like giving your fabric a precise haircut – you want it neat and even all the way down.
Precision cutting is essential for a clean french seam finish.
Properly finishing raw edges prevents fraying and enhances the final look.
Creating French Seam Finish
You’ll love how your French seam takes shape as you fold the fabric right sides together and stitch that final seam with precision.
Now it’s time to transform those raw edges into a beautifully enclosed seam that looks as good on the inside as it does on the outside.
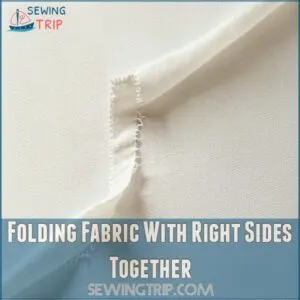
Folding Fabric With Right Sides Together
Now that you’ve trimmed your seam allowance, let’s tackle the fun part!
Fold your fabric with right sides together, making sure your previous stitching line sits right at the fold’s edge.
For perfect french seam sewing, run your fingers along the edge to feel for proper fabric alignment.
Think of it like wrapping a tiny present – you want those edges perfectly matched!
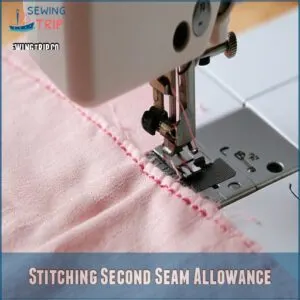
Stitching Second Seam Allowance
Along the folded edge, sew your second seam allowance with a steady stitch length of 2.5-3mm.
For a clean finish on delicate fabrics, learn the essential french seam technique.
You’ll want to keep your fabric tension even as you guide the material through your machine.
Make sure you’re stitching about 3/8 inch from the fold – this’ll completely enclose those raw edges you trimmed earlier.
Your french seam‘s almost done, and it’s looking pretty professional!
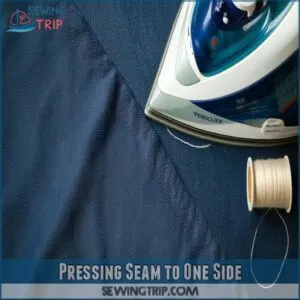
Pressing Seam to One Side
Your perfectly pressed French seam’s final step is essential for that professional finish.
Take your iron and press the seam firmly to one side – whichever direction your pattern suggests or what feels natural for your garment.
For invisible seams, smooth the fabric gently as you press, ensuring the fold lies completely flat.
A well-pressed seam makes all the difference in your finished piece!
Finishing and Troubleshooting Seams
You’ll love how easy it’s to fix those little French seam hiccups with your trusty seam ripper and iron at your side.
Once you’ve trimmed any excess fabric and pressed that final seam flat, you’ll have a perfectly polished finish that looks like it came straight from a designer’s workroom.
Trimming Excess Seam Allowance
Now that you’ve created your French seam, you’ll want to trim any excess seam allowance for a clean finish.
Take your fabric scissors and carefully trim the raw edges to about 1/8 inch from the stitching line. Don’t trim too close – you want to prevent fraying while maintaining the seam’s strength.
A clean edge means your invisible seams will lay flatter and look more professional.
Inspecting Seams for Errors
The success of your sewing project depends on carefully inspecting your seams after completing your French seams. Careful seam inspection is essential to ensure the quality and durability of your work.
- Look for puckered fabric or uneven stitching along the seam line.
- Check that raw edges are completely enclosed within the seam allowance.
- Verify stitch quality is consistent, without skips or loose threads.
- Verify seam integrity by gently pulling fabric from both sides.
Using Seam Ripper to Correct Mistakes
When you spot those pesky seam mistakes, don’t panic!
Grab your seam ripper and gently slide its pointed tip under the stitches.
A seam ripper product website offers a variety of tools for this task.
Hold the fabric taut and carefully work the ripper forward to cut through threads.
For french seams, you’ll need to undo both seam lines if there’s an error.
Take your time – rushing through seam repair can damage your fabric.
Pressing Final Seam for Neat Finish
Finally, you’ll give your beautifully sewn French seams that professional touch with proper pressing.
Start by opening your fabric with the wrong side up and pressing the seam flat to one side. Then, flip your piece over and press from the right side, using gentle steam for that crisp, polished look.
Using specialized pressing tools can elevate your sewing projects. A press cloth helps protect delicate fabrics while you work.
Frequently Asked Questions (FAQs)
How to sew French seams?
Pin wrong sides together, stitch 1/4 inch from edge, trim seam to 1/8 inch. Then fold right sides together, press seam, and stitch again 1/4 inch in to enclose raw edges.
Can you finish French seams with a sewing machine?
Like a skilled conductor leading an orchestra, you can masterfully create French seams using your sewing machine.
You’ll stitch twice – first with wrong sides together, trim, then fold right sides together and stitch again.
How do you make French seams smooth?
Press your seams after each stitch to flatten them, using steam and proper heat settings for your fabric.
You’ll want to trim seam allowances neatly and fold carefully to get perfectly smooth results.
How do I choose the right fabric for French seams?
Choose lightweight to medium fabrics like silk, chiffon, or cotton for your French seams.
You’ll want to avoid bulky materials that’ll create thick, awkward seams.
Light linens and voiles work beautifully too.
What do you need to make French seams?
Just as a chef needs their tools, you’ll need basic sewing supplies: pins, fabric, sewing machine, thread, scissors, iron, and ironing board.
You’ll also want a measuring tape and fabric shears.
Is it necessary to finish a French seam?
French seams don’t need additional finishing since they’re already self-enclosed.
You’ve got raw edges neatly tucked inside the seam, creating a clean, professional look.
It’s one of the perks you’ll love!
Do you need extra seam allowance for French seams?
Holy smokes, you’ll need some extra fabric!
For French seams, add 1/2 inch to your standard seam allowance since you’re stitching twice.
This helps you nail that professional finish without any raw edges showing.
What is the difference between a French and felled seam?
You’ll notice that both seams enclose raw edges, but they’re constructed differently.
While French seams fold inward twice, felled seams fold to one side and get stitched down flat against the fabric.
What are the disadvantages of a French seam?
Like a stubborn thread that won’t budge, French seams are time-consuming to create.
They’re not suitable for thick fabrics, can’t handle sharp curves well, and aren’t ideal for stretchy materials.
What is the point of a French seam?
You’ll love using a French seam to hide raw edges inside your garment for a clean, professional finish.
It’s perfect for delicate fabrics and creates a strong, durable seam that won’t fray.
Conclusion
Mastering French seams might seem tricky at first, but you’ve now got all the tools for success.
Who knew such a simple technique could transform your sewing projects into professional-looking pieces? With this sewing tutorial for French seams in your back pocket, you’re ready to tackle delicate fabrics with confidence.
Remember, practice makes perfect – and before you know it, you’ll be showing off those beautifully finished seams to anyone who’ll listen.
Keep stitching, and enjoy your elevated sewing game!

