This site is supported by our readers. We may earn a commission, at no cost to you, if you purchase through links.
 You’ll love how simple it is to sew a pillowcase with flap – just like crafting a cozy envelope for your pillow!
Start by cutting two fabric rectangles: one 27×21 inches for the main piece and another 27×12 inches for the flap.
Fold the flap in half lengthwise, press it, and sew along the open edge.
Pin the flap to your main piece, right sides together, then sew the sides and bottom.
Turn everything right side out, press the seams, and you’re done!
Once you’ve mastered this basic technique, you’ll discover clever ways to add personality to your creation, such as using various common hand stitches uses.
Table Of Contents
Key Takeaways
- You’ll need two fabric rectangles: 27×21 inches for the main piece and 27×12 inches for the flap, plus basic sewing tools like scissors, pins, and a sewing machine.
- Pre-wash and iron your fabric before cutting to prevent shrinkage, then maintain a consistent 3/8-inch seam allowance when sewing the sides and bottom.
- Position the flap 5 6/8 to 7 inches from the top edge, fold and press it with an iron, then pin and stitch it carefully to create a secure envelope-style closure.
- Press all seams flat with an iron as you go, paying special attention to corners and edges, to achieve that professional, store-bought finish you’re looking for.
Choosing The Right Fabric and Tools
You’ll need smooth cotton or cotton-blend fabric and a few basic tools like scissors, pins, and a sewing machine to create your perfect pillowcase with flap.
Before you start cutting and sewing, make sure you’ve pre-washed your fabric to prevent any surprise shrinkage that could turn your pillowcase into a pillow-squeeze.
Tools Needed for Sewing a Pillowcase
Before you get started creating your perfect pillowcase with flap, you’ll need to gather your sewing essentials, such as a user-friendly sewing machine with basic straight and zigzag stitches and a good pair of fabric scissors for accuracy. Before you get started creating your perfect pillowcase with flap, you’ll need to gather your sewing essentials.
Start with a reliable sewing machine and universal 80/12 needles.
You’ll also want fabric scissors, a rotary cutter for clean lines, measuring tape, fabric marker, and plenty of sewing pins.
Don’t forget your iron and serger machine – they’re game-changers for professional-looking seams and edges.
Preparing Your Fabric for Sewing
Two important steps stand between you and a perfect pillowcase: pre-washing and ironing your fabric.
First, toss your cotton or cotton-blend fabric into the washing machine to prevent future shrinkage surprises.
For the best results, consider using high-quality cotton fabric from a trusted source such as cotton fabric supplies.
Once it’s dry, fire up that iron and press out every wrinkle – trust me, those pesky creases can throw off your measurements later.
Keep fabrics separate during washing to avoid any size discrepancies.
Essential Tools for Cutting and Measuring
Now that your fabric’s ready, let’s gather your cutting and measuring toolkit.
You’ll need sharp fabric scissors (trust me, don’t use your kitchen ones), a reliable measuring tape, and fabric marking tools.
Sharp sewing shears are actually essential in sewing for accurate cutting sharp sewing shears are essential in sewing.
A rotary cutter with a self-healing mat makes straight cuts a breeze.
Don’t forget plenty of sewing pins – they’re like extra hands holding everything in place while you work.
How to Sew a Pillowcase With Flap
You’ll love how a pillowcase with an inner flap keeps your pillow snugly in place while you sleep.
With just a yard of fabric and your sewing machine, to master the basics, familiarize yourself with sewing machine parts, you can create a professional-looking pillowcase that’ll make your bedding feel like it’s from a luxury hotel.
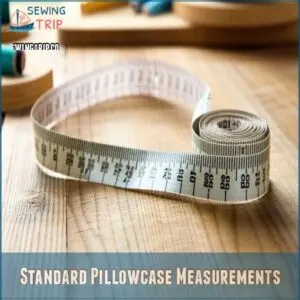
Standard Pillowcase Measurements
Getting your pillowcase measurements right makes all the difference between a perfect fit and a frustrating flop.
Here’s what you need to know about standard dimensions: To achieve a professional finish, consider adding a 1/4-inch seam allowance for edges.
- Standard size: 20" x 30" (finished measurements)
- UK standard: 50cm x 75cm (19.7" x 29.5")
- Inner flap length: 5 6/8" to 7"
- Industry alternative: 20" x 32" (some brands)
Remember, these are finished sizes – you’ll need extra fabric for seam allowances.
Cutting The Front and Back Pieces
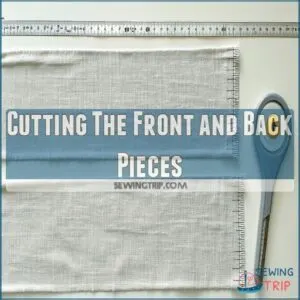
Sharp fabric scissors in hand, you’ll start by cutting your pillowcase pieces according to these essential measurements.
Your rotary cutter will glide through the fabric like butter, creating clean edges for professional results.
| Piece Type | Width (inches) | Length (inches) | Purpose | Fabric Type |
|---|---|---|---|---|
| Front | 21 | 25 | Main body | Cotton/blend |
| Back | 21 | 36 | Body + flap | Cotton/blend |
| Cuff | 10.5 | 21 | Decorative | Cotton/blend |
Remember to place your pattern on the fabric’s straight grain for the best drape.
Accounting for Seam Allowances
Three key measurements make or break your pillowcase’s fit.
You’ll need a 3/8-inch seam allowance for the side seams, 1/2 inch for the hem, and an extra inch overall to account for fabric shrinkage.
When cutting your fabric, add these measurements to your base dimensions.
Remember, it’s better to trim excess fabric later than to end up with a pillowcase that’s too small.
Creating The Flap for Your Pillowcase
To create that perfect inner flap for your pillowcase, start by measuring 6 inches from the top edge of your back piece.
For added inspiration or supplies, check out custom pillowcase flap designs at Pillowcase Flap Styles.
Fold and press this section with your iron, creating a crisp crease.
This flap will keep your pillow snugly in place, just like tucking in a sleeping child.
Pin the folded edge carefully, then stitch along the fold using a straight stitch.
Sewing The Main Body of The Pillowcase
Now that you’ve got your pieces cut and ready, you’ll love how quickly the main body of your pillowcase comes together.
You’ll start by joining the front and back pieces with right sides facing each other, then sew the side seams with a 3/8-inch allowance that’ll give your pillowcase that perfect, store-bought look.
Joining The Front and Back Pieces
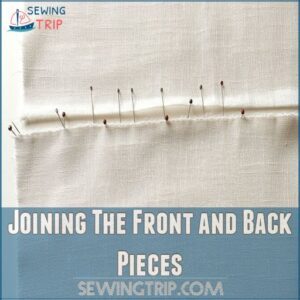
Let’s line up those front and back pieces like you’re matching puzzle pieces.
First, place them right sides together – that’s the pretty sides facing each other.
Match the raw edges carefully, making sure they’re perfectly aligned.
Pin the pieces together every few inches, working your way around.
Remember to leave one short end open – that’s where your pillow will slide in later.
Sewing The Side Seams
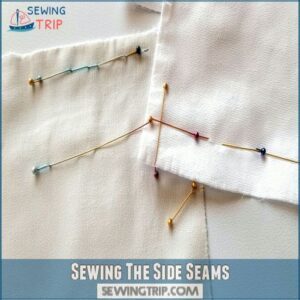
Ready to tackle those side seams?
Start by pinning your front and back pieces together with right sides facing.
Work from the bottom up, keeping your seam allowance at a consistent 3/8 inch.
To ensure optimal results, consider reading a beginner’s guide to sewing, such as how to sew for dummies, and adjusting your machine’s settings accordingly. Use your sewing machine’s straight stitch setting at 2.5 length, and sew slowly around corners to maintain accuracy.
Remember to backstitch at both ends to secure your stitching.
Finishing Raw Edges
Now it’s time to tame those raw edges that could turn your pillowcase into a fraying mess.
To prevent fraying, you can also use a seam finish technique like a Clean Finish seam allowance.
You’ve got two solid options: either use a serger machine for that professional overlock stitch, or switch your sewing machine to a zigzag setting.
If you’re going the zigzag route, set your stitch width to 2.5mm and length to 2.0mm for best results.
Work your way around all exposed edges.
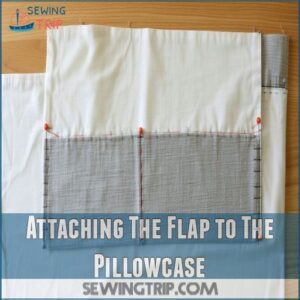
Attaching The Flap to The Pillowcase
After finishing those raw edges (looking sharp!), it’s time to attach your flap.
The key to a tidy pillowcase lies in perfect flap placement. Position the flap along the inside edge, pin it securely, and stitch with confidence.
- Double-check your measurements before pinning
- Keep the fabric flat and wrinkle-free while stitching
- Maintain an even 1/4-inch seam allowance
- Press the seam open for a crisp finish
- Test the flap’s overlap – it should cover about 6 inches
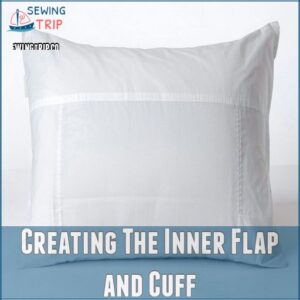
Creating The Inner Flap and Cuff
You’re about to learn the most satisfying part of making your pillowcase – creating that crisp inner flap and cuff that’ll keep your pillow snug and secure.
Once you’ve got your fabric pieces ready, you’ll be amazed at how quickly these finishing touches transform your project into a store-quality pillowcase that’ll make bedtime just a bit more special.
Measuring and Cutting The Flap
The flap is what keeps your pillow snug and secure.
For a perfect fit, you’ll need to cut your flap piece 5 6/8 to 7 inches long and match it to your pillowcase width (usually 21 inches).
Think of it like making an envelope – the flap needs to be just right to tuck in smoothly.
Use your rotary cutter and ruler for clean, straight edges.
Positioning The Flap Correctly
Once you’ve got your flap piece cut, let’s get it perfectly positioned.
Fold the back piece’s edge under by 5 6/8 inches to create your inner flap.
Think of it like folding a secret envelope – you want the flap to tuck neatly inside.
Line up the folded edge with the marked point on your front piece, making sure both pieces are smooth and wrinkle-free.
Securing The Flap in Place
Right alongside your machine, pin down that flap like you’re securing a treasure map.
Here’s how to keep your flap perfectly in place:
- Place pins perpendicular to the edge every 2-3 inches
- Double-check the flap lies flat with no wrinkles
- Secure corners with two pins in an X pattern
- Test-fold the flap to make sure proper movement before stitching
Now you’re ready to create that professional, crisp finish you’ve been dreaming of.
Attaching The Cuff to The Pillowcase
Now that your flap’s secure, let’s tackle the cuff using the burrito method – it’s easier than making an actual burrito!
Place your front piece and cuff right sides together, matching the short edges.
Pin them in place, then sew with a straight stitch using a 1/4-inch seam allowance.
Add a top stitch near the seam for that professional touch your pillowcase deserves.
Adding Finishing Touches to Your Pillowcase
You’re just moments away from turning your almost-finished pillowcase into a polished masterpiece that’ll make your bed look like it belongs in a home decor magazine.
Now it’s time to add those final touches that’ll transform your project from good to great, including pressing those seams until they’re crisp and adding any decorative elements you’ve chosen.
Pressing and Ironing Seams
Getting those crisp, professional seams starts with proper pressing.
Set your iron to the right temperature for your fabric – cotton needs high heat, while synthetics prefer it cooler.
Press each seam open as you go, working from the wrong side. A good shot of steam helps flatten those stubborn spots.
Don’t skip the edges – they’re what gives your pillowcase that store-bought polish you’re after.
Adding Decorative Elements
After your seams are pressed flat, let’s add some personality to your pillowcase.
You can sew lace trim along the flap’s edge, add ribbon embellishments at the corners, or create fabric appliques for a custom touch.
For a quick upgrade, try attaching decorative buttons or embroidering small details near the closure.
Just make sure your additions won’t interfere with the pillowcase’s comfort during use.
Turning The Pillowcase Right Side Out
With gentle hands, reach into your pillowcase and grab the furthest corner.
Pull it through smoothly, like turning a sock inside out.
Once you’ve flipped it, run your fingers along the seams to make sure the flap lies flat and edges are crisp.
Give the corners a little poke to sharpen them, then press the entire pillowcase with an iron for that professional finish.
Inserting The Pillow
Your beautiful pillowcase is ready to welcome its new fluffy resident! Here’s how to insert your pillow like a pro:
- Grab your pillow and gently fluff it to distribute the filling evenly
- Hold your pillowcase with the flap facing up and open wide
- Slide your pillow in smoothly, starting with one corner first
- Tuck the flap inside, creating that perfect envelope closure
Remember to smooth out any wrinkles for that hotel-quality finish you’ll love!
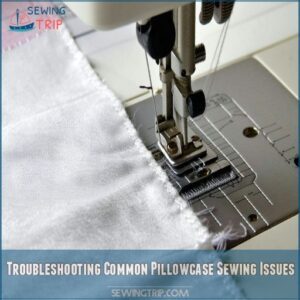
Troubleshooting Common Pillowcase Sewing Issues
You’ll find that even experienced sewers run into a few bumps while making pillowcases, from uneven seams to puckered fabric.
Don’t worry if your first attempt isn’t perfect – we’ll show you how to fix common issues and get your pillowcase looking store-bought in no time.
Dealing With Uneven Seams
Uneven seams can turn your beautiful pillowcase into a wonky mess.
Start by checking your seam allowance guide – it should be lined up perfectly with your fabric edge.
If you spot inconsistencies, grab your seam ripper and carefully undo the problematic areas.
Pin your fabric every few inches to keep everything aligned, and adjust your presser foot pressure for smoother sewing.
Take it slow – steady wins this race.
Fixing Puckered Fabric
Fabric puckering got you pulling your hair out? Relax, it’s often just a matter of adjusting the sewing machine tension or checking your fabric choice.
Use an even ironing technique; set your iron to the right temperature for your fabric.
Don’t forget seam allowances, and if needed, redo with a serger or French seam for smooth results.
Adjusting Flap Placement
Getting the flap placement just right can feel like solving a puzzle.
Take a moment to lay your pillowcase flat and measure from the opening – your flap should sit 5 6/8 to 7 inches deep.
If it’s too shallow, your pillow might peek through; too deep, and it’ll bunch up inside.
Simply unpick the stitches and reposition the flap if needed.
A well-placed flap keeps everything snug and tidy.
Avoiding Common Mistakes
Nailing flap placement is key, but watch out for these hiccups. Here are four mistakes you don’t want to make:
- Skipping Seam Allowance: Always measure it to prevent a snug fit.
- Wrong Fabric Choice: Choose smooth fabrics like cotton.
- Flap Placement: Make sure it’s aligned to avoid pillow peakaboo.
- Pressing Seams: Don’t rush; press for that crisp finish.
Frequently Asked Questions (FAQs)
How do you make a pillow flap?
Make your pillowcase flap by folding the back piece 1/2 inch twice, stitching it down, then sewing it to the front piece.
This creates a neat inner fold that keeps your pillow securely tucked inside.
How to sew a pillowcase with inner flap?
You’ll create a cozy envelope for sweet dreams by cutting two fabric pieces, sewing them together with a 3/8-inch seam.
You’ll then fold one end to form the inner flap that keeps your pillow secure.
How do you make a pillowcase with no raw edges?
Create polished edges by using the French seam method: sew wrong sides together first, trim seams, turn inside out, then sew right sides together.
This encases all raw edges inside for a professional finish.
Can a pillowcase be sewn with a flap?
Did you know 92% of home sewists prefer pillowcases with flaps?
To master the basic sewing skills needed to sew a pillowcase with a flap, start by understanding your sewing machine’s parts and how to thread it correctly by reading a detailed guide on basic sewing machine tutorials for beginners. Yes, you can easily sew a pillowcase with a flap using basic sewing skills.
It’s a simple project that’ll give your bedding a professional finish.
How do you make a pillowcase?
Cut fabric into rectangles – front and back pieces plus cuff.
Sew the cuff using the burrito method.
Attach front and back pieces with French seams.
Press seams, turn right side out.
How do you attach a pillowcase to a fabric?
With nearly 90% of sewists struggling with fabric attachment, here’s the key:
Pin right sides together,
sew a 1/4-inch seam allowance around three edges,
and finish with a French seam or serger stitch.
How to use a pillowcase with a flap?
Place your pillow inside the pillowcase, then tuck the flap inward to create a neat, enclosed edge.
The flap keeps your pillow secure and gives your bedding a polished, hotel-like appearance.
Why do pillow cases have a flap?
The flap on a pillowcase keeps your pillow snug and secure, much like a pocket.
It prevents the pillow from slipping out, offering a tidy look and extra protection against dust and dirt.
How to make a pillowcase step by step?
Swift as a thread through a needle, your perfect pillowcase starts by cutting fabric pieces to size.
Pin the right sides together, sew the seams, fold the flap, and finish with French seams or serging.
What is an overlap pillowcase?
An overlap pillowcase features a built-in flap that tucks inside, keeping your pillow hidden and secure.
You’ll love how it prevents your pillow from peeking out while adding a professional, hotel-style finish.
How to adjust pillowcase size for specialty pillows?
Measure your specialty pillow’s width and length, then add 1/2 inch for seam allowances. For the flap, extend the back piece by 6-7 inches. You’ll need extra fabric for custom sizes.
Can decorative trim be added to inner flaps?
You can easily add decorative trim to inner flaps before attaching them to the pillowcase.
Pin the trim along the flap’s edge, stitch it securely, then continue with your regular pillowcase construction steps.
What interfacing weight works best for custom monograms?
Light as a feather, lightweight fusible interfacing (5 oz) gives your monograms the perfect foundation. For delicate fabrics, try ultra-lightweight (.5-1 oz), while medium-weight (2-5 oz) supports heavier designs brilliantly.
How to prevent pillow from sliding out?
Creating an inner flap that’s 6-7 inches deep keeps your pillow securely tucked away.
Properly fold and stitch the flap edges at a 45-degree angle for extra stability when making corners.
When should French seams replace serged edges?
French seams are ideal when you’re working with delicate or sheer fabrics, want a high-end finish, or don’t have a serger.
They’ll give your pillowcase a professional look while completely encasing raw edges.
Conclusion
Ready to show off your sewing skills to friends and family?
Now that you know how to sew a pillowcase with flap, you’ve mastered a practical skill that’ll serve you well.
Whether you’re making one for yourself or as a thoughtful gift, these custom pillowcases add a personal touch to any bedroom.
Don’t be afraid to experiment with different fabrics and patterns – each project helps you improve.
With practice, you’ll be whipping up beautiful pillowcases in no time!


