This site is supported by our readers. We may earn a commission, at no cost to you, if you purchase through links.
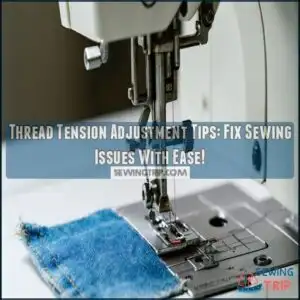 You’ll know you’ve nailed your thread tension when your stitches look identical on both sides of the fabric.
To adjust thread tension, start with your upper tension dial—turn it higher for tighter stitches or lower for looser ones.
Don’t forget the bobbins tension, which needs a tiny screwdriver and a gentle touch.
Always test on scrap fabric first, making small adjustments (like tuning a guitar string).
Different fabrics need different settings: lightweight materials prefer lower tension while denim demands more.
Clean your machine regularly too—lint buildup is often the culprit behind tension tantrums that even perfect settings can’t fix.
Table Of Contents
Key Takeaways
- Test thread tension settings on scrap fabric, making small adjustments to achieve balanced stitches on both sides.
- Keep your machine clean by removing lint regularly to prevent tension problems caused by buildup.
- Adjust the top tension dial incrementally and use a screwdriver for fine-tuning bobbin tension when necessary.
- Match thread, needle, and fabric type to avoid issues like loops, puckers, or frequent thread breakage.
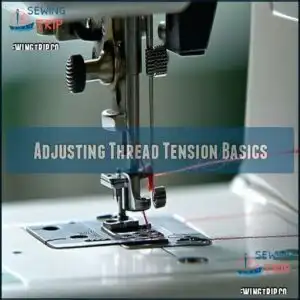
Adjusting Thread Tension Basics
Getting your thread tension just right is the key to smooth, even stitches and frustration-free sewing.
Perfect thread tension is where sewing frustration ends and professional results begin.
By understanding how thread paths and balance work together, you can fix common problems and keep your projects looking professional.
Understanding Thread Path and Balance
Thread path basics are key to balanced tension. Follow these tips for smooth stitching success:
- Align the thread in tension discs properly—no tangles allowed!
- Make certain the bobbin’s wound evenly to avoid uneven stitches.
- Place the thread spool correctly, so it feeds smoothly.
- Verify the thread path through every guide.
- Test stitch for balanced stitch formation to ensure smooth stitching.
Identifying Proper Tension Settings
Getting perfect stitch appearance starts with matching tension settings to your fabric and thread weight.
Visual inspection helps confirm balanced tension—your sewing machine tension should secure threads without puckering fabric. Watch for balanced interlocking of top and bobbin threads.
If seams look uneven, adjust in small steps until thread tension is smooth and stitches lay evenly on both sides.
To maintain consistent results, consider cleaning tension discs regularly, ensuring your sewing process is always optimized for the best thread tension.
Default Tension Settings for Normal Fabrics
Now that you know how to spot proper stitch balance, let’s look at your starting point.
The standard tension setting on most machines is 4 (your sweet spot). For normal straight-stitch sewing on medium-weight fabrics like quilting cottons, this ideal dial position works perfectly.
Lighter fabrics usually need lower settings (around 3), while heavier materials might require different adjustments.
Always do a quick tension testing before starting your project to ensure the best results with your starting point.
Troubleshooting Tension Issues
You’ll quickly spot thread tension problems when your stitches look loopy or your fabric puckers like it’s trying to escape from your project.
Thread tension problems reveal themselves when stitches loop wildly or fabric puckers in rebellion against your careful work.
With a few simple adjustments to your tension dial, you can transform those frustrating tangles into perfectly balanced seams that make your sewing look professional.
Common Signs of Tension Problems
Now that you understand the basics of thread tension, let’s look at how trouble might show up in your sewing.
You’ll know something’s wrong when your fabric doesn’t lie flat or your stitches look wonky. Think of these signs as your machine’s way of waving a little red flag!
- Loopy stitches that resemble bird’s nests on the bottom of your fabric
- Puckered seams that make your project look like a ruffled potato chip
- Frequent thread breakage that has you rethreading every few minutes
- Rippled fabric that waves like the ocean instead of lying smooth
- Uneven stitches that zigzag when they should march in a straight line, which can be considered a clear sign of trouble, and these issues can lead to frequent thread breakage, causing you to rethread every few minutes, and ultimately resulting in a project that looks like a ruffled potato chip.
Causes of Loose or Tight Thread Tension
Many sewing frustrations stem from improper thread tension, often with simple causes you can fix yourself.
Your machine’s tension problems usually boil down to a few common culprits. Regular machine cleaning helps prevent consistent tension issues.
| Issue | Cause | Solution |
|---|---|---|
| Incorrect Threading | Thread missed tension discs | Rethread with presser foot up |
| Mismatched Threads | Different weights or types | Use same thread top and bottom |
| Uneven Bobbin | Inconsistent winding | Rewind bobbin at consistent speed |
| Machine Damage | Nicks in throat plate or tension discs | Seek professional repair |
| Low-Quality Thread | Inconsistent thickness | Invest in better thread |
The issues listed can be resolved by addressing the specific causes, such as rewinding the bobbin or using the same thread type for both the top and bottom. This approach helps in maintaining a smooth sewing experience and prevents tension problems.
Diagnosing Thread Breakage and Puckering
When your thread keeps breaking or your fabric puckers like a fish face, tension imbalance is likely the culprit.
Thread breakage often results from mismatched thread weight and needle size, or excessive tension.
Fabric distortion and seam rippling indicate your tension’s too tight.
Loose stitches on the underside? Your top tension needs adjustment.
Remember, tension troubleshooting is like detective work—find the clues, solve the case!
Fine Tuning Tension Settings
You’ll find that small, precise adjustments to your tension dial can transform those frustrating stitches into perfect seams.
Start with test samples on scrap fabric that matches your project, turning the dial just a quarter-notch at a time until your top and bottom threads meet in a balanced hug, which can be achieved through precise adjustments.
Using Test Samples for Tension Adjustment
A scrap of fabric in your hands is your secret weapon for mastering thread tension.
Before tackling your project, always test your settings on a sample of the actual fabric you’ll use.
- Cut a 6-inch square of your project fabric for accurate testing
- Sew diagonal lines to reveal tension issues that straight lines might hide
- Compare both sides to check for balanced stitches
This simple step saves hours of frustration later.
You can also find inspiration for creative sewing projects using leftover material.
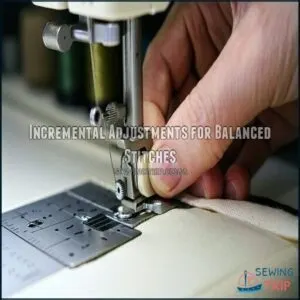
Incremental Adjustments for Balanced Stitches
Now that you’re ready to adjust tension, remember that small changes make big differences.
Turn your tension dial control in tiny increments (about ¼ turn), testing after each change on your scrap fabric.
Finding balanced stitch goals takes patience – like seasoning a soup, you can always add more but can’t take it away.
Precise control is key when adjusting thread tension, and maintaining proper sewing tension is essential for quality stitches.
Watch how your fabric and thread compatibility improves with each balanced tension adjustment, and for more information, visit proper sewing tension.
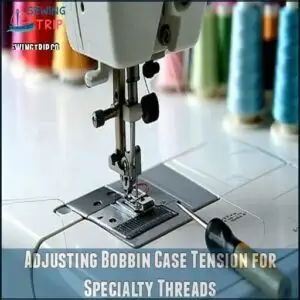
Adjusting Bobbin Case Tension for Specialty Threads
When working with specialty threads like rayon or polyester, your bobbin case tension needs special attention.
For rayon threads, set tension between 100-120 grams; polyester needs 120-150 grams.
Understanding proper thread control is vital for achieving superior results with rayon.
Use a small screwdriver to make tiny adjustments—think of turning the bobbins case screws in "5-minute" clock increments.
Always test your tension after each adjustment, aiming for 1/3 bobbins thread showing on the bottom side.
Maintaining Optimal Tension
You’ll keep your sewing machine purring like a happy cat with regular cleaning and proper maintenance of its tension components.
Just like your car needs an oil change, your faithful sewing companion needs lint removed from tension discs and a drop of oil in the right spots to maintain those perfect stitches.
Regular Machine Cleaning and Maintenance
Keeping your machine in pristine condition is the secret to tension success.
Regular sewing machine maintenance prevents most common tension headaches before they start.
Your cleaning schedule should include:
- Brushing away lint buildup from tension discs and bobbin case weekly
- Inspecting parts for wear or damage monthly
- Applying sewing machine oiling to designated points (check your manual)
- Scheduling professional servicing annually for deep cleaning
Don’t wait until thread quality issues signal problems! Regular maintenance is key to tension success.
Preventing Lint Buildup and Tension Issues
Lint is the silent saboteur of perfect thread tension in your sewing machine.
To prevent buildup, clean your bobbin area after every project using lint removal tools. Don’t skimp on thread quality—cheap threads shed more and create tension problems faster.
Cover your machine when not in use and schedule preventative maintenance regularly. A quick brush-out before each sewing session saves hours of tension troubleshooting later, which can be considered a form of preventative care.
Servicing and Oil Maintenance for Smooth Operation
Behind every smooth sewing experience is a well-maintained machine.
Treat your sewing buddy to professional servicing twice yearly—think of it as a spa day for your machine!
Between visits, establish a regular oiling frequency (check your manual), remove lint after every project, and inspect parts for wear.
Proper maintenance includes using high-quality sewing machine oil to guarantee longevity.
A drop of oil on tension disks prevents stiffness, but don’t overdo it—too much oil attracts more lint!
Advanced Tension Techniques
You’ll master sewing’s trickiest projects once you’ve got these advanced tension techniques in your toolkit.
From quilting thick layers to creating those barely-there basting stitches that’ll save your sanity during fittings, these specialized adjustments transform your machine from temperamental to terrific.
Adjusting Tension for Quilting and Heavy Fabrics
Quilting heroes need special tension techniques! When working with multiple fabric layers, increase your tension setting to 6-8 for thick fabrics like denim and canvas.
Test your quilting tension on scrap fabric first, aiming for a stitch length between 2.5-3.0mm.
Remember, heavier thread weights require looser tension settings.
Heavy-duty needles are also essential.
If you see the top thread floating, just loosen up—your fabric sandwich will thank you, and using the right techniques will make you a quilting hero with special tension.
Using Intentionally Loose Tension for Basting Stitches
While heavy fabrics need tighter tension, basting stitches work best when you intentionally loosen your thread tension. Set your dial between 1-2 for these temporary stitches that’ll make your sewing life easier.
- Loose tension creates easily removable stitches that won’t damage delicate fabrics
- You’ll enjoy quick project assembly with temporary seam allowances that hold pieces together
- Fabric handling becomes a breeze when patterns stay aligned without permanent commitment, allowing for quick project assembly and easily removable stitches with loose tension.
Consulting Professionals for Persistent Tension Issues
While basting stitches benefit from looser settings, sometimes your tension issues won’t budge despite your best efforts.
When you’ve tried everything and still face problems, it’s time for professional consultation. A sewing machine tuneup typically costs $80-150, with repair timelines ranging from same-day to two weeks.
Finding experts through local fabric shops protects your warranty and includes a thorough machine evaluation.
Frequently Asked Questions (FAQs)
How do you adjust thread tension?
To adjust thread tension, turn the dial slowly in small increments—clockwise to tighten, counterclockwise to loosen.
Start at 5 and test on scrap fabric until your stitches look identical on both sides.
How do you adjust tension on a sewing machine?
To adjust tension on your sewing machine, turn the numbered dial slowly in small increments.
Test on scrap fabric between changes.
The default setting (usually 5) works for most fabrics, but you’ll need adjustments for specialty materials.
How to adjust bobbin thread tension?
Like tightening a delicate balance, turn the tiny screw on your bobbin case clockwise for tighter tension or counterclockwise to loosen it.
Make small adjustments and test with scrap fabric between changes.
Why do I need to adjust thread tension?
You need to adjust thread tension to avoid puckered seams, loose loops, or messy stitches.
Proper tension keeps your sewing clean, balanced, and sturdy, making sure your creations look polished and hold together well.
What should I know before adjusting tension settings?
Before adjusting thread tension, check threading, clean lint, and test on scrap fabric.
Understand your machine’s tension dial, starting at
Smooth stitches need balance—imagine a tug-of-war where neither side overpowers!
How do you troubleshoot thread problems?
Start by rethreading your machine, checking for tangling or missed guides.
Inspect the bobbin for proper insertion and winding.
Clean lint from tension discs, adjust tension knobs in small steps, and test seams on scrap fabric to ensure proper functioning.
What is the best tension setting on a sewing machine?
Think of the tension dial as a sweet spot seeker—usually, 5 works like a charm for straight stitches on most fabrics.
Adjust slightly for trickier projects, and don’t hesitate to test on scraps!
Why does my thread keep looping under fabric?
Your thread loops under the fabric when top tension is too loose or threading is incorrect.
Make sure the thread sits snugly in the tension discs, and rethread the machine carefully to solve the issue, ensuring that you address the top tension to prevent further problems.
How does humidity affect thread tension?
Did you know thread expands 15% in high humidity.
Moisture makes it swell and stick, throwing off tension balance.
Use a dehumidifier, store thread in sealed containers, and test tension before sewing for smoother results.
Does thread age impact tension settings?
Older thread can mess with tension settings since it weakens, frays, or gathers lint, affecting smooth flow.
Check its strength by tugging lightly; if it breaks easily, swap it out for fresher thread.
Conclusion
They say practice makes perfect, and that rings true for mastering thread tension.
Use these thread tension adjustment tips to keep your machine stitching smoothly. Start by testing settings on scrap fabric, tweaking small changes to find balance.
Keep your machine clean—lint loves creating havoc. Adjust the bobbin tension when specialty threads demand it.
Remember, different fabrics need different approaches, so don’t hesitate to experiment. With patience and these tips, you’ll conquer any sewing project effortlessly.

