This site is supported by our readers. We may earn a commission, at no cost to you, if you purchase through links.
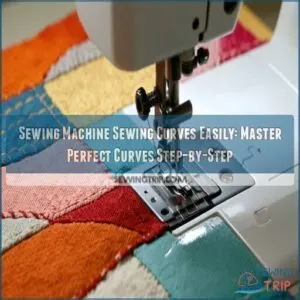
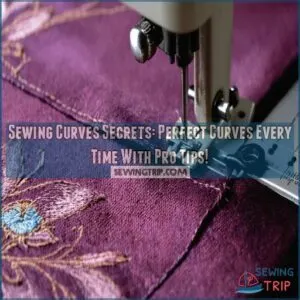
Start by using lots of pins or glue basting to keep your curve stable—think of it as giving your fabric a “roadmap.”
Adjust your stitch length to a shorter setting for better control, and go slow; rushing is a surefire way to end up with puckers.
Lift the presser foot as needed to smooth out the fabric, and don’t forget to clip the seam allowance on tight curves for a clean finish.
Want pro-level curves? It’s all in the prep, and using the right techniques will make a big difference, helping you achieve better control.
Table Of Contents
Key Takeaways
- Use plenty of pins or acid-free glue basting to secure fabric and prevent shifting while sewing smooth curves.
- Shorten your stitch length and sew slowly for better precision and smoother seams.
- Clip or notch seam allowances on tight curves to release tension and ensure smooth, flat seams.
- Press seams with steam and use tools like a tailor’s clapper to shape and stabilize curves for a professional finish.
Preparing Fabric for Curves
Getting fabric ready for curves is quick and simple with the right prep work.
Start by starching and ironing your fabric for stability, then use acid-free glue to keep everything in place while you sew.
Starching Fabric With Spray Starch
Why start with starch? Starching fabric with sprays like Best Press strengthens material, making sewing curves a breeze.
Mist lightly, focusing on tricky edges, and let a hot iron do the drying. It’s like giving fabric a backbone!
Pre-washing fabric matters for removing excess chemicals.
If sprays aren’t your thing, starch alternatives like glue sticks work too. Prepping right guarantees smooth, manageable sewing every time.
Ironing Fabric for Stability
Sometimes, ironing feels like magic—especially when you’re prepping fabric for curves.
Use a hot iron and your favorite starch, like Best Press, to stabilize your material.
Press gently, smoothing out wrinkles without causing fabric distortion.
For a pro touch, use a seam clapper to lock in those crisp lines.
Your fabric’s never been more curve-ready!
Using Acid-Free Glue for Basting
Using acid-free glue for basting makes curved piecing a breeze! It’s gentle on your fabric and keeps everything secure.
- Glue Basting Benefits: No pins mean no puckering or distortion.
- Acid-Free Types: Safe for sensitive fabrics.
- Glue Application Tips: Use sparingly.
- Ironing Glued Seams: Heat sets it perfectly.
- Sensitive Fabric Glue: Works wonders without damage.
Cutting Curved Fabric Pieces
Cutting curved fabric pieces might seem tricky, but the right tools and techniques make it simple.
With fabric cutting machines, rotary cutters, and quilting templates, you’ll get perfect curves every time.
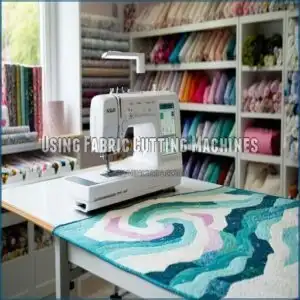
Using Fabric Cutting Machines
AccuQuilt dies and fabric cutting machines take the hassle out of cutting curves.
Instead of struggling with scissors or a rotary cutter, these machines deliver machine precision and curve consistency every time.
They’re great for creating precise shapes like Drunkard’s Path or Double Wedding Ring.
Plus, templates often pair perfectly with die cut fabric machines for flawless results!
Many users purchase fabric cutter products to simplify their projects and achieve professional-grade outcomes.
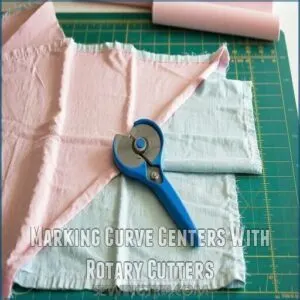
Marking Curve Centers With Rotary Cutters
Marking curve centers with a rotary cutter makes curve sewing a breeze. Fold your fabric in half and press firmly to create a crease. This crease becomes your center guide for accurate curve sewing.
Ergonomic handles can improve control during this process.
- Use chalk, pens, or markers for clear markings.
- Try different rotary cutter types for precision.
- Combine crease pressing techniques with marking tools for perfect curves.
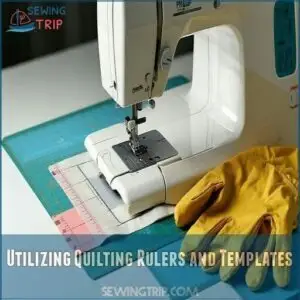
Utilizing Quilting Rulers and Templates
Master curve cutting with quilting rulers and templates! These tools bring ruler accuracy while shaping perfect designs like circles or arcs.
Durable template materials guarantee precision over time, while cardboard templates or rotary cutters offer great alternatives.
Many sewers find curved quilting rulers essential for precision.
Keep your quilting rulers organized with tidy ruler storage and achieve flawless quilting curve cutting to bring your creative curve design ideas to life effortlessly!
Basting and Sewing Curved Seams
Sewing curved seams might sound tricky, but with a few simple tricks, you’ll nail it in no time.
By basting carefully and sewing slowly, you can shape smooth, professional-looking curves with ease.
With patience and the right techniques, sewing curves transforms from daunting to delightful in just a few stitches!
Glue Basting for Curved Pieces
Glue basting curved fabric pieces makes sewing curves feel straightforward. A small dab of acid-free glue keeps fabric steady without shifting or puckering.
- Glue types: Elmer’s glue sticks or liquid fabric glue work wonders.
- Application techniques: Apply glue within the seam allowance only.
- Ironing glue: Heat sets it fast!
- Fabric compatibility: Test on scraps first.
- Glue removal: Washes out effortlessly.
Sewing Slowly for Even Curves
Take control of sewing machine curves by slowing down.
Adjust your sewing machine speed for precision and use a shorter stitch length for smoother lines.
Keep the needle down when pivoting at key points, ensuring fabric control, and guide the fabric gently with your fingertips to maintain accuracy.
Slow, steady sewing gives you confident sewing machine control around those tricky curves!
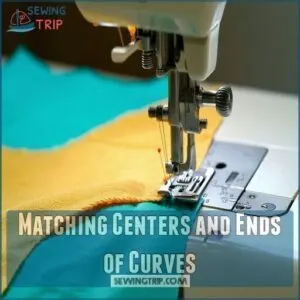
Matching Centers and Ends of Curves
Aligning centers is the secret sauce to smooth curved seams.
Fold fabric to find the midpoint, then pin it snugly with ends aligned. Use pins every inch along the curve for consistent seams.
Gently ease the fabric together as you work—no tugging! This pinning technique guarantees perfect curve alignment, leaving your project looking seamless and professional.
Stay patient, and you’ve got it, with a result that looks professional.
Sewing Convex and Concave Curves
Sewing convex and concave curves might sound tricky, but with the right techniques, it’s surprisingly simple.
You’ll learn how to handle those inward and outward bends smoothly, ensuring a polished, professional finish every time.
Sewing Convex Curves With Shorter Stitch Length
Sewing convex curves is smoother with a shorter stitch length. It helps you glide through those tricky bends without fabric bunching.
Think of it like taming a wild curve—just take it slow.
Use a zipper foot for tight spots, and layer fabric correctly for stability.
Press seams after sewing to set them perfectly. Stitch length impact matters!
Sewing Concave Curves With Small Snips
When sewing concave curves, carefully snip along the seam allowance to release tension and flatten the curve.
Match your snip placement to the curve depth—shallow curves need fewer snips, while deeper ones need more.
Use small, precise clips to avoid cutting through the seam, and this technique works for any fabric type and guarantees smooth, professional sewing curves every time!
Pressing Curves for a Smooth Finish
Mastering seamless curves is all about pressing. Here’s how to shape curves professionally:
- Use steam to soften fabric for effortless curve shaping.
- Press seams gently, moving with the curve, not against it.
- A tailor’s clapper locks seams in place—no surprises!
- Let pressing tools cool before evaluating results.
- Patience and steady ironing techniques always win. A tailor’s ham is essential for shaping garments.
Mastering Curved Seams and Edges
You can easily master curved seams and edges with the right techniques and a bit of patience.
By clipping, notching, and pressing carefully, your curves will look smooth and professional every time.
Master the art of curves—clip, notch, press, and watch your fabric transform into smooth, professional perfection!
Clipping Seam Allowance for Smooth Curves
Clipping seams is your secret weapon for smooth curve sewing.
For curved seams, make small cuts perpendicular to the seam line to release tension. Focus on precise clipping angles without cutting stitches, keeping seam integrity intact.
Tighter curve types need closer clips. This helps prevent fraying and guarantees your seam allowance lies flat, creating flawless, professional results every time, with smooth curve sewing.
Notching Fabric for Reduced Bulk
Getting curves to lay flat means saying goodbye to bulk. Notching angles helps fabric avoid puckers and behave like a dream.
Here’s how:
- Clip small triangular notches into the seam allowance.
- Space notches evenly along curved seams.
- Avoid cutting too close to stitching lines.
Proper notching guarantees accurate seam matching. Layer fabrics carefully for smooth results.
Test on scraps first, and remember that proper notching is key to achieving the desired outcome.
Pressing Seams for a Professional Finish
After notching fabric for reduced bulk, it’s time to press.
Use steam pressing techniques and a tailor’s clapper to flatten seam allowances perfectly. Manipulate curves gently, letting steam set them.
Proper tools can enhance effective steam pressing.
Press seams from the back to prevent shine. Precision here guarantees smooth, professional curves.
Think of it as sculpting—steam molds fabric into shape while you guide it patiently.
Troubleshooting Common Curve Sewing Issues
Sewing curves can be tricky, but most issues like puckering or uneven seams have simple fixes.
With a few practical tips and some practice, you’ll be sewing smooth, professional-looking curves in no time.
Avoiding Puckering Fabric
Avoiding puckers when sewing curves can seem tricky, but it’s not rocket science—it’s all about preparation and control.
- Clip the seam allowance strategically for smooth fabric bends.
- Use glue basting to hold edges steady before stitching.
- Shorten your stitch length for better curve precision.
- Gently manipulate fabric under the presser foot.
- Press seams carefully to set those curves perfectly.
Preventing Uneven Seams
Uneven seams? They happen to the best of us!
To prevent them, start with precise cutting and accurate alignment.
Keep a consistent tension as you sew, and double-check your stitch length—shorter stitches often work best for sewing curved seams.
Stay on the seam allowance line, adjusting gently to avoid puckers. Slow and steady wins this curve-sewing race!
Practicing on Scrap Fabric for Improvement
If uneven seams frustrate you, grab some scrap fabric and let loose.
Practicing on scraps sharpens your sewing skills without fear of mistakes.
Try sewing curves from different types of fabric to refine your technique, and simulate real projects to test curve sewing tips.
Confidence builds stitch by stitch, and soon, your sewing machine practice delivers smooth, flawless curves effortlessly.
Frequently Asked Questions (FAQs)
My Curved Seams Puckered After Sewing. How Can I Fix This?
Around 60% of puckered seams happen due to untrimmed seam allowances.
Clip small notches into the curve to release tension.
Press seams with steam after sewing—ironing works miracles in smoothing fabrics back into shape!
What makes it easier to sew curved areas?
You’ll find curved sewing easier by slowing down, using short stitches, and clipping seam allowances.
Pin fabrics every quarter-inch and guide gently with your fingers.
Practice on scraps first—it’s like learning to ride a bike, and this step is crucial for mastering curved sewing techniques.
How to sew curves on a sewing machine?
Isn’t it satisfying when curves come out smooth?
Pin often, sew slowly, and use a shorter stitch length.
Stop with the needle down, pivot gently, and clip seam allowances—it’s like curve magic!
What stitch is best for curves?
The best stitch for curves is a shorter straight stitch, around 0 to
It gives you better control, smoother lines, and prevents puckering.
Go slow, pivot often, and embrace the curve mastery!
Why is my sewing machine not sewing smoothly?
When your sewing machine isn’t sewing smoothly, it’s often a tension issue, dull needle, or lint buildup.
Clean it out, replace the needle, and check thread tension.
It’s like giving your machine a mini spa!
How do I sew curves on stretchy fabrics?
Keep the fabric stable by using a walking foot and stretch stitches.
Don’t skip stabilizers like spray starch or interfacing.
Pin closely, sew slowly, and let the machine guide the fabric without pulling, this will help keep the fabric stable.
What thread tension is best for sewing curves?
You’ll want to set moderate thread tension, typically between 3 and
Too tight can pucker the curve, too loose won’t hold.
Test on scraps first—every fabric behaves differently, so trust your tests!
Can I sew curves without pinning fabric pieces?
You can sew curves without pinning, but it takes practice.
Try glue basting or use your fingers to guide and align the fabric as you sew slowly.
It’s like steering around tight corners!
How do I fix puckers after sewing curves?
Puckers happen to the best of us.
To fix them, gently steam the seam flat using your iron, then press carefully.
If it’s stubborn, unpick the stitches, smooth the fabric, and resew slowly.
Conclusion
Sewing curves on a sewing machine doesn’t have to feel like dialing up the internet in the ‘90s—slow and frustrating.
With proper prep, like starching and basting, and techniques like shortening stitch length and clipping seam allowances, you’ll breeze through curved seams.
Take it slow, use your pins, and practice on scraps to sharpen your skills.
Before you know it, you’ll be sewing machine sewing curves easily with confidence and achieving smooth, professional results every time!
- https://www.youtube.com/watch?v=CN91YJkpJR8
- http://www.52quilts.com/2013/04/tuesday-tool-curved-piecing.html
- https://sew4home.com/sewing-smooth-curves-every-time/
- https://sewingbysarah.com/blogs/tutorials/top-tips-for-sewing-curved-seams?srsltid=AfmBOooM_KyE3Jic3r6z2lBMJV7xua_W9TlWLFQRgNJokcYsw3pio6_s
- https://leatherworker.net/forum/topic/25806-proper-tool-for-curved-sewing-channels/

