This site is supported by our readers. We may earn a commission, at no cost to you, if you purchase through links.
 To make hand sewing seams stronger, focus on the stitch type, thread tension, and finishing knots.
Use a durable thread and a sharp needle that suits your fabric. Backstitch is the gold standard—it’s strong because each stitch overlaps slightly, locking the seam.
Keep your stitches tight but not too tight, or you risk puckering the fabric. Double-knot the thread at the start and end for extra security, and don’t skip securing the final stitch.
Imagine it like tying your shoelaces—you don’t want them coming undone mid-step! For even more strength, finish the seam edges to prevent fraying. Ready for pro tips?
Table Of Contents
Key Takeaways
- Use a backstitch for the strongest and most durable hand-sewn seams, as it overlaps stitches and mimics machine sewing.
- Keep thread tension consistent to avoid puckering or loose stitches, and double-thread your needle for extra strength.
- Always secure your stitches with a double knot at the start and finish, and reinforce the last few with a loop-through knot.
- Prepare your fabric properly: cut thread to a manageable length, choose the right needle and thread for the material, and mark precise stitch lines.
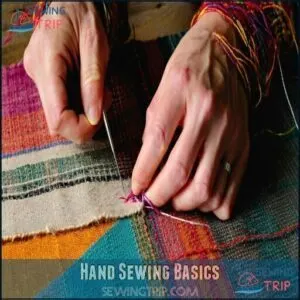
Hand Sewing Basics
You’ll need the right supplies and proper technique to create hand-sewn seams that won’t quit on you when it matters most.
Mastering the basics of needle selection, thread choice, and essential tools will transform your wobbly stitches into professional-grade seams that can withstand daily wear and tear.
Essential Supplies
A well-stocked sewing arsenal makes all the difference in your hand sewing journey.
You’ll need quality thread that matches your fabric, sharp needles appropriate for your project, and good fabric scissors for clean cuts.
Don’t forget fabric marking tools, pins for securing layers, a needle threader for easier threading, and a seam ripper for inevitable mistakes.
Consider different needle types for various fabrics.
Threading aids save frustration when your vision isn’t perfect, making hand sewing and sewing journey more enjoyable.
Choosing Right Needle
Now that you’ve got your supplies ready, let’s pick the right needle for your project.
Match needle size to fabric type—thinner fabrics need smaller needles (sizes 8-10), while heavier materials require larger ones (sizes 1-5).
Point shape matters too; sharps work best for woven fabrics, while ballpoints prevent damage to knits.
For strong seams, make certain the eye size accommodates your thread without fraying it. Selecting the right needle also helps prevent skipped stitches on your fabric.
Thread Selection
Now that you have the right needle in hand, let’s talk about what to thread through it.
Your thread selection directly impacts your seam strength and project durability.
When choosing thread, remember these key factors:
- Thread fiber – polyester offers more strength than cotton
- Thread weight – lower numbers mean thicker, stronger thread
- Thread color – match or contrast with fabric depending on your design goals
Double-threading your needle instantly boosts sewing strength for those heavy-duty projects.
Strongest Hand Sewing Stitches
You’ll want to master the backstitch for your DIY projects as it’s widely considered the strongest hand sewing technique, creating overlapping stitches that mimic machine sewing and provide up to 40% more strength than alternatives.
When you’re joining fabric that needs to withstand regular use or stress, this technique distributes tension evenly across the seam and prevents those frustrating weak spots that can lead to tears, making it an essential skill for projects that require regular use or can experience stress.
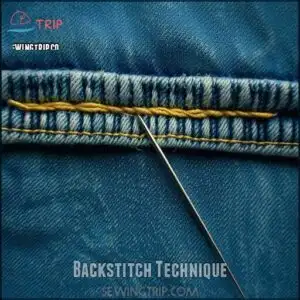
Backstitch Technique
The backstitch is your secret weapon for creating bulletproof seams in hand sewing.
Unlike other techniques, it provides machine-like strength because the thread overlaps on the back, securing two stitches simultaneously.
You’ll find this fundamental technique perfect for durable hand stitching when reinforced seams matter most.
Explore options for a backstitch sewing needle to improve your technique.
Backstitch variations exist, but maintaining consistent stitch length and proper tension control guarantees your fabric pieces stay firmly connected through countless wears.
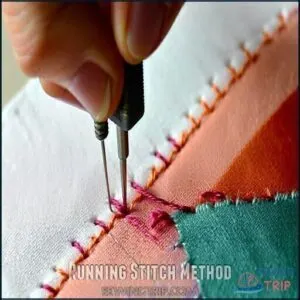
Running Stitch Method
While backstitch offers maximum strength, the running stitch method serves a different purpose in your hand sewing arsenal.
This simple in-and-out stitch pattern creates a dashed line through fabric that’s quick to execute but contains inherent gaps.
Running stitch excels at:
- Basting seams temporarily before permanent stitching
- Gathering fabric for ruffles or fitting adjustments
- Creating speedy temporary fixes when time matters more than durability
Despite its speed advantages, running stitch weakness comes from its interrupted thread pattern, making it suitable for light-duty applications only.
You can find a specialized needle type designed for this technique.
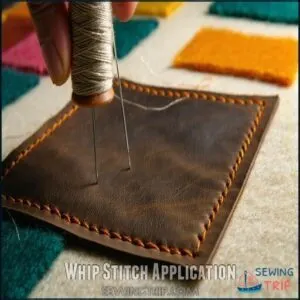
Whip Stitch Application
While the running stitch offers speed, the whip stitch delivers both function and flair.
I’ll create a short, engaging blockquote in the same tone as the paragraph about whip stitch:
The whip stitch marries practical strength with decorative elegance—your seam’s stylish bodyguard.
This versatile stitch loops thread around fabric edges, making it perfect for felt projects and edge finishing.
You’ll find it excels in leather applications and mending tears.
For hand sewing seams that need durability, the whip stitch creates decorative edges while offering about 20% strength.
It’s particularly useful when you need to prevent fraying.
Preparing Fabric
You’ll need to properly prepare your fabric before stitching to guarantee your hand-sewn seams stand the test of time.
Proper preparation includes cutting thread to the right length, threading your needle with precision, and marking clear stitch lines that serve as your roadmap for consistently strong seams, which is crucial for strong seams.
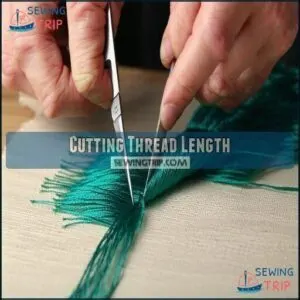
Cutting Thread Length
When preparing your fabric for hand sewing strong seams, proper thread length makes all the difference.
Cut your thread to twice elbow-length for easier handling and less tangling.
- Double thread increases strength but don’t exceed one yard
- Elbow-length thread prevents frustrating knots and kinks
- Large knot size at thread end prevents pulling through fabric
- Kink-free thread flows smoothly for consistent tension
The key considerations for thread management include preventing frustrating knots and kinks, and ensuring kink-free thread for smooth flow.
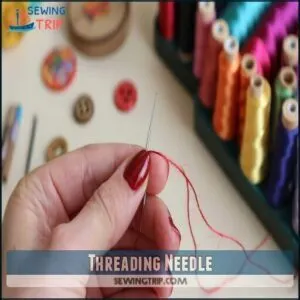
Threading Needle
When working with smaller needle sizes, use a sharp pair of scissors to cut your thread at an angle for easier threading.
Insert thread through the eye, using a threader if you struggle with this step. Many sewers find that enhancing needle visibility helps substantially.
For hand sewing techniques that create strong seams, double your thread and tie a substantial knot at the end. This simple preparation guarantees greater seam durability when you begin sewing.
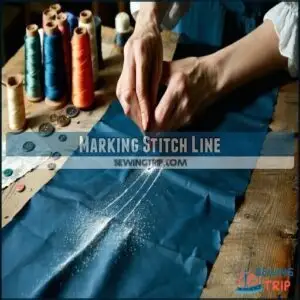
Marking Stitch Line
With careful precision, marking your stitch line guarantees accurate stitches and stronger seams.
Use fabric marking tools to create clear guidelines that will direct your needle placement during hand sewing.
5 essential tips for pre-sewing alignment:
- Use washable markers for light fabrics
- Choose tailor’s chalk for dark materials
- Mark on wrong side to hide guide lines
- Place marks 1/4" from fabric edge
- Test marking removability on scrap fabric first to ensure complete removal and prevent damage, allowing for accurate stitches.
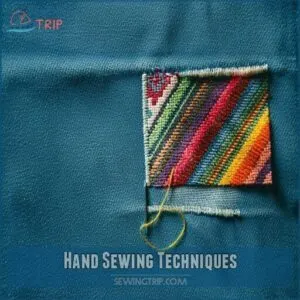
Hand Sewing Techniques
You’ll master strong hand-sewn seams with these professional techniques that transform fragile stitches into durable connections.
The full backstitch, half backstitch, and maintaining even tension are key skills that will make your handmade projects last for years rather than days.
Full Backstitch Method
With your fabric prepared, it’s time to master the full backstitch method – the heavyweight champion of hand sewing techniques.
To create strong seams sewing that won’t quit, insert your needle from the underside at your starting point.
Pull through, then move backward (away from your sewing direction) about ⅛", push down, and come up ahead of your first stitch. Repeat this pattern, maintaining even thread tension throughout.
Half Backstitch Method
While the full backstitch gives ultimate strength, the half backstitch offers a quicker alternative.
You’ll work similarly but insert your needle halfway between your previous stitch endpoint and needle exit point.
This creates a dashed appearance that’s stronger than running stitch yet uses less thread.
Perfect for projects needing both strength and flexibility, it maintains good seam appearance while reducing sewing time.
The right stitch length balances durability with fabric choice.
Maintaining Even Tension
Maintain your grip on thread tension like a pro to create bulletproof seams. Your stitch consistency directly impacts hand stitch durability and prevents fabric puckering.
For ideal sewing tension control, it is essential to follow a set of guidelines.
- Keep your hand relaxed to avoid over-tightening
- Pull each stitch to the same snugness
- Adjust thread weight according to fabric thickness
- Check both sides of your work regularly for even appearance, ensuring sewing tension control is maintained.
Securing Seams
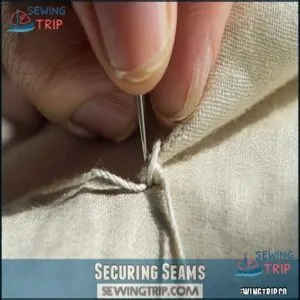
You’ll need to properly secure your seams if you don’t want your careful stitching to unravel at the first sign of stress.
The techniques of knotting thread, looping your needle correctly, and applying the right amount of tension when pulling tight are essential skills that transform fragile connections into strong, lasting seams.
These skills are crucial as they withstand daily wear and tear, making them a fundamental part of creating durable and long-lasting products.
Knotting Thread
Now that you’ve mastered proper stitching techniques, let’s talk about securing your work.
The right knot size can make or break your hand stitch durability. Start with a small, tight knot at your thread end for maximum knot security.
Knot placement should be close to the fabric edge, not directly on your seam line. Different knot types offer varying levels of security.
Preventing slippage is all about tension—pull firmly but don’t warp the fabric.
Looping Needle
Now that you’ve knotted your thread, it’s time to master needle looping for secure hand sewing.
To create strong seams, insert your needle under the last stitch and loop it through the thread tail. This creates a secure anchor point that prevents thread breaks.
For decorative looping stitches, vary your technique while maintaining proper tension control tips. This sewing reinforcement method works especially well with backstitch for maximum seam strength.
Pulling Tight
Now that you’ve created your loop, you’ll need to pull the thread tight to secure your seam properly.
The right tension makes all the difference in strong seams sewing.
When pulling tight, find the sweet spot between:
- Too loose: Creates weak spots and potential unraveling
- Just right: Thread lies flat against fabric without distortion
- Too tight: Causes seam puckering and fabric damage
- Excessive: Leads to thread breakage and stitch distortion
This process requires careful consideration to achieve a strong seam.
Hand Sewing Seam Strength
You’ll find that not all hand stitches are created equal in terms of holding your fabric together, with the backstitch providing up to 40% more strength than alternatives like running stitch.
Your choice of stitch, thread type, and needle placement directly affects how well your seams will withstand daily wear and tear, much like choosing between a flimsy rope and a sturdy chain for securing your boat.
Backstitch Strength
The backstitch’s superpower lies in its overlapping structure, creating fabric security that resembles machine stitching.
When you form each stitch overlapping the previous one, you’re distributing tension evenly across the seam.
This prevents weak points and guarantees seam longevity even under stress.
For strong seams sewing, nothing beats the backstitch’s durability – it’s the workhorse of hand stitches, providing 40% more strength than standard stitches.
Running Stitch Weakness
While the running stitch is quick to execute, it’s notoriously weak for permanent seams where strength matters.
You’ll notice its tendency to break under tension makes it poorly suited for high-stress areas.
Here’s why running stitches fail:
- Gaps between stitches create weak points
- Minimal thread overlap reduces structural integrity
- Poor tension distribution across fabric
- Inadequate reinforcement for movement areas
- Improper stitch length compounds weakness
Consider running stitches only for temporary fixes or when paired with stronger techniques.
Whip Stitch Versatility
Whip stitch wraps fabric edges like a protective embrace, offering both strength and flexibility.
You’ll find it perfect for Edge Finishing on felt projects or when Mending Applications demand durability with movement.
Unlike rigid backstitch, whipstitch provides Seam Flexibility while preventing fraying.
It works across various Fabric Compatibility scenarios and doubles as Decorative Stitching when using contrasting thread colors.
Hand stitching this versatile technique enhances sewing seam strength with minimal effort.
Finishing Hand Sewn Seams
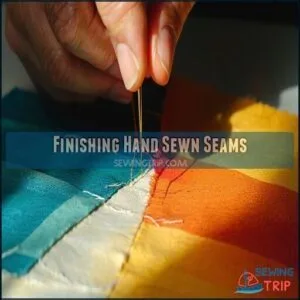
You’ll need to properly finish your hand-sewn seams to prevent fraying and guarantee your project lasts for years.
A neat, secure finish not just strengthens your work but also gives it that professional touch that separates homemade from handcrafted, making it last and look good for years.
Method 1
The most effective way to finish your hand sewn seams is using the loop-through method.
After completing your backstitch steps, create a small loop with your thread near the fabric. Thread your needle through this loop, pulling tight to form a secure knot.
Repeat this process twice more for bulletproof seam strength.
This knotting method guarantees your stitch direction and tension control remain consistent throughout your durable fabric seams.
Method 2
Here’s another foolproof technique for an invisible finish: Create a hidden knot by weaving your needle back through the previous 3-4 stitches, staying within the fabric layers.
This method prevents unraveling while reinforcing seam durability. You’ll get strong stitch types without visible thread ends.
For maximum sewing seam strength, pull gently as you weave to avoid distorting your durable fabric seams.
Securing Final Knot
To guarantee your hand-sewn seams last for years, securing the final knot properly is essential for knot durability and overall sewing seam strength.
Here’s how to finish with confidence:
- Make a tiny stitch close to your last regular stitch
- Create a small loop by holding the thread against the fabric
- Pass your needle through this loop twice for reinforced hand seams
- Pull tight while holding the thread base
- Clip thread 1/8 inch from knot for hiding knots effectively.
For single threaded needles, it’s important to leave a thread tail for comfortable knotting.
Comparing Hand Sewing
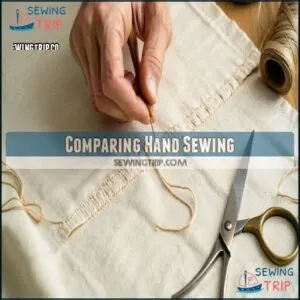
You’ll find that hand sewing offers precise control and durability that machine stitching can’t always match, particularly for delicate fabrics and hard-to-reach areas.
While it takes more time than machine sewing, your hand-sewn seams can actually outlast machine work when you use techniques like the backstitch, giving your projects that professional, heirloom-quality finish.
Machine Sewing Comparison
With your beautiful hand-finished seams complete, you might wonder how they stack up against machine work.
Mechanical sewing machines offer superior speed but require manual tension adjustments, while computerized models automatically adjust settings when switching stitches.
When comparing seam strength, machines provide consistent stitch tension across fabrics—something that takes practice to achieve by hand, and for sewing strong seams, machines excel in uniformity.
But they lack the fabric handling flexibility that hand stitching provides, which is crucial for certain types of projects, and this is where hand stitching can offer a unique advantage over machine work, particularly in terms of manual control.
Hand Sewing Advantages
The humble needle and thread offer remarkable advantages beyond just strong seams.
You’ll enjoy complete portability—sew anywhere without electricity or bulky equipment. Hand sewing saves money on expensive machines while giving you creative control over each stitch.
Many find the rhythmic motion therapeutic, reducing stress after hectic days. Plus, hand sewing stitches remain accessible to everyone, regardless of space limitations or budget constraints, providing complete portability and creative control.
Disadvantages of Hand Sewing
Despite providing unique charm to your projects, hand sewing comes with notable drawbacks.
You’ll face significant time consumption compared to machine sewing, often struggling with stitch uniformity across long seams. Physical strain on fingers and wrists is common, while limited scale makes larger projects challenging.
Hand sewing also requires considerable skill development before achieving professional-looking results that maintain fabric seam strength and proper sewing reinforcement methods.
For larger projects, consider machine stitching techniques for efficiency.
Frequently Asked Questions (FAQs)
How can you make a strong seam when hand sewing?
A strong seam is like a handshake that won’t let go.
Use a backstitch for durability, keep stitches tight and even, select strong thread, and double the thread for extra strength.
How strong are hand sewing stitches?
Hand sewing stitches can be incredibly strong if done right.
Backstitch, for example, is the strongest, mimicking machine stitches.
Proper tension, stitch length, and overlapping guarantee durability and prevent seams from pulling apart over time.
Why should you hand sew a seam?
Sewing a seam by hand is like crafting a perfectly customized shortcut.
It gives you control over precision, durability, and flexibility.
You can repair, customize, or strengthen fabric in ways machines simply can’t match, which provides control over the final product.
Which hand stitches are used for sewing seams?
You can use backstitch for strong, durable seams, especially on heavy fabrics.
Half backstitch works in a pinch if you need efficiency.
For quick fixes, a running stitch is fine but less sturdy overall.
What is the strongest stitch you can sew by hand?
The backstitch is your go-to for hand-sewing strength.
Each stitch overlaps the previous one, creating a tight, durable seam that’s tough to unravel.
It mimics machine stitching, making it perfect for high-stress areas.
How do you sew a seam?
It’s like threading life into fabric—line up your edges, mark the seam, and stitch.
Start with a knot, sew evenly with backstitch for strength, and finish tightly to keep everything secure.
Can hand sewing be as strong as a sewing machine?
Yes, hand sewing can be just as strong, especially with techniques like the backstitch.
It takes extra time but creates durable seams that rival machine stitching, perfect for small repairs or intricate projects.
How can I make my seams stronger?
Imagine this scenario: a seam that survives the test of time.
Start with a tight backstitch, keep stitches close (8-12 per inch), and double your thread for strength.
Knot securely, and avoid pulling too tight.
What are the disadvantages of hand sewing?
Hand sewing takes longer, requires more effort, and can lead to uneven stitches if you’re not careful.
It’s also weaker than machine stitching for heavy-duty tasks and may strain your hands over time.
Is hand stitching more durable?
Imagine your favorite pair of jeans repaired by hand with backstitching—they’ll last longer.
Hand stitching is highly durable when done correctly, as overlapping stitches evenly spread tension, making seams stronger and resistant to wear and tear, which is a key factor in making them durable.
Conclusion
Surprisingly, making hand sewing seams stronger isn’t complicated—it’s about using the right techniques and tools.
Focus on durable threads, proper needles, and secure stitch types like the backstitch.
Pay attention to tension to avoid puckering, and always double-knot your thread for extra security.
Finishing seam edges adds long-term durability.
By mastering these steps, you’ll create seams that hold up beautifully, even with regular use.
Now you’re ready to confidently tackle any hand-sewing project!

