This site is supported by our readers. We may earn a commission, at no cost to you, if you purchase through links.
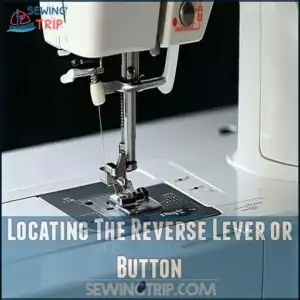
You’ll find this feature as a button or lever marked with a backward arrow.
When pressed, it makes your machine sew backward, locking threads at the beginning and end of seams to prevent unraveling.
To use it, start sewing forward for a few stitches, hold down the reverse button while sewing backward over those stitches, then continue forward.
It’s not just practical—it’s essential for professional-looking projects that stand the test of time.
The secret to perfect reverse stitching lies in maintaining consistent pressure and speed.
Table Of Contents
- Key Takeaways
- What is a Reverse Stitch?
- How to Use The Reverse Stitch Function
- Machine-Specific Reverse Stitch Operations
- Benefits of Using The Reverse Stitch
- Advanced Reverse Stitching Techniques
- Troubleshooting Common Issues
- Preventing Sewing Machines From Getting Stuck
- Reverse Stitching With Specialized Feet
- Maintenance and Care for Optimal Performance
- Common Mistakes to Avoid
- Frequently Asked Questions (FAQs)
- Conclusion
Key Takeaways
- You’ll find the reverse stitch button or lever marked with a backward arrow on your sewing machine, allowing you to sew backward and lock threads at seam beginnings and ends.
- You should use reverse stitching at the start and end of seams by sewing forward a few stitches, holding down the reverse button while sewing backward over those stitches, then continuing forward.
- You’ll achieve stronger, more durable projects by using reverse stitching to reinforce stress points and prevent seams from unraveling over time.
- You’ll avoid common issues by maintaining your machine regularly, using quality thread, selecting the proper needle for your fabric, and winding bobbins correctly.
What is a Reverse Stitch?
A reverse stitch is when your sewing machine sews backward instead of forward to secure the thread.
It’s mainly used at the beginning and end of seams to prevent unraveling and strengthen your project.
Definition and Purpose
What makes a reverse stitch so valuable? It secures seams by reinforcing the start and end, boosting sewing integrity.
Also called backstitching or reinforcement stitching, this technique strengthens stitches, ensuring durability enhancement in projects.
Reverse stitching involves sewing backward to overlap stitches, creating seam security and preventing unraveling. It’s essential for stitch strengthening and maintaining long-lasting, professional results in any sewing task.
Types of Reverse Stitches
Reverse stitching comes in several forms, each with a unique purpose.
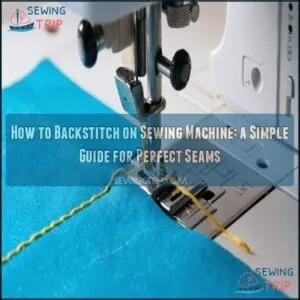
For basic reinforcement, the classic backstitch strengthens seams with added security.
Hand reverse stitching is great for precision work on delicate fabrics.
Decorative reverse stitches add flair to projects, while knitting reverse stitches create textured patterns.
These variations guarantee durability, style, and functionality—perfect for any sewing or craft project.
Importance in Sewing Projects
A reverse stitch isn’t just a fancy trick—it’s your secret to seam reinforcement and stitch security. It strengthens sewing projects, guaranteeing fabric integrity and increasing project longevity.
Plus, backstitching adds a polished, professional finish. Here’s why it’s indispensable:
- Prevents seam unraveling.
- Reinforces stress points.
- Adds fabric reinforcement.
- Enhances durability for heavy use.
- Keeps sewing projects neat and intact.
To guarantee the seams don’t unravel, understanding how it secures seams is key, ensuring project longevity with fabric integrity.
How to Use The Reverse Stitch Function
Using the reverse stitch function on your sewing machine is straightforward once you locate the lever or button.
Follow a simple step-by-step process to secure your seams and guarantee they stay strong.
This process will help you to ensure that your seams are properly secured.
Locating The Reverse Lever or Button
Ever wonder where the reverse stitch button or lever is? Brands place these differently: Singer uses a U-shaped button, while Brother prefers a hold-to-use design.
Some machines even feature touchscreens for reverse functions. Check your sewing machine manual for lever location or button design specifics.
Familiarity with your model guarantees smooth operation and better control of sewing machine functions.
Operating The Reverse Stitch Mechanism
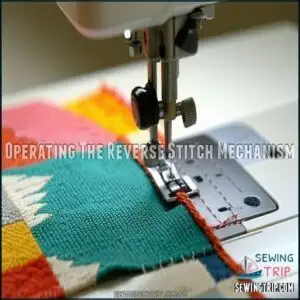
Your sewing machine’s reverse stitching depends on its lever functionality, button design, or touchscreen operation.
Most models require holding the lever or button to activate the reverse stitch. Some advanced machines feature automatic reverse for convenience.
Brand variations like Brother or Singer might differ slightly, so consult your manual. Always verify proper settings for smooth backstitching and secure results.
Step-by-Step Process for Reverse Stitching
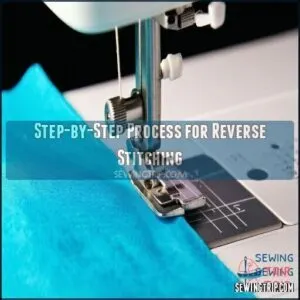
To master reverse stitching on a sewing machine, follow these steps:
- Start with the needle down to anchor the fabric.
- Sew 4-5 stitches forward, then hold the reverse stitch button.
- Maintain alignment consistency while stitching backward.
- Release the button and secure ends by sewing forward again.
- Understanding how it secures seam beginnings is key to preventing unraveling.
- Trim threads and inspect fabric for smooth, error-free stitching.
Machine-Specific Reverse Stitch Operations
Each sewing machine handles reverse stitching differently, so it’s important to understand your model’s unique operation.
Knowing where the reverse button or lever is and how it functions will help you achieve secure and consistent stitches.
Brother Models
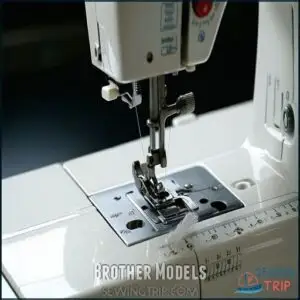
Brother sewing machines, like Innovis NS1750D and NS1850D, make reverse stitching simple with clearly marked button locations.
Hold the reverse button while stitching to strengthen seams. Use specific models’ manuals for troubleshooting tips and maintenance needs.
These machines boast reliable reverse stitch features, but regular care guarantees peak performance.
If you’re looking for NS1750D replacement parts, there are online resources available. Check for lint buildup or sticky levers if issues arise.
| Model | Button Location | Key Feature | Common Issue |
|---|---|---|---|
| Innovis NS1750D | Near stitch panel | Smooth reverse stitching | Sticky levers |
| Innovis NS1850D | Below needle arm | Reinforcement stitching auto | Lint buildup |
| Brother SE700 | Front-facing panel | User-friendly settings | Thread jams |
| FS70WTX | Beside speed dial | Consistent stitch quality | Incorrect tension |
Regular maintenance helps to promote superior functioning of these sewing machines. It is essential to check for lint buildup and sticky levers to ensure the machines continue to work effectively. Smooth reverse stitching and reinforcement stitching auto are key features of these machines. By following these tips, you can ensure your Brother sewing machine continues to work at its best. Regular care and maintenance needs are crucial to extending the life of your machine.
Singer Models
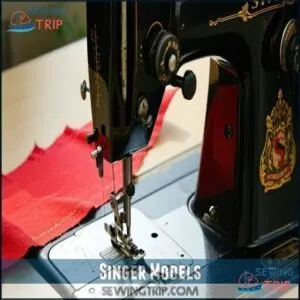
Singer sewing machine mechanisms vary by model, making button location important. For reverse stitching:
- The Singer Promise II 1512 has a reverse button for easy stitch reinforcement.
- The Singer 503A features a lever on the front for operation.
- Older models like the Singer 66K lack reverse functionality.
Many users seek specific parts online for these machines. Check your manual tutorials for model variations and sewing machine operation specifics to ensure you understand how to use your specific model correctly.
Bernina Models
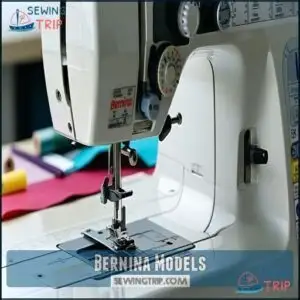
Bernina sewing machines feature unique reverse stitch options.
Many models, like the B570QE, include a spring-loaded Bernina lever for easy control.
Stitch length adjustments and model variations impact performance, so explore manual tutorials for proper use.
Reverse stitching secures seams, while advanced options like continuous reverse boost functionality.
Bernina offers products related to this function.
These machines deliver precision, making them reliable for mastering sewing techniques.
Other Machine Brands
For brands like Janome, Pfaff, Viking, Juki, and Elna, reverse stitching varies.
Here’s what to check:
- Janome Reverse: Look for a prominent button near stitch controls.
- Pfaff Backstitch: Often uses ergonomic levers for precision.
- Juki Back Tack & Viking Reinforcement: Typically involve intuitive dials.
Explore your sewing machine manual for detailed operations and unique features.
Benefits of Using The Reverse Stitch
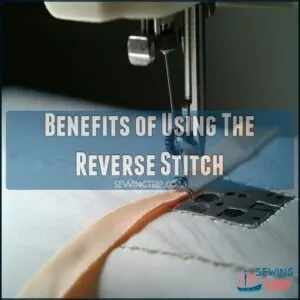
Using the reverse stitch strengthens seams and keeps them from unraveling over time.
It also adds durability and a polished finish to your sewing projects, making them both reliable and professional.
Reinforcing Seams and Preventing Unraveling
A reverse stitch adds essential strength to any sewing project by overlapping stitches at the seam’s beginning and end.
This reinforcement stitch secures seams, handles fabric stress, and prevents fraying over time.
By sewing backward for a few stitches, you lock the thread in place, ensuring seam durability and minimizing the risk of unraveling, making it a simple yet powerful safeguard that provides essential strength.
Enhancing Project Durability and Aesthetic Appeal
Adding a reverse stitch improves stitch strength, giving your seams the reinforcement they need to handle wear and tear.
This simple technique guarantees fabric stability, boosts garment longevity, and delivers professional finishes.
A secure seam isn’t just about durability—it also polishes your project’s aesthetic, creating clean, neat lines that elevate any sewing creation from amateur to polished perfection, ensuring professional finishes.
Creating Textured Patterns and Decorative Edges
Textured patterns and decorative edges can elevate your sewing projects, blending form with function.
Use the reverse stitch for knitted textures, decorative backstitch, or Crab Stitch Edges to add style and strength.
Try appliqué detailing or edge embellishments for fabric texture enhancement.
These techniques offer pattern reinforcement and let you create decorative trims while ensuring practical durability.
Advanced Reverse Stitching Techniques
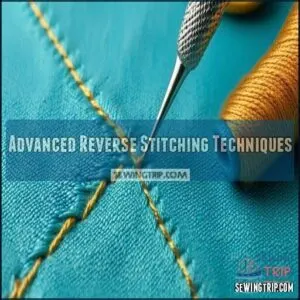
Mastering advanced reverse stitching techniques lets you create stronger, more decorative seams that stand out. You’ll explore methods like reverse appliqué, crab stitch, and reinforced backstitching for professional results.
Reverse Appliqué
Reverse appliqué is a creative way to combine fabric layers for striking designs.
Start by choosing sturdy fabric combinations for stability and layer visibility.
Use the reverse stitch to secure edges before cutting the top fabric, revealing the design beneath.
Precise thread choices and small stitches guarantee clean seams.
It’s perfect for intricate design complexity, enhancing projects with unique textures.
Reverse Single Crochet (Crab Stitch)
A crab stitch, or reverse single crochet stitch, creates a twisted edge design that’s perfect for clean, decorative finishes.
Work from left to right (if you’re right-handed). Keep tension steady to avoid uneven edges or puckering.
- Use a suitable crochet hook size based on your yarn.
- Practice tension control tips for smoother crab stitch edges.
- Match yarn weight effects to your project.
Backstitching for Strong and Durable Seams
Backstitching strengthens seams by combining stitch overlap with reverse stitching techniques.
Start by sewing a few forward stitches, then reverse stitch over them to create a secure seam.
This reinforcement stitch improves fabric stability and prevents unraveling.
For decorative purposes, you can also explore reverse stitch embroidery.
By managing thread tension and exploring backstitch alternatives, you’ll achieve durable, reliable seams that hold up under the stress of everyday wear, using techniques like reverse stitching.
Troubleshooting Common Issues
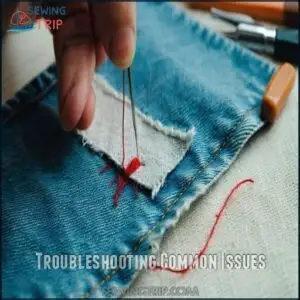
When your sewing machine’s reverse stitch function isn’t working as expected, it’s often due to common culprits.
Like lint buildup, bent needles, or sticky latches, these issues can be easily addressed.
Addressing these issues quickly guarantees smooth operation and prevents further damage to your machine.
Lint Buildup and Bent Needles
Lint buildup and bent needles can ruin your sewing machine’s stitch quality. Regular lint removal prevents fabric snags and thread breaks while extending machine life.
Replace bent needles to maintain proper thread tension and avoid damaging your fabric.
Consistent sewing machine maintenance guarantees smooth reverse stitch operations and boosts troubleshooting efficiency.
Check your needle’s condition often for superior results, ensuring proper thread tension and superior results.
Sticky Latches and Thread Jams
Sticky latches and thread jams can disrupt your reverse stitch.
Start by cleaning lint from the reverse mechanism and check for stuck parts.
A little latch lubrication works wonders.
Verify you’re using proper thread quality and the correct needle type to prevent tangles.
Inspect the bobbin for issues, and adjust tension problems carefully to keep stitching smooth.
Incorrect Stitch Length and Width Settings
Incorrect stitch length and width settings can wreak havoc on your reverse stitch quality.
Pay attention to these troubleshooting tips:
- Check the stitch length impact on seam strength.
- Adjust the width setting errors to suit your fabric type.
- Verify fabric type matters in your settings.
- Confirm proper tension balance issues.
- Use a clear troubleshooting guide for consistent results.
Preventing Sewing Machines From Getting Stuck
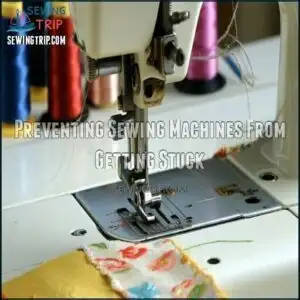
Keep your sewing machine running smoothly by focusing on regular maintenance and proper techniques.
Using high-quality thread, the correct needles, and properly wound bobbins can help prevent jams and keep your projects stress-free.
Regular Maintenance
Regular sewing machine maintenance is key to smooth reverse stitching.
Clean tension discs and remove lint to keep parts running well.
Align your needle and wind your bobbin correctly for consistent stitching.
Lubricate parts as recommended in your manual to prevent wear.
Regular checks help avoid costly sewing machine repair and guarantee flawless performance during projects.
Avoid issues by troubleshooting early.
Quality Thread
Choosing quality thread keeps your sewing machine running smoothly during a reverse stitch.
Opt for trusted thread brands and match thread composition with your project.
Proper thread weight guarantees even stitch tension and prevents breaks.
Always store thread in a cool, dry place for durability.
Good thread enhances stitch quality, offering better thread control and reducing jams that disrupt stitching, which is crucial for smoothly running your sewing machine.
Correct Needle Usage
Using the right needle is key for smooth reverse stitching.
Match needle types and sizes to fabric compatibility—delicate fabrics need fine needles, while heavy fabrics require thicker ones.
Always follow sewing machine instructions for needle installation and maintenance.
Keep the needle sharp and correctly positioned to avoid skipped stitches.
Uneven seams? A bent needle could be the culprit.
Replace it to ensure smooth reverse stitching and to prevent further issues with your sewing machine.
Proper Bobbin Winding
To prevent sewing machine trouble, make certain consistent winding on the bobbins. Use the correct bobbin type and balance thread tension for even thread distribution.
Adjust winding speed for smooth results and avoid overfilling. Check your sewing machine’s manual for tension settings that suit the bobbin case.
Proper winding reduces thread jams and supports reliable performance during stitching, ensuring a smooth and efficient sewing process with consistent results.
Reverse Stitching With Specialized Feet
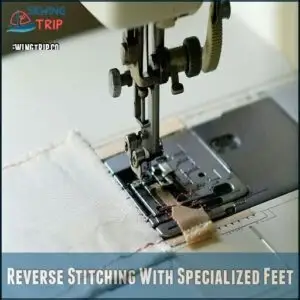
Using specialized feet, like a walking foot, can improve the accuracy and consistency of reverse stitching, especially on thick or slippery fabrics.
These attachments help feed layers evenly, preventing fabric shifting and ensuring clean, reinforced seams.
Walking Foot Models
A walking foot reverse stitch offers unmatched fabric feed control, perfect for quilting applications and specialty projects.
These sewing machine features keep fabric layers even, making even layer sewing smoother.
While not all sewing machine models support reverse stitching with a walking foot, Bernina models excel here, and always check compatibility to enhance reverse stitching precision in fabric-heavy tasks.
Limitations and Considerations
While reverse stitching on walking foot models, you’ll face limitations.
Some machines don’t support reverse stitching due to foot structure.
Keep these considerations in mind:
- Avoid lock stitches on sheer fabrics—they may disrupt drape.
- Maintain your machine—clean threads and parts regularly.
- Use quality thread to prevent jams.
- Change needles often for precise stitching.
Maintenance and Care for Optimal Performance
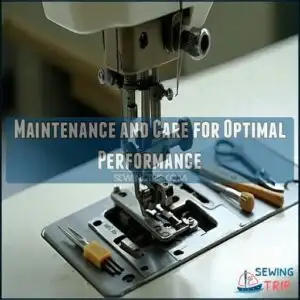
Proper maintenance keeps your sewing machine running smoothly and guarantees accurate reverse stitching. Clean and lubricate the machine regularly, and don’t forget to replace needles and bobbins as needed.
Cleaning and Lubricating The Machine
Keeping your machine in top shape starts with lint removal and regular oiling.
Focus on key oiling points in your manual, clean tension discs, and inspect needle alignment.
Removing debris from bobbin care areas prevents snags.
Compare sewing machine maintenance once a season, proper upkeep avoids costly sewing machine services and enhances sewing machine troubleshooting effectiveness.
Clean equals smooth performance.
Changing Needles and Bobbins
After cleaning your sewing machine, check your needle and bobbin.
Use the right needle type for your fabric, as dull needles can miss stitches.
Verify that bobbin materials match thread compatibility for smooth tension adjustments.
Proper winding techniques prevent uneven stitches.
Tighten or loosen bobbin tension as needed.
A healthy setup guarantees cleaner seams, reinforced by your machine’s reverse stitch function, ensuring smooth tension adjustments.
Common Mistakes to Avoid
Using the reverse stitch incorrectly can lead to weak seams, unaligned stitches, or fabric damage. Pay attention to stitch length, direction, and machine settings to guarantee secure, professional results.
Mindful Use of The Reverse Stitch
Your sewing machine’s reverse stitch is a powerful tool when used thoughtfully.
Master Intentional Backstitching with these steps:
- Apply Controlled Reversal for reinforcement stitches.
- Use Consistent Pressure to avoid uneven seams.
- Confirm Precise Placement when securing seams.
- Avoid Overuse; too much reverse stitching can bulk fabric.
Practice these reverse stitching techniques for strong, secure seams every time.
Avoiding Unintended Backward Sewing
Mastering sewing machine controls prevents unintended backward sewing.
Be mindful of button sensitivity and make certain the lever for reverse stitch disengagement functions smoothly.
Practice using foot control for precise stitch direction.
Machine ergonomics affect reverse stitching accuracy, so adjust settings to your comfort.
Jammed feed dogs can also cause this issue.
Regularly check sewing machine operations to avoid accidental stitch reversals during projects, and mastering the controls will help prevent unintended backward sewing, ensuring precise stitch direction and smooth machine operation.
Following Stitch Length and Width Guidelines
Smart sewers know that proper stitch length and width settings are essential for successful reverse stitching.
When using your sewing machine’s reverse stitch function, adjust settings based on fabric type to prevent puckering.
Thicker materials need longer stitches (3-4mm), while delicate fabrics require shorter ones (1.5-2mm).
Consistent seams depend on these ideal settings, which you’ll find in your machine’s manual or through fabric testing.
Frequently Asked Questions (FAQs)
What is a reverse stitch on a sewing machine?
A reverse stitch is your fabric’s safety belt.
You’ll push a button or lever on your machine to sew backward over existing stitches, securing the thread and preventing your seam from unraveling.
How do I use a reverse stitch?
To use a reverse stitch, press the reverse button while your fabric is under the needle.
Hold it down while sewing backward for 4-5 stitches, then release and continue forward.
This reinforces your seam ends.
How does reverse stitch work?
You’d think reverse stitching is rocket science, but it’s not.
Your machine simply runs backward when you press the reverse button, creating reinforced stitches at seam beginnings and endings to prevent unraveling.
What is the reverse stitch lever?
The reverse stitch lever is a small control on your sewing machine that lets you stitch backward.
You’ll find it near the stitch controls, often marked with an arrow pointing in the opposite direction, which is typically a clear indicator of the reverse function.
How do you fix a reverse stitch on a sewing machine?
To fix a stuck reverse stitch, first clean lint from the mechanism, lubricate moving parts if needed.
Check for thread jams, and verify the button/lever isn’t physically stuck.
Regular maintenance prevents most issues, and is key to avoiding a stuck reverse stitch in the future.
Why does my sewing machine reverse stitch?
Your sewing machine’s reverse function isn’t a problem—it’s a feature!
It’s designed to reinforce seams at the beginning and end of stitching runs, preventing your hard work from unraveling over time.
What is the function of the reverse level on a sewing machine?
The reverse lever on your sewing machine makes stitches go backward, reinforcing seams to prevent unraveling.
You’ll find it near the stitch controls, typically marked with an arrow pointing backward or a "U" symbol.
What is the reverse switch on a sewing machine?
The reverse switch on your sewing machine lets you stitch backwards, reinforcing seams at the beginning and end.
You’ll find it as a button or lever marked with a U-shaped arrow near your stitch controls.
How to do a reverse stitch on a Singer sewing machine?
On your Singer machine, locate the U-shaped arrow button.
Press and hold this button while operating the foot pedal to sew backward.
Do this at the start and end of seams for reinforcement.
Can automatic reverse stitching replace manual backstitching?
Yes, automatic reverse stitching can replace manual backstitching.
You’ll save time and get consistent results, but you’ll lose some control over stitch placement and length.
Each method has its place depending on your project needs, and each offers a unique set of advantages, with automatic reverse stitching providing efficiency.
Conclusion
Mastering your sewing machine reverse stitch function is like having a secret weapon in your crafting arsenal.
You’ll create stronger, more professional projects that withstand daily wear and tear.
By practicing consistent pressure and speed, you’ll perfect this essential technique to create durable and polished creations.
Remember to use it at the beginning and end of each seam, and don’t hesitate to reinforce high-stress areas.
With these tips, you’re now equipped to showcase your sewing skills.

