This site is supported by our readers. We may earn a commission, at no cost to you, if you purchase through links.
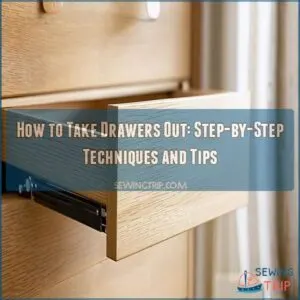
Press these tabs to free the drawer from its slides—and voilà!—pull it out gently.
If your drawer refuses to budge, it might have a catch mechanism or a mysterious screw holding it hostage.
A screwdriver and a steady hand will be your best allies here.
With drawers out of the way, don’t forget to inspect and clean those dusty corners.
Curious about how to handle stubborn drawers or odd designs? We can help!
Table Of Contents
- Key Takeaways
- Types of Drawers and Removal Techniques
- How to Take Drawers Out Safely
- Preparing for Drawer Removal
- Removing Drawers by Slide Type
- Safety Precautions for Drawer Removal
- Common Issues and Troubleshooting
- Specialized Drawer Removal Techniques
- Removing Drawers From Specific Furniture
- Drawer Removal Tools and Materials
- Post-Removal Steps and Considerations
- Frequently Asked Questions (FAQs)
- Conclusion
Key Takeaways
- Identify the type of drawer slide, like front-mounted or side-mounted, to understand the specific release mechanism you’ll need to use.
- Always look for release levers or hidden latches, and ensure you fully understand the drawer’s attachment before attempting to remove it.
- Empty the drawers before removal to prevent spills and maintain balance, especially with heavier drawers.
- Wear safety gear and use proper tools like screwdrivers and lubricants to ensure safe and smooth drawer removal.
Types of Drawers and Removal Techniques
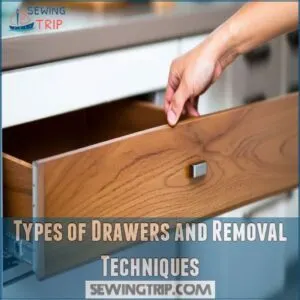
When you’re trying to remove a drawer, knowing its type is the first step.
From front-mounted to hidden drawers, each kind comes with its own removal tricks that you’ll need to master.
Front-Mounted Drawers
Tackling front-mounted drawers? Here’s what you do.
First, find those sneaky release latches at the front.
With care, disengage the drawer slides – a gentle push or lift might be needed.
Once free, pull the drawer straight out.
It’s kind of like freeing a reluctant guest from a crowded party.
Remember, smooth moves make DIY drawer repair simpler and satisfying!
Side-Mounted Drawers
Got a side-mounted drawer that’s acting like it’s glued in place? It’s a breeze with the right touch.
Slide the drawer out fully to find the release levers.
Squeeze each lever simultaneously and gently pull the drawer in your direction.
Remember, balance the drawer’s weight to maintain stability. Take charge and watch your drawer easily glide to freedom!
Under-Mounted Drawers
Under-mounted drawers, those sleek beauties hidden beneath the countertop, present a unique challenge.
Before you begin, check the drawer weight limits; you don’t want a kitchen catastrophe!
Locate the release mechanism—usually clips or levers—and carefully disengage the glides.
Then, gently pull the drawer out.
Clean the glides afterward for smooth operation.
Common problems? Stuck drawers often need a little lubricant.
Hidden Drawers
Hidden drawers are like secret agents of furniture, waiting to be discovered.
These sneaky compartments, often used for storing valuables or creating extra space, require a bit of investigation.
To remove them, find the discreet latches or levers first.
Press them gently, and voilà! Your hidden drawer should glide out smoothly, revealing its secrets with ease.
How to Take Drawers Out Safely
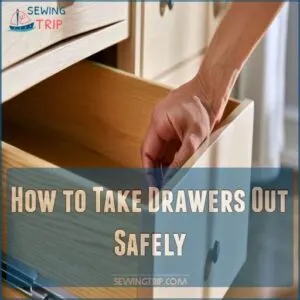
Removing drawers safely is important to avoid accidents or damage.
Whether you’re dealing with stubborn or tricky sliders, keeping a few drawer safety tips in mind can help everything slide smoothly.
Here’s a four-step guide to make sure you handle those drawers like a pro without common drawer issues:
- Clear the Load: Empty your drawer completely. Avoid the mess if it spills or tips over.
- Check Mechanisms: Locate any release levers or buttons before yanking it out.
- Stay Balanced: Keep the drawer level as you pull it out to prevent tilting or jamming.
- Don’t Rush: Avoid drawer removal mistakes by removing drawers one at a time, especially if they’re heavy.
Practice these simple steps, and you’ll master drawer removal with ease!
Preparing for Drawer Removal
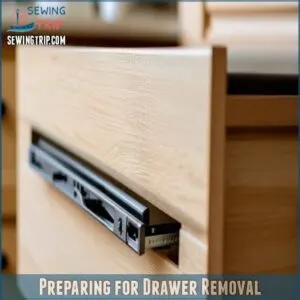
Before removing a drawer, you’ll need to figure out how it’s attached by locating the release mechanism, whether it’s a button, lever, or latch.
Once you’ve got that sorted, you’re ready to disconnect it from the slide, remove the front if needed, and gently pull it out to clean and inspect.
Locate The Drawer Release Mechanism
First things first, locate the drawer release mechanism—think of it as your secret handshake to freedom. Hidden latches, release button types, levers—they’re all in play. Feeling like a detective yet?
Be sure to also check for IKEA Alex Drawer Types, which might’ve a unique release mechanism such as friction disconnects or push latches.
Here’s a quick guide:
| Mechanism Type | Location | Action Needed |
|---|---|---|
| Hidden Latches | Side or Back | Press or Pull |
| Release Button | Underneath | Press |
| Lever | Side or Back | Push or Pull |
| Slide Mechanism | Sides | Press Lever |
| Drawer Front Removal | Front | Unscrew or Pry |
Disengage The Drawer Slide
Disarming your drawer can be as simple as a good old-fashioned reach-around—for the slide mechanism, of course!
Feel for any levers or buttons that scream "release me!"
Gently press or push these helpful helpers while pulling the drawer toward you.
Remember, you’re in control.
It’s like coaxing a reluctant guest—easy does it with a firm grip!
Remove The Drawer Front
Discovering the secrets of your drawer’s front can make all the difference.
With the right touch, wiggle those stubborn pieces loose like a pro.
- Use a screwdriver to loosen any visible screws.
- Pry gently with a flat tool to avoid damage.
- Watch for hidden latches underneath.
- Have a buddy help for those heavier or trickier fronts.
Now you’re in control!
Carefully Remove The Drawer
Once the drawer’s release mechanism is disengaged, gently pull the drawer straight out.
If it feels stuck, don’t force it! A little jiggling might help.
Remember those Drawer Removal Tips? Slow and steady wins the race, especially with heavier drawers.
Safety first—use Drawer Removal Tools if needed and always prioritize Drawer Removal Safety.
Avoid damaging your drawers; take your time.
Inspect and Clean
Inspecting and cleaning drawers keeps them gliding smoothly like a well-oiled machine. Here’s how to do it:
- Use a flashlight to check drawer parts for dust or damage.
- Wipe down surfaces with a soft cloth and mild cleaner; leave no nook untouched.
- Check for wear, ensuring slides and tracks are intact. Regular maintenance prevents future headaches!
Removing Drawers by Slide Type
When removing drawers, it’s important to recognize the type of slide mechanism you’re dealing with to prevent unnecessary frustration.
Whether it’s side glides, bottom metal glides, or specialized slides like those found in Wren and IKEA kitchen drawers, understanding their unique release methods will make the process much smoother.
Side Glides
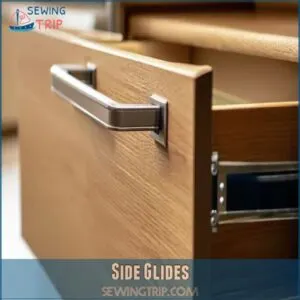
Side glides giving you trouble? You’re in the right place!
Spot them by those levers on each side. Push both levers down at once, pulling the drawer out until it slides free. Voila! No more struggling with a stubborn drawer.
Regularly check for common side glide problems and consider glide maintenance or replacement if they’re acting up. Happy fixing!
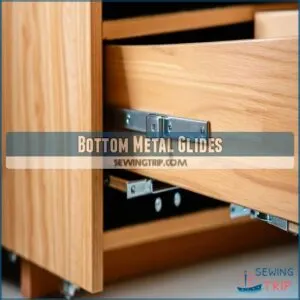
Bottom Metal Glides
Switching gears to bottom metal glides takes precision.
Here’s your roadmap:
- Locate latches on the drawer’s underside and squeeze them like a lemon.
- Pull out the drawer, lifting it off those glides.
- Clean and maintain by clearing debris for smooth sailing.
- Adjust or replace as needed, ensuring snug, hassle-free operation.
Enjoy the glide!
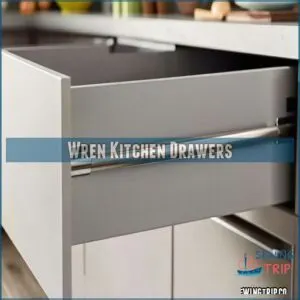
Wren Kitchen Drawers
Master the art of tackling Wren kitchen drawers!
When dealing with these drawers, tug sharply upwards at the front to snap those spring clips free from their reign.
Lift the drawer up and away as if you’re parting clouds on a rainy day.
Want to keep your Wren drawer warranty? Handle with care and precision, embracing the smooth removal process.
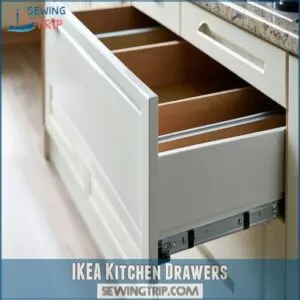
IKEA Kitchen Drawers
Ever wrestled with IKEA drawers?
Here’s a trick: find the hidden mechanisms by prying off the rubber cover, and release the latching mechanism.
Tug those levers up on both sides, freeing the guide rails.
Keep calm—it’s like solving a tiny puzzle.
Remember, when you’re reassembling, a quick drawer adjustment can save headaches later.
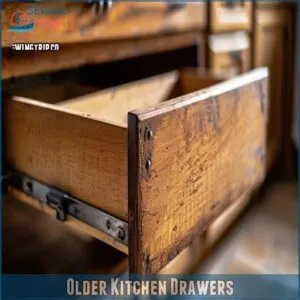
Older Kitchen Drawers
Older kitchen drawers can be tricky! Sometimes, they lack slides entirely or have just a single bottom glide.
Here’s what you need to know:
- Carefully inspect the drawer’s construction.
- If there are no slides, gently jiggle the drawer to loosen it.
- For a single bottom glide, proceed with caution; there’s no release mechanism to prevent it from falling. Remember drawer safety first! A little DIY drawer fix might be needed.
Safety Precautions for Drawer Removal
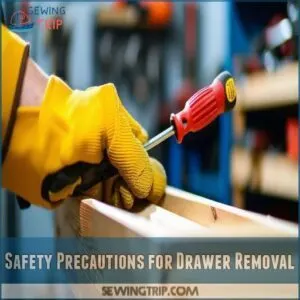
When you’re gearing up to remove a drawer, taking a few safety precautions can save you from unwanted surprises.
Disconnect any power sources and use the right tools to handle heavy drawers safely.
Make sure to wear protective gear.
Wear Protective Gear
Before tackling drawer removal specifics, remember the golden rule: safety first!
Don your eye protection or safety glasses—no one needs unexpected sawdust surprises.
Gloves are your best pals, guarding against scrapes or splinters.
A good, sturdy work attire shields you from snagging hazards.
Picture yourself as a superhero: well-equipped, ready, and virtually invincible in the face of rogue drawers!
Disconnect Power Source
Unplugging appliances or furniture might seem like a small step, but it’s essential for electrical safety and to dodge appliance dangers.
Power outages during DIY repairs mean no nasty surprises when you’re knee-deep in a project.
Here’s the short list:
- Unplug from the wall: Always the first move.
- Turn off power strips: Double check.
- Use surge protectors: For extra safety.
Use Proper Tools
Grabbing the right tool is like having a trusty sidekick on your drawer adventure.
Tool safety starts with selection—choose screwdrivers, prying tools, and lubricants in good condition.
Don’t forget about tool maintenance; it’s what keeps them doing their job.
Those tools, shining in their variety, turn a tricky removal into a smooth and controlled process.
Be Mindful of Heavy Drawers
Whenever you’re dealing with heavy drawers, don’t go it alone. Enlist help to keep things safe and sound. Here’s a quick guide to managing those hefty pull-outs:
- Use proper tools for leverage.
- Focus on lifting techniques to avoid strain.
- Mind the weight distribution for balance.
- Prioritize drawer safety by clearing contents first.
Common Issues and Troubleshooting
When you’re dealing with stuck or misaligned drawers, troubleshooting can feel like solving a frustrating puzzle.
By understanding common issues like broken slides or tricky drawer fronts, you’ll be back on track in no time.
Stuck Drawers
Dealing with a stubborn, stuck drawer?
First, try some drawer lubrication.
A little spray lubricant on the stuck drawer slides often does the trick.
If that doesn’t free it up, gently tap the drawer sides with a rubber mallet.
Sometimes, a slight drawer alignment adjustment is all it needs.
Persistent drawer jams? Check for obstructions.
A quick drawer repair might involve just a little elbow grease!
Broken Drawer Slides
Broken drawer slides can turn functioning spaces into frustration.
Here’s how you can tackle this DIY repair:
- Identify common causes: Look for visible wear or damage.
- Slide replacement: Measure the current slides accurately before shopping for replacements.
- Explore alternative glides: Consider upgrading to smoother, quieter options.
- Ensuring smooth drawer operation is similar to achieving high-quality output in sewing, where attention to detail and proper techniques are crucial, mastering proper sewing techniques can help prevent mistakes. Ensure proper drawer alignment: Misalignment can worsen slide issues.
Empower yourself and regain control over your furniture.
Misaligned Drawers
While tackling drawer alignment issues, check if the slides are properly engaged.
Drawer track problems often cause misalignment.
Adjust the drawer slide by gently pushing or pulling it to realign, you might need additional drawer alignment tools or accessories, check out the options on drawer alignment products.
Sometimes, loose screws can lead to common drawer misalignment causes—tighten them with a screwdriver.
Remember, fixing drawer alignment is a delicate dance—handle with care to avoid further issues.
Drawer Front Issues
Sometimes, drawer front issues can make you feel like you’re wrestling an octopus.
Check for hidden screws or latches causing stuck fronts.
A swift fix might involve realigning a misbehaving drawer face, especially when dealing with IKEA Alex drawers and their specific drawer removal techniques.
If the front’s broken, a little DIY magic with wood glue can save the day.
Cosmetic damage? A bit of polish and love could restore the charm.
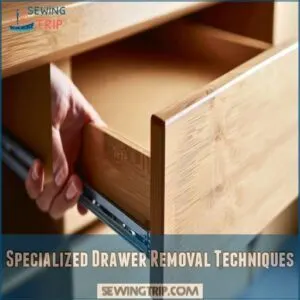
Specialized Drawer Removal Techniques
In this section, you’ll explore specialized techniques to tackle tricky drawer types like metal glides with levers and soft-close systems.
From handling anti-tip mechanisms to stabilizer screws,
these tips will guide you in mastering the removal of even the most stubborn drawers.
Metal Glides With Lever
Tackling drawers with metal glides and levers is like solving a fun puzzle.
Start by pulling the drawer out until you see the lever on each side.
Press both levers simultaneously and pull the drawer out.
If it’s resisting, consider applying a little glide lubrication.
Regular lever-type glide maintenance can save you from future hassle.
Wood Glides
Got a stubborn wood glide? It can feel like wrestling a bear! Here’s how you tame it:
- Give it a yank—don’t be shy, it needs a firm hand.
- Feel that wiggle? Tug and jiggle till it’s free.
- Need leverage? Use a flathead screwdriver.
- Lubricate stubborn tracks for smooth sailing next time.
Anti-Tip Mechanisms
Wood glides are pretty straightforward, but now let’s talk about anti-tip mechanisms.
These safety features, common in cheaper furniture, use cables to stop multiple drawers from opening at once.
They’re designed to prevent tipping – a real concern with top-heavy drawers!
To remove a drawer with an anti-tip mechanism, you might need to disconnect the cable first – check your furniture’s manual for specifics.
Remember, safety first!
Soft-Close Drawers
Soft-close drawers, with their gentle closing action, add flair to any space.
To remove them, knowing their mechanics is key.
First, empty the drawer and pull it out to its limit.
Look for the release levers or clips inside.
Engage these to detach the drawer smoothly.
- Inspect clips carefully
- Use minimal force
- Reassemble gently
- Clean slides regularly
Stabilizer Screws
Now, let’s tackle drawers with stabilizer screws, which are like the safety net in your cabinet.
These screws keep everything stable, especially when handling heavy items.
For secure removal, empty the drawer completely before starting, just like with the IKEA ALEX drawers removal process ikea alex removal.
You’ll need a screwdriver to loosen them before gently releasing the catch tabs on either side.
This method helps you safely remove the drawer without a hitch.
Happy unscrewing!
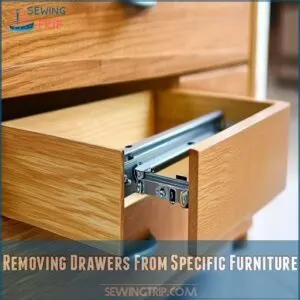
Removing Drawers From Specific Furniture
Taking drawers out of dressers, buffets, or metal filing cabinets might seem straightforward, but each piece of furniture has its own quirks.
You’ll need to identify the type of drawer slide and follow simple steps to make sure a smooth removal process without any hassle.
Dressers
When tackling dresser drawer removal, understanding diverse drawer styles is key.
For most vintage dressers, gently pull and lift, while modern ones might have a hidden latch like release levers found in metal slides for drawers.
A little patience goes a long way in dresser care and repair.
Remember, DIY dresser projects let you control your space, making sure it fits just right.
Buffets
Buffets, those stylish storage saviors, often hide secrets behind stuck drawers. Ready to master buffet care and restoration? Here’s how:
- Identify Style: See if it’s a classic or modern piece.
- Examine the Slides: Are they wood or metal?
- Gently Remove: Tug carefully to avoid damage.
- Check and Clean: Sweep out dust and forgotten treasures.
Metal Filing Cabinets
Tackling metal filing cabinets is like discovering secrets.
To remove drawers, open them fully and locate the small latch or lever inside near the back.
You can find a variety of metal filing cabinet drawers online at metal filing cabinet drawers.
Press and hold while gently pulling the drawer.
Voila! You can organize your space better.
Remember to check for filing systems and security features while cleaning, and spot common problems like jammed slides.
Drawer Removal Tools and Materials
Before you start, gather the right tools.
You’ll likely need screwdrivers, maybe some prying tools, and definitely safety glasses.
Having a lubricant handy can also make the process smoother, especially for older drawers.
Screwdrivers
Speaking of furniture challenges, every good drawer-removal escapade needs screwdrivers in the toolkit.
With different types like Phillips and flathead, screwdriver sizes matter for tackling those stubborn screws.
Remember, screwdriver uses extend beyond loosening—a trusty companion in reassembly too.
Keep ’em in tip-top shape with regular maintenance to guarantee smooth, slip-free handling.
Safety first, always.
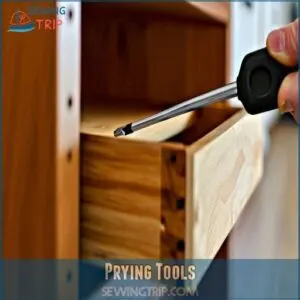
Prying Tools
After wielding a trusty screwdriver, you might reach for prying tools like a slim crowbar or flat-edge lever.
These types of pry bars slip into tight spots, gently easing stubborn drawers free.
Always mind safety: protect fingers and use sturdy models such as ones from Stanley or Craftsman.
DIY options, like a spatula, work too, ensuring you’re never stuck without alternatives.
Lubricants
Imagine prying tools failed you.
That’s where lubricants step in.
Opt for spray-on lubricants like WD-40 or silicone sprays; they’re lifesavers for stuck drawers.
A quick squirt can break the tension and free jammed slides.
Look into eco-friendly DIY solutions—olive oil can work wonders too.
Keep these handy, ensuring drawer glides stay smooth and frustration-free.
Safety Glasses
Protecting your eyes is just as important as using the right lubricants.
Ever had a small speck cause a big hassle?
Safety glasses are your trusty sidekick in DIY safety adventures. They shield you from unexpected challenges and eye injuries.
Here’s what to look for:
- Impact-resistant lenses
- Comfortable fit
- Clear visibility
Whether in the workplace or at home, safeguard your vision!
Post-Removal Steps and Considerations
Now that you’ve successfully removed the drawers, it’s important to think about the next steps for maintaining your furniture.
Take a moment to clean the area and check for any potential repairs, ensuring everything functions smoothly for future use.
Why Your Brand Matters
Got your drawers out? Great! Now, let’s talk brand.
Your brand isn’t just a logo; it’s your reputation.
Strong brand identity builds customer loyalty, giving you a competitive edge and boosting market value.
To keep your drawers running smoothly and maintain a positive brand image, consider investing in high-quality drawer slides for sale.
A positive brand reputation is priceless – it’s the key to long-term success.
Think of it as the cherry on top of a job well done!
Crafting Effective Promotional Messages
You’ve honed your brand, so now let’s craft promotional messages that resonate.
Speak directly to your target audience with clarity and a compelling call to action.
Let your brand voice shine through humor or relatability.
Make sure visual appeal aligns with your message.
Like a skilled chef perfecting a recipe, balance each element for maximum impact.
Choosing Right Marketing Channels
Understanding marketing channels can be like finding your way in a maze.
Consider these three gems for success:
- Target audience: Tailor your approach based on who you’re talking to.
- Budget constraints: Stay mindful of your financial limits.
- Channel performance: Analyze what works and discard what doesn’t.
To increase your online visibility, focus on Etsy shop optimization by mastering Etsy’s search algorithm.
Keep your brand messaging sharp and watch your efforts soar!
Frequently Asked Questions (FAQs)
How to remove drawers from furniture?
Identify the drawer’s release mechanism, usually latches or levers, and disengage the slide.
Pull the drawer smoothly while supporting its weight.
For stubborn drawers, apply lubricant or tap gently.
Remember, safety glasses are your friends here!
How do you remove a drawer from a track?
Start by extending the drawer fully.
Press down the release levers on both sides or squeeze the bottom latches, then pull the drawer out smoothly.
Make sure to support the drawer’s weight and avoid jerking it.
Do you need to manually remove drawers?
Let’s open those drawers!
Sometimes, yes; you’ll need to manually remove them.
Depending on the type of drawer slides, you might need to release levers or clips.
It’s often straightforward, but always check first.
How do you pull a drawer out of a cabinet?
To pull a drawer out of a cabinet, find the release lever or latch on the slides, press it while pulling the drawer out.
Lift slightly for smooth removal.
If it jams, check for obstructions.
How do you remove a drawer from a slider?
Identify the release levers on each side of the drawer.
Press them simultaneously, then pull the drawer straight out until it clears the rails.
If it’s heavy, have a friend help to prevent accidents.
How to remove drawers without a lever?
You don’t have a lever to worry about.
Gently pull the drawer out, using a little wiggle if stuck.
If there’s resistance, check for hidden latches or buttons inside that might be holding it in place.
How do I pull my drawer out?
Locate the drawer’s release mechanism or latches.
Hold them down and gently pull the drawer out.
If it feels stuck, wiggle it a bit.
Be mindful if it’s heavy; ask for help if needed.
How to pull out drawer slides?
Crack the code of drawer slides by pressing down on release levers or squeezing the latches near the front.
Gently pull the drawer out, keeping the slides parallel.
It’s like opening a secret compartment in your furniture.
How to remove a stuck drawer?
Is that drawer giving you a hard time?
Try some lubricant on the slides.
A gentle tap might help.
If it’s still stuck, check for obstructions.
Sometimes a little jiggling does the trick!
How do you remove drawers from dresser for moving?
Slow and steady wins the race."
Start by emptying the drawers, then locate and press the release levers or mechanisms.
With help if needed, gently pull the drawer out, angling upwards to remove it smoothly.
How do I identify drawer type?
To identify your drawer type, check how it’s attached.
Front-mounted drawers connect at the front,
side-mounted at the sides,
under-mounted below,
and hidden drawers are concealed.
Observing these features helps determine the removal method.
Can I remove drawers silently?
About 70% of noise in drawer removal comes from friction.
You can silence this by applying silicone lubricant to the slides and moving slowly.
Use gentle pressure to reduce scraping sounds for a stealthy operation.
What are the signs of a broken slide?
You know a slide’s broken when the drawer sticks, tilts, or wobbles.
If you hear grinding or notice sagging, it’s time to check the slides.
Sometimes you’ll spot visible cracks or missing pieces, too.
Why does a drawer tilt when opening?
A drawer tilts when opening due to misaligned tracks or worn-out slides, causing uneven weight distribution.
Check for loose screws or broken parts.
Adjust or replace the slides to make sure the drawer moves smoothly and evenly.
How can I store removed drawers?
Storing removed drawers is like finding hidden treasure.
Stack them neatly like puzzle pieces, wrap in bubble wrap for protection, and tuck away in a dry, cool space—your very own backstage for future reassembly performances.
Conclusion
Remember that scene in "The Parent Trap" where they’re rearranging their rooms?
Taking drawers out is similarly transformative!
You’ve now mastered the art of taking drawers out, whether it’s a simple dresser or a tricky kitchen cabinet.
Remember to always prioritize safety, using the right tools and taking your time.
With a little patience and these techniques, you’ll be a drawer-removal expert in no time.
Now go forth and conquer those stubborn drawers!
Taking drawers out shouldn’t be a headache; it should be empowering!

