This site is supported by our readers. We may earn a commission, at no cost to you, if you purchase through links.
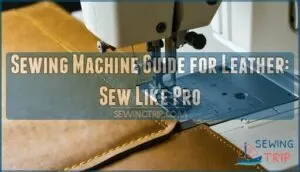
Use polyester or nylon thread for strength, and adjust your machine’s tension to prevent puckering. Go slow and steady – leather doesn’t forgive mistakes like fabric does.
Choose medium-weight leather for beginners, as it’s forgiving yet substantial. Clean your leather first, then mark your seam allowances carefully.
Practice on scraps before tackling your main project. The right preparation makes the difference between amateur hour and professional results that’ll last decades.
Table Of Contents
Key Takeaways
- You’ll need heavy-duty needles (size 16-18), polyester or nylon thread, and proper tension adjustments to handle leather’s thickness without breaking needles or creating weak seams.
- You should choose medium-weight leather for beginners, clean and condition it properly, and practice accurate seam allowance marking before starting your main project.
- You can use a regular sewing machine for leather if you adjust stitch length to 3-4mm, reduce presser foot pressure, and work slowly to maintain control through thick materials.
- You must guide leather gently rather than forcing it through the machine, use longer stitches than fabric requires, and finish seams with an awl or bone folder for professional results.
Choosing Leather Type
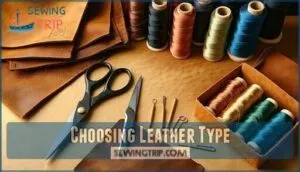
You’re about to choose the right leather type for your project, which is a vital step in achieving professional-looking results.
By selecting the right leather thickness, understanding grain direction, and identifying a suitable finish, you’ll be well on your way to creating high-quality leather products with your sewing machine.
Selecting Right Leather Thickness
You choose leather thickness based on project requirements.
Consider:
- Garment Weight for clothing
- Medium thickness for accessories
- Heavy upholstery for durability
A leather thickness guide helps.
Match leather thickness to machine capability, considering layering leather and thickness variation for ideal results with your leather sewing machine and sewing machine needles leather.
Understanding Leather Grain Direction
You’re now considering leather grain direction, which affects stretch impact and appearance effects.
Identify the grain to determine your sewing direction, guaranteeing you cut and stitch parallel for ideal results with your leather sewing machine, following the leather grain for a professional finish.
Understanding the importance of grainline guarantees better fit and seam stability.
Identifying Suitable Leather Finish
When working with leather, you’ll encounter various finishes.
- Aniline vs. Protected leathers have different needs
- Semi-Aniline Leathers require careful handling
- Corrected Grain Leather is sanded for a uniform texture
- Patent Leather Finishes add a glossy look
- Suede and Nubuck leathers need specialized care.
Understanding these leather types and their grain will help you master your leather sewing machine, ensuring a professional finish in your leather guide and sewing projects.
Preparing Leather Fabric
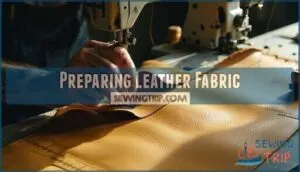
Before you start sewing leather, you’ll need to prepare the material properly to guarantee clean, professional results.
This preparation involves cleaning and conditioning the leather, marking accurate seam allowances, and smoothing out any wrinkles or creases that could affect your stitching quality. Accurate seam allowances and smoothing out any wrinkles or creases that could affect your stitching quality.
Cleaning and Conditioning Leather
Before you fire up your sewing machine, proper leather cleaning and leather conditioning sets the foundation for success.
Use pH-balanced cleaners like Fiebing’s to remove dirt without damaging the surface. Follow with quality conditioner types like natural oils or commercial products, applying evenly using microfiber cloths.
Cleaning frequency should align with your project timeline—clean once, condition thoroughly. For delicate items, consider pH neutral detergents to maintain the material’s integrity.
Allow complete drying to prevent presser foot marks and guarantee the best leather durability. This essential leather care process enhances leather longevity and prevents cracking during stitching.
Marking Leather Seam Allowances
Accurate measurements start with selecting proper marking tools for your leather project. The chalk vs. pen debate matters—chalk provides temporary markings that disappear, while pens create permanent marks you can’t remove.
- Apply chalk marking on leather’s right side for visible seam allowance guides during sewing
- Use pencil marking on the wrong side for pattern placement and cutting references
- Test marking tools on scraps first to verify clean removal and prevent permanent damage
Smart leather sewing begins with precise temporary markings.
Smoothing Leather Wrinkles and Creases
Wrinkled leather can derail your leather sewing project from the start.
Place your leather on a clean, flat surface and secure with weights. For persistent creases, try gentle leather steaming or rolling methods with a bone folder.
Avoid ironing leather directly—use a pressing cloth instead. Quality leather conditioners keep material supple and prevent future wrinkles.
When sewing leather becomes challenging, consider professional treatment for severely damaged hides. Your leather sewing machine performs better with properly prepared materials.
Selecting Sewing Machine Tools
You’ll need specialized tools to successfully sew leather, including leather needles with cutting blades, heavy-duty thread like nylon upholstery thread, and proper cutting equipment.
The right tools make the difference between professional results and frustrating struggles with torn seams, broken needles, and damaged leather.
Choosing Right Leather Needle Size
Your leather needle selection determines whether you’ll create professional seams or struggle with skipped stitches and torn material.
Machine compatibility starts with understanding that leather sewing machine needles differ substantially from standard fabric needles.
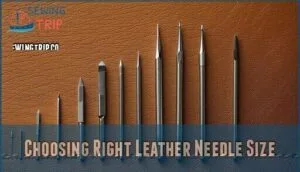
Here’s your Needle Size Chart for ideal leather sewing results:
- Thin leather (1-2oz) – Use 90/14 needles for delicate hides
- Medium leather (3-5oz) – Choose 100/16 to 110/18 needles
- Thick leather (6-9oz) – Select 120/19 to 130/21 needles
- Heavy leather (10oz+) – Use 140/22 or larger needles
Diamond point needles penetrate cleanly, avoiding skipped stitches that plague many leather projects.
Consider that needle size affects stitching when selecting your equipment.
Selecting Suitable Thread Type and Color
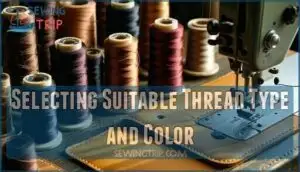
Your Thread Material choice makes or breaks leather projects. Bonded nylon thread delivers unmatched strength for bags and belts, while polyester thread offers UV Resistance for outdoor gear.
Match Thread Weight to your needle—heavy duty thread prevents breakage on thick leather. Color Matching creates visual impact: contrasting colors showcase stitching skills, matching tones appear professional.
Consider Special Finishes like waxed coatings for smoother stitching. Many leatherworkers find nylon thread is ideal for their projects.
Perfect thread tension depends on selecting quality leather thread that complements your material’s thickness and intended use.
Using Rotary Cutter and Mat for Cutting
Sharp rotary cutter blades slice through leather cleanly—dull ones create ragged edges that compromise your project.
Your cutting mat should be self-healing and spacious enough for pattern pieces.
Blade sharpness determines cutting quality, so replace blades regularly.
For cutting curves, move slowly and let the blade follow your marked lines.
When layering leather pieces, secure them with weights to prevent shifting.
Always practice safety practices by cutting away from your body and retracting the blade after use.
Proper mat maintenance includes cleaning debris and rotating the surface regularly.
Maintaining proper blade performance guarantees clean cuts.
Mastering Sewing Techniques
Once you’ve gathered the right tools and prepared your leather, you’ll need to master the specific techniques that make leather sewing successful.
These fundamental skills include guiding leather smoothly through your machine, adjusting stitch settings for different leather thicknesses, and properly finishing seams to create professional-quality results.
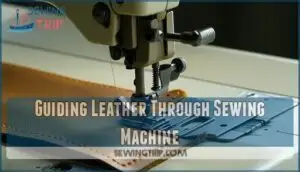
Guiding Leather Through Sewing Machine
Now that you’ve selected the right tools, hand guiding techniques become your secret weapon for professional results.
Support your leather’s weight while maintaining speed control—let your walking foot and feed dog adjustment work together.
Your leather sewing machine foot creates stitch consistency when you guide rather than force the material.
Presser foot choice matters, but gentle guidance with your sewing machine for leather prevents stretching and guarantees leather sewing machine settings perform at their best.
For larger projects, consider how flatbed machines offer space.
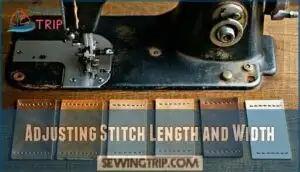
Adjusting Stitch Length and Width
Perfect machine guidance sets you up for the next critical step: dialing in your settings.
Master your settings—transform amateur stitches into professional craftsmanship with precision adjustments.
Adjusting stitch length and width transforms your leather projects from amateur attempts into professional masterpieces. Start with 4mm stitch length for most leather—longer than fabric’s standard 3mm. Your sewing machine settings directly impact seam durability and aesthetic considerations.
Consider these leather sewing machine adjustments:
- Thick leather: Requires longer stitches for proper penetration
- Delicate work: Shorter lengths create refined, elegant appearance
- Heavy-duty seams: Wider stitches distribute stress across leather thickness
Experiment with leather stitch types until you find your sweet spot.
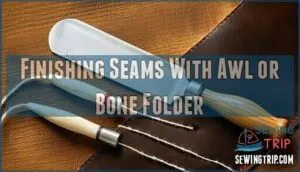
Finishing Seams With Awl or Bone Folder
Once you’ve set your stitch length and width correctly, finishing those seams properly separates amateur work from professional results.
Your awl becomes invaluable for Awl Stitch Securing – gently push thread ends through the leather backing for clean finishes. The bone folder excels at Bone Folder Creasing, creating sharp edges along seam lines through leather sewing techniques.
For specialized tools, consider exploring options for awl stitch products.
| Tool | Primary Function | Best Application |
|---|---|---|
| Awl | Thread securing | Handsewing reinforcement |
| Bone folder | Edge creasing | Leather edges finishing |
| Combined use | Seam Reinforcement Methods | Decorative Seam Accents |
These Edge Finishing Techniques transform basic stitching into polished craftsmanship.
Troubleshooting Common Issues
Even experienced sewers encounter problems when working with leather, from broken threads to machine jams that can frustrate your progress.
Understanding how to identify and fix these common issues will save you time, protect your equipment, and guarantee your leather projects turn out professional-looking every time.
Resolving Thread Breakage and Tension
Breaking thread during leather projects signals something’s wrong with your setup, but fixing it’s straightforward.
When your sewing machine tension acts up, follow these steps:
- Adjust both tensions – Leather thickness requires tighter top and bobbin settings than fabric
- Replace your leather needle – Fresh needles prevent thread snags and breaks
- Check thread quality – Heavy duty thread handles leather’s demands better than regular polyester
- Perform machine maintenance – Re-thread completely with presser foot raised for proper tension paths
Proper tension adjustment and needle size selection solve most breaking thread problems you’ll encounter.
Preventing Leather Damage and Distortion
Protecting your leather from damage starts with proper Needle Size selection and correct Thread Tension adjustments.
Support leather underneath while sewing to prevent sagging. Never pull or stretch material—guide it gently and let your machine handle the work.
The right Presser Foot prevents marking, while appropriate Stitch Length reduces perforation.
Always Scrap Practice first to test settings. These leather sewing tips keep projects looking professional and prevent costly mistakes.
Maintaining Sewing Machine Performance
Beyond protecting your leather from harm, your machine demands attention too. Machine Cleaning after leather projects prevents debris buildup that kills performance. Needle Replacement every few hours maintains clean cuts through tough hides.
Follow your Lubrication Schedule with recommended oils for smooth Motor Maintenance. Tension Calibration adjustments accommodate varying leather weights, ensuring consistent sewing machine performance and sewing machine durability.
- Feel the satisfaction of perfectly smooth stitches every time
- Experience the confidence of a well-maintained, reliable machine
- Enjoy years of leather crafting without costly repairs
- Achieve professional results that make you proud
Frequently Asked Questions (FAQs)
What kind of sewing machine do I need for leather?
Ninety percent of standard machines can’t handle leather’s thickness.
You’ll need a heavy-duty machine with adjustable tension, walking foot capability, and motor power exceeding 5 amps for consistent stitching through thick materials, utilizing a walking foot capability.
What setting do you sew leather on?
You’ll want to use longer stitches, reduce presser foot pressure, and loosen thread tension slightly.
Set your machine to 3-4 stitches per inch and use a leather needle for clean penetration through tough material.
Can I sew leather with a regular sewing machine?
Like threading a needle through determination, you can sew leather with your regular machine. Use leather needles, heavy-duty thread, adjust tension, and employ a walking foot for success.
What stitch to use when sewing leather?
You’ll want longer stitches when sewing leather—typically 3-6mm stitch length works best.
This reduces perforation lines that can weaken your seams.
Test different settings on scrap leather first to find what works, as complete concepts like these are crucial for a strong seam.
How to store leather projects between sewing sessions?
Like a precious heirloom, your leather projects need proper shelter.
Store them flat between acid-free tissue paper in breathable cotton bags.
Keep them away from direct sunlight and humidity to prevent cracking or warping, as this is crucial for maintaining their quality, and proper care will ensure they last.
What safety precautions when sewing thick leather?
Use leather needles to prevent breakage, work slowly to maintain control.
Keep fingers away from the needle area, make certain proper lighting.
Wear safety glasses to protect against flying debris or broken needle fragments.
Can vintage sewing machines handle leather work?
Can your trusty vintage machine rise to leather’s challenge?
Most vintage machines pack enough punch for thin to medium leather, but you’ll need leather needles, heavy thread, and patience—they weren’t built for today’s thick hides.
How to repair mistakes in leather stitching?
Carefully remove incorrect stitches using a seam ripper, working slowly to avoid tearing leather.
Re-stitch through existing holes when possible, or adjust your line slightly to prevent weakening the material with multiple perforations, using a seam ripper and working to avoid tearing.
Which leather projects are best for beginners?
Start with simple accessories like keychains, bookmarks, or coasters.
These small projects let you practice basic stitching without wasting expensive leather.
You’ll build confidence while mastering essential techniques before tackling larger items.
Can I sew leather on a regular sewing machine?
Picture your trusty home machine humming through supple cowhide like butter.
Yes, you can sew leather on a regular sewing machine with proper leather needles, heavy-duty thread, and adjusted settings for beautiful results.
Conclusion
Mastering leather work transforms your crafting abilities forever.
You’ve learned every essential technique in this thorough sewing machine guide for leather, from selecting proper materials to troubleshooting common problems.
Your machine now handles thick hides with confidence, producing professional-quality seams that withstand years of use.
Remember to practice consistently on scraps, maintain your equipment regularly, and never rush through projects.
With patience and these proven methods, you’ll create stunning leather pieces that showcase true craftsmanship and durability.

