This site is supported by our readers. We may earn a commission, at no cost to you, if you purchase through links.
 You can master hand sewing mending clothes by learning five essential stitches.
The running stitch works perfectly for simple repairs and beginners. The back stitch when you need extra strength – it’s your go-to for stressed seams.
The whip stitch excels at binding raw edges, while the slip stitch creates nearly invisible repairs. For cross-hatched reinforcement, try the catch stitch.
Each technique serves different mending scenarios, from tiny tears to major holes. Start with basic cotton thread and sharp needles.
Practice on fabric scraps first – your fingers will thank you later. These foundational skills open up countless repair possibilities with the use of the running stitch.
Table Of Contents
Key Takeaways
- Master five essential stitches – You will handle most clothing repairs with the running stitch, back stitch, whip stitch, slip stitch, and catch stitch, each serving different repair scenarios, from simple tears to stressed seams.
- Start with proper tools and materials – You will need sharp needles, matching thread, and good scissors to create professional-looking repairs that last, with cotton thread for natural fabrics and polyester for synthetic materials.
- Practice reinforcement techniques – You will extend garment life significantly by using the back stitch for high-stress areas, adding patches for large holes, and applying fusible interfacing for weak fabric areas.
- Embrace sustainable mending – You will reduce textile waste and save money while turning repairs into creative expression through visible mending techniques that celebrate imperfection as design.
Basic Hand Sewing Stitches
You’ll master four essential hand sewing stitches that form the foundation of clothing repair and mending.
These basic techniques – running stitch, back stitch, whip stitch, and slip stitch – require only a needle, thread, and patience to execute effectively.
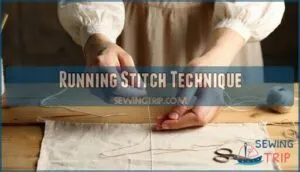
Running Stitch Technique
The running stitch forms the foundation of hand sewing repairs, offering simplicity and effectiveness for mending clothes.
You’ll thread your needle, secure the fabric, and create even stitches by weaving through the material.
- Stitch Length: Keep stitches consistent at 1/8 to 1/4 inch for ideal strength and appearance
- Thread Tension: Maintain moderate tension to prevent puckering while ensuring secure hold
- Needle Selection: Choose needle size based on fabric weight – fine needles for delicate materials, heavy-duty for denim
Master your sewing speed through practice, adjusting fabric choice considerations as needed.
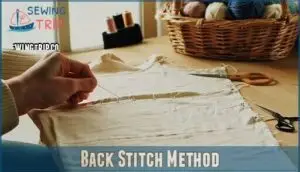
Back Stitch Method
While running stitch handles basic repairs, back stitch creates secure seams that won’t fail under stress.
You’ll overlap each stitch to form a continuous line of thread, making it perfect for mending torn seams and high-wear areas.
| Stitch Aspect | Back Stitch Details |
|---|---|
| Technique | Overlap stitches working right to left |
| Strength | Creates strongest hand-sewn seam |
| Best Uses | Torn seams, stress points, repairs |
Master proper stitch tension and thread selection for fabric reinforcement that lasts.
This hand sewing technique transforms garment mending from temporary fixes to permanent solutions.
Understanding backstitch techniques is essential for achieving professional-looking repairs.
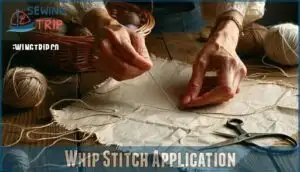
Whip Stitch Application
Whip stitch creates secure edge finishing by wrapping thread around fabric edges, preventing fraying and providing durable seam closure.
You’ll thread your needle, position the fabric, then make diagonal stitches that encircle the raw edge.
This hand sewing technique works perfectly for fabric wrapping applications where you need strong fray prevention. Maintain consistent thread tension while making evenly spaced stitches to mend tears effectively using proper sewing techniques for reliable fabric repair.
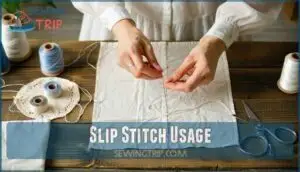
Slip Stitch Usage
Slip stitch creates your garment’s secret weapon for invisible hems and seamless seam repair. This hand sewing technique hides stitches between fabric layers, making mending clothes look professional.
Here’s how to master slip stitch for invisible stitches techniques:
- Fabric Binding – Catch only one thread from the main fabric
- Hem Finishing – Pull thread gently to avoid puckering
- Edge Stitching – Keep stitches 1/4 inch apart for strength
- Seam Repair – Work from right to left for control
- Invisible Hems – Match thread color perfectly to fabric
Mending Tears and Holes
You’ll encounter fabric tears and holes in your clothes more often than you’d expect. These common damage types require specific repair techniques to restore your garments effectively.
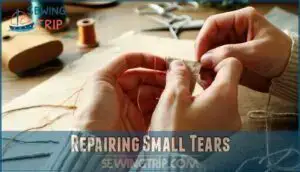
Repairing Small Tears
Addressing small tears quickly prevents them from expanding into larger problems.
You’ll want to align fabric edges carefully and use matching thread for invisible repairs.
Start with a running stitch for basic tear repair, then reinforce with back stitches for durability.
Small mends work best when you trim frayed edges first and apply gentle tension while stitching to avoid puckering.
Fixing Large Holes
Large holes demand fabric patching and darning techniques for effective repair.
You’ll need matching fabric pieces and proper thread selection to restore garment integrity.
Cut patches slightly larger than holes, then secure with hand sewing using running or back stitches.
For knit fabrics, use darning techniques with perpendicular weaving motions to provide seam strengthening and extend clothing life.
This hole reinforcement approach provides skilled textile repair methods.
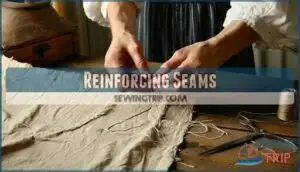
Reinforcing Seams
Worn-out seams often split under pressure, but seam reinforcement prevents future failures.
Back stitch creates the strongest repair for high-stress areas, while proper thread tension maintains fabric integrity without puckering.
- Choose heavy-duty thread – Select polyester or cotton thread that matches your fabric weight for maximum seam strengthening
- Maintain consistent stitch length – Keep stitches 1/8 to 1/4 inch apart for balanced strength and flexibility in hand sewing
- Control thread tension – Pull thread snugly but not tight to prevent fabric bunching during seam repairs
- Reinforce stress points – Double-stitch areas like pocket corners and armholes using proven hand stitching techniques
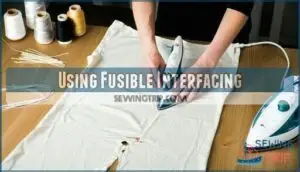
Using Fusible Interfacing
Fusible interfacing transforms weak fabric into sturdy material with simple heat application.
Cut your fabric stabilizer slightly smaller than the repair area, then press with appropriate iron settings for 10-15 seconds.
This reinforcement technique creates permanent bonds without hand sewing, making mending clothes faster while providing professional results for fabric repair.
To achieve the best results, understanding fusible interfacing types is essential for selecting the right material and ensuring a successful fabric repair.
Sewing Buttons and Zippers
You’ll encounter loose buttons and broken zippers more often than you’d expect, making these essential repair skills worth mastering.
Button sewing requires matching thread and securing placement, while zipper replacement demands careful removal and precise installation of the new component.
Button Sewing Technique
Thread choice matters most when sewing buttons, match thread color to your fabric for invisible repairs, or use contrasting colors for decorative effects.
Choose the perfect thread – it’s the invisible hero that makes or breaks your repair.
Select polyester thread for durability and cotton for natural fabrics.
Position buttons carefully using existing holes as guides, secure with tight stitches through button holes, maintaining consistent sewing speed.
Different button types require specific stitch patterns – four-hole buttons need cross or parallel stitches.
Zipper Replacement Method
Zipper replacement transforms damaged garments into functional pieces.
Start with zipper removal using a seam ripper, carefully extracting old hardware.
Position your new zipper along the seam, ensuring proper zipper alignment with fabric edges.
Use backstitch sewing technique to secure the zipper tape firmly. Complete the hand sewing repair with thorough zipper testing to verify smooth operation.
Hidden Button Sewing
Hidden buttons demand precision in your button placement and thread matching.
You’ll master the invisible stitch technique by securing anchor knots on the fabric’s underside. Your discreet finishing relies on matching thread color perfectly with the garment.
Practice this hand sewing method using ladder stitch patterns for professional results that remain completely hidden from view.
- Freedom from embarrassing gaps – No more awkward shirt openings or jacket fronts that won’t stay closed
- Confidence in every outfit – Walk tall knowing your hidden buttons will hold strong through any movement
- Pride in your craftsmanship – Create repairs so seamless that even you’ll forget where the original buttons were
Thread Selection Tips
Smart thread selection makes the difference between amateur and professional repairs.
Match thread colors to your fabric’s dominant hue for invisible mending. Cotton threads work best for natural fabrics, while polyester handles synthetic materials.
For hand sewing repairs, choose slightly darker thread shades since they appear lighter when sewn.
Embroidery thread adds decorative flair to visible mending projects, and professional repairs can be achieved with the right thread selection.
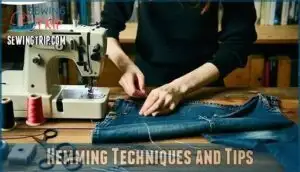
Hemming Techniques and Tips
You can master hemming techniques to fix loose hems and adjust garment length with precision.
These methods use basic stitches like running stitch and blind hem stitch to create professional-looking results that save money on tailoring costs, utilizing techniques that help you achieve precision.
Hand Hemming Method
Moving from button and zipper work, hand hemming puts you in complete control of your garment’s length. This technique requires patience but delivers professional results.
Here’s your step-by-step approach:
- Measure and mark your desired hem length with pins
- Fold fabric evenly, creating clean fabric folds for consistency
- Use running stitch to secure folded hems with small, even stitches
- Keep stitches loose enough to prevent puckering but tight enough for durability
- Press finished hem with iron for crisp, professional appearance
Hand stitching hems gives you precision that machines can’t match. You’ll control every stitch, ensuring perfect alignment and tension throughout your hem repair project. Mastering sewing hem tips is essential for achieving professional-looking results in your hand hemming projects.
Machine Hemming Technique
When working with machine hemming on your sewing setup, proper machine settings determine success.
You’ll need to adjust stitch length and thread tension for different fabrics.
| Setting | Lightweight Fabrics | Heavy Fabrics |
|---|---|---|
| Stitch Length | 2.0-2.5mm | 3.0-3.5mm |
| Thread Tension | 3-4 | 5-6 |
| Needle Size | 70/10-80/12 | 90/14-100/16 |
Machine hemming offers superior hemming speed compared to hand hemming.
Start with proper fabric folding, then test your machine settings on scraps first.
Blind Hem Stitch Application
The blind hem stitch creates invisible hems by catching only a few fabric threads from the garment’s front side.
You’ll fold the hem fabric and insert your needle almost parallel to the edge, maintaining balanced stitch tension to prevent puckering.
This hand sewing technique works best on lightweight fabrics using matching thread for true invisibility.
Fabric Folding Tips
Proper fabric folding transforms hemming from frustrating to satisfying.
Master these fabric folding techniques to achieve professional results every time.
- Press sharp creases – Use an iron to create clean fold lines before sewing
- Measure twice, fold once – Double-check measurements to avoid uneven hems
- Pin strategically – Place pins perpendicular to fold for easy removal while stitching
- Grade thick seams – Trim layers to reduce bulk at folded edges
- Test fold tension – Confirm fabric lies flat without puckering or stretching
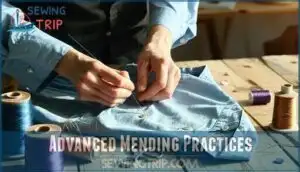
Advanced Mending Practices
Once you’ve mastered basic stitches, you’ll want to explore advanced techniques that tackle complex repairs and add creative flair to your mending work.
These specialized methods transform ordinary fixes into professional-quality repairs that can even enhance your garment’s original design.
Catch Stitch Technique
Catch stitch creates flexible seams that move with your fabric, making it perfect for stretchy materials and high-stress areas.
This zigzag pattern distributes tension across multiple points, preventing tears at single stress points.
You’ll work from left to right, creating small alternating stitches that form an X-pattern, and the catch stitch excels at fabric joining while providing reinforcement stitches that won’t snap under pressure, making it invaluable for mending clothes effectively.
Invisible Stitch Method
The invisible stitch method creates seamless repairs that vanish into your fabric like a magic trick.
This hand sewing technique uses the ladder stitch to connect torn edges or secure hems without visible stitches on the garment’s surface.
Thread your needle with matching thread, then alternate tiny catches between fabric layers.
This blind hem stitch excels at discreet repair work, making hidden seams look professionally finished.
Mastering invisible stitching methods is essential for achieving professional-looking results in sewing projects.
Basting Stitch Application
Basting stitch creates temporary seams for testing garment fit before permanent stitching.
You’ll use loose, long running stitches with minimal stitch tension for easy removal. This hand sewing technique helps with fabric prep and positioning adjustments.
Keep your sewing aids handy – basting tips include using contrasting thread colors for visibility. These sewing basics guarantee accurate hand stitching fabric repair without commitment, using a temporary seam.
Visible Mending Tips
Transform damage into design with visible mending techniques that celebrate imperfection.
Choose colorful repairs using decorative stitches and creative patches to turn worn spots into textile art.
This sustainable fashion approach makes clothing repair a form of self-expression.
Embrace contrasting threads, bold patterns, and hand sewing methods that showcase your mending skills while extending garment life through intentional fabric repair, using techniques that highlight textile art and sustainable fashion.
Sustainable Mending Approaches
You’ll transform clothing repair from a mundane chore into an eco-conscious practice that reduces textile waste and saves money.
This approach combines traditional mending techniques with creative flair, turning necessary repairs into opportunities for artistic expression while supporting sustainable fashion choices.
Reducing Waste Through Mending
Every mended piece equals one less item in landfills.
Every stitch you make fights fast fashion’s wasteful grip on our planet.
When you repair instead of replace, you’re practicing waste reduction and eco mending that transforms sustainable fashion from buzzword to lifestyle.
Your hand sewing skills become garment rescue missions, turning textile conservation into personal empowerment.
Each stitch saves resources, money, and proves that mending clothes creates sustainable living through fabric repair and clothing alteration choices.
Eco-Friendly Mending Materials
Choose natural fibers and recycled materials for eco-friendly mending that reduces environmental impact.
Organic cotton threads avoid harmful pesticides while supporting sustainable farming. Hemp fibers provide exceptional strength for reinforcing worn areas.
Recycled polyester threads divert plastic waste from landfills. Upcycled fabric patches extend textile lifecycles.
Biodegradable yarns decompose naturally without harming ecosystems. Using organic cotton options can further enhance the sustainability of mending projects, promoting an overall eco-friendly approach.
Creative Mending Techniques
Creative mending transforms damaged clothing into personal statements through intentional design choices.
You’ll turn tears into opportunities for self-expression while extending garment life. This hand sewing technique embraces visible repairs as decorative elements rather than hiding them.
- Contrasting Thread Darning – Use bright embroidery floss to highlight repairs with geometric patterns
- Decorative Fabric Patches – Apply colorful patches with blanket stitches for bold visual impact
- Spiral Stitching – Create artistic swirls over small holes using running stitches in metallic thread
- Star Pattern Repairs – Cover tears with star-shaped visible mending stitches for playful textile repair
Textile Art and Mending
Textile artists transform damaged garments into stunning artwork through visible mending techniques.
You’ll use embroidery designs and weaving techniques to create beautiful fabric embellishment. Yarn repair becomes decorative when you embrace tapestry restoration methods.
These hand sewing techniques turn clothing repair into artistic expression while promoting textile recycling.
| Traditional Repair | Textile Art Approach |
|---|---|
| Hide fabric tear repair | Highlight with embroidery designs |
| Match thread colors | Use contrasting yarn repair |
| Invisible mending | Create visible mending showcase |
| Quick fixes | Detailed weaving techniques |
Essential Hand Sewing Tools
You’ll need the right tools to make mending clothes both effective and enjoyable. Having quality supplies guarantees your repairs last longer and appear more professional.
Needle and Thread Selection
Your needle and thread choices make or break your mending project.
Match thread thickness to fabric weight – heavy fabrics need sturdy thread, delicate materials require fine options.
Select needle sizes based on fabric density and thread type.
Color selection matters most for invisible repairs, while contrasting threads work for visible mending.
Cotton thread suits natural fabrics, polyester works universally.
Keep various thread types and sewing needles handy for different hand sewing technique applications.
Understanding sewing thread types is essential for successful mending projects.
Scissors and Seam Ripper Usage
Sharp scissors and a reliable seam ripper are your best friends for precise clothing repair.
Keep embroidery scissors handy for detailed thread removal and fabric trimming.
A seam ripper helps you carefully undo mistakes without damaging fabric.
Regular scissor maintenance keeps blades sharp for clean cuts.
Master these cutting techniques to make hand sewing repairs look professional and last longer.
Understanding sewing kit essentials is vital for selecting the right tools for your projects, which is key to successful sewing and creating a professional finish.
Thimble and Bobbin Tips
Thimble Care starts with proper sizing – you’ll want a snug fit that won’t slip off during hand sewing technique.
Clean your thimble regularly and store it safely to prevent dents.
For Bobbin Management, wind thread evenly to maintain consistent Thread Tension.
Keep multiple bobbins organized by color for quick access.
Proper Needle Handling and Sewing Ergonomics prevent finger fatigue during extended sewing basics sessions.
Fabric Patching Techniques
When patching fabric, you’ll create stronger repairs by choosing the right patch material and placement technique.
Cut patches slightly larger than the damaged area, allowing extra fabric for secure attachment. Position patches on the inside for invisible repairs or outside for decorative effects.
Match thread color closely for seamless blending. For denim patching, use sturdy cotton patches with reinforced edges.
Leather patching requires specialized needles and strong thread for durability. Understanding proper fabric patch techniques is essential for a long-lasting repair.
Mending and Repair Benefits
Hand sewing mending clothes offers significant advantages that make it a valuable skill for anyone looking to maintain their wardrobe efficiently.
You’ll save money, extend garment life, support sustainability, and develop practical repair skills that serve you for years to come.
The ability to mend clothes allows you to develop practical repair skills.
Saving Time and Money
DIY repairs deliver impressive cost savings – you’ll slash clothing repair expenses by up to 70% compared to professional services.
Simple hand sewing technique fixes cost under $2 in materials versus $15-50 for shop repairs.
Time management improves dramatically since basic clothing repair takes just 30 minutes at home.
Money savings accumulate quickly through frugal living practices and visible mending approaches that extend garment usefulness substantially, using techniques that promote cost savings.
Extending Garment Life
Proper fabric care transforms worn garments into lasting wardrobe staples.
Hand sewing techniques and clothing repair methods extend textile life substantially through targeted clothing maintenance. Garment restoration becomes your gateway to textile preservation mastery.
- Doubled lifespan: Strategic sewing for durability prevents premature disposal
- Cost savings: Visible mending costs pennies compared to replacement purchases
- Personal satisfaction: Each repair strengthens your connection to cherished pieces
- Skill building: Every mend improves your garment restoration expertise
Promoting Sustainability
Hand mending transforms old clothes into lasting treasures while championing eco-friendly practices.
You’re not just fixing fabric—you’re fighting fast fashion’s wasteful cycle. Each stitch reduces textile waste heading to landfills, making sustainable living achievable through simple actions.
Green fashion starts with your needle and thread, proving eco mending creates meaningful environmental impact.
| Mending Benefit | Environmental Impact |
|---|---|
| Clothing Repair | Prevents 1 garment from landfill |
| Zero Waste Living | Reduces textile waste by 80% |
| Sewing for Sustainability | Cuts carbon footprint substantially |
Improving Mending Skills
Regular practice transforms basic sewing knowledge into reliable mending skills.
Start with simple repairs like loose buttons or small tears.
Each project builds confidence and muscle memory.
Keep a practice fabric scrap for testing new techniques.
Focus on thread choices and stitch mastery – these fundamentals improve every repair.
Hand stitching fabric repair becomes second nature with consistent practice and proper fabric care habits.
Frequently Asked Questions (FAQs)
What is the best stitch for repairing clothes?
Back stitch is your best friend for clothing repairs.
It creates strong, durable seams that won’t fail under stress.
Use it for torn seams, ripped pockets, and areas needing extra strength.
How to mend clothes without a sewing machine?
Like a skilled tailor threading a needle in dim light, you’ll need patience and the right technique.
Use running stitch for small tears, backstitch for seams, and slip stitch for invisible hems.
Match thread color, trim loose threads first, and reinforce weak spots with patches.
Is it okay to hand sew clothes?
Hand sewing is perfectly fine and often superior for detailed work.
You’ll get stronger, more controlled stitches than machines for repairs, hems, and delicate fabrics.
It’s quieter, portable, and gives you complete control over every stitch.
How do I choose the right needle size for different fabrics?
Choose needle size based on fabric weight: fine needles (size 9-11) for lightweight fabrics like silk.
Medium needles (size 12-14) for cotton.
Heavy-duty needles (size 16-18) for denim or canvas.
How can I fix a snag without making it worse?
Stop pulling immediately to avoid making the hole larger.
Use a needle to gently work the snag back through the fabric weave.
For stubborn snags, carefully trim the pulled thread close to the fabric surface instead of yanking it completely through, and always work with care to preserve the fabric.
When should I use a thimble for hand sewing?
A thimble’s your finger’s armor when threading through thick fabrics.
You’ll need one for heavy materials like denim or canvas, lengthy projects that strain your fingertip, or when pushing needles through multiple layers repeatedly, which can be a lengthy process.
How do I remove old stitches without damaging fabric?
Use a seam ripper to carefully cut through old stitches, working from the backside when possible.
Pull threads gently to avoid fabric stress.
Small scissors work for tight spaces, but move slowly to prevent accidental cuts, and always consider using a seam ripper to carefully manage the process.
Conclusion
Surprisingly, your grandmother’s mending wisdom wasn’t just old-fashioned frugality—it was environmental activism before it was trendy.
Hand sewing mending clothes transforms you from a fashion victim into a repair hero. You’ve learned the running stitch, mastered reinforcement techniques, and discovered sustainable approaches.
These skills save money, extend garment life, and reduce textile waste. Your needle and thread now serve as tools for both practical repairs and creative expression, proving that mending clothes is both economical and ecological.
- https://www.thesprucecrafts.com/sew-a-running-stitch-2978418
- https://www.youtube.com/channel/UCQlGBspQdj17WOPBQMT1k9A
- https://www.thesewingdirectory.co.uk/introduction-to-interfacing/
- https://www.moodfabrics.com/blog/all-about-interfacing/
- https://www.bradschultzdesign.com/post/fusible-vs-sew-in-interfacing-comprehensive-guide

