This site is supported by our readers. We may earn a commission, at no cost to you, if you purchase through links.

Start by checking your thread tension—it should feel like a firm handshake, not a death grip. Re-thread your machine completely, making sure the thread follows every guide.
Switch to a fresh needle that matches your fabric weight. Stop tugging or pushing your fabric; let the machine do its job while you guide gently.
Check your bobbins winding too—lumpy bobbins create lumpy stitches. Sometimes the simplest fixes yield the most dramatic improvements in your sewing game.
Table Of Contents
Key Takeaways
- Check your thread tension first – Adjust it to feel like a firm handshake (between 3-4 on most machines) and rethread completely through every guide and tension disc.
- Replace your needle with the right size – A dull or wrong-sized needle fights your fabric instead of gliding through it smoothly, causing skipped and uneven stitches.
- Let your machine do the work – Stop pulling or pushing fabric; guide it gently while the feed dogs control movement to prevent irregular stitch formation.
- Wind your bobbins properly – Slow, steady winding creates consistent tension, while rushed or uneven winding causes lumpy stitches throughout your project.
Causes of Uneven Stitches
Uneven stitches can turn your sewing project from a masterpiece into a frustrating mess, but understanding the root causes makes fixing them straightforward.
You’ll encounter this common problem when thread tension isn’t balanced, your machine isn’t threaded correctly, you’re using the wrong needle, you’re manipulating fabric too much, or your bobbin isn’t wound properly.
The issues that lead to uneven stitches include incorrect machine setup, improper fabric handling, and bobbin problems, all of which can be easily addressed once identified.
Incorrect Thread Tension
Your sewing machine tension acts like a delicate dance between upper and lower threads.
Perfect tension balance creates flawless stitches every single time.
When this tension balance goes awry, you’ll notice loopy stitches on top or puckered fabric below.
Thread breaks often signal overly tight settings, while loose tension creates messy loops.
The tension dial and bobbin tension work together through tension discs to create perfect stitches when properly calibrated, ensuring a delicate dance.
Improper Threading
When you don’t follow the proper threading order, your sewing machine throws a tantrum with uneven stitches.
The thread path must snake through every guide, tension disc, and takeup lever exactly as your manual shows.
Skipping even one checkpoint creates tension problems that manifest as loops, puckers, or skipped stitches.
Always rethread completely when switching projects—it’s your first line of defense against threading-related disasters, and this simple step can prevent tension problems and skipped stitches.
Damaged or Incorrectly Sized Needles
A dull needle is like trying to cut butter with a spoon—it just won’t work smoothly. Needle damage signs include burrs, bends, or dull points that create skipped stitches and fabric snags.
A dull needle fights your fabric instead of gliding through it smoothly.
Proper fabric needle pairing prevents these issues entirely. Find replacements for worn sewing tools at online retailers.
Here’s your needle size guide:
- Size 60/8: Delicate fabrics like silk or chiffon
- Size 70/10: Lightweight cottons and synthetic blends
- Size 80/12: Medium-weight fabrics including denim
- Size 90/14: Heavy fabrics like canvas or upholstery
- Size 100/16: Extra-heavy materials requiring specialty needle types.
Bent needle risks include thread breakage and uneven stitch formation. Replace needles every 8-10 hours of sewing or when needle issues appear.
Pulling or Pushing Fabric
Your hands shouldn’t fight the machine when sewing. Fabric manipulation disrupts natural fabric feeding, creating uneven stitches and puckered seams.
Instead of pulling or pushing, use gentle hand placement to guide fabric while maintaining consistent speed. Let the feed dog impact do the work—your job is simply guiding fabric through the needle.
Poor fabric handling causes fabric feed issues that result in irregular stitch formation and compromised seam quality. Incorrect tension can be a factor, so adjust thread tension accordingly.
Uneven Bobbin Winding
Poor bobbin-winding technique creates tension nightmares that’ll haunt your seams.
When you wind thread too quickly or unevenly, you’re setting yourself up for bobbins tension issues that cause irregular stitches.
Slow, steady winding creates consistent bobbin fill, while rushed winding produces loose spots that affect bobbin thread delivery.
Different thread types require adjusted winding speeds—delicate threads need gentler handling than heavy-duty varieties.
Check your bobbin case for proper bobbin insertion to prevent threading disasters and ensure proper bobbin insertion.
Fixing Uneven Stitches
Beyond identifying the root cause, you’ll need to take systematic action to restore stitch uniformity.
Start with needle replacement – a dull or bent needle creates havoc with thread formation. Check your thread quality next; cheap thread breaks easily and feeds unevenly through tension discs.
Clean your feed dog thoroughly, removing lint buildup that prevents proper fabric movement. Adjust your stitch length based on fabric weight – shorter lengths work better for delicate materials.
Fine-tune thread tension gradually, testing on scraps until you achieve balanced stitches without puckering. Consider bobbin tension if upper adjustments don’t solve the problem.
For challenging fabrics, stabilizer use prevents stretching during stitching. When working with multiple layers or slippery materials, a walking foot guarantees even fabric feeding.
Remember that sewing machine troubleshooting often requires patience – make one adjustment at a time to identify what actually fixes your uneven stitches.
Troubleshooting Stitch Issues
Before you start troubleshooting, you’ll need to identify exactly what’s going wrong with your stitches.
A systematic approach to examining your work will reveal whether you’re dealing with tension issues, threading problems, or mechanical malfunctions that require specific fixes.
Visual Inspection
Look closely at each stitch using a magnifying glass to spot telltale signs of uneven stitches.
Check for loop formation on fabric surfaces, pucker detection around seam areas, and length inconsistency between individual stitches.
Examine seam straightness from multiple angles and identify stitch gaps that compromise stitch quality.
This visual assessment reveals stitch irregularities affecting overall stitch appearance.
Tactile Check
Feel your seams with gentle fingers to detect fabric bumps and stitch irregularities that visual inspection might miss.
Run your fingertips along the stitching line—smooth, even stitches indicate proper thread tension and stitch quality.
Bumpy or raised areas suggest tension imbalance between upper and bobbin threads.
This texture analysis helps identify where stitch length adjustment or bobbin tension corrections are needed for consistent seam feel.
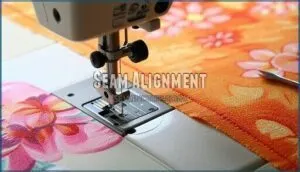
Seam Alignment
After checking for bumps and irregularities, examine your seam alignment to verify straight, consistent stitching. Poor seam alignment creates uneven stitches that affect overall stitch quality, making your project look unprofessional and affecting pattern accuracy.
Check these alignment factors:
- Seam Straightness – Verify your stitching line follows the intended path without wavering, preventing fabric creep that causes irregular thread tension
- Consistent Margins – Maintain uniform seam allowances throughout your project to guarantee proper sewing machine settings and matching points
- Pattern Accuracy – Confirm your seams align with pattern markings and construction guidelines for professional results.
Regular maintenance helps prevent thread tension issues.
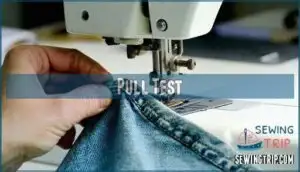
Pull Test
After checking seam alignment, you’ll want to perform a pull test to assess fabric distortion and stitch integrity.
Gently stretch the sewn seam to identify stress points where uneven stitches create weak areas.
This reveals whether your thread tension needs adjustments for ideal stitch quality.
| Pull Test Results | Likely Cause |
|---|---|
| Seam puckers when stretched | Excessive upper thread tension |
| Fabric tears at stitch line | Poor stitch integrity from tension imbalance |
| Uneven stretching response | Inconsistent tension balance throughout seam |
| Visible thread loops appear | Loose bobbin or upper thread tension |
| Seam strength varies along line | Multiple tension adjustments needed during sewing |
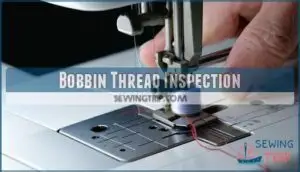
Bobbin Thread Inspection
Proper bobbin thread inspection reveals threading issues that cause uneven stitches. Check your sewing machine bobbin for correct insertion and smooth thread feed. Bobbin thread quality affects stitch balance, so make certain thread type compatibility with your upper thread for tension adjustment that yields the best results.
- Examine bobbin winding tension – Uneven winding creates inconsistent thread feed that disrupts stitch formation
- Verify correct bobbin insertion – Improper placement affects thread path and creates tension imbalances
- Check thread compatibility – Mismatched thread types between bobbin and upper threading cause irregular stitch patterns
Adjusting Machine Settings
When your sewing machine produces uneven stitches, adjusting the right settings can transform your results from frustrating to flawless.
These precise modifications target the root causes of stitch irregularities, giving you the control needed to achieve professional-quality seams every time.
Thread Tension Adjustment
Start by adjusting your upper thread tension dial between 3-4 for most fabric types.
Test stitching on scrap material reveals whether you’ve achieved proper tension balance. If loops appear on the fabric’s underside, decrease tension; loops on top mean increase it.
Incorrect threading can lead to random loops forming.
Thread type and fabric weight influence these sewing machine tension settings, so expert adjustments require patience and systematic testing for ideal stitch balance.
Stitch Length and Width Modification
Beyond tension adjustments, modifying your sewing machine stitch length and stitch width transforms stitch quality dramatically.
Standard stitch length sits between 2.0-3.0mm for medium fabrics, but fabric type demands specific stitch adjustments for maximum seam strength.
As a general rule, remember that feed dogs control the stitch length by moving fabric.
- Lightweight fabrics require shorter stitch settings (1.8-2.5mm) to prevent puckering and maintain stitch density
- Heavy materials need longer lengths (3.0-4.0mm) for smooth feeding and reduced thread breakage
- Specialty stitches benefit from decreased length and increased width for enhanced decorative stitching quality
Presser Foot Pressure Adjustment
Your machine’s presser foot pressure acts like a gentle but firm handshake—too light and fabric slips, too heavy and delicate materials get crushed.
Proper pressure settings guarantee smooth fabric feeding and prevent uneven stitches.
| Fabric Type | Pressure Setting | Specialty Feet |
|---|---|---|
| Delicate fabrics | Low (2-3) | Teflon foot |
| Standard cotton | Medium (4-6) | All-purpose foot |
| Heavy denim | High (7-8) | Denim foot |
Start pressure testing on fabric scraps before your main project.
Most sewing machine settings feature numbered dials or digital controls—adjust incrementally while monitoring stitch quality.
When presser foot pressure matches your fabric type, you’ll notice consistent feeding and improved thread tension balance.
Upper Thread Tension Adjustment
When adjusting upper thread tension, you’ll find the numbered dial typically ranges from 1-9, with 4-5 being standard starting points.
Different thread types require specific tension dial settings—heavier threads need lower numbers, while lightweight threads demand higher settings.
Always test fabric importance by sewing sample stitches before your main project, then make incremental tension changes using quarter-turn adjustments, and retest to ensure proper results.
Proper rethreading best practices guarantee accurate results.
Bobbin Thread Tension Adjustment
While upper thread tension handles the visible stitching, bobbin thread tension affects the underside quality. Bobbin tension requires delicate adjustments since it’s less accessible than upper controls.
You’ll typically adjust the small screw on your bobbin case using quarter-turns, testing each change on scrap fabric. Understanding balanced thread tension is key to achieving quality stitches.
Most sewing machines need minimal bobbin tension adjustments.
- Bobbin Case Types: Drop-in cases have built-in tension disks, while front-loading cases feature adjustable screws
- Tension Measurement Tools: Use bobbin tension gauges or perform the "dangle test" to check proper spring resistance
- Pre-wound Bobbins: These maintain consistent tension but may require slight adjustments depending on your sewing machine’s specifications
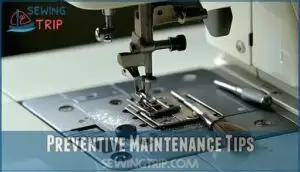
Preventive Maintenance Tips
The secret to consistently perfect stitches lies in establishing a solid preventive maintenance routine that keeps your machine running smoothly.
By taking a few minutes before each sewing session to clean, check, and prepare your equipment, you’ll avoid most stitch problems before they start, which is key to a smoothly running machine.
Regular Machine Cleaning
Think of your sewing machine like a car – it needs regular care to run smoothly.
Lint buildup under feed dogs causes major stitching headaches, so grab those tweezers and clean thoroughly. Don’t forget oiling mechanisms per your manual’s schedule.
Keeping it clean may require a specialized cleaning product. Focus on the bobbin area where thread debris loves to hide, and perform calibration checks monthly for consistent performance.
Proper Bobbin Winding
Proper bobbin winding forms the foundation of smooth sewing machine operation.
You’ll want to wind your bobbin at medium speed to create consistent layers without gaps or overlaps. Different thread types require specific bobbin tension adjustments—cotton needs tighter winding than polyester.
To prevent issues such as tangling, be sure to guide thread properly.
Always match your bobbin size to your sewing machine’s specifications, as incorrect sizing affects bobbin thread tension and creates uneven stitches throughout your project.
Avoiding Excessive Fabric Manipulation
Beyond proper bobbin winding, your fabric handling directly impacts stitch quality. Excessive pulling, pushing, or stretching during sewing disrupts the machine’s natural fabric feeding rhythm, creating uneven stitches that frustrate even experienced sewers.
Here’s how to master gentle fabric handling:
- Let the feed dogs do their job – Guide fabric lightly without forcing it through the machine, allowing natural fabric feeding to maintain consistent stitch formation.
- Keep your hands relaxed – Tense gripping causes fabric stretching that throws off stitch spacing and creates puckered seams.
- Maintain steady, controlled speed – Rushing leads to jerky movements that disrupt fabric stabilization and stitch consistency.
- Use proper posture – Sit upright with shoulders relaxed to maintain consistent pressure and smooth guiding techniques throughout your project.
- Support heavy fabrics – Let the machine table bear the weight instead of pulling fabric toward you, preventing distortion that causes irregular stitching.
Remember: your sewing machine is designed to move fabric automatically. Trust the mechanism and focus on gentle guidance rather than aggressive manipulation.
Using High-Quality Thread
High-quality thread transforms your sewing game—literally.
Premium brands like Gutermann and Coats & Clark feature consistent thread weight and superior thread material that reduces breakage by 30%.
When you match thread type to fabric, you’ll notice improved thread compatibility and enhanced stitch quality.
Store threads properly to maintain thread colorfastness and performance.
Consider purchasing reliable thread for best results.
Quality thread minimizes thread tension issues, protecting your needle and delivering professional results every time, with superior thread material.
Monitoring Stitches During Sewing
Watch your work like a hawk – Early Detection prevents major headaches later.
Keep Speed Control steady while maintaining Stitch Consistency throughout each seam.
Use Scrap Testing before starting projects to identify tension issues early. This ongoing vigilance catches problems before they compromise your entire piece.
Fabric Stabilizing techniques combined with consistent monitoring guarantee superior stitch quality and professional results every time, ensuring superior outcomes.
Frequently Asked Questions (FAQs)
How to fix uneven stitching on a sewing machine?
Like a finicky car engine that needs tuning, your sewing machine requires proper adjustments to achieve smooth, even stitches.
Start by checking thread tension, rethreading completely, and replacing your needle with the correct size for your fabric.
How do you fix uneven stitching?
Check your thread tension first – adjust it between 3-4 for balanced stitches. Rethread your machine completely, replace worn needles, and test on fabric scraps before sewing your project.
What causes uneven stitches?
Most sewing issues stem from thread tension problems, affecting roughly 70% of stitching complaints.
You’ll encounter uneven stitches when your thread tension’s off, needle’s damaged, threading’s incorrect, or you’re manipulating fabric too much during sewing, which can be attributed to tension problems.
Why does my sewing machine have uneven or looping stitches?
Your machine’s tension settings are likely off-balance, causing the upper and lower threads to pull unevenly. Incorrect threading, worn needles, or damaged feed dogs also disrupt stitch formation consistency.
Why do I have a stitch problem?
Your stitch troubles likely stem from incorrect thread tension, improper threading, or a damaged needle.
Fabric manipulation during sewing, worn feed dogs, or lint buildup can also disrupt stitch formation and consistency, which are complete concepts that affect the quality of your stitches.
How do you improve stitch quality?
Practice makes perfect – you’ll improve stitch quality by adjusting thread tension, rethreading your machine correctly, replacing damaged needles, maintaining steady fabric control, and performing regular maintenance cleaning.
Does blocking fix uneven stitches?
Blocking won’t fix uneven stitches caused by tension, threading, or needle issues. You’ll need to address the root mechanical problems first, then blocking can help smooth minor fabric irregularities afterward.
Why are my stitches uneven?
Ever wonder why your fabric looks more like a battlefield than a masterpiece?
Your stitches turn uneven when thread tension’s off, you’re using the wrong needle, or you’re wrestling with fabric instead of guiding it smoothly through the machine, which can make your fabric look like a battlefield.
How to fix uneven knitting stitches?
Check your knitting tension—too tight creates puckered stitches, too loose makes them sloppy.
Count your stitches regularly, maintain consistent yarn tension, and use proper needle size for your yarn weight.
What can help me out with fixing my stitches that went the wrong way?
Like a medieval seamstress unraveling errant threads, you’ll need to identify what caused your stitches to go astray.
Check your thread tension, rethread your machine completely, and replace any damaged needles to restore proper stitch formation.
This will help you restore proper stitch formation and get back to sewing efficiently.
Conclusion
Studies show that 68% of sewing frustrations stem from tension-related issues, making this knowledge invaluable for every seamstress.
Mastering how to fix uneven stitches transforms your projects from amateur attempts into professional-quality work.
You’ve learned that proper tension, correct threading, and fresh needles form the foundation of consistent stitching.
Regular maintenance prevents most problems before they start. Remember, patience beats force every time—your machine works best when you guide rather than wrestle.
These techniques guarantee smooth, even stitches that’ll make your sewing projects shine.
- https://www.threadsmagazine.com/2008/11/02/understanding-thread-tension
- https://www.tillyandthebuttons.com/2020/03/thread-tension-troubleshooting.html
- https://www.youtube.com/watch?v=ji786ELirvo
- https://www.thesewingdirectory.co.uk/thread-tension/
- https://sewingmachineman.substack.com/p/the-problem-with-poor-quality-thread


