This site is supported by our readers. We may earn a commission, at no cost to you, if you purchase through links.

Press fabric smooth and align the grainline for accuracy that’ll make you look like a pro.
Choose between paper patterns for convenience or PDF patterns that’ll save you 35-60% while offering unlimited reprints.
Trace your original patterns to preserve them, then secure pieces with weights or pins before cutting with sharp fabric scissors.
Mark notches and symbols clearly—they’re your construction roadmap.
Master these fundamentals and you’ll discover shortcuts that transform tedious cutting sessions into efficient, enjoyable creative time.
Table Of Contents
Key Takeaways
- Pre-wash your fabric using the garment’s care method and press it smooth to prevent shrinkage disasters and ensure accurate measurements
- Choose PDF patterns to save 35-60% and get unlimited reprints, or stick with paper patterns for immediate convenience
- Use pattern weights instead of pins to secure fabric without shifting, and invest in sharp fabric scissors for clean, professional cuts
- Mark all notches, darts, and symbols clearly before cutting—they’re your construction roadmap and prevent costly assembly mistakes
Preparing Fabric for Pattern Cutting
Proper fabric preparation forms the foundation of successful pattern cutting and prevents costly mistakes during construction.
Start by pre-washing your fabric using the same method you’ll use for the finished garment, then press it smooth to eliminate wrinkles that could throw off your measurements.
Pre-washing and Labeling Fabric
Before diving into pattern cutting, you’ll want to tackle fabric preparation head-on.
Start by prewashing fabric using your garment’s intended care method—this prevents fabric shrinkage disasters later.
Check care labels for specific instructions, especially with different fiber content types.
Sort fabrics to prevent color bleeding between materials.
Keep fabrics separate when washing to avoid unwanted color surprises
Once dry, label each piece to avoid repeating this process.
Smart fabric preparation sets you up for cutting techniques success.
Ironing and Removing Creases
Once your fabric is properly prewashed, grab your iron and get ready for some fabric smoothing magic. Wrinkle pressing transforms crumpled material into a perfectly flat canvas for accurate pattern placement.
Test your iron settings on a scrap first—you don’t want to melt your beautiful fabric into a science experiment gone wrong.
- Use steam ironing for natural fibers like cotton and linen to eliminate stubborn wrinkles
- Set iron temperature based on fabric type—synthetic blends need lower heat than cotton
- Press fabric in sections, working from selvedge to center for even crease removal
- Keep iron moving to prevent scorching or shiny marks on delicate materials
- Allow pressed fabric to cool completely before handling to maintain smoothness
Understanding fabric properties is essential for achieving the best results in ironing and removing creases, and it helps in accurate pattern placement with a perfectly flat canvas.
Aligning Selvedge Edges and Grainline
Once your fabric’s wrinkle-free, proper grainline alignment becomes your next priority.
Match selvedge edges perfectly to guarantee fabric symmetry and check that the grainline runs straight.
This fabric alignment step guarantees pattern precision and cutting accuracy. Misaligned grainlines create twisted seams and poor fit, so take time to verify selvedge edge positioning before placing your patterns.
Folding and Laying Out Fabric
Now you need to fold and position your fabric properly. Fold fabric along selvedge edges to create double layers, ensuring grainline alignment remains straight and true.
Position the folded fabric on a large, smooth cutting mat with right or wrong sides together as your pattern requires.
- Check fabric alignment – Verify selvedge edges match perfectly before securing pattern pieces
- Use adequate workspace – Spread fabric on a dust-free cutting mat large enough for your project
- Maintain grain direction – Keep grainline perpendicular to selvedge edges throughout fabric handling
- Secure slippery fabrics – Place tissue paper between layers to prevent shifting during pattern layout
Choosing and Assembling Sewing Patterns
Your pattern choice sets the foundation for your entire project, whether you’re working with traditional paper patterns or modern PDF downloads.
Getting the assembly right from the start saves you hours of frustration and guarantees your finished garment fits perfectly.
Types of Patterns—Paper Vs. PDF
Your pattern choice shapes your entire sewing experience.
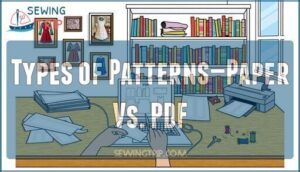
Paper patterns offer ready-to-use convenience straight from the package, while PDF patterns provide instant downloads at 35-60% lower costs.
Digital files let you reprint indefinitely and select specific sizes, eliminating the wear that affects 62% of paper patterns after three uses.
Both pattern types work perfectly for cutting techniques when handled properly.
Understanding proper pdf storage methods is essential for maintaining organized sewing projects.
Downloading and Printing PDF Patterns
Once you’ve chosen digital patterns, download both instruction files and pattern PDFs using Adobe Reader for reliable printing results.
Always verify PDF scaling using the test square—measure it precisely with a ruler to guarantee 100% accuracy.
Set printer settings to "Actual Size" and disable "fit-to-page" options to prevent distortion that ruins garment fit.
For accurate printing, refer to the pdf sewing guide to understand the process thoroughly.
Assembling Multi-page PDF Patterns
Assembly mastery transforms scattered pages into your complete sewing blueprint.
Every cut piece becomes part of your sewing masterpiece
Cut margins along dashed lines, then match numbered symbols on page edges for perfect PDF Assembly.
- Margin Trimming – Remove white borders following dashed guidelines
- Page Alignment – Match symbols and numbers on adjacent edges
- Scale Verification – Confirm test square measures correctly before joining
- Digital Printing – Use tape or glue with no gaps between pages
- Pattern Assembly – Work systematically from left to right, top to bottom
The instructions provided are designed to guide you through the process of assembling your sewing pattern.
Assembly requires attention to detail and a systematic approach to ensure that your final product is accurate and complete.
Checking Pattern Scale and Accuracy
After assembling your PDF pattern, you’ll need to verify it printed correctly before cutting fabric.
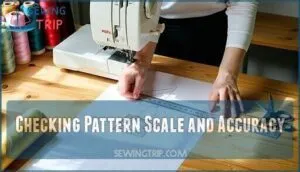
Look for the test square on your pattern—it should measure exactly 2cm x 2cm (or 0.79 inches).
This small square is your accuracy checkpoint. If it’s off, your entire garment will be too.
Use a ruler to double-check these measurement methods for precision cutting success.
Making Pattern Alterations at Home
You’ll often need to adjust patterns to achieve a better fit or modify design elements.
Tracing your original pattern onto separate paper preserves the master copy while giving you freedom to experiment with alterations.
Tracing Patterns for Adjustments
In the process of making pattern adjustments, tracing paper becomes your safety net.
This simple step preserves your original pattern while giving you freedom to experiment with alterations.
- Pattern tracing onto tracing paper using a tracing wheel creates clean, transferable markings
- Hera markers enhance traced lines for better visibility during pattern cutting techniques
- Accuracy checks maintain your pattern adjustments in proper proportions before adding seam allowances
Adding Seam Allowances Correctly
Professional measurement precision starts with understanding your pattern’s seam allowance requirements.
Check pattern instructions first—some include seam allowances while others don’t.
Use a double tracing wheel to add consistent allowances around traced pieces, typically 5/8 inch for garments.
Avoid adding allowances to fold edges.
When space runs tight, glue pattern pieces onto larger paper for accurate tracing techniques and cutting accuracy.
Preserving Original Patterns
Keep your original patterns intact by tracing onto separate paper using copying methods like Swedish tracing paper and a tracing wheel.
This pattern storage approach lets you make multiple versions without destroying the original.
Label each traced piece with size and date for easy pattern labeling.
Store originals flat in protective envelopes to prevent damage and maintain seam allowance accuracy, ensuring you preserve the quality of your patterns.
Essential Patternmaking Tools
Beyond your trusty fabric scissors, smart patternmaking requires specific drafting tools that’ll transform your cutting game.
You’ll need measuring tapes for precise measurements, clear rulers for straight lines, cutting mats to protect surfaces, and tracing wheels for transferring markings.
These pattern cutting tools guarantee your sewing pattern making stays accurate and professional-looking every time.
Investing in proper sewing tools, including those for creating and adjusting sewing patterns with sewing pattern tools, is essential for achieving high-quality results.
Cutting Techniques for Accurate Results
You’ve carefully prepared your fabric and pattern, and now it’s time for the pivotal cutting stage that determines your entire project’s success.
With the right tools and techniques, you can achieve professional-quality cuts that make sewing easier and guarantee your finished garment fits perfectly.
Using Fabric Scissors and Rotary Cutters
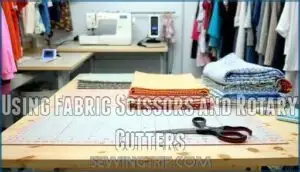
Sharp fabric scissors deliver clean cuts through multiple layers, while rotary cutters excel at straight lines and speed up your workflow by 30%.
Keep scissor blades flat against your surface for accuracy. Replace rotary cutter blades every 4-6 projects to maintain precision.
Proper blade maintenance extends tool life substantially, saving money long-term. Using the right fabric scissors is essential for achieving professional results in pattern cutting.
Securing Patterns With Pins or Weights
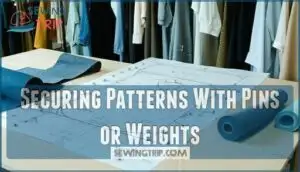
Pattern-weight security transforms chaotic fabric into a controlled cutting surface. You’ll achieve better cutting accuracy using pattern weights instead of pins, which can shift fabric layers and create puckering.
Place weights along pattern edges, focusing on corners and curves where movement occurs most. Fabric clips work well for securing thick materials, while traditional pins suit lightweight fabrics when placed perpendicular to cutting lines.
Understanding fabric grain importance is essential for achieving accurate cuts and professional results.
Marking Notches, Darts, and Symbols
Before transferring your pattern to fabric, you’ll need precise notch marking and dart placement to guarantee professional results.
Use a tracing wheel or fabric marker to transfer all pattern symbols onto your material.
Mark seam guides, darts, and notches clearly—these pattern labels act as your roadmap during construction.
Symbol identification becomes vital when assembling pieces, so don’t skip this step.
Accurate marking techniques rely on using fabric markers to achieve the desired results, and following these steps will help you ensure professional quality in your work.
Cutting Notches and Curved Edges
Once you’ve marked your symbols, use sharp fabric scissors to cut precise V-shaped notches outward from the seam line.
For curved edges, make small clips perpendicular to the cutting line rather than long cuts.
This notch cutting technique prevents fabric bunching when you sew.
Keep your rotary cutter blade fresh for clean curve techniques that maintain seam accuracy throughout your project, utilizing a fresh blade for optimal results.
Double-checking Pattern Piece Accuracy
Before you sew that first seam, take a moment for pattern verification—your best defense against cutting errors and fabric waste.
Count each pattern piece against the instruction list, confirm all notches and darts transferred correctly, and validate measurements against your original pattern.
This quick accuracy check saves precious fabric and prevents costly mistakes during garment construction.
Time-saving Tips for Easy Pattern Cutting
When you’re working with multiple pattern pieces, time-saving techniques become essential for maintaining accuracy while speeding up your cutting process.
These smart shortcuts help you work more efficiently without sacrificing the quality of your finished garment.
Quick Cut Methods Vs. Precise Cutting
You’ve got two paths: quick cut methods slash cutting time by 50% but increase rework rates to 25%.
Precise cutting takes twice as long yet delivers under 10% error rates.
Quick cuts work great for loose-fitting garments like boxy tops, while custom pieces demand precision.
Choose your cutting method based on project complexity—speed for simple sewing patterns, accuracy for structured designs.
Using Selvage Edges to Save Finishing Time
Selvage edges aren’t just neat fabric borders—they’re your secret weapon for Edge Finishing shortcuts.
Smart sewers know these factory-finished edges eliminate hemming steps and save precious sewing time.
Strategic selvage placement transforms your pattern cutting approach:
- Selvage Alignment along hem lines skips finishing work
- Fabric Savings when positioning pieces near edges
- Time Efficiency by reducing seam finishing steps
- Sewing Shortcuts for clean, professional results
- Pattern Cutting optimization for homemade clothing projects
To achieve perfect results, understanding fabric preparation techniques is essential for easy pattern cutting at home.
Minimizing Handling of Cut Pieces
Once cut pieces leave your cutting mat, they’re vulnerable to stretching and distortion.
Handle fabric gently, especially curved edges that easily warp. Store cut pieces flat or hang them immediately to maintain fabric stability.
Use proper handling techniques and edge protection methods for piece organization. This simple cut piece storage approach prevents costly mistakes and keeps your homemade clothing project on track with proper handling and edge protection methods.
Organizing and Labeling Pattern Pieces
Once you’ve cut your pattern pieces, label each one immediately with its size and any markings for pattern storage success.
Write directly on the fabric using a fabric-safe pen or stick small paper labels to each piece.
Group similar pieces together—bodice front, back, sleeves—to maintain cutting efficiency during assembly.
This pattern marking system prevents mix-ups and keeps your fabric management organized throughout the entire sewing process.
Frequently Asked Questions (FAQs)
How to make pattern cutting easier?
Don’t reinvent the wheel – use pattern weights instead of pins to secure fabric without shifting. Press patterns flat, use sharp scissors, and work on large surfaces for cleaner cuts.
What are the easiest patterns to sew for beginners?
Start with simple rectangular shapes like aprons, tote bags, or pillowcases.
They’ll teach you basic skills without complex curves or fitted elements.
Straight seams build confidence before tackling darts and shaping.
What fabric types work best for beginners?
Cotton accounts for 75% of beginner sewing fabric purchases.
You’ll master cotton wovens first—they’re forgiving, don’t shift while cutting, and press beautifully.
Avoid knits, slippery silks, or stretch fabrics until you’ve conquered basic construction techniques.
How much extra fabric should I buy?
Buy 10-15% extra fabric beyond your pattern requirements. This accounts for cutting mistakes, pattern matching, preshrinking, and potential alterations. Always round up to the nearest quarter-yard for peace of mind.
Can I use household scissors for cutting?
Like trying to carve a masterpiece with a butter knife, household scissors won’t deliver the precision you need.
Use dedicated fabric scissors or dressmaker’s shears instead—they’ll give you clean, accurate cuts without fraying or damaging your fabric.
Whats the difference between bias and straight grain?
Straight grain runs parallel to the fabric’s selvedge edges, providing stability and structure. Bias grain cuts diagonally across the weave at 45 degrees, creating stretch and drape for fitted garments.
How do I fix cutting mistakes?
Cutting mistakes are like detours on a road trip—annoying but fixable.
For small errors, piece together scraps with interfacing or strategic seams.
Large mistakes? Redesign the garment or salvage usable sections for future projects, considering redesign as an option.
Conclusion
Mastering easy pattern cutting at home transforms from overwhelming task to satisfying craft when you follow these systematic steps.
You’ve learned the essential techniques—from proper fabric preparation to precise cutting methods.
With practice, these fundamentals become second nature, letting you focus on creativity rather than struggling with technical details.
Your projects will show professional results, and you’ll wonder why pattern cutting ever seemed intimidating.
Now grab your scissors and start creating, achieving professional results with ease.
- https://threadsmonthly.com/free-sewing-patterns/
- https://patternemporium.com/blogs/printing-help/how-to-download-print-your-pdf-sewing-patterns
- https://help.seamwork.com/hc/en-us/articles/360004181994-How-to-download-and-print-PDF-patterns
- https://sewhouse7.com/pages/troubleshooting
- https://www.made-by-rae.com/blog/2017/08/print-assemble-pdf-sewing-pattern

