This site is supported by our readers. We may earn a commission, at no cost to you, if you purchase through links.
When you’re seeing bird’s nests underneath or bobbin thread on top, that’s your tension talking.
Replace needles every 5-8 hours—worn needles cause skipped stitches and fabric tears.
For hooping, pull fabric drum-tight without overstretching, and match your stabilizer to fabric weight, and reduce stitch density by 15-20% on delicate materials.
Clean lint from tension discs regularly and oil the rotary hook every 4-6 hours, which are simple fixes that solve 80% of quality issues without expensive repairs or service calls.
Table Of Contents
Key Takeaways
- Master the three main culprits: Focus on tension adjustments, needle replacement every 5-8 hours, and proper hooping technique—these solve 80% of your stitch problems without expensive repairs.
- Match your materials correctly: Use the right stabilizer weight for your fabric, reduce stitch density by 15-20% on delicate materials, and choose quality thread to prevent breakage and distortion.
- Perfect your hooping technique: Pull fabric drum-tight without overstretching, match hoop size to design dimensions, and ensure proper stabilizer support to eliminate puckering and misalignment.
- Maintain your machine regularly: Clean lint from tension discs weekly, oil the rotary hook every 4-6 hours, and replace dull needles immediately to prevent skipped stitches and fabric tears.
Common Embroidery Machine Stitch Problems
You’ve probably stared at your embroidery machine wondering why your perfect design turned into a wrinkled mess or why threads keep breaking mid-stitch.
These common stitch problems aren’t mysteries—they’re fixable issues that every embroiderer faces, and once you know what causes them, you can get back to creating beautiful work.
Puckering and Fabric Distortion
Puckering turns smooth embroidery into a wrinkled mess, but you can beat this common nemesis. Poor Fabric Tension from Hooping Errors causes 35-50% more distortion near design edges, while mismatched Stabilizer Choice accounts for 60% of complaints.
Poor hooping and wrong stabilizers turn perfect designs into puckered disasters—but these enemies are completely beatable
Quick fixes that work:
- Match your stabilizer weight – Lightweight fabrics need cut-away stabilizers, not tear-away options that increase distortion risk
- Perfect your hooping technique – Keep fabric taut but not stretched; over-tightening deforms the grain and creates alignment issues
- Adjust your Embroidery Settings** – Reduce stitch density by 15-20% on delicate materials to prevent surface stress
Looping and Thread Bunching
You’ll spot those frustrating loops and thread bunching when your embroidery machine’s tension goes haywire.
Random loops happen occasionally—grab a loop removal tool for quick fixes.
Constant looping screams tension trouble: check if your top thread tension‘s too loose or bobbin’s too tight.
Adjust embroidery settings gradually, test on scrap fabric, and make certain proper thread quality to prevent thread tangling and maintain stitch quality throughout your project.
Misaligned or Shifted Stitches
When your embroidery design goes off-track, fabric shift during stitching creates misaligned fill and outline elements.
Incorrect stabilizer selection causes your fabric to buckle and move, throwing off design accuracy.
Check your hoop tension—it should hold fabric taut without overstretching.
Use proper backing weight for your project.
Poor thread tracking and inadequate stabilization turn precise designs into embroidery machine nightmares.
Skipped Stitches and Gaps
Missing stitches drive you crazy when they appear randomly across your design.
Poor thread tension and incorrect stitch density cause most gaps you’ll encounter.
Check your needle condition first—dull needles skip stitches on stretchy fabrics.
Tighten your hooping technique to prevent fabric stretch during stitching.
Thread breakage from low-quality materials creates obvious gaps that proper machine maintenance prevents.
Regular machine maintenance checks can help identify issues before they cause missing stitches.
Regular checks and maintenance are key to preventing these issues, and by following these steps, you can minimize the occurrence of missing stitches in your embroidery designs.
Needle Breaks and Holes
**Broken needles pierce through your project dreams, leaving unwanted holes that seem impossible to fix.
When broken needles shatter your embroidery dreams, leaving frustrating holes in perfect fabric
**When needle damage strikes, you’re dealing with more than just stitch problems—you’re facing potential fabric tears that can ruin hours of work.
Thread tension issues often contribute to breakage prevention failures.
- Replace needles every 5-8 hours of continuous use or after three thread breaks to prevent needle damage
- Match needle type to fabric—sharp for wovens, ballpoint for knits to avoid fabric tears
- Use titanium-coated needles for reduced friction and longer life in challenging materials
- Apply heat-adhesive patches for hole repair, then embroider over with proper backing
- Check thread tension settings before starting to minimize needle threading stress and breakage prevention
Causes of Poor Stitch Quality
You’ll encounter poor stitch quality when your machine’s settings don’t match your project’s specific requirements.
Common culprits include incorrect tension, wrong needle type, poor stabilization, or using low-quality thread that can’t handle your machine’s speed and precision demands, such as poor stabilization.
Data Privacy in AI
Modern smart embroidery machines collect user data for performance analytics, creating unexpected privacy concerns. Your machine’s connectivity features might expose personal information through unsecured networks.
Understanding Digital Rights and Privacy Laws helps you protect your creative work while troubleshooting embroidery machine issues and stitch problems.
| Data Collection Point | Privacy Risk | Protection Method |
|---|---|---|
| WiFi connectivity logs | Location tracking | Use guest networks |
| Design file uploads | Copyright exposure | Read terms carefully |
| Usage analytics | Pattern profiling | Disable data sharing |
AI Ethics in embroidery technology requires balancing innovation with Data Security. Your stitch skipping problems might stem from machine malfunction, but protecting your Cyber Protection starts with understanding how connected devices handle your embroidery errors data.
Algorithm Bias Concerns
Sometimes stitch quality takes a hit because the settings behind your embroidery machine aren’t as fair as you think.
Bias Detection and Fairness Metrics can help flag embroidery errors and stitch skipping.
Data Preprocessing, Model Auditing, and an Ethics Framework keep embroidery machine issues in check, so tension issues don’t spiral out of control.
To achieve ideal results, understanding thread tension settings is vital for embroidery machine users.
- Needle hiccups
- Uneven tension
- Random stitch skipping
- Design distortions
- Unexpected gaps
Ethical Deployment Strategies
Spotting bias in your embroidery software is step one—now, let’s talk ethical deployment strategies.
You want your digital rights protected and software that follows Fair Use and Data Ethics.
Go for AI governance that supports sustainable tech and safe embroidery troubleshooting.
Ethical choices in embroidery techniques and tension issues help improve stitch quality while supporting responsible, modern machine use.
Troubleshooting Thread and Tension Issues
Thread and tension problems are the culprits behind most embroidery disasters, turning your perfect design into a tangled mess.
You’ll save hours of frustration by learning to spot tension imbalances and thread quality issues before they wreck your project.
Top and Bobbin Tension Problems
When your embroidery machine acts like a temperamental artist, tension problems are usually the culprit. Poor thread tension creates visible bobbin thread on top or loose, looping stitches underneath.
- Check tension settings match your fabric weight and thread type
- Clean lint from bobbin adjustment areas and tension discs regularly
- Make small incremental changes to achieve balanced stitch quality
Proper embroidery tension prevents hoop troubles and fabric snags. Regular checks on thread tension indicators help maintain superior machine performance.
Thread Breakage and Fraying
Beyond tension adjustments, you’ll face thread breakage and fraying that can halt your projects mid-stitch. Poor Fiber Quality creates weak spots that snap under embroidery machine stress. Check your thread’s Yarn Strength before starting—quality thread prevents most Breakage Prevention headaches.
| Breakage Cause | Quick Fix | Prevention Tip |
|---|---|---|
| Fraying Causes from rough needle eye | Replace with smooth needle | Use titanium-coated needles |
| Thread Tension too tight | Reduce upper tension setting | Test on scrap fabric first |
| Fabric stretching during hoop troubles | Rehoop without overstretching | Use proper stabilizer weight |
| Stitch length too dense | Adjust density in software | Communicate fabric type to digitizer |
| Fabric snags catching thread | Smooth fabric surface | Remove loose fibers before hooping |
Incorrect Thread Type or Quality
Cheap thread spells disaster for your projects.
Low-quality thread lacks proper fiber quality and breaks constantly during stitching.
You’ll notice inconsistent yarn types creating uneven tension and poor color consistency throughout your design.
Smart material selection means investing in premium embroidery thread that matches your fabric weight.
Quality thread prevents design flaws, maintains proper stitch length, and reduces fabric stretching.
Professional custom embroidery services always use high-grade materials for reliable embroidery solutions, which is key to achieving proper stitch length and preventing design flaws.
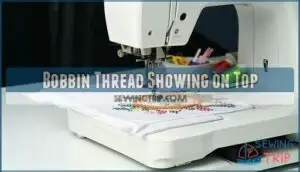
Bobbin Thread Showing on Top
When your bobbin thread shows on top, you’re dealing with tension imbalance that ruins color accuracy and stitch quality. This common issue stems from top tension being too tight or bobbin tension too loose, affecting thread visibility in your custom embroidery services.
- Check bobbin placement – wrong insertion direction doubles show-through rates
- Adjust top tension between 2-6 and test bobbin tension at 18-22 grams
- Re-thread upper path completely, ensuring all guides are properly engaged
- Clean bobbin area of lint buildup that forces tension flaps open
Proper tension balance delivers high-quality stitching for embroidery solutions across all occasions, preventing design flaws that compromise your finished work. The correct bobbin tension settings are vital for achieving superior stitch quality and minimizing thread breakage.
Preventing Design and Hooping Mistakes
You’ll avoid 90% of embroidery headaches by mastering proper hooping and choosing the right stabilizer for each project.
Getting these fundamentals right prevents puckering, misalignment, and the frustration of redoing work that could’ve been perfect the first time.
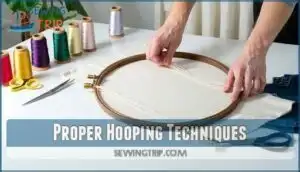
Proper Hooping Techniques
Your fabric tension determines everything.
It is crucial to get it right, as too loose creates shifting, while too tight causes puckering.
Match hoop sizes to your embroidery design dimensions—oversized frames waste stabilizer, while undersized ones compress artwork.
Pull fabric drum-tight across embroidery frames, checking for wrinkles, as thread control improves when fabric stays stable.
Professional custom embroidery services and apparel customization depend on this foundation for quality garment decoration.
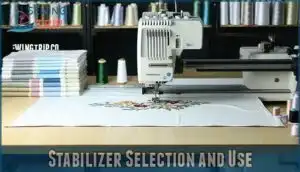
Stabilizer Selection and Use
Stabilizer Types match your fabric’s weight and weave.
Tearaway backing materials work best for woven fabrics, while cutaway provides superior fabric support for stretchy knits.
Your stabilizer choice directly impacts tension control during stitching.
Lightweight fabrics need delicate backing, heavy materials require robust support.
Match stabilizer density to your embroidery design complexity for professional garment decoration results.
Understanding the role of embroidery stabilizer in preventing distortions is vital for achieving superior stabilizer support techniques, which require superior fabric support and delicate backing for optimal results, ensuring professional garment decoration.
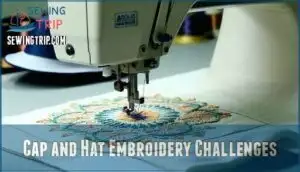
Cap and Hat Embroidery Challenges
Curved surfaces create headaches, but you can conquer them.
Cap Design demands different embroidery techniques than flat garments—structured panels shift under pressure, causing misaligned stitches.
Choose appropriate Hat Materials and adjust your approach accordingly.
Stitch Quality suffers when you rush hooping or ignore fabric tension.
Proper Fabric Selection and custom embroidery services guarantee professional results every time.
Mastering even tension techniques is vital for achieving professional embroidery results on curved surfaces like caps and hats, ensuring proper results.
Artwork and Digitizing Requirements
Quality artwork sets the foundation for flawless custom embroidery services.
You’ll need clear, high-resolution graphics with specified thread colors and digitizing requirements that match your cap styles.
Professional digitizing fees guarantee your embroidery design translates perfectly from graphic design to custom logo apparel, preventing costly stitching problems later, which is crucial for custom embroidery services.
Essential Machine Maintenance and Best Practices
You can’t fix stitch problems without maintaining your machine properly – it’s like trying to drive a car with a dirty windshield.
Regular maintenance prevents most embroidery headaches before they start, saving you time and frustration when you’re working on important projects, which is crucial for regular maintenance.
Needle Selection and Replacement
Once your hooping game is strong, sharpen your focus on needle selection and replacement.
Swapping in the right Needle Types for your fabric choice makes all the difference in stitch quality—think of it as picking the best tool for a job.
For smooth embroidery machine results and fewer headaches, remember:
- Change needles regularly
- Match needle to thread selection
- Monitor for wear
Understanding proper needle selection techniques is essential for achieving superior stitch quality with the right needle types.
Cleaning and Lubricating The Machine
Keep your embroidery machine running smoothly with regular maintenance that’ll prevent costly breakdowns.
Clean the bobbin area weekly, removing lint with soft brushes—never compressed air.
Apply one drop of machine oil to the rotary hook every 4-6 hours of operation.
Quality lubricant types and proper oil application guarantee your custom embroidery services deliver high-quality stitching for all occasions, ensuring high-quality results.
Adjusting Stitch Density and Settings
After keeping your machine clean, fine-tuning stitch density and settings makes the difference between amateur and professional results.
Dense areas can cause puckering, while sparse sections create gaps that ruin your design’s appearance.
- Stitch Optimization: Adjust density based on fabric weight—lighter fabrics need fewer stitches per inch
- Density Control: Test different settings on scrap material before running your final piece
- Thread Tension: Balance stitch length with fabric settings for consistent, high-quality stitching across all custom embroidery services
Frequently Asked Questions (FAQs)
Why does embroidery thread keep shredding during stitching?
Thread shredding happens when you’re using poor-quality thread, running your machine too fast, or have a dull needle.
Check your thread path for snags and replace that needle—it’s probably duller than you think.
How to fix embroidery that pulls fabric together?
Fix fabric pulling by using proper stabilizer weight, loosening your hoop tension, and adjusting machine thread tension.
Poor stabilization causes puckering – match stabilizer type to your fabric weight for smooth results.
What causes embroidery designs to distort or stretch?
Ah, the age-old embroidery mystery—your pristine design transforms into abstract art.
You’re creating distortion when you stretch fabric too tight during hooping or use inadequate stabilizer that can’t handle your design’s pull compensation needs.
Why do metallic threads jam in embroidery machines?
Metallic threads jam because they’re slicker than regular thread, causing tension issues and catching on machine parts.
You’ll need to slow your machine speed, use metallic-specific needles, and adjust tension settings for smoother stitching.
How to prevent embroidery from washing out colors?
Apparently, your stunning embroidery thinks it’s a chameleon.
Use quality colorfast threads, wash in cold water with mild detergent, turn garments inside out, and avoid bleach to maintain vibrant colors permanently.
Conclusion
While complex embroidery machine stitch problems appear intimidating, simple maintenance solves most issues quickly.
You’ve learned that tension adjustments, proper needle selection, and correct hooping techniques address 80% of quality problems.
Regular cleaning prevents lint buildup, while matching stabilizers to fabric weight eliminates puckering.
Don’t overcomplicate embroidery machine stitch problems—these proven troubleshooting steps will keep your projects running smoothly and save expensive service calls, following simple maintenance.
- https://d5883cb1-0eef-4b94-b513-699bffccc05d.usrfiles.com/html/db9376e69cfa487ea0fa0b912ae51a4f_v1.html
- https://embroideryonline.com/loop-and-tail-wand/?aff=95
- https://www.youtube.com/channel/UCqUhduP-IwgRutJ-A9L7ZoQ
- https://www.superiorthreads.com/education/bobbin-tension-guide
- https://www2.thriftyfun.com/about/contact.lasso

