This site is supported by our readers. We may earn a commission, at no cost to you, if you purchase through links.
 If you want to make bags that look like they came from a boutique, focus on three essentials: sharp rotary cutters and cutting mats for clean lines, forgiving fabrics like quilting cotton that won’t give you headaches, and the right interfacing to turn flimsy fabric into something with real structure.
Sharp blades make clean cuts, while walking feet handle thick layers without breaking a sweat. Don’t skimp on seam rippers either—they’re your safety net when things go sideways.
Smart fabric prep and understanding grain lines prevent those heartbreaking warps and puckers that scream "homemade." The magic happens when these basics become second nature.
Table Of Contents
- Key Takeaways
- Essential Tools for Bag Sewing Success
- Selecting The Best Fabrics for Bags
- Understanding Interfacing and Stabilizers
- Accurate Cutting and Pattern Placement
- Sewing Strong and Neat Seams
- Professional Bag Handle and Strap Techniques
- Installing Zippers and Fasteners
- Adding Structure With Corners and Boxing
- Constructing Pockets and Functional Features
- Finishing Touches for a Professional Look
- Frequently Asked Questions (FAQs)
- Conclusion
Key Takeaways
- Invest in quality cutting tools first – Sharp rotary cutters, self-healing mats, and acrylic rulers prevent wonky seams and mismatched pieces that scream "homemade mistake."
- Master interfacing selection early – The right weight transforms flimsy fabric into structured, professional bags that stand proud instead of slumping like deflated balloons.
- Choose beginner-friendly fabrics – Cotton and canvas forgive mistakes and cooperate during every step, while specialty materials like vinyl demand specialized techniques you’ll learn later.
- Focus on seam strength over fancy stitches – Lock stitches at stress points, proper tension settings, and strategic reinforcement create bags that survive real-world use instead of falling apart at the first heavy load.
Essential Tools for Bag Sewing Success
Your bag-making journey starts with the right gear—quality tools make every cut, seam, and finish easier and more precise.
From rotary cutters to walking feet, investing in essential equipment sets you up for professional results, even as a beginner.
Must-Have Cutting Tools and Mats
You can’t build a bag that stands up to real use if your cutting game is off—precision here saves you from wonky seams, mismatched pieces, and that sinking feeling when nothing lines up at the end.
Start with a self-healing cutting mat, a sharp rotary cutter, and a clear acrylic ruler. These three form your baseline kit.
Add quality fabric scissors for curves and a seam ripper for inevitable fixes, and you’re equipped to cut with confidence.
Choosing The Right Sewing Machine
If your sewing machine can’t handle thick canvas and interfacing, you’ll hit a wall fast.
Focus on motor power and tension control—they’ll serve you better than fancy auto-threading features when you’re wrestling with heavy fabrics.
Prioritize stitch quality over bells and whistles, because bag making demands power and consistency to handle thick seams without skipping stitches.
Helpful Accessories (Clips, Seam Rippers, Rulers)
The right accessories can mean the difference between wrestling with stubborn fabric layers and gliding through your project like a pro. Binding clips hold thick materials without leaving pin holes—a lifesaver for vinyl and cork.
Keep seam rippers handy because mistakes happen, and acrylic rulers paired with cutting mats deliver precision every time.
Don’t overlook edge stitching guides and magnetic snaps for that polished finish.
Selecting The Best Fabrics for Bags
Your fabric choice sets the foundation for everything that follows—structure, durability, and ease of sewing.
Start with forgiving materials like quilting cotton or canvas to build confidence, then graduate to specialty fabrics like cork or faux leather once you’ve mastered the basics.
Beginner-Friendly Fabrics (Cotton, Canvas)
Cotton and canvas won’t throw you curveballs when you’re just starting out—they forgive mistakes, press beautifully, and handle like a dream under your machine’s presser foot.
Cotton blends hold their shape without fighting back, while canvas weaves give you that sturdy structure bags need.
Proper fabric prep—a quick pre-wash—prevents future surprises, and you’ll find these textiles cooperate during every step of fabric crafting.
Working With Vinyl, Faux Leather, Cork
Sticky materials like vinyl, faux leather, and cork demand smart fabric selection and specialized tools to avoid frustration. Here’s your game plan:
- Swap pins for clips – pins leave permanent holes in vinyl and faux leather every single time
- Use a Teflon foot – eliminates drag and sticking in 94% of projects; washed tape works in a pinch
- Choose the right needle – 80-90 universal or microtex prevents skipped stitches
- Add interfacing strategically – lightweight fusible woven manages stretch in vinyl without bulk
Set your stitch length to 2.5–3 mm for piecing and 3.5–4 mm for topstitching. Cut vinyl against the stretch to maintain shape.
Cork fabric crafting brings bonus perks: it’s waterproof, stain-resistant, and lasts over a decade with proper sewing techniques for bags. Understanding interfacing techniques is essential for a successful project.
Pre-Washing and Fabric Preparation
Here’s the thing about fabric prep: skip it, and your beautiful bag will probably shrink, pucker, or go wonky after its first wash.
Pre-wash natural fabrics like cotton or canvas to eliminate fabric shrinkage and color bleeding issues before fabric fusing with interfacing.
Check your fabric type’s weave density and thread count—tighter weaves need less aggressive treatment during fabric preparation, while looser materials benefit from gentle fabric softening cycles that won’t compromise structural integrity for your fabric selection for bags.
Understanding Interfacing and Stabilizers
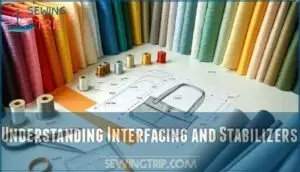
Interfacing and stabilizers transform flimsy fabric into structured, professional-looking bags that hold their shape under real-world use.
Choosing the right weight and type makes the difference between a bag that stands proud on the shelf and one that slumps like a deflated balloon.
Types of Interfacing for Bags
When you’re working with bags, you’ll run into five different types of interfacing that each handle structure in their own way. Woven interfacing keeps your fabric flowing naturally, though you’ll need to match up those grain lines—it’s your best bet for delicate materials.
Nonwoven versions let you cut in any direction, which cuts down waste by about 15%, but they might get a bit floppy after a few washes.
Fusible interfacing is super popular because you just iron it on—no fuss, no mess. Pellon SF-101 is a go-to choice that most sewists swear by.
If your fabric doesn’t like heat or has texture that might get crushed, sew-in interfacing is your friend.
For something lighter that won’t add bulk, foam stabilizers like Style-Vil give you structure without the weight.
Understanding the interfacing types is essential for achieving the desired look and feel in bag making projects.
When to Use Heavy Vs. Light Interfacing
Choosing the wrong weight of interfacing can turn a perfectly good bag into a floppy disappointment or a stiff, unwieldy brick—so let’s talk about when each weight earns its place in your project.
Light interfacing works best for smaller, unstructured bags where you want drape—think fabric totes or casual clutches. Heavy interfacing gives you the structural backing needed for larger bags, messenger styles, or anything carrying weight.
Match your interfacing types to your fabric weight and intended use: canvas paired with firm fusible creates bag stability, while cotton benefits from medium-weight for seam reinforcement without bulk.
Foam Stabilizers and Alternatives
Foam stabilizers act like the skeleton of your bag—they’re what turn floppy fabric into a structured, stand-on-its-own masterpiece. You’ve got options like flex foam for soft structure or fusible fleece for gentle backing.
SF101 works great as a lighter alternative, while some makers skip foam entirely and double up interfacing layers for bag reinforcement.
Pick your stabilizer based on how much structural backing you need.
Accurate Cutting and Pattern Placement
Precision cutting makes the difference between a bag that holds together and one that sags or puckers.
Master your rotary cutter, understand grain lines, and choose the right cutting method—your seams will thank you later.
Using Rotary Cutters and Acrylic Rulers
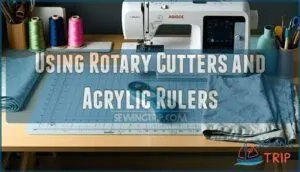
A rotary cutter gliding through layered fabric feels like magic—until you try it freehand and end up with wobbly edges that look like they’ve survived a small earthquake. That’s where acrylic rulers come in—they’re your anchor. Line up your ruler with fabric measurement tips in mind, press firmly, and let the blade ride the edge.
Keep your cutting mat maintenance current and swap blades when you feel resistance. Rotary cutter safety means always closing that blade between cuts—one slip can send you to urgent care faster than you can say "seam ripper.
Grain Line and Pattern Layout Tips
Understanding grain line isn’t just about following arrows on a pattern—it’s the difference between a bag that holds its shape beautifully and one that sags like a deflated balloon after a few uses. Aligning fabric grainlines with your pattern pieces ensures structural integrity and prevents warping. Smart layout efficiency also minimizes fabric waste while respecting seam allowances.
Master these pattern layout essentials:
- Place pattern weights strategically to keep pieces stable without shifting during cutting—pins can distort heavyweight materials
- Plan your cutting order by arranging large pieces first, then nestle smaller components into gaps for optimal fabric efficiency
- Respect pattern grainlines religiously—even a 5-degree deviation can compromise your bag’s durability and drape
- Consider pattern matching when working with prints or stripes, positioning repeats where they’ll create visual flow across seams
Die-Cutting Vs. Manual Cutting Methods
When you’re cranking out multiple bags or perfecting a pattern you’ll use again and again, the choice between die-cutting precision and manual cutting flexibility can make or break your workflow.
Die cutting delivers dimensional tolerance within 0.5 mm and slashes material waste by 15%—perfect for production runs.
Manual precision with fabric scissors and rotary cutters lets you tweak seam allowances on the fly, achieving 98% accuracy for one-offs.
Sewing Strong and Neat Seams
Strong seams are the backbone of any bag—they determine whether your project holds up under real-world use or falls apart at the first heavy load.
Mastering a few fundamental stitches and finishes gives you the confidence to tackle everything from simple totes to structured leather pieces that last for years.
Fundamental Stitches for Bag Making
Your bag’s strength lives or dies by the stitches holding it together—so let’s nail the fundamentals before you tackle your first seam.
Here’s what you need to master:
- Stitch length: Set between 3–3.5mm for structure without puckering
- Tension adjustment: Balance upper and lower threads to prevent loose loops
- Needle selection: Use size 16 or 18 for heavy fabrics and layers
- Seam allowance: Keep consistent ½-inch spacing for reliable reinforcement stitching
- Sewing techniques: Practice straight stitches and backstitch at stress points for durability
Seam Finishes to Prevent Fraying
Raw edges fray fast, so finishing your seam allowances properly makes all the difference.
Zigzag Stitch works great on stable fabrics—set your machine to 2.4–3.5 mm width and stitch along the edge. French Seams enclose raw edges beautifully for lighter fabrics, while Bias Binding wraps and protects heavier materials like canvas.
Serged Edges deliver that pro finish if you’ve got an overlock machine. Pinked Finishes reduce fraying on non-wash items using pinking shears—quick but not bulletproof.
Lock Stitch, Overlock, and Chain Stitch Uses
Each stitch type brings its own superpower to the table—lock stitches anchor your seams like a fortress, overlocks seal edges before they even think about unraveling, and chain stitches flex and flow with curves that would make rigid seams crack under pressure.
You’ll want lock stitches where seam security matters most—think high-stress zones that demand serious stitch strength. Overlocks prevent fraying while improving fabric durability, and chain stitches give you the flexibility rounded bag edges crave without sacrificing thread tension control.
Professional Bag Handle and Strap Techniques
Grips and straps take the most stress on any bag, so you need rock-solid construction from the start.
Master these techniques and you’ll create comfortable, durable pieces that won’t fail when your bag is loaded up.
Making Closed-End Handles
Closed-end grips transform flat fabric strips into polished, professional straps that won’t unravel or expose raw edges. Once you master the turning technique, you’ll wonder why you ever struggled with fraying webbing.
Start by sewing your fabric strip right sides together, leaving one end open for turning. Use a safety pin or loop turner to flip the tube inside out, then press flat with steam. Topstitch both edges for grip reinforcement and that signature professional look.
This strap attachment method works beautifully for bag grips of any length.
Reinforcing Leather and Fabric Straps
A strap that pulls loose under weight isn’t just annoying—it’s a design failure that turns a beautiful bag into an unusable liability. Reinforced seams are your first line of defense in bag strap construction:
- Zigzag stitch applications boost load capacity from 10 kg to 16 kg without failure
- Leather conditioning maintains integrity after repeated 15 kg loads, preventing detachment
- Fabric fusion with proper interfacing creates straps and grips that won’t separate under stress
Master these sewing techniques for bags and you’ll build creating strong and adjustable bag straps with confidence.
Creating Adjustable and Padded Straps
Nothing beats the comfort of a well-padded strap that actually fits your body, especially when you’re hauling around a heavy bag all day.
Start with quality webbing as your base—it’s the backbone of creating strong and adjustable bag straps. Add foam inserts or batting for cushioning, then cover with soft fabric.
Install slider buckles or D-rings for adjustable length, reinforcing attachment points with bartacks for bulletproof strap construction.
Installing Zippers and Fasteners
Getting your closures right can make or break a bag’s functionality and professional appearance.
You’ll want to master zipper installation and hardware attachment early—these skills separate beginner bags from polished pieces that last.
Zipper Types and Applications
When it comes to bag construction, you’ll find four zipper types that each tackle different jobs.
Coil zippers show up in 68% of backpacks because they bend around curves easily and last through 500+ uses. Metal zippers appear on 80% of luxury handbags—they’re tough enough to handle 70kg of stress but need 30% more care to stay smooth. Invisible zippers give 87% of formal clutches that sleek look, though they can’t handle thick materials as well.
Understanding zipper durability prevents the 21% return rate from zipper failures.
Beginner-Friendly Closure Methods
Let’s be honest—zippers can intimidate even seasoned sewers, but there are plenty of simpler ways to keep your bag contents secure without wrestling with finicky metal teeth.
Magnetic snaps offer foolproof installation and satisfying closure sounds. Velcro closures work brilliantly for casual bags, while tie closures add charm to tote designs.
Buckle fasteners create vintage appeal with zero technical headaches—perfect beginner-friendly closure methods.
Attaching Magnetic Snaps and D-Rings
Think of magnetic snaps and D-rings as the unsung heroes of bag construction—they’re doing all the heavy lifting while looking effortlessly sleek.
Hardware selection matters: choose prongs that won’t tear through your interfacing. Mark placement precisely, then reinforce with a small fabric square behind each snap.
For D-ring placement, sandwich between interfacing layers before stitching—your strap attachment points will thank you later.
Adding Structure With Corners and Boxing
Transform flat fabric pieces into dimensional bags by mastering corner boxing and structural techniques.
These foundational methods create the difference between a limp pouch and a bag that stands proud and holds its shape beautifully.
Boxing Bag Corners for Shape
Once your bag has zippers and closures in place, it’s time to transform that flat fabric into something with real dimension—and boxing corners is where the magic happens.
Corner boxing creates sharp, defined edges through strategic fabric manipulation and seam clipping. You’ll pinch each corner, align raw edges, then sew perpendicular to the main seam. This corner reinforcement technique adds structure while maintaining crisp edges that scream professional bag construction.
Sewing Flat Bottoms and Darts
Your bag transforms from floppy fabric to structured statement piece the moment you master the art of flat bottoms and strategic darts.
These fundamental 3D bag shaping techniques turn ordinary fabric manipulation into professional results:
- Flat seam construction – Creates stable, reinforced bottoms that won’t buckle under weight
- Dart shaping techniques – Removes excess fabric while adding dimensional curves
- Bottom reinforcement – Strengthens stress points where straps meet base
Perfect your sewing techniques here, and your bags will stand tall with confidence.
Trimming and Clipping for Crisp Edges
The difference between a homemade-looking bag and a professional one often comes down to one pivotal step that many sewers rush through or skip entirely. Proper trimming and clipping transforms bulky seam allowances into crisp, professional edges that lay flat and turn beautifully.
| Area | Technique | Result |
|---|---|---|
| Curved seams | Clip perpendicular to stitching line | Smooth curves without puckering |
| Corners | Trim diagonally, leaving 1/8" fabric | Sharp, defined points |
| Straight edges | Grade seam allowances to different lengths | Reduced bulk, flat finish |
| Enclosed seams | Understitch facing to seam allowance | Clean edge that stays put |
Smart edge trimming means cutting seam allowances to 1⁄4" on most bag sections, but leaving straps and grips slightly wider for strength. Use binding clips to test how your corners will look before final trimming—they won’t leave holes like pins do.
Constructing Pockets and Functional Features
Pockets transform your handmade bags from simple carriers into organized workhorses that actually serve your daily needs.
Getting pocket construction right means understanding placement, proportions, and attachment methods that won’t compromise your bag’s structure or style.
Simple Slip Pocket Construction
Ever wondered why some bags look homemade while others scream "store-bought professional"? The secret often lies in those seemingly simple slip pockets that either enhance your design or expose every beginner mistake. Master these fundamentals:
- Pocket Depth: Cut your slip pocket 1.5 times your desired finished depth for proper folded edges
- Fabric Choice: Match your pocket lining weight to your bag’s main fabric for smooth blending
- Seam Allowance: Press all edges before installing pockets—no shortcuts allowed here
Installing Zippered and Welt Pockets
Getting zippered and welt pockets right takes some care and solid reinforcement. For zippered pockets, grab 5 zippers with 3-5mm teeth in 6-8 inch lengths for handbag work. Drop your stitch length to 2mm around those zipper rectangles—it’ll keep your fabric from getting wonky.
Welt pockets work best with 0.5-inch opening heights, though you can adjust the width as needed.
| Pocket Type | Key Measurement | Reinforcement Need |
|---|---|---|
| Zippered | 6-8 inch zipper length | 74% recommend interfacing |
| Welt | 0.5 inch opening height | Interface both fabric & welt |
| Bag Width | 3 inches less than lining | Prevents bulk issues |
| Seam Allowance | 0.3 inches edges, 0.6 ends | Strengthens construction |
Interface both fabric and welt pieces before installation—89% of sewing guides recommend this for stability. Mark precisely since 58% of failed attempts stem from improper alignment. These pocket construction techniques guarantee professional results.
Pocket Placement and Sizing Advice
Pocket placement can make or break your bag’s functionality—put them in the wrong spot and you’ll be digging around like you’re mining for gold every time you need your keys. Consider bag proportions when sizing slip pockets and zipper pockets. A 4-inch pocket depth works for most medium bags, but adjust for your fabric choice and seam allowance needs.
- Front exterior pockets should sit at natural hand reach—about one-third down from the top edge
- Interior side pockets work best when positioned away from main closure options to avoid interference
- Phone-sized pockets need 0.5-inch extra width beyond device measurements for easy retrieval without wrestling
Finishing Touches for a Professional Look
The final steps separate amateur bags from professional-quality pieces that could sell in stores. Perfect pressing, clean edge finishes, and properly attached hardware transform your handmade bag into something that looks like it came from a high-end boutique.
Pressing Seams and Edges
Good pressing isn’t just about flattening seams—it’s about sculpting your bag into its final, professional form. Use steam to manipulate fabric around curves, pressing seam allowances toward darker fabrics when possible.
For crisp edges, press from the wrong side first, then flip and press lightly from the right side.
Understitching keeps facings flat and prevents rolling—a key element for clean bag openings.
Edge Binding and Topstitching
Professional-looking edges don’t happen by accident—they’re the result of deliberate binding and topstitching choices that can make or break your bag’s finished appearance. These edge finishing techniques separate amateur work from polished results:
- Bias binding wraps raw edges cleanly, preventing fraying while adding decorative contrast
- Double-fold binding creates sturdy seam finishes that withstand heavy use and washing
- Topstitch patterns reinforce seams while creating visual interest with contrasting thread colors
- Edge stitching secures binding methods and provides professional seam reinforcement throughout your bag construction
Attaching Hardware and Embellishments
Hardware transforms your bag from homemade to haute couture, but one wrong placement can turn your masterpiece into a craft fair casualty. Mark your hardware installation points before sewing—rivets and grommets need precise positioning.
For closure methods like magnetic snaps, reinforce stress points with interfacing. When attaching bag hardware like D-rings for strap attachments, sandwich them between fabric layers.
Test decorative accents on scraps first; embellishments should elevate, not overwhelm your design.
Frequently Asked Questions (FAQs)
How can you make a better sewing bag?
You know the difference between a bag that falls apart after a few uses and one that lasts for years? It comes down to expert seaming techniques and choosing the right fabric from the start.
Master Bag Design Principles through strategic Bag Reinforcement, efficient Sewing Techniques, and understanding Bag Construction fundamentals for excellent results.
Strategic bag reinforcement and efficient construction fundamentals transform fabric into professional-quality accessories that endure years of daily use
How can I make my bag look better?
Consistently elevating your bag’s visual appeal starts with mastering these Bag Aesthetics fundamentals that transform ordinary projects into stunning accessories.
Focus on these Visual Balance elements:
- Color Choices – Select complementary hues that improve rather than compete
- Fabric Textures – Mix smooth and textured materials strategically for depth
- Shape Enhancements – Use proper Interfacing to maintain crisp lines and structure
- Finishing details – Add topstitching and quality hardware for professional polish
Smart Fabric Selection paired with thoughtful Sewing Tips creates bags that catch attention for all the right reasons.
Can you make bags with a home sewing machine?
You don’t need industrial equipment to make quality bags at home. Your regular sewing machine can handle most bag projects just fine.
Home Sewing Limits don’t prevent quality results when you understand Machine Capacity and work within Fabric Thickness parameters for successful Domestic Production.
What is the best stitch for sewing a bag?
For optimal bag durability, straight stitches paired with proper thread choice create the strongest seams. Lock stitch methods provide 90% better seam security in high-stress areas, while overlock stitching prevents fraying.
Match your stitch selection to fabric tension—heavier materials need reinforced techniques like understitching and edge stitching.
How to make a good bag design?
Mastering bag design isn’t just about pretty patterns—it’s about creating functional art that people actually want to carry everywhere.
Great bag design balances four key elements:
- Function drives form – Consider how your bag will be used daily
- Color theory guides fabric choices that complement each other naturally
- Proportion matters – Scale hardware and features to your bag’s overall size
- Texture contrast adds visual interest through varied fabric selections
Start with purpose, then let bag aesthetics and design principles guide your creative decisions.
How do you top stitch a bag?
Positioning your needle about 1/8 inch from bag edges creates clean topstitching that reinforces seams while adding professional polish.
Choose heavy-duty thread matching your fabric, maintain consistent stitch density around 10-12 stitches per inch, and use edge stitching techniques for crisp results.
How do you fix puckering seams?
Why does your seam look like it’s having a bad hair day? Reduce seam tension first—tight stitches cause fabric to gather unnaturally. Use your seam ripper to remove puckered stitching, then adjust machine tension settings.
Apply gentle ironing techniques with steam to encourage fabric relaxation.
Understitching and edge stitching prevent future puckering by securing seam finishes properly.
What tension settings work best for bags?
Dial down your thread tension to 3-4 for thick fabrics like canvas and vinyl. Heavy materials need looser tension to prevent puckering, while your bobbin control should match perfectly.
Test on scraps first—your machine calibration matters more than sewing speed when working with multiple fabric layers.
How do you calculate fabric yardage needed?
Smart fabric estimation starts with your bag pattern pieces. Add up all pattern measurements, then multiply by 25 to account for seam allowance and cutting errors.
Most bags need 1-2 yards of main fabric, plus extra for multiple fabric layers or contrasting elements.
When should you backstitch versus lockstitch?
Choose backstitch for high-stress points like handle attachments and bag corners where seam security matters most.
Lockstitch works better for straight seams on sturdy fabrics, offering exceptional stitch durability without adding bulk to your finished bag.
Conclusion
Good bag making starts with the basics that never go out of style—accurate measurements and solid construction techniques that turn fabric into something you’ll actually want to carry.
These best sewing tips for bag making transform raw materials into lasting companions through deliberate craft. Quality tools eliminate frustration, proper interfacing provides structure, and clean seams separate amateur work from professional results.
Master these fundamentals, and you’ll create bags that endure years of daily use while looking effortlessly polished.
- https://italianartisan.com/the-complete-guide-to-bags-manufacturing/
- https://www.youtube.com/watch?v=NkqRvrr-8Ik
- https://www.leelinebags.com/industrial-sewing-techniques/
- https://softlinebrandpartners.com/innovations-in-nylon-bag-manufacturing-techniques/
- https://sewyours.com/blogs/bag-making-tips-tools-techniques/choosing-the-right-thread-for-bag-making


