This site is supported by our readers. We may earn a commission, at no cost to you, if you purchase through links.
Use your needle plate’s seam guide markings as your north star—they’re there for a reason. Keep steady pressure on your fabric without pulling or pushing too hard.
Think of it like driving a car down a highway lane. You make small adjustments, not sharp turns. Practice on scrap fabric first to build muscle memory.
Your machine wants to help you succeed, so work with it, not against it. The real game-changers involve specialty tools and techniques, and using them can make a big difference in your sewing, helping you to sew straight.
Table Of Contents
Key Takeaways
- Focus on your seam guide markings, not the needle – You’ll sew straighter lines when you watch the reference points on your needle plate instead of following the dancing needle with your eyes.
- Control your speed and let the machine do the work – Slow down your stitching pace and let the feed dogs pull the fabric naturally while you provide gentle guidance rather than forcing or pulling the material.
- Use specialty tools to your advantage – You can dramatically improve accuracy with magnetic seam guides, quarter-inch quilting feet, or even simple DIY solutions like tape markings on your machine.
- Practice builds muscle memory that makes straight seams automatic – You’ll develop consistent stitching through regular practice on scrap fabric, focusing on proper posture and steady hand positioning until straight sewing becomes second nature.
Sewing Straight Basics
You can’t sew straight lines if you don’t master the basics first. These four foundation skills will transform your crooked seams into perfectly aligned stitches that look professional every time.
Maintaining Proper Posture
Finding your ergonomic sewing sweet spot starts with chair height adjustment—your arms should rest naturally at machine level.
Your sewing machine works best when your body feels comfortable and naturally aligned—let ergonomics guide your stitching success.
Plant your feet flat and use back support to stay upright. Position lighting properly to avoid neck strain.
Sewing posture directly impacts your sewing control and accuracy.
To further alleviate strain, remember to strengthen core muscles for better spinal support. Take regular posture breaks to stretch and reset your body for better sewing alignment.
Using Reference Points
Your sewing accuracy depends on smart reference points, not staring at that dancing needle.
Master these visual cues for perfect fabric alignment and consistent focus:
- Needle plate markings guide your seam allowance with precision
- Tape strips create instant sewing machine guide lines
- Edge monitoring keeps fabric tracking straight
- Marking methods pre-plan your straight stitch path
These techniques transform wobbly seams into sewing straight lines perfection.
Controlling Fabric Tension
Most sewing machine tension problems stem from imbalanced settings that create uneven stitches and fabric puckering.
Most crooked seams aren’t skill problems—they’re tension problems waiting for the right adjustment.
Your tension dial controls how tightly the thread pulls through fabric.
When sewing machine tension runs too tight, fabric bunches up.
Too loose, and stitches look messy.
Thread quality matters just as much.
Match your thread type to fabric weight—cotton thread works best for most projects.
Let the feed dog control fabric movement instead of pulling or pushing.
The presser foot should guide fabric smoothly without resistance.
Test tension balance on scraps before starting your project.
Adjust stitch length if needed.
Test on scraps
Hands off fabric!
Practicing on Scrap Fabric
Once you’ve mastered fabric tension, scrap fabric becomes your best teacher.
Use remnants for sewing practice with different thread and fabric combinations. Try beginner patterns or simple rows to build skill development through consistent practice.
Your sewing machine practice doesn’t judge mistakes—it celebrates progress. Each crooked line teaches your hands how to guide fabric for perfect straight stitch results on real projects.
How to Sew Straight
Perfect straight stitch technique starts with Fabric Edge Prep—trim those frayed edges for clean alignment.
Your sewing machine control improves dramatically when you master these fundamentals:
- Maintain Consistent Hand Pressure while guiding fabric
- Use Machine Speed Control to sew slowly and steadily
- Trust Feed Dog Function to pull fabric smoothly
- Focus on seam allowance markings, not the needle
- Apply Backstitching Technique at seam starts and ends
Sewing straight lines becomes second nature when you let your machine do the work while you provide gentle guidance.
For even greater precision, consider using magnetic seam guides.
Mastering Seam Guides
Your sewing machine’s seam guides are like built-in rulers that help you sew perfectly straight lines every time.
When you learn to use these markings on your needle plate, you’ll stop wobbling and start creating professional-looking seams.
Using Needle Plate Markings
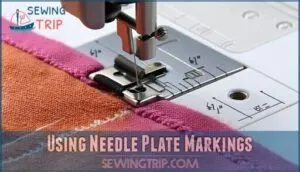
Your sewing machine needle plate comes with built-in guides that’ll transform your straight stitch game. These engraved lines show accurate seam allowance measurements – typically ⅜", ½", and ⅝" from the needle.
Simply align your fabric edge with the appropriate marking for consistent alignment every time. The key is markings visibility – if they’re worn, you’re flying blind. Use good lighting and position your fabric so you can clearly see where it meets the needle plate guide.
This measuring fabric method beats guessing every single time.
Applying Tape or Sticky Notes
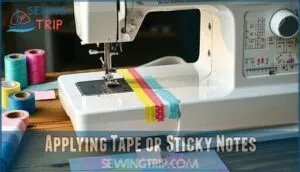
Two tape types work best for sewing straight lines: painter’s tape and washi tape.
Choose low adhesive strength options to avoid residue removal headaches.
Place your sewing machine masking tape or Postit notes along seam guides for better visibility.
Smart note placement creates instant reference lines.
These simple tools transform wobbly stitches into perfectly straight seams every time.
Utilizing Laser Guides
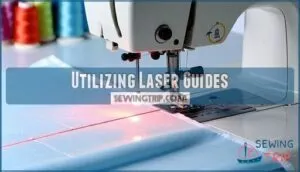
Beyond tape and sticky notes, laser guides offer space-age precision for your sewing machine. These high-tech seam guides project a bright red line directly onto your fabric, making sewing straight lines feel effortless.
Your laser guide needs proper guide calibration to deliver laser accuracy. Here’s how to maximize this tool:
- Position the laser parallel to your needle for straight stitch alignment
- Adjust brightness based on fabric types and visibility factors
- Test calibration on scrap fabric before starting projects
- Combine with needle plate markings for double-check precision
- Consider DIY lasers for budget-friendly sewing upgrades
Many users find it helpful to purchase a laser guide for their sewing machines.
Creating DIY Seam Guides
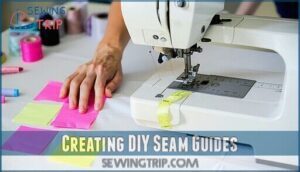
When you’re short on fancy tools, creating your own seam guide saves money and works brilliantly.
Stack Post-it notes for instant fabric barriers, or use masking tape for custom measurements. These simple tricks deliver professional results without breaking the bank.
| DIY Guide Type | Materials Needed | Best For |
|---|---|---|
| Post-it Note Guide | Sticky notes, ruler | Quick temporary guides |
| Masking Tape Guide | Washi tape, measuring tool | Permanent machine markings |
| Elastic Circle Guide | Elastic band, safety pin | Curved seam allowances |
| Fabric Scrap Guide | Heavy fabric pieces | Thick material barriers |
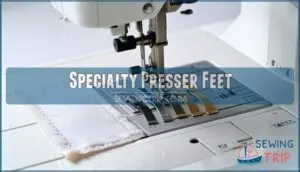
Specialty Presser Feet
You don’t need to struggle with wobbly seams when specialty presser feet can do the hard work for you.
These clever attachments snap onto your machine and provide built-in guides that keep your fabric perfectly aligned for straight stitching every time.
Adjustable Guide Feet
Adjustable guide feet take your straight stitch game to the next level. These sewing machine presser foot attachments feature rulers and sliding guides that lock onto your desired seam guide position.
Unlike basic feet, they offer precise foot calibration for different seam widths across various fabric types. These feet improve seam accuracy.
Key benefits include:
- 1mm markings for exact measurements
- Universal compatibility with most machines
- Stable guidance for topstitching projects
- Easy maintenance with simple cleaning
Perfect for when your sewing machine foot with guide needs an upgrade.
Quarter-Inch Quilting Feet
Quarter-inch quilting feet deliver accurate seam allowance every time you sew. These specialized foot types attach to your sewing machine using simple attachment methods that work with most low-shank models.
You’ll achieve perfect quilting applications by letting the foot guide your fabric edges. The built-in guide keeps patchwork pieces aligned for precise straight stitch work. No more measuring or guessing your seam allowance.
When sewing straight becomes challenging, these feet solve common troubleshooting issues. They’re game-changers for quilting projects where precision matters most. Many users purchase a specialty quarter inch foot to improve their quilting accuracy.
Here’s a quick comparison:
Accurate Seams
Border Guide Presser Feet
Border guide presser feet take your straight stitching to the next level with their adjustable settings and built-in seam guide system.
These sewing machine presser feet excel at creating decorative borders and maintaining stitch precision across various fabric types.
- Foot installation snaps on easily to most modern machines
- Fabric compatibility works with cotton, linen, and lightweight materials
- Adjustable settings let you customize spacing for different project needs
These feet are available at online retail locations.
Perfect for quilters wanting consistent border widths and seamstresses tackling larger projects.
Magnetic Seam Guides
Strong magnets keep these seam guides locked in place, transforming your straight stitch accuracy.
You’ll find magnetic seam guides attach directly to your sewing machine’s needle plate, creating a reliable fence for fabric alignment. Guide placement matters – position it precisely where your seam allowance needs to be.
Different fabric types work well with this tool, from cotton to denim. If you’re experiencing troubleshooting slippage, clean your needle plate first.
These sewing techniques beat other guide alternatives hands down.
| Feature | Benefit |
|---|---|
| Magnet Strength | Stays put during sewing |
| Adjustable Position | Works with any seam width |
| Universal Fit | Compatible with most machines |
| Scratch-Free Pads | Protects your needle plate |
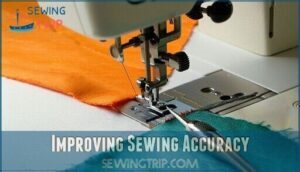
Improving Sewing Accuracy
You’ve mastered the tools and techniques, but consistent accuracy requires focused practice and patience.
These proven methods will help you build the muscle memory and troubleshooting skills that turn wobbly stitches into perfectly straight seams every time, resulting in perfectly straight seams.
Taking Time and Controlling Speed
The secret to sewing straight isn’t rushing—it’s mastering Controlled Stitching through Deliberate Practice.
Rushing Mistakes create crooked seams and frustration. Slowing Benefits include better accuracy and reduced errors.
Here’s your speed control roadmap:
- Set your sewing machine speed control to medium for Consistent Speed
- Practice sewing tricks with steady rhythm—no speed contests
- Focus on precision over pace for straight sewing mastery
Patient stitching wins every time.
Practicing With Different Fabrics
Once you’ve mastered speed control, fabric experimentation takes your skills further.
Different fabric types teach unique lessons about tension adjustments and stitch settings.
Start with stable fabrics like cotton for sewing machine practice sessions.
The feed dog handles each material differently.
Slippery satin requires lighter tension, while stretchy knits need ballpoint needles.
These sewing machine fabric experimentation sessions build confidence.
Fabric preparation varies too—some need special seam finishes for clean results.
Troubleshooting Common Issues
After practicing with different fabrics, you’ll encounter common sewing mistakes that need quick fixes. Fabric Drifting and Uneven Stitches happen when your sewing machine settings aren’t right. Skipped Stitches and Needle Breaks signal threading or needle problems.
Here’s your sewing machine troubleshooting guide:
- Puckered Seams: Adjust thread tension and slow down your straight stitch speed
- Fabric Drifting: Support your project properly and let feed dogs control movement
These sewing mistakes won’t derail your sewing straight progress.
Building Muscle Memory Through Practice
Your hands learn through repetitive motion and consistent practice. Start with paper exercises, then progress to fabric scraps. Mindful sewing creates muscle memory faster than rushing through projects. Focus on gradual improvement through daily practice sessions.
Sewing straight lines is one of the essential sewing machine skills to master.
| Practice Stage | Exercise Type | Time Investment |
|---|---|---|
| Beginner | Paper line tracing | 10-15 minutes daily |
| Intermediate | Fabric scrap stitching | 15-20 minutes daily |
| Advanced | Complex seam patterns | 20-30 minutes daily |
Skill reinforcement happens when you repeat the same straight stitch motion consistently. Your sewing machine becomes an extension of your hands through dedicated sewing practice. Each session builds toward effortless consistent stitching and perfect sewing machine straight stitching.
Frequently Asked Questions (FAQs)
How to sew straight on a sewing machine?
Like a ship following its compass, you’ll find success by watching your seam guide instead of the needle.
Keep fabric edges aligned with markings, sew slowly, and let feed dogs pull the material forward smoothly.
Should you learn to sew a straight line?
Yes, you should absolutely learn to sew straight lines.
It’s the foundation of quality sewing that affects every project’s appearance.
Straight seams create professional-looking garments, quilts, and home décor items you’ll proudly display.
How do you sew straight lines?
Before knights wielded swords, seamstresses mastered needle control.
Focus on the seam guide, not the needle. Keep fabric edges aligned with markings.
Sew slowly and steadily. Let feed dogs pull while you guide gently.
Do you need a sewing machine to sew a straight line?
You don’t need a sewing machine to sew straight lines.
Hand sewing works perfectly fine with proper technique.
Use a ruler, chalk lines, or fabric markers as guides.
Practice steady, even stitches for best results.
How do I make my sewing straight?
Focus on your seam guide, not the needle.
Keep fabric edges aligned with machine markings. Sew slowly and steadily.
Use your hands to guide fabric gently. Practice on scraps first to build confidence.
How to do a straight stitch?
Set your machine to straight stitch mode.
Position fabric edge along the seam guide markings on your needle plate.
Keep your eyes on the guide, not the needle.
Sew slowly and let feed dogs pull fabric smoothly forward.
How do you sew perfectly straight?
Watch your seam guide, not the needle.
Keep fabric edges aligned with machine markings. Sew slowly and let feed dogs pull fabric naturally.
Support larger pieces with extension tables to prevent dragging and distortion, and remember to sew slowly.
Why can’t I sew a straight line?
Like a ship without a compass, you’re probably watching the needle instead of your seam guide.
You’re also sewing too fast, not supporting your fabric properly, or using dull cutting tools that create uneven edges.
How to keep a line straight when sewing?
Keep your eyes on the seam guide markings, not the needle.
Let the feed dogs pull fabric while you guide gently.
Sew slowly and use your presser foot as a reliable reference point.
How to stop fabric curling when sewing?
Back in the stone age, seamstresses knew this trick: press your seams flat with an iron before stitching.
Use stabilizer on stretchy fabrics.
Pin edges down securely. Let the machine’s feed dogs do their work without pulling, using the feed dogs to guide the fabric.
Conclusion
Surprisingly, learning how to sew straight doesn’t require superhuman powers or ancient magic.
You’ve got the tools and techniques now. Your machine’s seam guides aren’t just decorative lines. Specialty presser feet aren’t mysterious gadgets.
Practice builds muscle memory that makes straight seams automatic. Start with scraps, maintain good posture, and control your speed.
Soon you’ll wonder why crooked seams ever seemed normal. Master these basics, and you’ll sew straight lines consistently every time, with straight seams becoming second nature.

