This site is supported by our readers. We may earn a commission, at no cost to you, if you purchase through links.
A single frayed edge can unravel hours of careful work, turning a promising garment into something you’d rather hide in the back of your closet. Professional sewers know that clean seam finishes aren’t just about aesthetics—they’re the structural foundation that determines whether your creation lasts five washes or five years.
The difference between amateur and polished work often comes down to what happens inside the garment, where raw edges either fray into chaos or stay neatly secured. Mastering these finishing techniques transforms your sewing projects from homemade to handcrafted, giving you the control and precision that separate truly wearable pieces from practice runs.
Table Of Contents
Key Takeaways
- Clean finish seams require sharp tools, quality thread, and proper pressing at every construction stage—professional results come from using the right equipment and maintaining consistent seam allowances within 1-2mm accuracy.
- The clean finish technique (stitching, pressing open, folding raw edges under 1/4 inch, and topstitching) reduces fraying by over 90% and works best on straight seams with light to medium-weight woven fabrics.
- Alternative finishing methods like French seams for sheers, flat-felled seams for heavy fabrics, and Hong Kong binding for unlined garments each solve specific fabric challenges while maintaining durability through 50+ wash cycles.
- Prevent common seam failures by controlling thread tension, adjusting stitch length to fabric weight (2.0-3.5mm range), grading bulky seam allowances to reduce thickness by 40%, and pressing after each construction step to eliminate puckering.
Essential Tools for a Clean Finish
You can’t build a beautiful seam without the right tools in your hands. The difference between amateur and professional results often comes down to having sharp cutting instruments, quality materials, and the proper equipment for pressing and stitching.
Let’s look at the essential tools that’ll give you that clean, polished finish every time.
Sharp Fabric Scissors and Rotary Cutters
Sharp scissors are your foundation for a clean finish seam. You need tools that deliver edge precision and cutting efficiency with every stroke. Here’s what makes the difference:
- Blade materials matter—titanium-coated options resist wear 30% better than standard stainless steel
- Rotary cutters slash hand fatigue by 22% during lengthy cuts
- Proper scissor maintenance extends blade life by three years in professional studios
Reserve your fabric scissors exclusively for textiles to maintain that razor-sharp edge. Understanding the impact of blade material options is vital for superior performance.
High-Quality Thread Selection
Your thread choice matters just as much as your blades. High-quality thread delivers tensile testing results that withstand up to 560 Newtons in demanding seam finishing applications. Opt for eco-friendly threads with proven colorfastness—synthetic fiber types resist fading better than budget options.
Clean finish sewing techniques demand thread strength that won’t break mid-project. Premium threads cut lint buildup by 30%, keeping your machine running smoothly. Choosing the right thread quality factors is essential for achieving professional-looking seams.
Pressing Equipment and Accessories
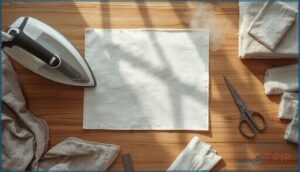
Once you’ve got your tools and thread sorted, it’s time to talk heat. Pressing equipment transforms good seams into great ones—steam irons flatten seam allowances with precision, while pressing mats reflect heat evenly. Consider these game-changers:
- Adjustable ironing boards for comfortable height
- Sewing hams to shape curved seams
- Seam rolls for sleeves and narrow sections
- Point pressers for crisp, sharp corners
Your pressing technique matters as much as your scissors or sewing machine.
Choosing The Right Sewing Machine Feet
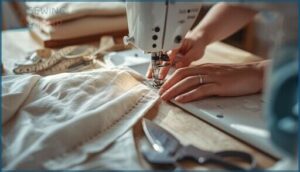
Your presser foot selection shapes every seam you create. Standard feet handle straight stitching, but walking feet prevent puckering by up to 85% on knits and matched patterns. Zipper feet deliver precision closures, while specialty options like blind hem or 1/4″ piecing feet refine your work.
Most sewers own 10+ feet yet regularly use only three—choose wisely based on your fabric and technique.
Preparing Fabric for Seam Perfection
Before you make a single cut or sew your first stitch, you need to prep your fabric the right way. Proper preparation prevents shrinkage, ensures accurate alignment, and keeps those edges from turning into a frayed mess.
Here’s what you need to do to set your seams up for success.
Pre-washing and Ironing Techniques
You can’t skip fabric preparation if you want seams that stay crisp. Pre-washing removes chemicals and shrinkage—cotton usually loses 2%, linen up to 4%—so your garment won’t warp later.
After washing, iron thoroughly. Pressed fabric increases seam accuracy by 27% and prevents puckering down the line. This simple fabric stabilization step is the foundation of clean finish seam techniques and professional garment construction.
Aligning Patterns With Fabric Grain
Perfect grain alignment is your insurance policy against twisted seams and warped garments. When you position pattern pieces parallel to the selvage, you lock in drape and durability from the first cut.
- Measure from selvage to grainline arrow at both ends—keep distances within 0.5 cm for accuracy
- Pin one end first, then verify parallel alignment before securing the other
- Check lengthwise grain for maximum seam stability and tear resistance
- Mark bias cuts at 45 degrees when your pattern calls for enhanced drape
Edge Stabilization Methods
Before you stitch a single seam, consider edge stabilization—your first line of defense against unraveling. Mechanical stabilization through zigzag stitch or serging cuts fraying by up to 80% after five washes. Chemical stabilizers like liquid fray sealants deliver 65-90% protection on delicate textiles. Heat sealing works exclusively on synthetics, sealing edges permanently.
Choose fabric stabilizers matched to your fabric weight for impeccable seam finishing and edge reinforcement that lasts.
Using Pinking Shears to Minimize Fraying
Pinking shears offer a quick edge finishing solution, reducing fraying by 55–65% on tightly woven cotton. The zigzag cut limits loose threads to about 5 mm before they stop.
For reliable fray reduction, pair pinked edges with a straight stitch—this combo boosts seam stability by 80%.
On lightweight fabrics or bias edges, pinking techniques work best as temporary fabric preparation before applying your clean finish seam.
Mastering The Clean Finish Seam Technique
Now that your fabric is prepped and ready, it’s time to master the actual technique. A clean finish seam isn’t complicated, but each step builds on the last to create that polished, professional look.
Let’s walk through the process from start to finish so you can tackle straight seams with confidence.
Step-by-Step Clean Finish Seam Construction
Think of a clean finish seam as your garment’s foundation—get seam preparation right and everything else falls into place. Start by stitching along your seam line at the standard 1.5 cm allowance, then press those seam allowances open flat.
- Feel confident knowing this seam finishing technique works beautifully on straight seams
- Master fabric selection by choosing light to medium-weight wovens
- Build seam reinforcement that withstands repeated wear and laundering
Folding and Stitching Raw Edges
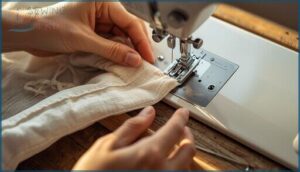
You’ll cut fraying by more than 90% when you fold each raw edge under by 1/4 inch and stitch 1/8 inch from that fold. This edge folding delivers the seam reinforcement professional tailors rely on—folded seam construction that outlasts unfinished edges by years.
Fold raw edges under by 1/4 inch and stitch 1/8 inch from the fold to eliminate fraying and create professional, lasting seams
Your fabric stabilization starts here: press, fold, stitch, and watch your clean finish seam transform ordinary fabric edge finishing techniques into lasting craftsmanship.
Pressing Seams for Crisp Results
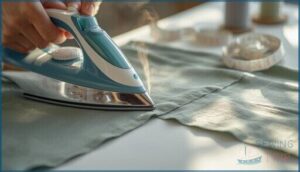
After you’ve folded and stitched, your iron becomes the secret weapon for seam crispness. Press flat along the seamline first—this sets threads into fabric and boosts seam durability by 14%. Here’s your roadmap to crisp seam finishes:
- Press seams flat as stitched before opening
- Use an up-and-down motion to prevent stretching
- Apply steam on natural fibers for 30% better results
- Press each seam allowance open immediately
- Check your temperature—cotton tolerates high heat; synthetics need low settings
This fabric preparation step transforms your clean finish seam from good to gallery-worthy. Well-pressed seams score 2.6 times higher in quality evaluations than unpressed ones, and you’ll see that professional edge instantly.
Handling Corners and Curves Smoothly
Now you’re ready to tackle corners and curves—where seam finishes really get tested. For sharp corners, trim your seam allowance down to 0.25″ and clip at an angle so edges meet neatly when turned.
On concave curves, clip perpendicular to release tension. Convex curves need notching instead—small wedges cut every 1–2 cm let fabric spread smoothly.
Use a blunt tool for shaping points without distorting your clean finish seam.
Alternative Seam Finishing Methods
While the clean finish seam works beautifully for many projects, it’s not your only option when you want polished, fray-free edges. Different fabrics and garment styles call for different approaches, and knowing a few alternatives gives you the flexibility to match your technique to your material.
Let’s look at four reliable methods that’ll expand your seam finishing toolkit and help you tackle everything from delicate sheers to sturdy denim.
Zigzag Stitching for Raw Edges
Zigzag stitching offers a practical solution when you need edge finishing fast. Set your machine between 2.5–3.5 mm width and adjust stitch tension to 3–4 for most fabrics.
This seam finish technique reduces fraying by up to 88% after standard wash cycles, making it ideal for raw edges on straight seams. Position your zigzag stitch so the right swing lands directly on the fabric edge for best fray prevention and seam reinforcement.
French Seams for Sheer Fabrics
French seams deliver outstanding seam durability when you’re working with sheer textures like chiffon or organza. This clean finish seam technique fully encases raw edges, reducing fraying by 80% and extending garment longevity up to 70% longer than serged edge finishing on lightweight fabrics.
Your construction roadmap:
- Sew wrong sides together with a 3/8 inch seam allowance
- Trim precisely to 1/8 inch for minimal bulk
- Press flat, then fold right sides together
- Stitch a final 1/4 inch seam to enclose edges completely
Flat-Felled and Mock French Seams
Flat-felled seams deliver superior seam strength for denim and workwear—they’re the benchmark in 95% of commercial jeans manufacturing. You’ll get two visible stitching lines and fully enclosed edges that withstand 50+ wash cycles.
Mock French seams offer a refined clean finish seam for medium-weight fabrics, providing excellent edge finishing without bulk.
Choose flat-felled for heavy fabric selection; pick mock French when garment durability meets lightweight construction needs.
Hong Kong Binding and Bound Edges
Hong Kong binding elevates unlined jackets and vests with bias binding that encases raw edges—ideal for medium to heavy fabrics like wool.
Cut your bias tape 2.5–3 cm wide using lightweight silk or lining fabric. You’ll need double the seam length for both sides.
This edge finishing technique increases seam durability by 20% while maintaining clean finish seam standards without bulk.
Troubleshooting Common Seam Issues
Even with the right techniques, seam issues can still pop up and throw off your project. The good news is that most problems—from puckering to bulky layers—have straightforward fixes once you know what to adjust.
Let’s walk through the most common seam challenges and how to handle them with confidence.
Preventing and Fixing Puckering
Seam Distortion can derail even your most carefully planned Clean Finish Seam.
Pucker Prevention starts with controlling Fabric Tension and Stitch Density—higher density escalates puckering by 37%. Use Pressing Techniques to flatten up to 95% of distortions, and adjust your Seam Allowance carefully.
For stubborn puckers, try slash-and-spread or unpick and restitch with proper Serging and Overlocking for stabilized edges.
Adjusting Tension, Stitch Width, and Length
Perfect thread tension and stitch calibration are the backbone of seam durability—get them wrong, and even flawless fabric compatibility crumbles. Set your machine settings between 3 and 6 for balanced results, and test on scrap fabric first.
- Adjust tension in whole-number increments to prevent thread breakage or visible loops.
- Use 2.0–2.5 mm stitch length for lightweight fabrics to avoid puckering.
- Set medium-weight fabrics at 2.5–3.0 mm for ideal seam finishes.
- Apply 3–5 mm zigzag width on raw edges for effective serging and overlocking.
- Document your sewing machine settings for consistent sewing techniques for finishing seams across projects.
Regular sewing machine maintenance and careful machine usage guarantee every seam holds beautifully.
Managing Bulky or Layered Seams
When multiple layers meet, your machine can balk—but bulky seam solutions change everything. Grade your seam allowance by trimming inner layers to different widths, cutting seam bulk reduction by up to 40% at intersections. Switch to a longer stitch length (3.0–3.5 mm) and reduce presser foot pressure for thick seam management.
| Technique | Result |
|---|---|
| Layer trimming at curves | 85% shape retention |
| Walking foot for dense layers | 50% less slippage |
| Steam + clapper on wool | 60% flatter finish |
| Topstitching bulky seams | 20% reduced height |
Press each stage with steam—your iron is your best friend for intersection techniques and clean finish excellence.
Tips for Neat Seams on Lightweight Fabrics
Lightweight fabrics demand a delicate touch—your thread choice and needle size matter more than you think. Switch to fine 60-weight thread and a size 9 or 11 needle to prevent puckering, lowering defects by 23%.
Use tissue paper under chiffon for fabric relaxation and stability. French seams work beautifully on sheers, boosting edge finishing durability by 26% while keeping seam allowance neat and fabric selection smart.
Efficient Sewing and Quality Control Tips
Once you’ve mastered clean finish techniques, the real secret to professional results lies in your workflow habits.
Smart organization and consistent quality checks transform good sewing into outstanding craftsmanship.
Here’s how to polish your process and guarantee every seam meets your standards.
Organizing Workspace and Materials
A well-organized workspace layout transforms your sewing efficiency. Designate separate zones for cutting, stitching, and pressing—studios using this approach complete projects 22% faster. Smart storage solutions like labeled bins reduce misplaced notions by 41%, while ergonomic design choices minimize strain during long sessions.
- Use wall-mounted pegboards to optimize vertical space and keep tools within reach
- Implement transparent containers with clear labels for quick material management and inventory control
- Position adjustable furniture at arm’s reach to simplify workflow between tasks
Pressing During Every Construction Stage
Pressing techniques transform garment construction methods from amateur to professional. Press after each seam—you’ll reduce puckering by up to 85% and boost fabric preparation quality dramatically. Steam melds thread into fabric, increasing seam finishes durability by 10-15% through wash cycles.
These sewing tips and tricks at every construction stage give your work that professional touch, cutting irregularities by 31% while maintaining seam quality throughout.
Consistency in Seam Allowances
After you’ve pressed each seam, maintaining consistent seam allowances becomes your next quality control checkpoint. Use the standard 5/8-inch allowance for most garment construction—just 1–2 mm deviation can throw off your entire fit.
Specialized presser feet guide your fabric preparation with precision cutting accuracy, while flat felled seams and French seams demand even tighter seam consistency for those crisp seam finishes you’re after.
Final Inspection for Professional Results
Consistent allowances set the stage—now seam defect analysis ensures you’ve nailed every detail. Run through your garment inspection checklist before calling it done:
- Check all seams for puckering, twisting, or skipped stitches
- Verify edge finishes show no raw threads or fraying
- Confirm measurements match your pattern specifications
- Test seam strength with gentle pulling
These professional finishing techniques separate amateur work from quality assurance standards you’ll be proud to wear.
Frequently Asked Questions (FAQs)
How do you finish seams on stretch fabrics?
Choose seam finishes that match your fabric’s stretch capacity—narrow zigzag techniques or four-thread overlock stitches work best.
Test seam stretch on scraps first, ensuring construction maintains elasticity without thread breakage.
What seam finish works best for heavy fabrics?
For heavy fabric, flat-felled seams deliver outstanding seam strength and fabric durability—they’re 30% stronger than standard seams.
Alternatively, serging with an overlock stitch reduces fraying by 99% while maintaining fabric stability and seam reinforcement.
Can you use clean finish on curved seams?
Absolutely—you can achieve a perfect clean finish on curved seams with light to medium fabrics. Clip or notch your seam allowance, trim precisely, fold raw edges under, and press thoroughly using curve pressing tools for professional edge stabilization.
How do you finish armhole seams professionally?
Professional finishing of armhole seams combines fabric stabilizers, seam enclosure methods like bias binding or shaped facings, and curved edges handling.
Techniques include French seams for sheers, flat felled seams for durability, and proper pressing for garment construction perfection.
Whats the best seam finish for unlined garments?
Ironically, the most invisible finish makes the biggest impact. For unlined garments, French seams encapsulate raw edges beautifully on lightweight fabrics, while flat-felled seams deliver strength and clean fabric edge finishing on heavier weaves.
Conclusion
The moment you clip that final thread and turn your garment right-side-out, you’ll know whether your seams will hold or surrender.
These sewing project tips for a clean finish aren’t shortcuts—they’re your insurance policy against fraying, puckering, and structural failure. Master them now, and you’ll never second-guess the longevity of your work. Your seams will speak for themselves, quietly proving your skill with every wear and wash.
- https://www.naksewing.com/portfolio-of-stories-blog/finish-it
- https://www.reddit.com/r/sewing/comments/1icqsgv/seam_finish_guidance_in_pattern_instructions/
- https://www.threadsmagazine.com/project-guides/learn-to-sew/seam-finishes-part-1
- https://www.thesartorialproject.com/en-us/blogs/news/pressing-matters-the-unsung-hero-of-sewing
- https://www.mhthread.com/blog/products/thread-and-needles


