This site is supported by our readers. We may earn a commission, at no cost to you, if you purchase through links.
You can spend hours picking the perfect fabric, but if your seams don’t match, every stripe and motif will shout louder than any color or print. One misplaced plaid can turn a custom jacket into a puzzle missing its corner piece. Pattern matching isn’t a luxury—it’s the difference between homemade and handmade.
Even seasoned sewists get tripped up by bias stretch or a sneaky repeat that gobbles extra yardage. Whether you’re working with bold florals or classic checks, mastering sewing pattern matching seams tips is what sets your work apart. Let’s break down the essentials for crisp, professional results every time.
Table Of Contents
Key Takeaways
- Pattern matching starts with careful fabric preparation, including identifying grainlines and measuring pattern repeats for accurate cutting.
- Always buy 10–20% extra fabric to allow for repeat matching and minimize waste, especially with bold or large-scale prints.
- Pinning and cutting techniques, like using your first piece as a template and aligning motifs at seam intersections, are essential for seamless visual continuity.
- Pressing seams with the right tools and settings preserves pattern alignment and prevents distortion for a polished, professional finish.
Essential Fabric Preparation for Seam Matching
Pattern matching starts long before your first cut or stitch. The foundation of polished results lies in how you prep your fabric and understand its structure.
Let’s walk through the key preparation steps that set you up for success.
Identifying Fabric Grain and Grainline
Understanding fabric grain is your first move toward professional seams. The lengthwise grain runs parallel to the selvedge—it’s the warp threads with minimal stretch. The crosswise grain, or weft, sits perpendicular with slightly more give. Bias grain angles at 45 degrees and stretches the most. Visual identification starts with the selvedge edge.
Fabric grain affects the drape and fit of a garment. Cutting off-grain can increase puckering by 25%, so accuracy impacts your final result greatly.
Recognizing Pattern Repeat and Print Orientation
Once you know your grain, pattern repeat and print orientation become your next checkpoint. Pattern repeat is the distance between identical points in your fabric’s design. Measure it by finding where a motif appears again—vertically and horizontally. Print direction matters too. Directional prints like florals or stripes need consistent orientation or your seams will look mismatched.
Follow these visual cues for repeat identification:
- Locate a distinctive motif in the fabric pattern and mark it with a pin.
- Measure vertically to the next identical motif for the lengthwise repeat.
- Measure horizontally across the fabric to find the crosswise repeat.
- Check for print direction by examining if the design has a clear top or bottom.
- Watch for fabric distortions near the selvedge that can throw off your measurements.
Automated recognition systems now achieve over 97% accuracy in identifying yarn-dyed fabric patterns. This is due to the use of automatic recognition methods.
Symmetry techniques help you cut strips in consistent North-South or East-West directions. Horizontal cuts create North-South print orientation while vertical strips produce East-West prints. Your placement order directly influences visible print direction and final garment symmetry.
Calculating Extra Fabric for Pattern Matching
Now that you’ve measured your repeat, it’s time to figure out how much extra fabric you’ll need. Repeat size impacts your calculations directly. For large-scale prints and patterns, multiply the number of major garment pieces requiring matching by your repeat measurement in inches, then add this to the envelope yardage.
Most professionals recommend 10–20% extra fabric beyond minimum requirements for waste minimization. Upholstery additions generally require 20% more per repeat.
Always round up—professional rounding means purchasing one full repeat or extra yardage beyond your formula application to prevent shortage from cutting mistakes or fabric flaws.
Choosing Fabrics for Best Results
Beyond buying enough yardage, the fabric itself matters. Firm weaves like cotton and linen cut distortion by 28% and support clean seam alignment better than slippery satins or stretchy jerseys.
High-contrast prints make mismatches 36% more visible, so precise fiber content and print clarity become your allies. Stable surface texture and accurate color precision turn tricky directional prints into manageable projects.
Accurate Cutting and Layout Techniques
Getting your fabric cut right is where pattern matching really comes together. The way you lay out and trace your pieces can make or break the final result.
Let’s walk through three core techniques that set you up for success before you even touch your scissors.
Tracing and Drawing Patterns for Precision
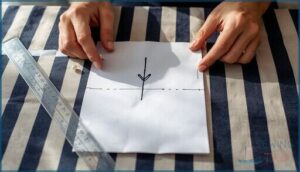
Drawing pattern on paper for precision transforms good seam matching into great seam matching. Use transparent rulers and rotary cutting tools to trace pattern pieces with up to 60% better accuracy.
Transfer all notches and darts with a sharp tracing wheel to maintain sewing tolerances within 3 mm.
Pin pattern paper at multiple anchor points to prevent drift during tracing.
Cutting One Piece First as a Template
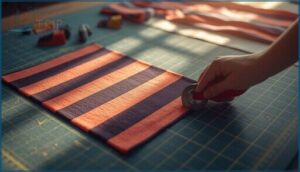
Cut your first fabric piece carefully on a cutting mat and use it as your guide for the second. This template accuracy approach improves seam alignment by 30% and delivers print continuity at joins.
You’ll match pattern pieces with cutting accuracy above 90%. While fabric waste may increase slightly, the time savings and precision make it worthwhile for matching stripes and plaids.
Aligning Pattern With Grainline and Repeat
After pinning your grainline arrow parallel to the selvage, measure perpendicular distances at both ends to confirm fabric alignment. This grainline accuracy step lowers error correction needs by 41%.
Then locate your pattern repeat start point and position your template piece so motifs match at seam intersections. Practical alignment of both elements prevents twisted seams and ensures yardage calculation accuracy through careful repeat identification before cutting.
Mastering Seam Matching Techniques
Getting your fabric cut and laid out correctly is only half the battle. The real magic happens when you bring those pieces together and your patterns line up perfectly at the seams.
Let’s walk through the core techniques that turn careful preparation into perfect finished garments.
Aligning and Pinning Seam Allowances
Seam accuracy starts with proper pin spacing. Place pins 1 to 2 inches apart within your seam allowance, keeping edges perfectly aligned. For curved seams, increase pin count by 30% to prevent shifting.
Remove each pin before your needle reaches it to avoid machine damage.
Watch the seam allowance guide on your machine’s throat plate rather than the needle for better precision and consistent results.
Matching Stripes, Plaids, and Directional Prints
Ever noticed how a mismatched stripe or off-kilter plaid can ruin Visual Symmetry? That’s why Print Directionality and Repeat Complexity matter. Use plaid rulers for perfect alignment, and always check Grain Alignment before cutting.
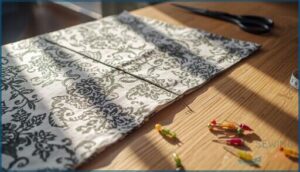
For Seam Continuity, anchor seams at a main motif—stripe alignment across adjoining pieces is key. Pattern matching here isn’t luck; it’s deliberate, precise planning.
Step-by-Step Pinning and Sewing Methods
Think of pinning as your blueprint for a perfect seam—every 1–2 inches, anchor your fabric using fine pins and mark focal motifs.
Basting is your insurance, especially with slippery materials.
Sew slowly, keeping stitch length at 2.0–2.5 mm. Match thread colors for invisible joins. If misalignment exceeds 2 mm, unpick, realign, and resew.
Adjusting for Different Fabric Types and Textures
Once you’ve basted and sewn, fabric types will test your skill. Knit fabric stretches, so use ballpoint pins and stay tape. Pile fabrics, like velvet, need extra pins and a walking foot. Sheer fabrics benefit from fine thread and gentle handling. Bulky fabrics require longer stitches and edge stitch feet. Stretch fabrics shift—mark grainline and pattern repeat closely.
- Use ballpoint pins for knits
- Double pin pile fabrics
- Handle sheers gently
- Lengthen stitches for bulky fabrics
- Mark grainline for stretch fabrics
Finishing Touches for Professional Results
Once your seams are matched, the final steps can make or break the look of your project. These finishing touches are where your work shifts from homemade to polished.
Here’s what you need to focus on next.
Pressing Seams Without Distorting Patterns
Pressing seams is where pattern matching can fall apart or shine. Use a pressing cloth and set your iron temperature just right—too hot causes shrinkage, too cool leaves puckering. Press down, don’t slide, to keep prints aligned. Good pressure control and the right equipment make all the difference.
Pressing cloth, correct iron temperature, and steady pressure are key to keeping your pattern perfectly matched and free from distortion
Here’s a quick reference:
| Iron Temperature | Pressing Motion | Equipment Efficacy |
|---|---|---|
| 170–190°C | Lift, don’t glide | Steam iron, seam roll |
| <205°C for synthetics | Firm, downward | Tailor’s ham, vacuum table |
| Low for heavy fabrics | Open with iron’s side | Heat-resistant pins |
| Use pressing cloth | Keep fabric flat | Automatic press machinery |
Using The Right Thread and Stitch Settings
Once your seams are pressed, focus on thread weight, tension balance, and stitch length. Match thread color and needle size to your fabric for clean results. Adjust thread tension—thicker threads need less, finer ones need more. Use a stitch length that suits fabric adaptation.
Consistent settings boost seam performance, especially on a modern sewing machine.
Trimming Seam Allowances for Smoother Seams
After you’ve dialed in your thread and stitch settings, turn your attention to seam allowance trimming. Bulk reduction matters—especially with layered seams. Use fabric grading for thick materials, and curve trimming for smooth edges.
For collars or cuffs, trim seam allowances to about 1cm. Material specifics shape your approach, but careful seam pressing always brings out a cleaner, flatter finish.
Troubleshooting Common Seam Matching Challenges
How often do you find a seam that just won’t sit right? Puckering solutions start with checking your tension issues and adjusting presser foot pressure.
Fabric shifting and intersection errors are common mismatch causes—pin at the stitching line for better seam alignment.
If matched seams go astray, grab your seam ripper and rework the area using precise seam matching techniques for perfect seams.
Top Tools for Perfect Pattern Matching Seams
Getting those seams to line up perfectly takes more than just skill—it also depends on the right tools. If you want crisp, professional results, your toolkit matters.
Here are a few essentials that make pattern matching much easier.
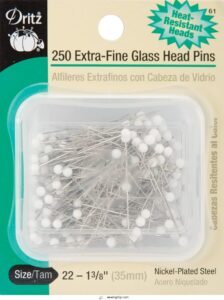
1. Dritz Extra Fine Glass Head Pins
Ever wondered how top sewists achieve pinpoint accuracy in pattern matching? Dritz Extra Fine Glass Head Pins are your answer. Their heat resistance means you can iron right over them, while durability tests show they withstand repeated use.
The ultra-fine shaft aids fabric stability—especially important when pinning strategies for quilting or delicate seams. User preferences lean heavily toward these pins for visible pattern work.
Pin more, worry less: precise pin placement and refined pinning techniques help you master perfect seam alignment every time.
Best For: Quilters, garment makers, and anyone working with delicate or patterned fabrics who needs precise seam alignment.
- Heat-resistant glass heads let you iron over pins without worry.
- Ultra-fine shaft pierces delicate fabrics smoothly, minimizing damage.
- Easy-to-spot white heads make pin removal quick and hassle-free.
- Pins may bend if too much pressure is used, especially on thick fabrics.
- Some batches can be duller than expected, making insertion tricky.
- Price is higher than standard pins, which some users find expensive.
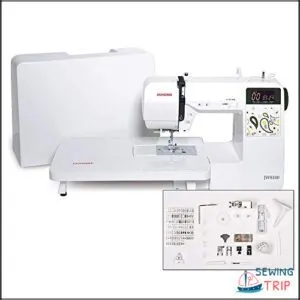
2. Janome Computerized Sewing Machine Bundle
A reliable sewing machine makes all the difference when you’re matching seams. The Janome Computerized Sewing Machine Bundle delivers practical Bundle Value—think extra-wide extension table and specialty feet for tricky seam allowances.
You get 100 Stitch Options and auto buttonholes, boosting Ease-of-Use whether you’re matching stripes or complex prints. Its smooth, quiet operation and adjustable speed control mean your matched seams stay sharp.
Accessory Benefits like built-in LED lighting help you catch every detail, supporting professional results and consistent Machine Reliability.
Best For: Home sewists and quilters who want an easy-to-use, versatile machine with plenty of stitch options and useful accessories.
- 100 built-in stitches and auto buttonholes make it great for a variety of projects.
- Bonus accessories like an extension table and specialty feet add real value.
- Quiet operation and adjustable speed control help with precise, professional results.
- The built-in LED light may not be bright enough for detailed work.
- Some decorative stitches may not turn out as expected.
- Learning all the features can take a bit of time, especially for beginners.
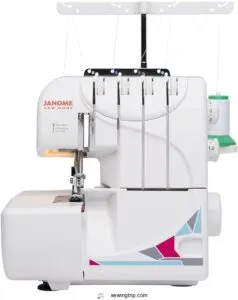
3. Janome MOD 8933 Serger Machine White
Want sharper serger seams and professional seam finishing? The Janome MOD 8933 Serger Machine White is built for precise work. Its Differential Feed keeps stretch fabrics flat and pattern repeats aligned, while adjustable Cutting Width means you control every edge.
Serger Threading is simplified with color-coded guides—less frustration, more accuracy. Machine Reliability holds up, even on denim and knits.
Accessory Uses cover everything from tweezers to spool caps, so using a serger for matching prints or sewing seams feels efficient and smooth.
Best For: Beginners and fashion enthusiasts who want clean, professional seams on denim, knits, and patterned fabrics.
- Handles thick materials like denim and canvas with ease
- Color-coded threading guides make setup less confusing
- Adjustable cutting width and differential feed help keep seams flat and patterns matched
- Threading can be tricky for first-time users
- No storage case or advanced machine cover included
- Can get noisy at high speeds and tension may need occasional tweaks
Frequently Asked Questions (FAQs)
How do I fix mismatched seams after sewing?
To fix mismatched seams, use a seam ripper to undo the section, then realign with precise pinning methods.
Adjust your needle and seam allowance, hand sew if needed, and double-check for consistent seams before restitching.
What techniques help with matching seams on curves?
Matching seams on curves is like piecing together a winding road—curve pinning methods, flexible measuring tape, and French curve drafting help.
Stitching curved seams with shorter stitches and pressing curved seams over a tailor’s ham make for perfect points and consistent seams.
How can I match patterns on pockets or collars?
To achieve pocket pattern matching or collar pattern matching, cut your first piece as a template, align print motifs precisely, pin at motif edges, and use a walking foot for steady seam registration—ensuring print continuity and perfect points every time.
Are there tips for pattern matching with recycled fabrics?
If you think recycled grainlines are straight as a ruler, think again. Mark print orientation, reuse templates for accuracy, pin for seam stability, and match thread to dominant tones. These sewing techniques help pattern matching on unpredictable fabric types.
How do I prevent shifting while sewing long seams?
To keep long seams from shifting, use a walking foot and pin the seams every 2–3 inches with fork pins. For slippery fabrics, try glue basting.
Stabilizer sprays and careful seam allowances also help. Baste first, then sew slowly.
Conclusion
Imagine your seams as telegram wires—one misaligned line and the message gets lost. Sewing pattern matching seams tips are your signal boosters, ensuring every motif speaks clearly from edge to edge.
With careful prep, precise cutting, and steady hands, you transform fabric chaos into visual harmony. Each matched seam is a handshake between patterns, proof of your attention.
Master these techniques and your garments won’t just fit—they’ll communicate your skill, stitch by stitch, without a word.
- https://www.moodfabrics.com/blog/a-guide-to-seam-allowances/
- https://digitalpatternlibrary.com/blog/2022/8/22/5-important-rules-to-pattern-match-your-sewing-projects
- https://weallsew.com/matching-fabric-design-on-seams/
- https://www.youtube.com/watch?v=oMTiWLvJKHw
- https://journals.sagepub.com/doi/10.1177/15589250221113479


