This site is supported by our readers. We may earn a commission, at no cost to you, if you purchase through links.
A single crooked cut can throw off an entire garment. Your seams won’t match. Your hems will twist. That beautiful fabric you spent an hour choosing suddenly looks homemade in the worst way.
The truth is that cutting accounts for about 80% of your sewing success, yet most sewers rush through it to get to the “fun part” of stitching. Smart sewing project cutting tips transform your work from amateur to polished.
The difference between a garment that fits beautifully and one that puckers at the seams often comes down to how you prep your fabric, which tools you choose, and whether you understand grain lines. Master these fundamentals and you’ll spend less time ripping out seams and more time wearing clothes you’re proud to show off.
Table Of Contents
- Essential Fabric Preparation Steps
- Choosing The Best Cutting Tools
- Mastering Straight Line Cutting
- Squaring Up Fabric for Precision
- Cutting Fabric on The Grain or Bias
- Techniques for Cutting Specialty Fabrics
- Efficient Fabric Cutting Strategies
- Precision Cutting and Error Prevention
- Top 7 Fabric Cutting Tools and Accessories
- Time-Saving Tips for Cutting Patterns
- Frequently Asked Questions (FAQs)
- Conclusion
Essential Fabric Preparation Steps
Before you make a single cut, you need to prep your fabric the right way. Skipping this step is like building a house on shaky ground—everything that follows will be off.
Here’s what you need to do to set yourself up for cutting success.
Pre-washing to Prevent Shrinkage
When you skip pre-washing, cotton fabrics generally shrink 3–5% on the first wash—enough to throw off your measurements and ruin that perfect fit. Rayon and viscose can shrink even more, around 8–10%.
Skipping pre-wash invites 3–5% cotton shrinkage on first wash—enough to ruin measurements and wreck that perfect fit
Wash your fabric using the same temperature and cycle you’ll use for the finished garment. This simple step removes chemicals, prevents color bleeding, and locks in those dimensions before you cut.
Proper pressing ensures fabrics drape gracefully, enhancing both fit and aesthetic.
Ironing for Smooth, Accurate Cuts
Now that your fabric’s pre-washed and ready, ironing transforms it into a precision-cutting powerhouse. A smooth surface eliminates wrinkles that throw off measurements—you’re looking at up to 30% better accuracy when fabric’s properly pressed.
Here’s what happens when you iron:
- Heat sets fibers into place, preventing shifting during cutting
- Chemical residue melts away, giving you cleaner edges
- Grain lines stay true, keeping your patterns aligned
Match ironing temperatures to your fabric type, apply minimal pressure, and let pieces cool before cutting. Understanding the importance of temperature and fabric is essential for avoiding damage. That’s professional-level control.
Aligning Fabric Grain and Selvage
Your iron’s done its job—now comes the alignment that separates polished projects from frustrating mistakes. Grain alignment is where precision really matters.
Line your pattern’s grainline parallel to the selvage edge, the finished border on your fabric. This single step cuts distortion by up to 83% and prevents seams from twisting later.
Pin at one end, then measure the distance from grainline to selvage at multiple points—they should match within 2mm. That’s control.
Removing Wrinkles and Chemicals
Now it’s time to handle two invisible enemies: wrinkles and chemicals. A single wash cycle removes formaldehyde from 20% of new garments, while airing fabric outdoors for 12 hours reduces off-gassing considerably. Steam ironing relaxes fibers better than dry heat alone, especially for cotton and linen.
For chemically sensitive projects, add baking soda or white vinegar to your wash. This dual approach—prewashing plus steam ironing—eliminates both shrinkage risks and residual pesticides, giving you clean fabric ready to cut with confidence.
Choosing The Best Cutting Tools
The right tools make all the difference between frustrated cutting sessions and clean, accurate results. You don’t need to own everything at once—but knowing what each tool does best helps you make smart choices for your projects.
Let’s look at the cutting tools that’ll serve you well, from rotary cutters to rulers to mats.
Rotary Cutters Vs. Fabric Scissors
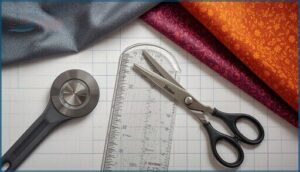
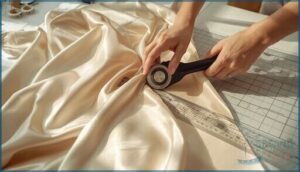
When cutting fabric, you’re basically choosing between two different philosophies. Rotary cutters shine for straight lines and speed—they’ll knock out quilting strips 30–50% faster and handle multiple layers cleanly. Fabric scissors give you precision on curves and cost less upfront, though they demand more hand effort.
Consider your project type, your hands’ comfort level, and your budget. Most designers keep both on hand because each excels at different jobs.
Benefits of Self-Healing Cutting Mats
A self-healing cutting mat transforms your rotary cutter from good to great. Its multi-layer PVC construction closes around blade cuts, protecting surface integrity for thousands of passes while extending blade longevity considerably.
You’ll save money on replacement blades and enjoy ergonomic benefits—less downward force means less hand strain.
With over 65% market adoption in fabric preparation and cutting tools, these mats deliver lasting cost efficiency that serious sewers appreciate.
Using Acrylic Quilting Rulers
Clear acrylic quilting rulers pair perfectly with your rotary cutter and cutting mat for unparalleled cutting accuracy. These rulers—dominating 58% of the market—feature multi-directional markings and non-slip surfaces that prevent shifting during rotary cutting.
You’ll achieve accurate piecing every time by:
- Aligning pre-printed angle lines for bias cuts and triangles
- Reading measurements from both directions to minimize errors
- Practicing ruler safety by always cutting away from your body
Their durability outlasts alternatives while marking fabrics stays crisp.
When to Use Electric Scissors
Electric scissors transform cutting fabric when hand fatigue threatens your progress or you’re tackling layered fabrics and complex shapes. These cutting tools deliver ergonomic benefits by running at 2,500 strokes per minute—slashing effort on thick denim and upholstery.
Perfect for DIY projects requiring repeated cuts, they’re commanding 68% of market trends as sewers discover faster, cleaner edges without the squeeze.
Mastering Straight Line Cutting
Cutting a straight line sounds simple until your rotary cutter starts wandering off course halfway through your fabric. The good news is that a few smart techniques can turn shaky cuts into sharp, professional edges every time.
Here’s how to keep your lines laser-straight and your projects looking polished.
Techniques for Cutting Fabric Straight
Want to nail cutting fabric straight every time? Start by laying your fabric flat on a cutting mat—this alone reduces distortion by up to 80%.
For woven fabrics, try thread-pulling: snip the edge and tear along the grain for a perfectly straight line.
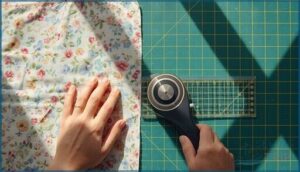
With a rotary cutter, use long, steady strokes and keep your ruler firmly in place to maintain accuracy.
Using Quilting Rulers for Accuracy
Quilting rulers turn guesswork into control. Look for non-slip features and clear ruler markings in 1/8-inch increments—these details boost cutting accuracy dramatically.
Stand over your work and press down firmly with your non-cutting hand while keeping fingers back from the edge. A clean cutting mat and sharp rotary cutter blade make all the difference.
Check your quilters ruler for nicks or wear regularly—even small damage throws off cutting precision.
Aligning Fabric With Cutting Mat Grids
Your cutting mat’s grid lines are more than decoration—they’re your precision cutting system. Start by lining up your fabric’s selvage parallel to a horizontal grid line. This simple grain alignment step cuts distortion by up to 50%. Check both top and bottom edges against parallel lines to catch any twist.
For multi-directional cuts, rotate your mat instead of lifting fabric—this maintains straight edges and prevents drift across repeated strips.
Avoiding Common Cutting Mistakes
Even with perfect pattern alignment, surface distortion sneaks in when fabric hangs off your table. Edge hangover pulls cloth out of shape before you make the first cut. Skewed layout and wrinkle alteration throw off cutting accuracy by several millimeters.
Skipping fabric preparation invites shrinkage distortion that ruins seam allowances later.
Keep your entire piece flat, press thoroughly, and pre-wash to prevent fraying and size issues down the line.
Squaring Up Fabric for Precision
Squaring up your fabric is like setting a strong foundation before building a house. If your fabric edges aren’t perfectly aligned with the grain, you’ll end up with wobbly seams and pieces that don’t fit together right.
Here’s what you need to know to get your fabric squared up and ready for cutting.
Why Squaring Up Fabric Matters
Precision is everything when you’re cutting fabric. Squaring up before you cut means your seams line up perfectly and your finished piece hangs right. Here’s why it matters:
- Seam accuracy improves dramatically when fabric grain and selvage align with your cutting line
- Drape quality stays beautiful instead of pulling awkwardly in finished garments
- Block accuracy in quilting prevents cumulative errors that throw off entire rows
Even small misalignments create dimensional stability problems and fabric waste.
Step-by-Step Squaring Process
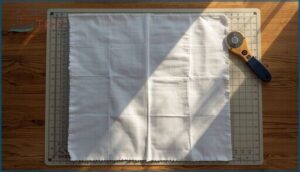
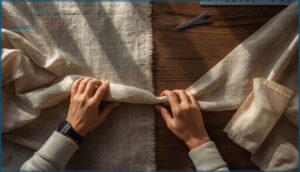
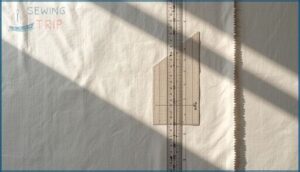
Now that you understand why squaring matters, here’s how to do it. Start by pulling a thread from the crosswise edge until you see the true grain. Fold your fabric selvage to selvage and lay it on your cutting mat with the fold closest to you. Slide the fabric until both fold and selvage look parallel—this removes twist from the bolt.
Next comes your reference cut. Line up a vertical ruler marking with your folded edge. The ruler’s edge now gives you a perfect 90‑degree angle. Trim off about 1/4 inch from the raw edge using a sharp rotary cutter. Keep your fingers at least an inch away from the blade path.
After that first straight line cut, verify squareness by sliding your ruler along the fold. Check that both fold and selvage match the mat’s grid lines at several spots. If the selvage drifts, refold and trim again. For pieced blocks, use diagonal ruler lines during unit trimming to square all four sides before assembly. This keeps every seam allowance consistent and your quilt blocks perfectly sized.
Here’s how fabric positioning affects your results:
| Fold Placement | Selvage Position | Working Width |
|---|---|---|
| Closest to you | Farthest away | 20–22 inches |
| Along grid line | Parallel check | Reduces torque |
| Smooth hang | No twisting | Confirms alignment |
Tools for Accurate Squaring
With the right cutting tools, you’ll transform squaring from guesswork into precision. Grab an acrylic quilters ruler with clear markings—they’re accurate within 1/16 inch and boost your cuts by 30% when paired with non-slip dots.
Add a sharp rotary cutter, self-healing cutting mat with grid lines, and metal rulers for T-angles. Electric scissors handle thick layers but save fabric shears for detail work.
Troubleshooting Misaligned Fabric
When fabric grain wanders off-course, you’ll see twisted hems and wavy seams—sometimes several centimeters over garment length. Check for skewing by measuring weft yarn angles against your cutting mat grid.
If pattern pieces shift during cutting, pin midpoints and redistribute excess fabric by sewing with the looser side down. Small seam allowance adjustments prevent cutting layer shifts from becoming major pattern alignment headaches.
Cutting Fabric on The Grain or Bias
Understanding grain and bias is like learning the secret language of fabric. Cut with the grain and your garment holds its shape beautifully. Cut on the bias and you discover a flowing drape that moves like water.
Here’s what you need to know about making the right choice for your project.
Identifying Fabric Grain Lines
Before you cut a single piece, learn to read your fabric like a map. Understanding fabric grain and selvage transforms your projects from wobbly to wow-worthy.
Here’s how to master fabric grainlines:
- Selvage Identification: Locate the tightly woven edges with manufacturer info—that’s your straight grain reference running lengthwise (warp threads).
- Warp/Weft Direction: Pull gently in both directions; the stiffest pull reveals the warp, while crosswise threads stretch more.
- Bias Stretch Test: Tug diagonally at 45°—maximum stretch means you’ve found the bias, confirming your straight grain accuracy.
Watch for skew indicators like fabric that won’t lie flat or distorts when pulled. Thread tracing helps on printed fabrics where grainlines hide.
Cutting Parallel to The Selvage
Think of the selvage as your personal GPS for cutting accuracy. Align your pattern’s grainline arrow parallel to the selvage—measure the distance from both ends to confirm they match exactly.
This simple grainline alignment unlocks warp stability, preventing vertical stretching and maintaining garment shape. Cutting parallel to the selvage gives you stronger seams and predictable drape every time.
| Cutting Parallel to Selvage | Why It Matters |
|---|---|
| Grainline Alignment | Keeps pattern pieces straight and true |
| Warp Stability | 10–30% stronger than crosswise cuts |
| Cutting Accuracy | Prevents fit errors from accumulating |
| Fabric Preparation | Creates consistent, professional results |
| Bias Deviation | Avoids unintended stretch and distortion |
How and When to Cut on The Bias
When should you break the cardinal rule of grain alignment? Bias cutting—that 45-degree angle to both warp and weft—unlocks diagonal stretch of 10–20% in woven fabrics. Choose this cutting technique for slip dresses, bias-cut bindings around curves, or any garment needing body-skimming drape.
Just remember: bias drape demands extra fabric yardage, wider seam allowances, and single-layer pattern layout to prevent shifting during cuts.
Achieving Proper Drape and Flexibility
Want drape that flows like water? Fabric weight, fiber type, and grain direction work together to control how your garment moves. Lightweight silks under 150 g/m² and bias cut pieces deliver that fluid, body-skimming effect you’re after. Pre-treatment matters too—washing removes stiffness-causing chemicals.
Here’s how cutting techniques shape drape garments:
- Straight-grain cuts keep stretch fabrics stable and structured
- Bias cutting adds diagonal flexibility and curves-hugging movement
- Filament fibers like modal naturally drape better than cotton
Techniques for Cutting Specialty Fabrics
Not all fabrics play by the same rules. Knits stretch, silks slide, and faux fur fights back—each one needs its own game plan.
Here’s how to cut specialty fabrics without the headaches.
Tips for Cutting Knit Fabrics
Because knit fabrics stretch easily, your cutting techniques need adjustment. Always use rotary cutters on self-healing mats—they deliver cleaner edges than scissors and minimize distortion. Lay knits in a single layer with pattern weights for better grain alignment. Keep your blade vertical and maintain a narrow seam allowance of around 1/4 inch for consistent results. Close that rotary blade immediately after each cut—blade safety matters.
| Tool/Technique | Why It Matters for Knits |
|---|---|
| Rotary cutters (45mm) | Reduce stretching by 30% vs. scissors |
| Single-layer layout | Prevents twist and improves grain accuracy |
| Pattern weights | Stabilize fabric without distorting stretch |
| Self-healing mats | Protect blades and prevent snagging |
| Vertical blade angle | Keeps edges clean and layers aligned |
Cutting Chiffon and Slippery Materials
Chiffon and slippery fabrics require smart fabric stabilization—sandwich them between tissue paper before cutting. Use very sharp rotary blades or micro-serrated shears for clean edges.
Work in a single layer with pattern weights to reduce shifting. Cover your cutting mat with flannel for extra grip.
Aim for narrow seam allowances around 4–5 mm and support the entire piece flat on your table to prevent distortion.
Handling Faux Fur and Leather
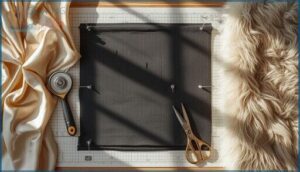
Faux fur and leather require specific cutting techniques to prevent surface damage and control shedding. Here’s how to handle these specialty materials:
- Cut faux fur from the backing side with a craft knife—this respects the fur nap and reduces fiber loss dramatically
- Use sharp rotary cutters or fine shears on faux leather to avoid jagged edges and stress lines
- Choose leather needles (size 80/12–90/14) and longer stitches to prevent perforations along seams
- Trim pile within seam allowances after cutting to reduce seam bulk on curves
Matching Prints and Patterns
Printed fabrics demand a different approach. Center large motifs by folding the fabric so the design sits on the fold line before placing your pattern pieces. Press a fold along each seam line to mark where prints meet, then pin heavily—more pins mean less shifting.
Cut one key piece first and use it as your template for repeat alignment. This method prevents fabric waste while delivering the visual quality that separates handmade garments from store-bought ones.
Efficient Fabric Cutting Strategies
You don’t need to spend hours at your cutting table if you work smarter instead of harder. A few simple strategies can dramatically speed up your workflow while keeping your cuts accurate.
Let’s look at the most effective ways to organize your cutting sessions and get more done in less time.
Cutting Large Pieces First
Start your cutting sequence with the largest pattern pieces—think bodice fronts or pant legs. This approach dramatically improves marker efficiency and fabric utilization while reducing waste.
Large pieces determine garment fit and structural integrity, so getting them right from the start prevents costly errors. Proper layout planning of these key components sets the foundation for success in your entire sewing project.
Batch Cutting Multiple Garments
When you’re ready to make several garments from the same pattern, layer cutting transforms your productivity. Stack two to four fabric layers on your cutting mat—optimized sequencing and careful handling movements prevent shifting during cuts.
This approach improves marker efficiency while maintaining precision in cutting fabric. A Hong Kong factory cutting multiple plies produced 18,000 garments daily, proving that smart layering parameters and proper fabric preparation deliver serious cutting productivity gains.
Simultaneously Cutting Lining and Interfacing
When you layer lining fabrics and interfacing with your shell fabric before cutting, you’ll save 20–40% of your total cutting time on coats and blazers. Align grain consistency across all fabric layers using pattern weights or temporary spray adhesive to reduce shifting.
A sharp rotary cutter slices cleanly through stacked layers, keeping pattern pieces dimensionally stable while preventing the twisting that misaligned cuts create.
Creating a Productive Cutting Routine
You’ll boost your productivity by about 12–15% when you batch cutting tasks into dedicated sessions rather than interrupting sewing flow.
Set up your workspace with proper table height to reduce musculoskeletal strain by 30%, keep rotary blades fresh to minimize hand fatigue, and plan your fabric preparation ahead.
Time management starts with smart tool maintenance and ergonomic practices that keep you cutting comfortably for hours.
Precision Cutting and Error Prevention
Small cutting mistakes add up fast—a quarter inch here and there can throw off your entire project. Precision isn’t about flawlessness, but it does require attention to a few key practices that keep your pieces aligned and your seams consistent.
Let’s look at the essential steps that prevent costly errors and save you from recutting fabric.
Measuring and Marking for Accuracy
A tiny 1/8-inch marking error doesn’t sound like much, but across multiple seams it can throw off your garment’s fit by a full inch or more. That’s why measuring and marking for cuts with precision tools matters.
Use tailors chalk or thread marking on pattern pieces to mark notches, darts, and seam allowance lines accurately—these best practices prevent the costly mistakes that derail even simple projects.
Maintaining Consistent Seam Allowances
Seam allowance guides on your presser foot give you instant accuracy—most garments need 5/8 inch for wovens and 1/4 inch for quilts.
Here’s how to keep them consistent:
- Test your presser foot accuracy by stitching a sample and measuring the actual width
- Use magnetic seam guides or tape on your machine as visual markers
- Check machine calibration when switching between pattern pieces or fabrics
- Build in alteration allowances of 3/4 inch or more on side seams for durability practices
Minimizing Fabric Distortion
Keeping your fabric in shape starts with proper preparation. Don’t skip pre-washing, as it can prevent up to 20% shrinkage in cotton and wool. Pre-washing also helps avoid post-construction warping.
Here’s how tool sharpness and layout support can further prevent distortion:
| Distortion Cause | Prevention Strategy |
|---|---|
| Off-grain cutting | Check grain alignment with selvage before cutting |
| Stretched knit edges | Apply knit stabilization with stay stitching |
| Wavy scissor cuts | Use sharp rotary cutters on cutting mat grids |
| Wrinkled fabric | Press flat before layout support begins |
| Multiple-layer shift | Cut on stable surface with pattern alignment guides |
Matching your cutting techniques to your fabric’s grain direction will help you avoid twisted seams.
Recognizing and Correcting Errors
Even perfect prep won’t stop every cutting mistake. You’ll catch most errors during defect analysis, but some slip through until you’re sewing uneven seams. Here’s what to watch for:
- Pieces that don’t match at seamlines signal cutting accuracy problems
- Excessive fabric scraps often mean layout or measurement errors
- Wavy edges indicate blade dullness or hand wobble
- Mismatched pattern notches reveal alignment issues during cutting
Quick error identification prevents rework and keeps your quality control on track.
Top 7 Fabric Cutting Tools and Accessories
Having the right tools in your workspace makes all the difference between frustrating cuts and clean, professional edges. You don’t need every gadget on the market, but a few solid essentials will transform your accuracy and speed.
Here are seven tools that belong on every serious sewer’s cutting table.
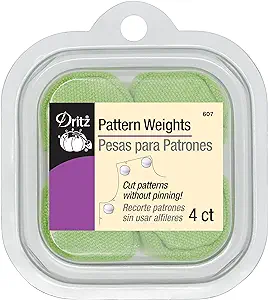
1. Dritz Pattern Weights Assorted Color 4ct
You’ll love Dritz Pattern Weights Assorted Color 4ct for securing pattern pieces without pins.
Each four-ounce weight keeps fabric stabilized during pattern cutting—especially helpful with slippery materials like chiffon. The steel-filled design provides weighted fabric control while you trace or use a rotary cutter.
Users report up to 30% faster cutting time compared to pinning. At around $8 for four weights, they’re a smart investment for any sewing project.
Just place them directly on your pattern for precision cutting tips that actually work.
Best For: Sewers and quilters who want to cut patterns quickly on delicate or slippery fabrics without damaging them with pins.
- Cuts pattern-cutting time by up to 30% compared to traditional pinning methods
- Works safely on all fabric types, especially delicate materials like chiffon, without leaving puncture marks
- Steel-filled weights at 4 oz each provide solid stability for accurate tracing and rotary cutting
- Some users find the weights smaller than expected for larger pattern pieces
- A few customers reported seam strength issues with weights splitting open over time
- Mixed reviews on overall value, with some feeling they’re too bulky for the price point
2. Fiskars Acrylic Sewing and Quilting Ruler
A 6″ x 24″ Fiskars Acrylic Sewing and Quilting Ruler puts ruler accuracy right in your hands. The clear acrylic lets you see fabric grain through grid visibility while highlighted red lines pop on dark materials.
You’ll notice the cutting performance immediately—straight cuts stay straight thanks to non-slip vinyl feet that grip your cutting mat. Whether you’re cutting fabric strips from the bolt or squaring quilt blocks, this ruler works smoothly with any rotary cutter.
Material durability holds up through countless projects, and product variants mean you can expand your cutting techniques as you grow.
Best For: Quilters and sewers who need a reliable ruler for cutting long fabric strips and squaring large blocks with precision.
- Clear acrylic with red highlighted lines makes measurements visible on both light and dark fabrics
- Non-slip vinyl feet keep the ruler stable during rotary cutting for straight, accurate cuts
- Durable construction with a lifetime warranty backs up long-term use across multiple projects
- Some users report that the numbers and grid lines can be hard to read depending on lighting and fabric patterns
- Acrylic surface can develop micro-cuts from repeated rotary blade use, which may shorten its lifespan
- No protractor markings if you need angled measurements beyond the basic slanted guidelines
3. Olfa 28mm Standard Rotary Cutter
When cutting fabric around tight curves or small appliqué shapes, the Olfa 28mm Standard Rotary Cutter delivers serious cutting performance in a compact package. Its tungsten steel blade stays sharper longer than standard cutters, and the ergonomic design fits comfortably in your hand for detailed work.
You’ll appreciate the safety features—a sliding blade cover protects fingers between cuts. While using a rotary cutter on a self-healing cutting mat, this 28mm size excels at precision tasks that larger blades can’t handle.
Blade replacement is straightforward with standardized RB28 refills.
Best For: Quilters, sewists, and crafters who need precision cutting around tight curves, small appliqué shapes, and intricate template work where maneuverability matters more than bulk cutting power.
- Tungsten steel blade offers superior edge retention and stays sharper longer than standard craft cutter blades
- Ambidextrous design works equally well for right- and left-handed users without needing different models
- Compact 28mm size excels at detailed work like curved templates and small pattern pieces that larger rotary cutters can’t navigate
- Some users report the blade starts skipping fairly quickly during extended use
- Higher price point than many competing brands, though most users consider it worth the investment
- Smaller blade size means more modest layer-cutting capacity compared to larger 45mm or 60mm models designed for bulk fabric cutting
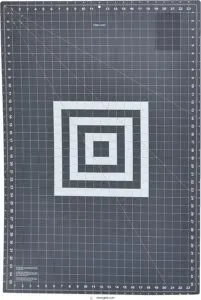
4. Fiskars Self Healing Cutting Mat Grid
Your rotary cutter deserves a solid foundation, and the Fiskars Self Healing Cutting Mat Grid delivers exactly that. This cutting mat features clear grid lines at 1-inch increments plus angle guides at 30, 45, and 60 degrees—perfect for bias cuts without extra marking.
The 24″ x 36″ size accommodates full-width fabric from standard bolts. Grid visibility stays sharp against both light and dark materials. Double-sided benefits mean you can flip it over and keep working.
The self-healing surface closes after cuts, lengthening your mat’s lifespan considerably.
Best For: Quilters and sewers who need a large, durable workspace for cutting full-width fabric and making precise angled cuts without constant measuring.
- Extra-large 24″ x 36″ surface handles full fabric widths and big projects like quilts or garment patterns
- Built-in angle guides (30°, 45°, 60°) and clear 1-inch grid lines make measuring and bias cuts quick and accurate
- Double-sided design extends the mat’s life—just flip it when one side shows wear
- Some users report a strong chemical smell when the mat arrives
- Self-healing feature doesn’t always work perfectly, and cut marks can remain visible over time
- Higher price point around $70-80 may feel steep, especially since it’s not covered by Fiskars’ lifetime warranty
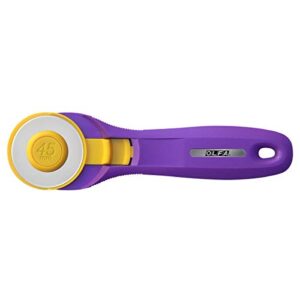
5. Olfa Splash Purple Rotary Cutter 45mm
When your hand cramps after three quilt blocks, you need a better rotary cutter. The Olfa Splash Purple 45mm delivers ergonomic design with contoured finger grooves that prevent slippage during extended fabric cutting sessions. Its quick-change blade replacement system beats old screw-based models—no tools required.
This rotary cutter slices through six layers of cotton on a self-healing cutting mat while maintaining cutting techniques that keep seams accurate. Safety features include a sliding blade cover.
User reviews consistently praise its comfortable grip and cutting capacity for medium to heavy-duty sewing projects.
Best For: Quilters and sewers who need a comfortable, ergonomic rotary cutter that can handle multiple fabric layers without causing hand fatigue during long cutting sessions.
- Contoured handle with finger grooves prevents slippage and reduces hand strain, making it ideal for people with arthritis or limited grip strength
- Quick-change blade system lets you swap blades without tools, saving time and reducing exposure to sharp edges
- Cuts through up to 6 layers of fabric in one pass, with tungsten steel blades lasting twice as long as standard options
- Some users find the blade change process slightly fiddly or tricky to navigate safely
- Requires a self-healing cutting mat for best performance and blade longevity (not suitable for all surfaces)
- Manual blade cover needs to be opened and closed each time, which can slow down workflow compared to auto-retracting models
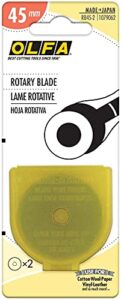
6. Olfa 45 mm Rotary Blade Refills
Your rotary cutter works brilliantly until the blade dulls—then every cut skips threads. Olfa 45 mm rotary blade refills use tungsten steel that slices through six fabric layers on a self-healing cutting mat. These cutting tools fit standard Olfa grips and come in a storage case that doubles as protection for used blades.
Replace blades every 2-4 major projects when using rotary cutters regularly. Safety practices matter: treat dull blades like medical sharps and never toss them loose in trash where they endanger sanitation workers.
Best For: Quilters and sewists who cut through multiple fabric layers regularly and need reliable, long-lasting blades that stay sharp through major projects.
- Tungsten steel construction cuts cleanly through up to six layers of fabric without skipping threads or requiring excessive pressure
- Fits all standard Olfa 45mm rotary cutters and includes a protective storage case that works for both new and used blades
- Lasts significantly longer than generic alternatives, typically staying sharp for 2-4 major quilting projects with regular use
- More expensive than off-brand rotary blade options, which can add up if you’re replacing blades frequently
- Storage case doesn’t separate individual blades, so you need to be careful when removing them to avoid cuts
- Requires the same careful handling as medical sharps during blade changes and disposal, making them less convenient than safer cutting tools
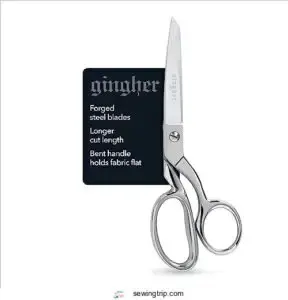
7. Premium Fabric Cutting Scissors
When fabric scissors cost $30-$50 for 8-inch models, steel quality drives that price. Premium fabric cutting tools use high-carbon blades that maintain blade sharpness through dozens of garment projects without dulling.
Ergonomic design matters too—bent grips keep fabric flat during cuts while reducing wrist strain. Brands like Gingher deliver brand longevity with fabric performance across everything from chiffon to denim.
Proper cutting techniques combined with these cutting tools transform preparing fabric from frustrating guesswork into precision work that lasts decades.
Best For: Sewists, quilters, and crafters who cut fabric regularly and want professional-grade shears that stay sharp through years of projects without constant replacement.
- Premium forged stainless steel blades with knife-edge grinding cut cleanly through multiple fabric layers—from delicate silk to heavy denim—and maintain sharpness for dozens of garments before needing professional sharpening.
- Bent handle design keeps fabric flat on your cutting surface while reducing hand and wrist strain during long cutting sessions, making pattern work and seam trimming more accurate and comfortable.
- Lifetime warranty and durable chrome-over-nickel finish mean this is a one-time investment that can last 10 years with basic care, replacing the need for multiple cheaper scissors over time.
- Stainless steel finger holes can feel slippery if you have very dry hands, which may affect grip control during detailed cutting work.
- At 7.2 ounces, the weight is noticeable during extended use, though the heft does contribute to smoother cuts through thick fabrics.
- The 8-inch blade length requires more frequent scissor strokes for long cuts compared to larger shears, which can slow down cutting speed and occasionally affect line straightness on very long seams.
Time-Saving Tips for Cutting Patterns
Cutting patterns doesn’t have to eat up your entire afternoon. With a few smart strategies, you can slice through your prep work and get to the fun part faster.
Here are four simple ways to speed up your cutting routine without sacrificing accuracy.
Using Pattern Weights Instead of Pins
You can shave 35–40% off your cutting time by swapping pins for pattern weights. They hold patterns flat without piercing delicate fabrics like silk or leather, which means better fabric preservation and no pinholes in your tissue patterns. Plus, you’ll skip the repetitive pinning motion, giving your hands ergonomic benefits during long sessions.
Weights work brilliantly with rotary cutters on flat surfaces, keeping both pattern and fabric steady while you slice clean lines. For specific fabrics like knits or slippery chiffon, distribute several small weights around curved edges to prevent shifting. You can buy commercial sets or create DIY options by wrapping stacked washers in fabric—either way, you’ll transform your cutting techniques and fabric preparation workflow into a faster, more precise process.
| Method | Key Advantage |
|---|---|
| Pattern weights + rotary cutter | Cuts prep time by one-third |
| DIY metal washers | Cost under $1 per weight |
| Commercial weight sets | Range $10–25 for 4–8 pieces |
| Household items (cans, mugs) | Zero additional cost |
Organizing and Storing Cut Pieces
Once your pieces are cut, smart organization keeps your sewing project moving. Labeling systems on each pattern piece with markings cut retrieval time by nearly half.
Store fabric scraps in clear container choices—transparent bins drop misplacement rates by 47%. Visual organization using color-coded trays accelerates sorting speeds by up to ten times.
For specialty solutions on large projects, try hanging folders or rolling carts to preserve your cut fabric without creasing.
Batching Similar Cutting Tasks
Your organization system flows naturally into workflow optimization when you batch similar cutting tasks together. Instead of cutting one project at a time, group all your pattern cutting into a single session. Home sewists report time savings of up to thirty percent through this approach.
Layer management becomes second nature when you’re cutting multiple pieces. Cutting efficiency and accuracy benefits compound as you develop rhythm and consistency across projects.
Saving Fabric Scraps for Future Use
That same momentum carries over to scrap management. Saving fabric scraps for future use is both sustainable and smart. The fashion industry generates 13 million tons of fabric waste yearly, with 15% coming from cutting scraps alone.
Your scrap organization transforms remnants into resources:
- Sort pieces by fabric type and color for quick access
- Store larger scraps flat and smaller bits in clear jars
- Keep a scrap bin near your cutting area for immediate collection
- Label containers by potential reuse projects like patchwork or appliqué
- Donate unusable pieces to textile recycling programs that process materials for repurposing
Small pieces work beautifully in creative applications like stuffing, trim details, or kids’ crafts. Donation options exist too—organizations like FabScrap accept scraps for processing, though they charge around $1.50 per pound. Your sustainable practices reduce waste disposal costs while building a stash of materials that add character to future sewing projects. That scrap value adds up when you consider both environmental impact and material savings.
Frequently Asked Questions (FAQs)
How do I sharpen dull rotary cutter blades?
A TrueCut TrueSharp electric sharpener can restore up to 90% of your rotary cutter’s performance.
Run the blade through 20 passes at 45° on a commercial tool or try stroking it 4–5 times on a leather strop.
Whats the best way to cut curves?
For gentle arcs, use a 28mm rotary cutter along a curved template for smooth, accurate curve cutting.
Tight curves need fabric scissors—take short snips and keep the lower blade flat for scissor curve control.
Can I cut multiple fabric layers at once?
Yes, you can cut multiple fabric layers at once. Home sewers usually handle 4-6 layers of quilting cotton with a sharp rotary blade. Fabric type and blade condition affect layer limits and cutting accuracy.
How do I prevent fabric from shifting while cutting?
Want to stop fabric from wandering? Use pattern weights on your cutting mat, pin layers every inch, and press slippery materials between tissue paper—these fabric preparation tricks boost cutting accuracy and pattern alignment dramatically.
Should I cut pattern pieces with or against nap?
Cut all pattern pieces with nap running in one direction—usually downward from neck to hem. This ensures visual uniformity in fabric sheen and garment appearance.
Match directional arrows on your pattern for consistent color and texture.
Conclusion
Here’s something worth considering: pattern companies estimate that 30% of home sewers never complete their first garment because of cutting errors. You don’t have to become that statistic.
When you apply these sewing project cutting tips—sharp tools, proper grain alignment, and thoughtful fabric prep—you’re building confidence with every slice. Your scissors become an extension of your vision. That’s when sewing stops feeling like a gamble and starts feeling like mastery.
- https://elizabethsuzann.com/blogs/blog/the-often-overlooked-impact-of-fabric-cutting-on-clothing-quality
- https://www.reddit.com/r/sewing/comments/17zwcpp/how_accurate_do_you_tolerate_when_cutting_and/
- https://www.quiltingboard.com/main-f1/accuracy-precision-t307757.html
- https://pmc.ncbi.nlm.nih.gov/articles/PMC10006435/
- https://mindymakes.com/should-i-buy-rotary-cutters-vs-scissors-for-my-sewing-toolbox/

