This site is supported by our readers. We may earn a commission, at no cost to you, if you purchase through links.
That tangled bobbin thread staring back at you isn’t a sign you lack talent—it’s just a tension disk waiting to be adjusted correctly. Most beginners hit the same snags: threading mix-ups, uneven stitches, a machine that seems to have a mind of its own. It feels overwhelming for the first ten minutes, then something clicks.
So, is a sewing machine hard to learn? Not really, once you break it into the right steps. With focused practice—often just a few hours—you’ll move from hesitant fumbling to confident, straight stitches.
This guide walks you through exactly what to master first, how long it takes, and the fixes that turn frustration into fluency.
Table Of Contents
Key Takeaways
- Beginners typically master core sewing machine skills—threading, bobbin winding, and pedal control—within 2.5 to 5 hours of focused practice, making the learning curve much shorter than expected.
- Mastering five foundational skills in order (threading, bobbin winding, pedal control, straight stitching, and reverse stitching) builds the confidence needed to tackle simple projects like tote bags or pillowcases within 2 to 4 hours.
- Common beginner problems like tangled bobbin thread, uneven tension, and wobbly seam allowances usually stem from fixable issues like incorrect threading paths, dirty tension discs, or pulling fabric instead of letting the feed dogs guide it.
- Choosing beginner-friendly tools—like cotton fabric, machines with automatic needle threaders, and clear step-by-step tutorials—significantly speeds up progress and reduces early frustration.
Is a Sewing Machine Hard to Learn?
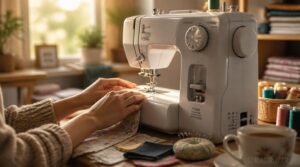
So, is a sewing machine hard to learn? Not really, but that first look at the tension dial and bobbin case can shake anyone’s confidence. Let’s break down what makes it feel tricky, what actually comes easy, and where your focus should go first.
Once you get the hang of threading and bobbin basics, everything else clicks into place faster than you’d expect—these beginner sewing lessons walk you through each step so nothing feels like guesswork.
Short Answer for Beginners
So, is a sewing machine hard to learn? No, it isn’t — the basics like threading, bobbin winding, and foot pedal control usually click within 2.5 to 5 hours of practice.
You’ll master straight stitches quickly, and that’s enough foundation for simple beginner sewing projects like pillowcases or tote bags. Stick with it, and steady sewing machine operation becomes second nature fast.
Why It Feels Intimidating
That first sit-down still feels rough, and here’s why: needle, bobbin, presser foot, and feed dogs all move in tight coordination, so one threading mistake causes skipped stitches or bunching.
The pedal’s speed sensitivity worries beginners who fear losing fabric control. Add mechanical noise, unfamiliar vibration, and decision fatigue from stitch settings, and imposter syndrome creeps in fast.
Skills That Come First
Good news: the nerves fade once you master five basics in order. Start with thread path mastery—guiding thread through guides and tension discs correctly. Then practice bobbin winding accuracy, pedal pressure control, and straight stitch consistency. Finish with reverse stitch technique for locking seams.
Nail these fundamental techniques, and most sewing machine troubleshooting headaches simply disappear before they start.
What Gets Easier Quickly
Once threading confidence clicks, the rest snowballs fast. Your hands learn the rhythm, and pedal control smooths out within hours.
- Stitch consistency improves as feed dogs guide fabric naturally
- Muscle memory builds after just a few practice sessions
- Seam allowance mastery comes quickly with repetition
However, you may encounter a period of conscious incompetence frustration as you become more aware of your mistakes.
Basic sewing skills stack quickly, turning early sewing machine troubleshooting worries into confident, steady progress.
How Long Does Learning Take?
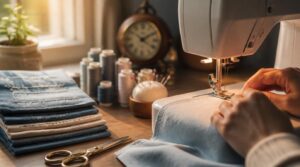
Once you’ve decided sewing is worth trying, the next question is always about time. Good news: you don’t need months before you feel capable at the machine. Here’s what your learning timeline actually looks like, from your very first stitch to sewing with real confidence.
First Few Practice Hours
Those opening minutes on the machine matter more than any stitch you’ll sew later. Keep sessions to 10-20 minutes, focused purely on machine setup routines—threading, bobbin winding, stitch selection. Short bursts build muscle memory without fatigue.
Once threading feels automatic, practice guiding scrap fabric edges straight past the presser foot, following this beginner’s guide to using a sewing machine for extra pointers.
Consistency beats marathon sessions: daily practice during week one cements skills faster than occasional long stretches. Always run initial stitch tests on scrap fabric before starting real work.
First Simple Project
Grab a half yard of lightweight cotton and you’re ready to sew something real. Skip straight to a tote bag or pillowcase—both use basic seams and a simple hem, no fancy techniques required.
Your beginner material list stays simple:
- Half yard cotton or muslin
- Matching thread
- Size 11 or 14 needle
Budget 2 to 4 hours for project timeline management, start to finish.
Wearable Garment Timeline
Once you’ve mastered a pillowcase, you might wonder where sewing skills can lead.
Garment construction has come a long way—from a 1985 fiber optic sweatshirt to the 2000 Levi’s ICD+ jacket, the first commercial wearable using early Bluetooth technology. Today’s smart textiles embed sensors and connectivity right into fabric, proving that solid sewing machine basics build toward genuinely futuristic projects.
Building Consistent Results
Consistency separates a hobby from a skill, and it comes from repeatable habits, not luck.
- Same thread and bobbin weights each session
- A stitch log tracking length and tension settings
- Machine maintenance every two hours of sewing
Pre-wash fabrics, stabilize wovens with interfacing, and inspect seams with quality control checks. By 40+ hours, you’ll repeat clean results across different fabrics with barely any adjustment.
What Beginners Must Learn First
Once you know how long the learning curve really takes, the next question is where to actually start.
Every confident sewist began with the same handful of essential skills, tackled one at a time and practiced until they felt natural. Here’s exactly what to master first, in the order that makes each next step easier.
Threading The Machine
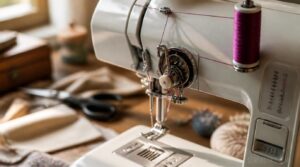
Threading looks fussy at first, but it’s just a path the thread follows in order — no shortcuts, no skipping.
Start at the spool pin, guide thread through each thread guide, down through the tension disks, then to the needle threading point. Always lift the presser foot first — this opens the tension disks so thread seats correctly. Miss one guide, and stitches will snarl fast.
Winding a Bobbin
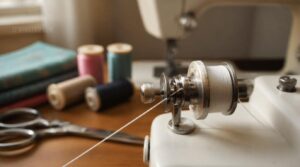
Every stitch depends on two threads working together, and the bobbin supplies the one hiding underneath your fabric.
Place the bobbin on the winder shaft, aligning the notch with the shaft’s spring for a secure fit. Thread it through the tension disk, keeping the path snug, then anchor the tail through the bobbin’s small hole. Wind at moderate speed for even winding, then trim the tail and test-stitch before inserting.
Using The Foot Pedal
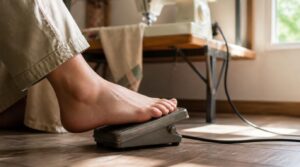
Once your bobbin’s wound and ready, your foot becomes the machine’s throttle. The pedal controls motor speed through simple pressure: light pressure for slow, controlled stitching, more for faster seams. Most pedals spring back to rest when released, stopping the needle instantly.
Many include a safety cutoff to prevent accidental bumps. Keep it lint-free, and check cords regularly for fraying.
Sewing Straight Stitches
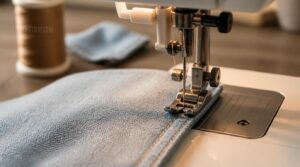
Now that your foot pedal feels natural, it’s time to put that control to work on straight stitching—the backbone of nearly every seam you’ll sew.
Use the presser foot’s edge for fabric edge tracking, keeping stitches parallel throughout.
- Set stitch length to 2.5-3mm
- Test on a scrap swatch first
- Guide fabric gently, don’t pull
- Watch the throat plate guidelines
- Keep pressure steady for seam consistency
Securing Seams in Reverse
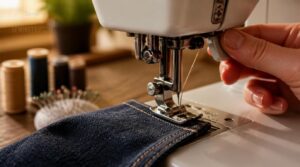
A straight seam only holds if both ends are locked, so find the reverse lever on your machine and use it. Backstitch 2–4 stitches at the start and end—this backstitching technique prevents unraveling.
Denim wants 5–6 reverse stitches; knits and silky fabrics need fewer, shorter bursts. Keep tension and stitch length matched forward and backward for neat, reinforced seam ends.
What Makes Sewing Easier?
Once you’ve got the basics down, a few smart choices can speed up your progress in a big way. The right machine, fabric, and tools all work together to keep frustration low and confidence high. Here’s what actually makes the learning curve easier to climb.
Beginner-Friendly Machine Features
Modern machines stack the odds in your favor. Start stop buttons let you sew without the foot pedal, while automatic needle threaders save your eyes the strain.
Drop in bobbins simplify winding, and integrated lights plus color coded guides show exactly where thread goes—turning confusing sewing machine parts into a system you can actually trust.
Stable Cotton Fabrics
Grab cotton first—it’s the fabric that forgives. Plain weave construction keeps the threads locked in a predictable grid, so your feed dogs grip evenly instead of stretching or slipping.
Pre-shrunk or sanforized cotton limits shrinkage to about 1-2%, meaning your project stays true to size after washing. Combed, long-staple cotton also resists pilling, giving you steady, professional-looking stitches every time.
Simple Starter Projects
Pick a project that finishes fast, and your confidence builds right along with it. Tote bags are the classic starting point—one rectangle, two straps, straight stitches only. Cushion covers teach precise cutting; aprons build alignment skills; pillowcases sharpen seam accuracy.
Try scrap fabric first, then keep a project notebook tracking stitch settings and fabric quirks for next time.
Essential Sewing Tools
Ten dollars’ worth of the right notions can save you hours of frustration. Beyond your sewing machine basics, build a small sewing kit essentials collection:
- Sharp shears for cutting tool selection
- Tape measure for accurate measuring methods
- Zipper and buttonhole feet (specialized presser feet)
- Pins, thimble, seam ripper (hand sewing notions)
- Bins or organizers for organizing sewing supplies
Good sewing notions turn frustrating moments into quick fixes.
Clear Step-By-Step Tutorials
A good tutorial does the heavy lifting your brain shouldn’t have to. Look for lessons broken into 5 to 8 steps, each with one action verb, a clear goal, and annotated screenshots showing exact dial or pedal settings.
Pacing matters: short demo clips under 60 seconds beat long videos. Finish with a checkpoint and small practice task—that’s how sewing machine basics actually stick.
Common Beginner Sewing Problems
Every beginner hits a few snags along the way, and that’s completely normal. These hiccups aren’t signs you’re doing something wrong—they’re just part of learning the machine’s quirks. Here are the five most common problems you’ll likely run into, along with what’s actually causing them.
Thread Tension Issues
Loops on the fabric’s underside or puckered seams almost always trace back to tension imbalance. Common causes include:
- Incorrect threading path
- Mismatched fabric and thread weight
- Dirty tension discs
- Bent needles
- Improper spool orientation
Adjust the tension dial in small quarter-turns, then test scrap swatches until stitches look balanced on both sides.
Tangled Bobbin Thread
That messy nest of thread under your fabric usually points to bobbin orientation gone wrong or a dirty bobbin case snagging the path. Check that thread pulls smoothly from the hub, matches your fabric’s thread weight, and unwinds evenly from the bobbin winder.
Regular machine maintenance—clearing lint, testing tension balance—keeps your sewing machine tangle-free and your stitches even.
Uneven Seam Allowances
Once your bobbin’s behaving, the next snag is often a wobbly seam allowance—wider in some spots, narrower in others. Fabric feeding errors and curved seam management are usually to blame, along with sloppy marking tool accuracy.
Left unchecked, this causes silhouette distortion in finished garments. A seam guide keeps your straight seams honest, giving your sewing basics a solid, professional edge.
Pulling Fabric Too Hard
Once your seams sit straight, the next habit to unlearn is tugging fabric through the machine. Feed dog disruption happens when you pull—stitches turn uneven, fabric buckles at the needle, and thread tension imbalance creates loops or puckers.
Let the feed dogs do the work. Guide fabric gently with open palms, and you’ll avoid fabric distortion, needle deflection, and those wavy, permanent puckers beginners dread most.
Let the feed dogs do the work—guide fabric gently, and you’ll avoid distortion, deflection, and stubborn puckers
Skipping Pressing Steps
Grabbing your iron feels like an extra step when you’re ready to finish, but skipping it causes real problems: puckering risks, seam misalignment, and a duller final look. Pressing sets fabric fibers and flattens bulky seams before they cause trouble.
Quick fix: press after each seam. Use a pressing cloth and steam burst—it keeps your professional silhouette intact without slowing you down.
Frequently Asked Questions (FAQs)
Is sewing easy to learn?
Yes — with steady practice, basic sewing skills click fast. Most beginners build real confidence within two hours, mastering simple stitches, and reach usable seams after just one to three practice sessions on scrap fabric.
How do I learn to sew with a sewing machine?
Pick a beginner-friendly machine, set up a bright workspace, and follow guided tutorials or local sewing lessons. Practice basic sewing skills on cotton for 15-30 minutes daily, starting with beginner sewing projects like pillow covers to build real confidence.
How hard is it to learn to sew?
Funny enough, most people ask this right after their first tangled bobbin. Truth is, it’s not as hard as it looks—it just asks for coordination between hands, pedal, and fabric, building steadily through short, consistent practice sessions.
Is it easy to use a sewing machine?
Using a sewing machine gets easy fast once you learn machine speed control through the foot pedal, basic stitch selection, and simple fabric handling—most beginners feel comfortable within hours, with confidence and consistency building steadily over their first few practice sessions.
What Are Some Common Mistakes Beginners Make When Learning to Sew?
Picture Maria cutting slippery rayon without pins, seams shifting instantly.
Common slip-ups include fabric selection errors, skipping pattern notes, neglecting machine maintenance, rushing pressing steps, and avoiding scrap practice before cutting into real project fabric.
How Can I Find a Local Sewing Community to Connect With?
Local sewing guilds, fabric store meetups, and craft clubs welcome beginners eagerly.
Try online community searches for your city, join Meetup groups, or ask retailers about classes—connecting with fellow sewists sharpens skills and makes your sewing journey far less lonely.
What Should I Look for When Buying Fabric for a Project?
Every bolt of fabric tells a story before you even cut it: check fabric weight, weave structure, and drape, then test colorfastness and match pattern scale — beginner-friendly cotton keeps your first textile arts adventure forgiving.
What Sewing Machine Features Are Most Important for a Beginner to Have?
Look for easy bobbin loading, adjustable stitch settings, and reliable thread tension control. Speed adjustment features, integrated lighting, and needle positioning controls make early beginner sewing projects far less frustrating on any sewing machine.
How long does it take to learn to use a sewing machine?
You’ll be sewing circles around your grandma’s old machine faster than you think—daily 15 to 30 minute sessions build real skill acquisition in 1 to 2 weeks, with your first finished project ready within 4 to 6 hours.
Which is harder, crochet or sewing?
Crochet usually wins on gentler learning curves and tool portability, but sewing lessons build faster project speed and pattern flexibility. Physical strain differs too: crochet taxes your hands, while sewing machine basics demand posture and focus.
Conclusion
Picture a woman who couldn’t thread a needle on Monday, sewing a pillowcase by Friday, just from ten-minute daily sessions. That’s the real answer to whether a sewing machine is hard to learn: it isn’t, once you tackle threading, bobbins, and straight stitches one at a time.
Tension issues and tangled threads aren’t failures—they’re checkpoints. Keep practicing, keep adjusting, and your machine stops feeling foreign. Soon it becomes what it was always meant to be: your tool for creative freedom.
- https://www.instructables.com/How-to-Sew-using-a-sewing-machine
- https://www.gloryallan.com/blogs/news/how-to-use-a-sewing-machine-a-beginners-guide
- https://www.couturearts.com.au/blog/8-things-i-wish-i-knew
- https://www.thelaststitch.com/top-7-sewing-machine-tips-for-beginners
- https://fashinnovation.nyc/fashinnovation-industrial-revolution-fashion/