This site is supported by our readers. We may earn a commission, at no cost to you, if you purchase through links.
You spend three hours perfecting a design in your editing software, hit export, and send it to a client who owns a different machine brand. Suddenly, those crisp curves and clean fills turn into a jumbled mess of misaligned stitches. What happened?
The difference between embroidery design formats comes down to a simple truth: some files hold editable artwork, while others lock in rigid, machine-specific instructions. One lets you tweak colors and resize freely; the other tells a needle exactly where to go and won’t budge without a full rebuild.
Understanding which format does what saves you from costly reworks and stitching disasters down the road.
Table Of Contents
Key Takeaways
- Embrother are two flavors: editable artwork you can tweak anytime, and locked stitch files that tell the needle exactly where to go, so keep your source artwork safe before converting.
- Your machine brand decides your format: PES works natively with Brother and Babylock, JEF is built for Janome, EXP covers Melco and Bernina, and VP3 handles Viking and Pfaff.
- DST is the closest thing to a universal format since nearly every machine reads it, but it trades away color storage and easy editing for that broad compatibility.
- Always test-stitch on scrap fabric before committing to your final piece, since screen colors, stitch density, and hoop compatibility often shift once thread actually hits fabric.
How Embroidery File Formats Differ
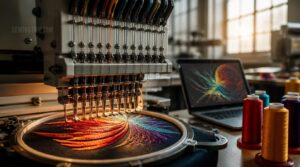
Not all embroidery files speak the same language, and that’s where a lot of confusion starts. Before you can pick the right format, you need to understand what’s actually happening under the hood, from the artwork you start with to the way machines read color and shape. Here’s what separates one file type from another.
If you’re curious how those raw design files get translated into stitch-by-stitch instructions, this breakdown of universal embroidery file formats walks through the technical differences in plain terms.
Artwork Versus Stitch Files
Every embroidery design lives two lives: one as editable artwork, another as rigid stitch commands. Artwork preserves layers and shapes for future edits; stitch files lock in needle paths and color stops for machines.
That’s why smart digitizers keep the source artwork safe before converting to machine formats, making sure design sharing and machine compatibility down the road.
When preparing designs for use, understanding the process of saving and sending designs helps make sure smooth transfer to your embroidery machine.
Raster Versus Vector Graphics
Before stitches enter the picture, artwork starts as either raster images or vector graphics, and that choice shapes everything downstream. Raster relies on pixels, so Image Resolution dictates Graphic Clarity. Vector uses math for true Vector Precision at any size.
- Crisp logos that never blur
- Smooth Pixel Scaling without jagged edges
- Confident file conversion for design sharing
- Cleaner embroidery file formats overall
Stitch Commands and Machine Data
Once artwork gets digitized, it becomes a language machines actually understand: stitch commands. Each command carries delta coordinates, dx and dy, telling the needle where to move next.
Machine data structures pack in color change signals, thread trimming commands, and header info like hoop size. Stitch command encoding varies by brand, which explains why file conversion between machines isn’t always plug-and-play.
Color Information and Previews
Beyond needle paths, files carry Color Information Storage: indices mapped to a palette, fueling thumbnail previews and Block Color Preview swatches. Color Layering Effects influence rendering when designs stack. Preview Color Accuracy depends on embedded values, not guesswork.
- Thread Color Storage varies by brand
- RGB values aid Preview Color Accuracy
- Swatches show color distribution
- Layering affects final render
- Design testing confirms true colors
Object-Based Versus Stitch-Based Files
Think of object-based files as layers in a design app, each shape tagged with editable object attributes like position and fill, versus stitch-based files, which lock everything into fixed needle points.
That’s why object formats need stitch command translation before machines can read them. Editable object attributes make revisions painless; stitch-based files demand rebuilding from scratch.
Popular Embroidery Formats Compared
Now that you know what separates these files under the hood, it’s time to meet the actual players. Every embroidery machine brand leans on its own preferred format, and each one carries its own quirks worth knowing before you hit "stitch." Here’s how the five biggest names stack up against each other.
If your Tajima machine is in the mix, brushing up on the DST file format’s stitch and thread-color structure will save you headaches down the line.
PES for Brother and Babylock
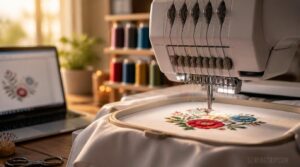
Own a Brother or Babylock? PES is your machine’s native language, storing stitch data, embedded color mapping, and preview thumbnails together.
- Reads directly on Brother/Babylock, no conversion
- Embedded thread color mapping
- On-screen preview thumbnails
- Version compatibility varies by model
- Has multiple hoop sizing options
Check your machine’s supported PES version before stitching, since older units may reject newer files.
DST for Broad Compatibility
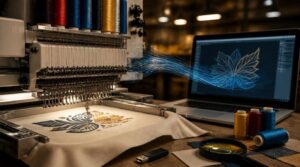
Need one format nearly every embroidery machine reads? DST is your answer.
Its compact DST header structure and simple stitch commands make format conversion easy across brands.
| Feature | DST Trait |
|---|---|
| Color mapping | Machine-translated |
| Editing | Needs software |
| Compatibility | Broad |
| Metadata | Minimal |
Run a DST compatibility check first, since direct file editing without proper tools risks stitch errors.
EXP for Melco and Bernina
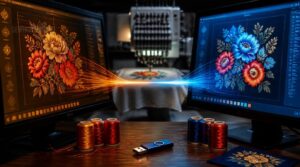
EXP splits into two personalities. Melco EXP ships bare, relying on a companion con file for thread mapping, while Bernina USB EXP bundles color charts right in, plus INF and BMP previews.
Moving between them? Cross-brand compatibility means carrying that con or INF file along, or your trims and colors won’t match what you digitized.
JEF for Janome Machines
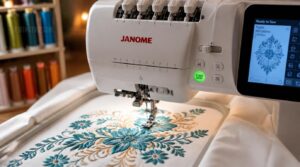
Janome machines run on JEF, a compact format storing exact stitch paths, hoop moves, and Janome-mapped color data for accurate thread matching.
Newer models read JEF plus, enabling post-merge editing like moving or rotating elements. For cutwork or AcuFil, you’ll need JPX files, built through Digitizer MBX, carrying specialized instructions standard JEF can’t handle, plus verified hoop compatibility for larger frames.
VP3, XXX, and EMB
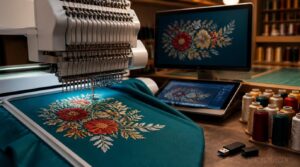
Three more formats round out the picture: VP3 for Viking and Pfaff, XXX for select brand-specific machines, and EMB for cross-brand archiving.
VP3 provides on-screen preview generation and multi-design blocks. XXX demands brand compatibility software for full fidelity. EMB favors editing tools and long-term storage.
- VP3: color-accurate previews
- XXX: layered stitch types
- EMB: archival flexibility
- VP3-to-XXX conversion needs care
Embroidery Formats by Machine Brand
Every embroidery machine brand plays by its own rules, and your file format has to match the manufacturer to work right. Some, like Brother’s PES, load straight onto the machine, while others need a little conversion know-how first. Here’s how the major brands stack up, one at a time.
Brother and Babylock Formats
Brother and Babylock machines speak PES natively, reading stitch data, color stops, and thumbnails without conversion.
DST file conversion opens up broader options when needed, and select digitizers even allow EXP cross-format use.
JEF interoperability tools give limited Janome access, while VP3 EMB legacy support usually demands extra software before these formats work reliably.
Janome Machine Formats
JEF is Janome’s native format, storing stitch and color data using the brand’s own palette system rather than universal RGB values.
Design resizing options stay limited once saved, and stitch editing usually flattens outside Janome’s own digitizing software.
- Coded thread numbers
- Machine-specific hoop tuning
- Restricted third-party compatibility
Commercial Embroidery Formats
Once a design leaves a single brand’s system, DST standardization takes over as the shop floor’s common language, since most multi-head machines read it without conversion.
Shops still lean on PES commercial use for Brother runs, while EXP workflow connection and JEF production conversion keep Melco, Bernina, and Janome files stitch-ready.
Format compatibility testing confirms everything runs true before production.
Husqvarna Viking and Pfaff
Owned by the same parent company, Husqvarna Viking and Pfaff share design language and engineering, so features overlap:
- VP3 format compatibility across both brands
- Shared firmware parity updates
- Common hardware options like dual feed
- Matching embroidery positioning tools
Unlike DST or PES workflows, VP3 stitches ride shared engineering, giving you predictable results whenever you switch between these siblings.
Bernina and Melco Formats
Where Brother leans on PES, Bernina and Melco share EXP, though each stores it differently under the hood.
| Format | Color Data | Editing |
|---|---|---|
| Bernina EXP | Fixed palette, color card | On-machine density edits |
| Melco EXP | Thread library numbers | Block-level, live preview |
Conversion between them often runs through Tajima DST as a bridge, so test stitch-out quality before trusting interoperability.
Key Format Features and Limitations
Once you know which brand your machine favors, the next question is what that format can actually handle. Every file type comes with its own rules around stitch counts, color storage, and how much editing room you get after the fact. Here’s what sets them apart under the hood.
Stitch and Color Limits
Every format has a ceiling, and hitting it mid-project is nobody’s idea of fun. Maximum stitch count varies widely: JEF caps around 64,000, PES v1 sits near 32,000, while newer PES and DST handle far more.
Color change thresholds matter too, since each swap adds stitch count and time. Watch stitch density and hoop size constraints, or puckering and thread trims become real headaches.
Thread Color Storage
Under the hood, your color index mapping ties each thread to a numeric slot, referencing manufacturer libraries via thread code references.
Some formats fire color change commands mid-stitch, others lean on palette serialization in a separate table.
Preview storage lets you eyeball placement before stitching.
Solid color information keeps thread color management smooth once you’re sharing files across machines.
Design Editing Options
Once your file’s open, real editing power kicks in: node point reshaping lets you tug outlines into place, while undo redo functionality means mistakes cost nothing. Stitch density adjustment fine-tunes fill patterns, color blending options simulate shading, and text path editing bends lettering along curves. Design previews confirm color changes and stitch optimization before you ever touch fabric.
Resizing and Stitch Density
Scaling a design isn’t just a resize click, it’s math: bigger dimensions spread stitches thinner unless you recalculate density.
- Stitch density measures in stitches per inch, guiding fill coverage
- Fabric type impact matters, knits tolerate less density than wovens
- Underlay relationship shifts with resize recalculation for stability
- Skipped density fixes risk puckering or gaps
Version and Hoop Compatibility
Ever loaded a "finished" design onto your machine, only to watch it stitch off-center? Version mismatches often cause this.
A finished design can still stitch off-center when hidden version mismatches go unchecked
Hoop tolerance verification matters most, since PES, DST, EXP, and JEF handle version hoop libraries differently. Font hoop constraints, multi hoop alignment, and export hoop degradation can all shift your design’s fit.
Always confirm compatibility before production, your hoop and firmware need to agree.
Choosing and Converting Embroidery Formats
Knowing the differences between formats is only half the battle, you still have to put that knowledge to work. Picking the right file, converting it correctly, and testing it before you stitch can save you hours of frustration and a ruined piece of fabric. Here’s what you need to keep in mind as you move from theory to your actual machine.
Check Your Machine Requirements
Before picking a format, look at your machine itself. Confirm Power Supply Check matches nameplate voltage, verify Hoop Size Match, and check Firmware Compatibility between software and unit.
Consider Processing Speed Needs and USB Data Transfer support. Whether you run Brother, Babylock, or another brand, this groundwork prevents compatibility headaches before design scaling even enters the picture.
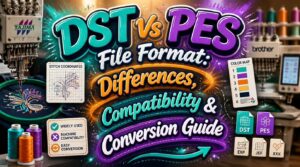
PES Versus DST
Once your machine checks out, the real choice comes down to PES versus DST. PES suits Brother and Babylock owners, storing color data and previews for easy visualization.
DST wins on compatibility, running on nearly any embroidery machine but skipping color storage and offering less editability. Weigh stitch limits and resizing needs before deciding.
Conversion Versus Digitizing
Choosing a format only gets you halfway there. That’s why understanding conversion versus digitizing matters: conversion turns artwork into stitches without changing structure, often yielding dense, sloppy seams.
Digitizing software rebuilds designs into true stitch instructions, letting you control stitch type selection, underlay control, density adjustment, and pull compensation for cleaner seam optimization and reliable file sharing across format versions.
Preserve Editable Source Files
Once you convert to stitches, there’s no going back, so keep your editable source files — .psp, .gpu, or.exp — safe before exporting to PES, DST, EXP, or JEF.
Build simple version control strategies and file naming conventions, back up regularly, and preserve color library management and metadata so future re-digitizing starts smart, not from scratch.
Test Designs Before Stitching
Before you commit to production, run a proper test stitch setup on scrap fabric matching your final piece. Check fabric stabilization, verify stitch density, and confirm color change accuracy across PES, DST, or EXP outputs. Don’t skip the machine tension test — it catches puckering early. If you’re unsure which export to trust, this guide to DST, PES, and EXP embroidery file formats breaks down how each handles color data and stitch playback.
Compare results against your digital design preview, document adjustments, then stitch with confidence!
Frequently Asked Questions (FAQs)
Which format is best for embroidery?
DST grips virtually unlimited stitch counts, which is why it’s the universal format for commercial digitizing. For most sewists, though, PES suits Brother and Babylock machines best, balancing color storage, editability, and machine compatibility without conversion headaches.
Is PES or DST better?
Neither wins outright: PES delivers richer color data and quality for detailed logos, while DST offers broader compatibility across embroidery machines.
Pick PES for Brother/Babylock precision, DST for universal stitching—your digitizing software and target machine ultimately decide.
What are the different types of embroidery designs?
The needle moves by hand, yet stitches feel most alive under a machine’s rhythm. You’ll find hand embroidery styles, machine embroidery designs, appliqué, dimensional (puff) embroidery, and patch designs—each shaped by formats like PES, DST, EXP, and JEF.
What are the different embroidery file formats?
Your machine determines the answer: PES suits Brother and Babylock, DST offers broad compatibility, EXP fits Melco and Bernina, and JEF works natively with Janome, each differing in stitch data, color storage, and editability.
Can I convert a JPEG image directly into DST?
Not directly. JPEG is raster artwork with no stitch data, so it needs a raster to stitch workflow—digitizing, color palette matching, and density control—before export. True one-step conversion doesn’t exist; quality digitizing software bridges that gap into usable DST files.
Why do my colors look wrong after stitching?
Screens glow; thread reflects. That gap alone shifts hue. Add dye lot variations, fabric texture, thread tension, stitch overlap, and lighting conditions, and your finished piece rarely matches the preview exactly, so always test-stitch first.
What causes puckering or distortion in finished designs?
Puckering usually traces back to fabric tension mismatches, poor hooping technique, or overly dense stitching. Wrong stabilizer choice, stretchy fabric types, or careless stitch density in fills can gather threads, pulling fabric into visible folds around your design.
How much does professional digitizing typically cost?
A simple text logo might run $1 to $2, while dense, multi-color artwork can top $50. Stitch count, color changes, fabric type, and rush turnaround all shape the final digitizing price for your embroidery design.
Can I edit a design without special software?
Yes, to a point. Many machines offer device editing menus and USB drive edits for on-screen color swaps or stop reordering. Bigger changes to stitch density or shape still need embroidery software for reliable results.
Conclusion
Roughly 90 percent of embroidery machine errors trace back to using the wrong file type, not bad digitizing. That single number reveals why the difference between embroidery design formatsdifference between embroidery design formats** matters more than thread quality or hoop size.
A DST works everywhere; a PES speaks only to certain brands. Master that distinction, and you’ll stop guessing and start stitching with confidence. Your machine reads instructions, not intentions, so give it the right ones, every single time.