This site is supported by our readers. We may earn a commission, at no cost to you, if you purchase through links.
Send a PES file to a Tajima machine and it won’t stitch a single thread — the machine simply can’t read it. That mismatch trips up beginners constantly, and it’s the reason so many finished designs stall out before production even starts.
Every embroidery machine speaks its own language: Brother wants PES, Janome wants JEF, most commercial shops run on DST. Get the format wrong, and you lose color data, hoop settings, even stitch sequencing.
This embroidery file format guide breaks down what separates DST, PES, JEF, and EXP, and shows you how to pick the right one before your machine ever hits a snag.
Table Of Contents
Key Takeaways
- Every embroidery machine reads its own file format, so sending the wrong one (like a PES to a Tajima) means your design simply won’t stitch.
- DST works as the universal, color-blind workhorse for commercial machines, while PES stores full color data and editing flexibility for Brother machines.
- Turning artwork into a real embroidery file requires digitizing—tracing shapes, picking stitch types, and setting density—not just saving a JPEG in a different format.
- Small prep details like hoop size, minimum text height (3-4mm), line thickness, and a six-color palette limit make the difference between a clean stitch-out and a warped one.
What Are Embroidery File Formats?
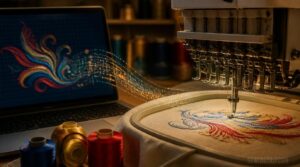
An embroidery file format isn’t just a technical label; it’s the language your machine reads to turn a design into stitches. Every format controls that translation differently, from how it stores color to whether it locks in the design or leaves it open for edits. Here’s what you need to know before picking one.
If you’re weighing options like PES, DST, or JEF, this breakdown of what file types are best for embroidery walks through which ones suit your machine and editing needs.
Stitch Files Versus Artwork
Your artwork is just a picture; a stitch file is the machine’s instructions. Digitizing converts that JPEG or vector into stitch data translation—stitch type, angle, length, jumps, trims—that a machine actually reads.
Artwork is just a picture; digitizing turns it into the stitch instructions a machine can actually read
Vector artwork conversion doesn’t equal stitch count until digitized; a simple graphic can still produce dense, complex stitching once translated into commands the needle follows.
Machine Compatibility Matters
Not every machine reads every stitch file the same way. Embroidery machine compatibility depends on format: DST suits commercial machines broadly, while EXP fits Melco systems specifically. Loading the wrong format risks jams or skipped stitches.
Compatibility also shapes:
- Hoop size limitations
- Stitch density adjustments
- Color data preservation
- Machine calibration accuracy
Format conversion challenges arise often, so confirm your machine’s required format before exporting.
Native and Export Formats
Once you know which machine you’re working with, the next question is whether you need a native file or an export file.
Native formats keep every layer and editable stitch path, but only your original software opens them.
Export formats like DST or EXP flatten that data for cross-brand sharing, trading editability for compatibility.
Color Data and Commands
Beyond stitch paths, your file carries color data blocks telling the machine which thread number goes where. Formats vary in depth: some store full RGB values, others just sequence numbers.
Color change commands pause the machine for thread swaps, while thread palette encoding and color management standards keep your color selection consistent across machines and reprints.
Common Embroidery File Formats Compared
Every embroidery machine reads files a little differently, and knowing which format matches your machine saves you time and headaches. Some formats carry color data, others don’t, and that difference shapes how you prep your designs. Here’s a breakdown of the formats you’ll run into most often, starting with DST.
Before you dig into DST specifics, it’s worth checking this guide on which file types embroidery machines actually support, since standard image files simply won’t cut it.
DST for Commercial Machines
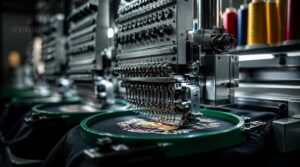
Think of DST as the industrial workhorse of embroidery file formats: a fixed 3-by-3 digit structure Tajima, Barudan, and Happy machines read natively. It packs jump stitches, trims, and satin fills into a compact linear stream—no color data, though, so you’ll map threads separately.
Editing means preserving coordinate precision; drift ruins production runs. That’s why service bureaus trust it for high-speed, multihead jobs.
PES for Brother Machines
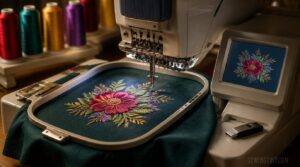
Where DST stays color-blind, PES carries the full picture: stitch commands, jumps, trims, and a Brother thread color palette in one file. You’ll find preview thumbnails aiding design database preview on USB transfers.
PES editing works best in Brother PE-Design, preserving stitch count and design dimensions. It’s the go-to for Brother and Babylock machines running direct production.
PES files include a preview image block for on-screen design viewing, known as the PEC preview block.
JEF for Janome Machines
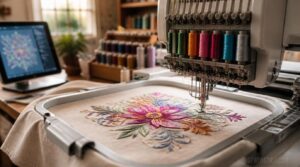
Janome machines run on JEF, a format storing every stitch coordinate, hoop movement, color order, and trim command your machine needs. Unlike DST’s blank slate, JEF preserves Janome’s palette data automatically.
Digitizing software exports designs directly to JEF, matching your specific hoop size compatibility and stitch density settings. Always verify design scaling against your model’s hoop dimensions before stitching.
EXP for Melco Machines
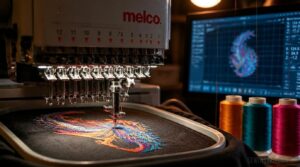
Melco machines run on EXP, storing stitch and path data using 16-bit coordinates, separate from color info kept in accompanying.INF files.
Your digitizing software exports EXP after vector artwork conversion, pairing colors through CND files for accurate playback. Check stitch count and thread tension settings beforehand, since EXP files skip embedded color palettes DST also lacks.
Other Popular Machine Formats
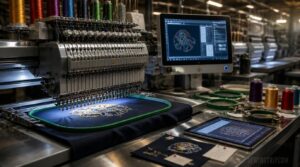
Not every shop runs Tajima, Brother, Janome, or Melco. GMP format shows up in industrial setups, storing stitch counts, color changes, and hoop notes for repeatable production.
- Stitch/color sequence
- Fabric compatibility
- Operator notes
- Hoop size limits
- Design metadata
Whichever format you choose, run a preview simulation before production, since format conversion tips only help after vector artwork conversion locks in.
Is DST or PES Better?
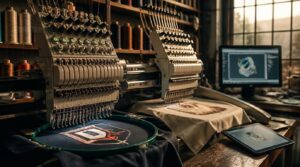
Truth is, neither format wins outright, since each one plays to different strengths on your production floor. Your answer depends on how you edit designs, which machines you run, and where each file needs to travel. Here’s how DST and PES stack up against each other, and where each one fits best.
Editing and Color Support
Color handling separates these two formats fast. PES stores editable thread colors straight from the Robinson-Anton palette, so color replacement tools and hue-based mapping work cleanly.
DST carries no color data at all, just stitch coordinates. That means visual color preview and color bleed simulation depend on your software, not the file itself, when working from a DST EXP export.
Cross-Machine Compatibility
That color gap creates real friction once you leave one machine’s setup. Machine header differences mean a DST EXP built for one brand won’t read correctly on another without conversion. Add in color index mapping, stitch density variants, and font rendering issues, and you’ll see why cross-machine compatibility and hoop size compatibility matter more than format choice alone.
Best Uses for DST
Once you’re running production, DST earns its keep on the shop floor. It’s built for high-speed industrial stitching, tight density control, and cap or tubular hoops.
- Works with dense logo fills without bloated stitch counts
- Works with automated nesting software
- Fits smoothly with legacy workflow
- Keeps thread tension stable on heavy fabrics
Best Uses for PES
DST rules the shop floor, but PES owns the design bench. If you’re running Brother machines, PES gives you native compatibility, no conversion needed, plus color data preservation and stitch density control for accurate reproduction.
It also fits multi-needle efficiency and editing workflows, letting you tweak logos in embroidery design software without rebuilding stitch geometry from scratch.
Converting Artwork Into Embroidery Files
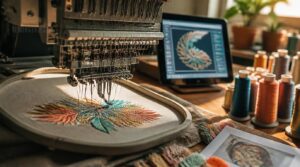
A JPEG or PNG won’t run on your embroidery machine, no matter how clean the artwork looks. Turning that image into stitches takes a few deliberate steps, each one shaping how the final design performs. Here’s what actually goes into that conversion process.
Why JPEGs Need Digitizing
A JPEG is just a photo, not a stitch plan. It carries no thread commands, no needle penetrations, nothing a machine reads.
That’s why embroidery digitization rebuilds it from scratch, tracing edges and converting flat color into stitch types the machine understands.
Compression artifacts and color banding only complicate that trace, which is why clean source art matters before you ever start.
Choosing Appropriate Stitch Types
Once traced, every shape needs a stitch type suited to its job. Satin stitches handle lettering and bold outlines; fill stitches cover broad areas with staggered loops; run stitches add fine detail.
Match stitch type to fabric compatibility, too, since woven fabrics take satin and fill well, while knits need stretch-friendly choices that won’t snap under tension.
Setting Density and Underlay
Push density too high and stitches pile up, causing puckering; too low, and fabric peeks through. Stitch spacing control balances coverage against strain, while underlay (tatami or satin) stabilizes the base.
- Prevents fabric show-through
- Reduces puckering on knits
- Protects thin threads from breaking
- Keeps curves crisp, not chipped
Manual tuning matters most on tiny text, dense fills, and tension-sensitive fabrics.
Exporting The Correct Format
Save the finished digitizing job in the format your machine actually reads—DST, EXP, whatever fits. Use clear file naming standards, keep color stop preservation intact, and select the right export profile. Include supporting files like color sheets.
Reload it for format verification before production; a quick check now beats a stalled machine later.
Preparing Designs for Better Embroidery
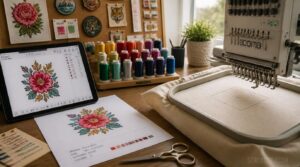
A good digitized file only gets you so far if the artwork behind it wasn’t ready for stitching in the first place. Before you send anything off for digitization, a few quick checks can save you from redoing work later. Here’s what to look at first.
Check Hoop Size Limits
A hoop that’s too small will crowd your stitches and warp the design. Check that your embroidery field limits match hoop diameter, leaving 5–8 cm clearance for stabilization.
Standard hoops run 60–260mm, in 40mm steps, but machine throat depth caps your ceiling. Undersized hoops cause fabric puckering—always confirm design dimensions in your Design Maker Mockup Preview first.
Simplify Gradients and Shading
Gradients look stunning on screen but chaotic in thread—stitch machines can’t mix pixels. Thread Palette Reduction limits colors while preserving highlights and shadows.
Use Color Shift Smoothing with longer stitches, wider spacing, and merged color steps to avoid banding. Adjust Stitch Density and add Underlay Gradient Support for stability, then run a Gradient Preview Simulation before committing thread to fabric.
Set Minimum Text Size
Tiny text turns to mush under a needle. Keep uppercase letters at least 3 to 4mm tall—smaller forces denser stitches, blurring edges on tight-weave fabrics. Script fonts need more room than block styles. Below minimum, add outlining to preserve legibility.
Test-stitch on your actual fabric first, then adjust letter height before committing to a full production run.
Thicken Fine Design Lines
Letter height isn’t the only weak point—fine outlines vanish just as fast. Bump line thickness by 0.5–1.5mm using satin stitch outline reinforcement, especially where fill stitches meet edges.
- Line Thickness Adjustment for edge clarity
- Stitch Density Control near contours
- Balanced thread tension to prevent puckering
- Test fabric preview before full runs
Plan Thread Colors Carefully
Line thickness fixes edges, but color choices decide whether your design reads clearly at all. Cap your palette at six threads, using a neutral base to anchor accents. Map colors to specific regions for a clean color mix, and pick colorfast brands so DST or EXP files stitch true across machines without drift.
Frequently Asked Questions (FAQs)
What is the best file format for embroidery?
The "best" format is the one that works worst for editing but best for machines: DST reads everywhere, while PES holds richer color data. Choose DST for cross-machine compatibility, PES for Brother-specific detail and easier rework.
Is DST or PES better?
Neither wins outright. DST favors broad machine compatibility and smaller stitch file size; PES offers stronger color sequencing accuracy and design editing flexibility. Choose based on your equipment and whether precise thread tension control matters more than cross-brand format conversion workflow.
How do I convert a jpeg to an embroidery file?
Turning a JPEG into stitches isn’t "sew" simple—it takes real digitizing. Use background removal, contrast adjustment, and vector tracing to clean art, then run it through embroidery design software, choosing stitch types and previewing before exporting to DST, EXP, or PES.
How to prepare files for embroidery?
Convert text to outlines, keep lines above 08", and limit colors to six. Avoid gradients, run a test sew, then export to DST or EXP with proper stabilization and optimized stitch count for your fabric.
Can digitized embroidery files be reused for reorders?
Digitizing costs nothing twice, but reordering still isn’t free of conditions. Your file gets reused across future orders, yet hoop size, placement, and format compatibility (DST, EXP) determine whether it stitches perfectly or needs adjustment first.
How does stitch count affect production time and cost?
Every 1,000 stitches adds about a minute of runtime, so stitch density impact and thread consumption drive cost directly. Color changes, needle wear, and stabilizer needs climb too, making stitch count optimization essential for production efficiency and predictable pricing.
What backing or stabilizer works best for silk fabric?
Match your stabilizer weight guide to fabric: light weight tear away for delicate charmeuse, cut away support for dense satin stitching.
Water soluble films protect sheen, fusible adhesion prevents shifting, and proper hoop stabilization stops fabric puckering during stitching.
What happens if a design fails quality review checks?
Failed files get sent back for free adjustments—no charge. Common culprits include dimension mismatch, stitch density issues, underlay problems, color command errors, or file corruption.
Digitizers fix the flaw, re-export in your format (DST, EXP), and resubmit before production runs.
Conclusion
A stitch file is a compass, not a map—it points your design toward the right machine, but you still choose the path. Master this embroidery file format guide, and DST, PES, JEF, and EXP stop looking like alphabet soup. They become tools, each suited to a purpose.
Match format to machine, digitize with care, and your designs will stitch clean every time. Precision now saves thread later.