This site is supported by our readers. We may earn a commission, at no cost to you, if you purchase through links.
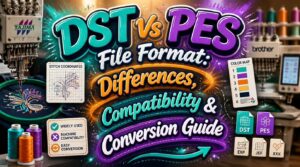
Send a DST file to a shop running PES machines, and you’ll get a design with zero color stops, forcing the operator to guess every thread change by eye. That gap trips up more digitizers than stitch count ever will.
The truth is, DST vs PES file format isn’t a matter of preference, it’s a matter of what your machine reads and what your software writes. Tajima built DST for raw coordinates; Brother and Baby Lock built PES to carry color maps, thumbnails, and metadata alongside the stitches.
Know which format your workflow demands, and you’ll save hours of guesswork on the production floor, starting with how each one stores your stitch data.
Table Of Contents
Key Takeaways
- DST stores only raw stitch coordinates with no color data, while PES adds thread color sequences, thumbnails, and metadata, so your choice should match what your machine actually reads.
- Brother and Baby Lock machines natively favor PES, Tajima commercial systems run on DST, and Janome or Bernina compatibility depends on your specific model and firmware.
- Converting between formats requires manually mapping thread colors, checking stitch density (aiming for 4–5 points per mm), and verifying underlay settings to avoid puckering or thread breaks.
- Keep your original design saved as an EMB master file in software like Wilcom, since that’s the only format that preserves full editing flexibility for future exports to DST, PES, or other machine formats.
DST Vs PES: Key Differences
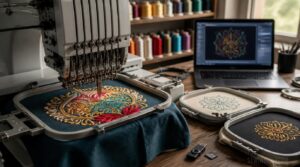
DST and PES look interchangeable at a glance, but the way each one stores your design tells a different story under the hood. Knowing where these formats split makes every conversion, edit, and machine hookup go smoother down the road.
Here’s what actually sets them apart, five key differences you’ll want firmly in your back pocket.
Before you shop, it helps to know exactly what commercial-grade sewing machines bring to the table, since durability and speed are what really separate them from home models.
Stitch Data Storage
Bare bones or dressed up? That’s the real split between DST and PES at the storage level. DST packs raw needle coordinates into tight 3-byte chunks after a 512-byte header, no color data attached. PES stores richer stitch data, thumbnails, and metadata.
DST packs bare needle coordinates with no color data, while PES dresses up the same stitches with thumbnails and metadata
| Format | Stores | Header Size |
|---|---|---|
| DST | Coordinates only | 512 bytes |
| PES | Stitches + metadata | Larger |
Thread Color Information
Strip away those coordinates and you’ll hit the real fork in the road: color. PES retains a full color sequence, mapping each block to actual thread numbers. DST drops it entirely.
| Format | Color Data |
|---|---|
| PES | Full sequence |
| DST | None |
That gap forces manual thread color mapping whenever you convert DST files for production runs.
Metadata and Design Thumbnails
That color gap explains why PES carries more baggage than DST: embedded thumbnails, palette data, and metadata fields for author or design name. DST skips all of it.
| Feature | PES | DST |
|---|---|---|
| Thumbnail | Yes | No |
| Color legend | Yes | No |
| Metadata fields | Yes | No |
Thumbnails update automatically after edits, so thumbnail color accuracy stays reliable for cataloging your design library.
File Size Differences
File size doesn’t follow a fixed rule. Stitch density impact matters more than format alone.
| Factor | DST | PES |
|---|---|---|
| Color change encoding | Explicit blocks | Compressed |
| Underlay stitch representation | Detailed | Compact |
| Thumbnail metadata size | None | Added |
Dense satin work can push DST past PES. File conversion rarely changes stitch count, just compression algorithm differences affecting final size.
Editing Limitations
Open a DST or PES file in your editor, and you’ll hit walls fast. Design integrity checks flag risky edits, since stitch count changes threaten machine compatibility.
If you’re unsure which format fits your setup, comparing common embroidery machine styles and their format support can save you from costly compatibility surprises.
| Edit Type | Common Risk |
|---|---|
| Color reassignment | Broken color stop consistency |
| Density tweaks | Uneven fabric coverage |
Format conversion quality loss compounds this—metadata preservation isn’t guaranteed, so revision flexibility shrinks with every re-save.
Which Format Fits Your Machine?
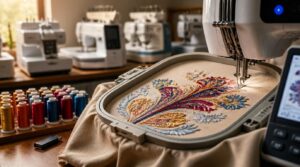
Your machine’s brand determines which format works best, and guessing wrong wastes time and thread. Brother, Baby Lock, Tajima, Janome, and Bernina each handle PES and DST a little differently, with some needing conversion and others reading both natively. Here’s how to match your hardware to the right format before you hit "start.
Brother and Baby Lock
Brother machines natively read PES, while Baby Lock units share the same basic engine in many models, so PES compatibility carries over. DST works too, but expect a conversion step.
- Check your embroidery field size
- Confirm USB or card-based import
- Verify auto-tension support
- Review dealer firmware updates
Both brands often use shared center platforms across models, such as the Destiny/Destiny II and Ellisimo/Ellisimo Gold series. Center platform sharing
Tajima Commercial Machines
Workhorse production floors run on DST, plain and simple, since older Tajima single and multi-head systems were built around Tajima format compatibility long before PES existed.
| Feature | Tajima Advantage |
|---|---|
| Scalability | 4–12 head Multi-Head Scalability |
| Stability | Digital Presser Foot control |
Thread Management Systems and a strong After-Sales Support Network keep production humming across demanding Fabric Compatibility Range jobs.
Janome and Bernina Compatibility
Janome and Bernina don’t share one universal format, so format compatibility hinges on your specific model. Bernina 770 QE reads PES and DST through firmware updates; older Janome units need conversion tools.
Color sequence mapping rarely lines up between brands without manual reordering. Run test stitch verification and underlay adjustments after any conversion, since satin stitches shift between formats.
Home Versus Commercial Use
Speed tells the real story: home embroidery machines run 500-800 stitches per minute versus 1000-1500 on commercial setups. Hoop size shrinks your options too, 4×4 or 5×7 inches at home against 12×18 commercial beds.
That gap shapes workflow efficiency and cost structure alike. Format interoperability matters less than throughput when 30 designs a day meets multi-head production runs demanding stricter quality control.
Checking Machine Requirements
Never assume compatibility—check your manual first. Confirm voltage requirements (120V or 230V, 60Hz), hoop size limits, and needle system (DB x 1 or 130/705).
Verify stabilizer thickness tolerance and power supply needs, since brownouts disrupt needle timing. Test whether your machine reads DST file or PES file formats natively, or requires conversion software before you commit to a workflow.
PES Vs DST Software Compatibility
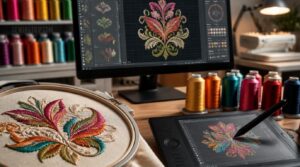
Your machine only tells half the story—the software you use to open, edit, or convert these files matters just as much. Some programs handle both formats with full editing power, while others only manage basic conversion without preserving your design’s finer details.
Here’s how five popular embroidery programs stack up for working with PES and DST files.
Wilcom Embroidery Studio
Professionals rely on Wilcom Embroidery Studio when file format conversion demands zero compromise. It works with DST file and PES file formats with full editing, preserving design file integrity throughout.
| Feature | Wilcom Advantage |
|---|---|
| Lettering/Vectors | Expert lettering tools, vector design connection |
| Automation | Auto digitizing, Redwork Automation, network deployment features |
Hatch Embroidery
Where Wilcom demands precision, Hatch Embroidery software meets you halfway with a friendlier Hatch Interface Overview and built-in lettering tools.
The Hatch Trial Period and design library let hobbyists test DST/PES conversion risk-free before committing.
| Level | Best For | Key Tool |
|---|---|---|
| Organizer | Beginners | File management |
| Composer | Hobbyists | Hatch Lettering Tools |
| Digitizer | Experienced | Auto Digitize |
Hatch Workflow Tips: preserve metadata only when staying in PES.
Bernina ArtLink
If Hatch feels like a workshop, Bernina ArtLink is the toolbox: ArtLink file support covers PES and DST for viewing, converting, and basic edits.
| Feature | ArtLink Function |
|---|---|
| Colors | ArtLink color tools |
| Setup | ArtLink machine setup |
| Placement | ArtLink template printing |
| History | ArtLink version history |
| Scaling | Design scalability |
It’s free, editing is limited, but it gets designs machine-ready fast.
Ink/Stitch
Free doesn’t always mean limited. Ink/Stitch runs inside Inkscape across Windows, macOS, and Linux, turning vector paths into running, satin, and fill stitches with real stitch parameter control and live preview simulation.
| Feature | Ink/Stitch Function |
|---|---|
| Platform | Cross-platform (Win/Mac/Linux) |
| Output | DST, PES export |
| Editing | Params dialog, live preview |
| Cost | Free, open source |
Embrilliance Essentials
When you need a gentler entry into machine embroidery software, this program delivers. Beginner-friendly editing controls text tools, design merging, and stitch preview without overwhelming menus.
| Feature | Essentials Function |
|---|---|
| Fonts | 12 built-in |
| Merging | Auto-recalculates density |
| Preview | Full stitch simulation |
| Color | Sort/reorder stops |
| Export | DST, PES compatible |
How to Convert DST and PES
Once you know which format your machine needs, converting between DST and PES becomes the next skill worth mastering.
Getting it right means more than clicking "export," since color data, density, and underlay settings all need your attention along the way.
Here’s what to check at each step to keep your converted designs stitching exactly as planned.
Converting PES to DST
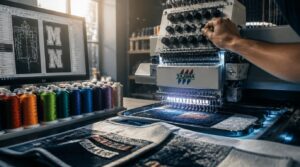
Going from PES to DST means stripping color data while translating stitches into Tajima’s language. Run Color Mapping Verification so thread sequences survive as block changes, and confirm Header Structure Compliance for machine readability.
Apply Stitch Density Adjustment for fabric type, tackle Jump Stitch Reduction at color stops, then run a Test Fabric Simulation in Wilcom Embroidery Studio before production.
Converting DST to PES
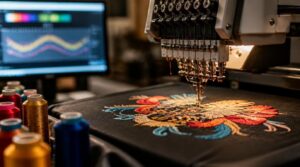
Since DST carries no color data, converting to PES means assigning thread values from scratch. Run color mapping verification, a stitch density adjustment, and an underlay preservation check in Wilcom Embroidery Studio, then:
- Import DST
- Assign colors
- Tune density
- Run test stitch validation
Confirm conversion profile tuning before trusting the PES output on your embroidery machine.
Preserving Color Sequences
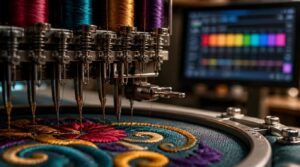
Color sequence integrity is the real test of a clean conversion. Each color change marker needs a matching thread value, with timing preserved so jump points fire correctly.
Verify palette consistency against your original design, checking thread change timing and block optimization. A sequence preview accuracy check catches drift before it reaches the machine.
Checking Density and Underlay
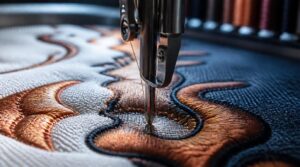
Stitch density and underlay settings won’t survive a sloppy conversion. Check three things: underlay type matches fabric weight, stitch density stays within 4–5 points per mm, and pull compensation adjusts for DST’s tighter data packing. Skipping this risks puckering or thread breaks once your embroidery machine compatibility assumptions meet real fabric.
Previewing Converted Designs
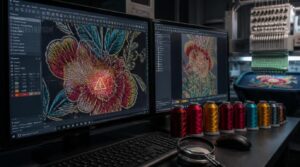
Never trust a converted file until you’ve watched it stitch on-screen first. Run stitch simulation to confirm design accuracy, checking that color preview matching lines up with your original thread sequence.
Use zoom inspection tools on dense motifs, and don’t ignore density warning indicators. Check the thumbnail layout preview too, then compare DST and PES results side-by-side before sending anything to the machine.
Choosing The Best Embroidery Format
Picking between DST and PES gets easier once you match the format to your actual workflow, not just your machine. Your choice depends on whether you’re stitching one-off gifts at home or running production orders for clients. Here’s how to sort out which format, and which habits, will serve you best.
Best Format for Beginners
Your first project deserves a forgiving format, and that’s PES. It stores color changes clearly, so your Brother SE1900 knows exactly when to pause for thread swaps.
Simple stitch commands mean less guesswork, and native software support makes editing painless.
DST works too, but PES gives new digitizers cleaner color sequencing and fewer surprises at the machine.
Best Format for Businesses
Beginners get forgiveness; businesses need production scalability. Run multi-head Tajima machines? Standardize on DST for commercial embroidery workflow efficiency. Running Brother or Baby Lock fleets instead? PES keeps color handoffs clean.
Mixed shops benefit from format standardization—pick one primary format, minimize conversions, cut errors. Cost efficiency follows: fewer mis-threaded runs, faster onboarding, smoother machine compatibility across your whole production line.
Keeping EMB Master Files
Standardizing DST or PES for production doesn’t mean discarding your EMB master files—those stay archived in Wilcom Embroidery Studio as master working files, preserving stitch density, underlay, and color sequence for future edits.
Protect them with:
- Role-based access controls and MFA
- Checksum integrity checks against archived copies
- Encrypted, geo-diverse backup procedures
- Complete provenance tracking and metadata management
Organizing Production Files
Once your EMB masters are archived, keep production-ready DST and PES copies inside a dedicated folder structure setup: Projects, Exports, Media Sources, Backups.
Apply consistent file naming conventions (ProjectName_V01_Client), tag files with metadata for quick search, and enforce role-based access permissions.
Pair this with scheduled backup strategies, checksum-verified, so every production file stays traceable and recoverable.
Test Stitching Before Production
Never send a converted DST or PES file straight to full production. Run test stitches on identical fabric and stabilizer first, checking needle compatibility, thread tension, stitch density, and fabric puckering.
This preproduction checkpoint on your actual embroidery machine catches skipped stitches or distortion early, saving thread, fabric, and costly reruns before committing to volume.
Frequently Asked Questions (FAQs)
Is PES or DST better?
Like choosing between a sturdy work truck and a sleek sports car, neither wins outright. DST favors production efficiency and machine compatibility; PES delivers better color fidelity and editing capabilities for detailed, small-batch designs.
How to convert a DST file to a pes file?
Open your DST in Wilcom or Hatch, select PES export, choose your hoop size, then verify color mapping accuracy, run a stitch simulation preview, and adjust thread density before saving for machine compatibility.
What is the best file format for embroidery?
There’s no single "best" format, only the right one for your setup. Beginners do well with PES for color clarity; businesses lean on DST for universal machine support and reliable production runs.
What program will open a PES file?
Beyond the Brother SE1900, try Embird Studio, SewWhat Pro, Embroidery Viewer Lite, or ArtLink Viewer for quick previews.
Embroidermodder 2 offers free, cross-platform design editing capabilities, reflecting file format evolution beyond factory-only PES support.
Whats inside a DST files 512-byte header?
Think of it as a design’s ID card: fixed at 512 bytes, it packs the design name field, stitch count location, and color change metadata, with leftover space filled by padding bytes.
How are individual stitches structured within a DST file?
Each stitch packs into a 3-byte binary chunk encoding X/Y deltas—the needle movement pattern from its last position. Stitch command types (running, jump, trim) hide in delta patterns and stop codes, all tallied against the header’s stitch count.
Can EMB files be opened directly on embroidery machines?
Not on most home machines. Your EMB master file needs conversion to DST, PES, or another native format first, since machine compatibility depends on reading proprietary formats—EMB stays a digitizing and format conversion hub, not a direct-load file.
What formats can EMB master files be exported to?
Funny how a "master" file can’t touch a machine directly, yet it’s the source for everything that can. Your EMB exports to DST export, PES export, EXP export, JEF export, and OFM export, covering nearly every embroidery machine on the market.
Conclusion
Think of DST as a blueprint and PES as a finished blueprint with labels attached. One gives raw coordinates; the other hands you the full picture. Mastering dst vs pes file format means reading your machine’s language before you thread a single needle.
Save your masters in EMB, export what each machine demands, and test stitch every conversion. Get this right, and your hoop never lies to you.