This site is supported by our readers. We may earn a commission, at no cost to you, if you purchase through links.

One wrong setting turns a crisp logo into a stiff, puckered mess. Change stitch spacing by a tenth of a millimeter, and the whole design shifts character.
That’s the thing about embroidery: density decides everything. Too tight, and fabric loses its drape. Too loose, and the backing peeks through your fill.
The best stitch density for embroidery isn’t one number. It shifts with fabric weight, thread type, and design size. Get the formula right, and your stitches lock in clean, consistent, and built to last.
Table Of Contents
- Key Takeaways
- What is The Best Stitch Density?
- How is Stitch Density Measured?
- Density Settings by Stitch Type
- Density Settings by Fabric Type
- Match Density to Thread Weight
- Balance Density, Underlay, and Stabilizer
- Adjust Density When Resizing Designs
- Fix Common Stitch Density Problems
- Use Digitizing Software More Effectively
- Test and Finalize Density Settings
- Frequently Asked Questions (FAQs)
- Conclusion
Key Takeaways
- There’s no single "best" stitch density—0.4mm works as your standard baseline, but the right number shifts based on your fabric weight, thread type, and design size.
- Density and flexibility pull in opposite directions, so tighter spacing means more coverage but stiffer fabric, while looser spacing keeps things flexible but risks the backing showing through.
- Underlay and stabilizer aren’t optional extras—strong underlay can cut your top-stitch count by 20%, and skipping proper stabilization undoes even perfect density settings.
- Always test on a scrap swatch before running full production, since resizing, fabric type, and thread weight all shift density in ways that guesswork won’t catch.
What is The Best Stitch Density?

Best stitch density isn’t one fixed number. It shifts with fabric, thread, and design detail. Here’s how to find your starting point and adjust from there.
For lighter fabrics that pucker easily, a quilting guide bar can help you keep spacing even while you dial in the right density.
Standard Spacing: 0.4 Millimeters
Think of 0.4 mm as your default gear. Standard spacing suits cotton twill and light denim, no stiffness, no gaps.
Pair it with 40-weight thread for smooth fabric stability and even thread tension. Underlay adds coverage; stabilizer keeps registration accurate.
Machine speed stays steady, stitches per inch stay predictable. It’s the safe starting point before scaling density up or down.
When to Use 0.3 Millimeters
Sometimes 0.4 mm is too heavy for the job. Drop to 0.3 millimeters for ultra light fabrics, delicate motifs, and small text where bulk ruins the look.
It sharpens applique edges and keeps baby garments soft against skin. Tighter stitch spacing here boosts stitches per inch without stiffening chiffon, silk, or fine cotton lawn.
When to Use 0.5 Millimeters
Not every job needs a tight grip. Bump up to 0.5 mm when you want fuller coverage with more give.
Use it for:
- Cap panel alignment on curved logo rims
- Small text clarity at 6-8 pt sizes
- Lightweight fabric protection on poplin and lawn
- Decorative fill uniformity across floral or geometric designs
Clean satin edge finishing holds steady, even at moderate thread weight.
Balancing Coverage and Flexibility
Coverage and flexibility pull in opposite directions. Tighter stitch density boosts coverage but stiffens fabric drape. Looser spacing improves flex but risks show-through.
Mid-range density (around 0.4mm) usually balances both. Thread weight and stabilizer type shift that sweet spot too.
Run a quick coverage uniformity test on scrap fabric first. It beats guessing every time.
Why Testing Remains Essential
Why skip a test stitch? That shortcut costs more than it saves.
Running a swatch first catches thread breaks and fabric puckering before production. It confirms your stitch density actually suits the fabric type on hand.
This isn’t extra work. It’s cheap insurance against costly rework, and it delivers consistent, real-world quality every single run.
A test stitch isn’t extra work, it’s cheap insurance against costly rework and inconsistent quality
How is Stitch Density Measured?
Numbers on a settings screen don’t mean much until you know what they’re tracking. Density comes down to a few simple measurements, and once you know them, every setting makes sense. Here’s what you’re actually looking at.
Millimeters Between Stitch Rows
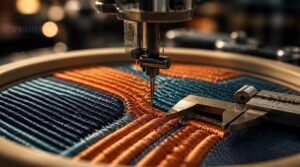
Row spacing is your main measurement tool. It’s the gap between stitch rows, in millimeters, and it drives fabric impact directly.
Standard jobs run 0.4 mm. Tighten to 0.3 mm for dense coverage, or widen to 0.5 mm on delicate fabric. Row spacing adjustment depends on thread weight and stitch count. Always confirm your numbers through density testing methods before running production. For best results, understanding stitch density measurement is essential.
Stitches Per Inch
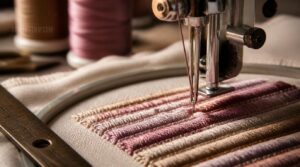
Ten stitches packed into one inch tells a different story than twelve. Stitches per inch (SPI) counts density along seams or fills, matched to fabric type and thread weight.
- Test swatches confirm SPI calibration before production
- SPI measurement tools translate settings into real numbers
- SPI fabric compatibility guides underlay type choices
Woven garments start around 10–12 SPI as your baseline.
Lower Numbers Mean Higher Density
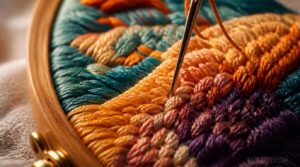
Smaller millimeter numbers pack rows tighter, not looser. That’s the flip side of SPI math: 0.3 mm beats 0.5 mm for density every time.
Tighter spacing boosts coverage, but it also affects flexibility, thread buildup, and machine speed. Dense fills need slower stitching and stabilizer support matched to fabric type, thread weight, and design size for clean results.
Row Spacing Versus Stitch Length
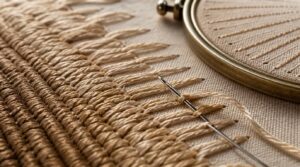
Two dials, one fill. Row spacing sets vertical distance between rows; stitch length sets how often the needle drops within each row. Tighten spacing with short stitches, and coverage gets thick fast.
Keep spacing fixed and stretch stitch length instead. You’ll get a looser silhouette without touching row count. Balance both against fabric type and thread type, or puckering creeps in.
Why Software Measurements Differ

Same file, different numbers? Blame unit conversion differences and machine calibration variance between brands.
Rounding also sneaks in through file formats, stitch library defaults, and scaling drift during resizing.
Three culprits worth checking:
- Software rounding stitch counts to integers
- Default underlay overriding your settings
- Scaling operations drifting density values
Tools like the AI Stitch Estimator or EZ Stitch Smart Estimator use density mapping and smart zone analysis for consistency.
Density Settings by Stitch Type
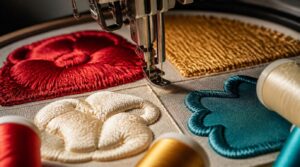
Every stitch type plays by its own rules. Satin, tatami, puff, and appliqué each need a different density to look sharp. Here’s what to set for each one.
Satin: 0.3–0.5 Millimeters
Satin stitch lives in the 0.3–0.5 mm range, the sweet spot for gloss and curved shape definition. Tighter spacing near 0.3 mm sharpens edges on logos; 0.5 mm suits larger, flatter fills.
Watch thread tension balance here — too loose invites thread breaks, too tight risks needle breaks and fabric distortion. Consistent spacing keeps fabric sheen consistency even across every letter.
Tatami: 0.4–0.6 Millimeters
From glossy borders, we move to broad coverage. Tatami fill runs 0.4–0.6 mm, built for overlapping passes across shirts and panels.
Think woven mat structure here — like tatami weave density in flooring, rows interlock for strength. Tighter spacing (0.40 mm) resists thread breaks; wider spacing adds flexibility. Pair with solid fabric stabilization to prevent shifting and keep fills even.
3D Puff: 0.28–0.32 Millimeters
Now the stitching gets bold. 3D Puff needs 0.28–0.32 mm, tight enough to fully encase foam without crushing it.
Use 40-weight puff thread for smooth foam encapsulation. Stabilizer strength keeps height stable; skimp, and thread breaks follow. Bold your design outline slightly to offset the raised profile — small height adjustments during digitizing help match fabric stretch and hooping tension.
Appliqué Edge Density
Foam encapsulation is one thing. Edges are another game entirely.
Appliqué zones need tight satin borders, securing fabric without bulk. Push edge density too high, and curl or distortion follows.
Coordinate underlay strength with edge tension for smooth curves. Lighter underlay plus denser stitching prevents thread buildup and stiffness.
Always run wash durability testing on swatches — fraying shows up fast if pull compensation’s off.
Running Stitch Length Controls
Unlike satin and tatami, running stitch skips row spacing entirely. Stitch length adjustment controls density here, not width.
Shorter lengths (1–2mm) fight fabric distortion and thread breaks. Longer settings speed production but weaken hold.
Watch for:
- Needle deflection on dense turns
- Fabric tension control drift
- Thread path optimization gaps
- Machine feed synchronization errors
- Inconsistent stitch density across curves
Test swatches first.
Density Settings by Fabric Type
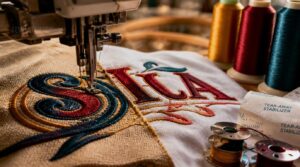
Every fabric behaves differently under the needle. What works on a stiff cap will pucker on a soft knit. Here’s how to dial in density for the materials you stitch most.
Cotton and Woven Shirts
Woven cotton shirts want 0.40 mm for satin and 3.8 SPI for fill. Poplin and Oxford differ in weave, but density stays steady since grainlines are stable.
| Fabric | Satin (mm) | Fill (SPI) |
|---|---|---|
| Poplin | 0.40 | 3.8 |
| Oxford | 0.40 | 3.8 |
Tight hooping and matched stabilizer keep coverage clean without distorting the weave.
Knits and Stretchy Fabrics
Loops make knits move, so density has to bend with the fabric. Use 0.45 mm for satin and 4.2 SPI for fill, loosening spacing to prevent loop distortion.
Light hooping tension protects drape and stretch recovery. Tight stabilizer backing controls creep without flattening stretch. Test needle deflection early. Balanced thread tension cuts thread breaks and keeps registration clean on moving fabric.
Denim and Heavy Workwear
Denim fights back. This twill weave demands tighter, tougher stitching to match its density.
- Satin: 0.38 mm
- Fill: 3.6 SPI
- Reinforced seam density at pockets
- Heavy stabilizer backing required
Fabric thickness (12–16 oz) needs stronger needle size and thread tension balance. Cutting density risks puckering; adding too much strains stitch durability. Stabilization keeps registration sharp on heavy fabric.
Caps and Structured Panels
Curved caps punish careless density. Front panels flex during wear, so stitch density limits matter more than on flat goods.
Center panel work needs strong underlay support, tight panel seam alignment, and a stabilizer built for curved panels. Match thread weight to a 0.35 mm satin baseline. Push too dense and panels warp; keep machine speed moderate for clean registration on that curve.
Lightweight and Delicate Fabrics
Silk, chiffon, and voile fight back against heavy stitching. Sub 150 gsm fabrics need light density near 0.5 mm, protecting drape control.
Use a fine 60-70 needle, floating stabilizer, and lightweight backing to stop puckering.
- Fine needle, size 60-70
- Floating or washaway stabilizer
- Light 40-60 weight thread
Test stitch first. Reduce underlay, watch fabric stretch, and finish seams narrow for clean results.
Match Density to Thread Weight
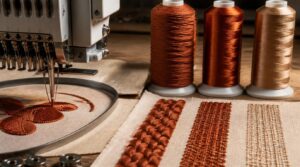
Fabric isn’t the only factor that decides your density. Thread weight changes the math too. Here’s how to match spacing to the thread on your bobbin.
40. weight Thread Baseline
Think of 40 weight as your workhorse thread, the default setting most digitizers reach for first. It pairs with 0.4mm density on satin fills, sitting comfortably between 0.3 and 0.5mm.
Use a size 75/11 or 80/12 needle for stable thread tension compatibility. Cotton and blends love this combo.
Solid underlay stitching keeps coverage clean on lighter fabrics.
60. weight Thread Spacing
Drop down to 60 weight, and everything gets tighter. This fine thread wants 0.28 to 0.32mm spacing, pulled snug for crisp small text.
Match it with a smaller needle for proper thread tension balance. Run a fabric swatch test first — dense fabrics favor 0.28mm, delicate ones lean toward 0.32mm. Trust your underlay support role here; it keeps stitch integrity check results clean.
Thick Specialty Thread Spacing
Go bulky, and the rules flip again. Thick specialty thread needs 0.28 to 0.50mm spacing, depending on fabric and density goals.
Wider gaps stop crowding and protect fabric recovery balance after washing. Keep edge density around 0.30 to 0.45mm for sharp borders.
Underlay interaction matters more here — strong support prevents stitch buildup and heat damage during high-speed runs.
Needle Size Compatibility
Get your needle wrong, and no density setting saves you. Needle gauge fabric matching prevents skipped stitches on heavy layers.
Eye size matters for thick thread — bigger eyes cut fraying. Shank style counts too:
- Ballpoint — knits, no snagging
- Sharp — wovens, clean holes
- Longer needles — dense, layered fills
Right needle, right thread weight. That’s the pairing.
Preventing Excessive Thread Buildup
Buildup piles up when fills overlap or paths repeat. Fix it with overlap reduction, smart stitch sequencing, and fill path breaks.
Pick lighter thread weight selection where possible. Use underlay optimization to distribute stitches, not stack them.
Skip these steps and stitch density spikes — causing thread breaks, puckering, or stiff patches instead of clean coverage.
Balance Density, Underlay, and Stabilizer
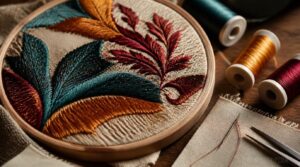
Density doesn’t work alone. Underlay and stabilizer carry half the load, holding stitches steady underneath. Here’s how these three pieces work together.
Underlay Improves Visible Coverage
Fabric showing through your fills? That’s a coverage problem, and underlay fixes it before your top stitches even start.
Underlay density adjustment matters most. Start moderate, tighten for glossy fabrics. Match underlay stitch direction to your main fill, avoiding gaps. Test on scrap fabric first. Right underlay fabric selection builds a solid foundation, hiding texture and making thread colors read richer, fuller, and more even.
Stabilizers Control Fabric Movement
Without a stabilizer, your fabric shifts mid-stitch, and that ruins registration fast.
Stabilizers lock fabric in place, giving stitch density something solid to grip. Fabric shift prevention keeps rows aligned on stretchy knits and loose weaves alike.
They also handle stabilizer tension control, reducing needle deflection and puckering. Skip this step, and even perfect density won’t stop fabric showing through your fills.
Hooping Pressure and Alignment
Skewed fabric ruins even the best density settings.
Even hoop tension control keeps rows straight. Match fabric grain alignment to the hoop edge to stop skew before it starts.
Firm pressure adjustment techniques prevent hoop marks and shifting. Run an alignment verification test first. Fabric stability now means fewer surprises later, including push compensation issues that distort stitch coverage on your final design.
Reducing Density With Strong Underlay
Think of underlay as your foundation, not an afterthought.
Strong underlay reduces density needed on top. A 0.3–0.5 mm underlay layer lets satin fills drop stitch count by 20%.
Underlay stabilizes fabric, spreading tension evenly. That means fewer stitches doing the same job.
Underlay prevents puckering by supporting the surface first. Less thread. Same coverage. Cleaner results, especially on woven fabrics under satin work.
Matching Backing to Fabric
Right backing, right fabric. That’s the whole game.
- Wovens: firmer tear-away resists puckering
- Knits: stretch-tolerant backing prevents ghosting
- Denim: heavyweight cutaway controls thick threads
- Silk: ultra-light stabilizer stops show-through
Match backing to stitch density and thread weight. Choosing tear-away for lighter fills, cutaway for dense designs, keeps machine embroidery clean after design scaling.
Adjust Density When Resizing Designs
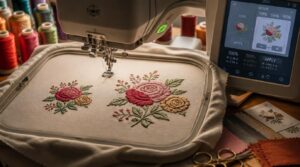
Resizing a design isn’t as simple as hitting shrink or enlarge. Your stitch density shifts with every size change, whether you plan for it or not. Here’s what you need to know before you scale anything.
Why Shrinking Increases Density
Shrink a design without adjusting settings, and stitch density climbs on its own. Less fabric area means the same stitch count packs tighter, closing gaps between rows.
Surface tension rises too, anchoring stitches firmly. Weave openness shrinks, giving fills a denser underlay to grip. That’s fabric physics working against your original settings, not your digitizing skill.
Recalculating Stitches After Scaling
That density shift is exactly why stitch count adjustment matters after any scale factor change. Doubling a design from 50mm to 100mm doubles stitch count and stitch spacing recalc becomes non-negotiable.
Most software auto-updates counts during machine scaling, but automatic tools can overshoot. Manual density tuning, paired with something like the EZ Stitch Smart Estimator, keeps row spacing consistent and predictable.
Editing Native Design Files
Skip the export step. Working inside your native file format keeps stitch type detection, node points, and thread metadata intact.
You get real-time preview tools and per-layer overrides for exact control. Stitch path refinement happens without rounding errors, so design coverage stays accurate through every resize.
Limits of Machine-file Resizing
Machine files hit a wall native files don’t. Resizing after export triggers memory usage spikes and heavier interpolation complexity. Push dimensions too far and you’ll see data loss artifacts: blurring, aliasing, warped stitch density.
Hardware memory limits and platform dimension caps only make it worse. Your machine runtime slows, and thread performance suffers under the strain.
Checking Small Text and Details
Tiny letters reveal every flaw fast. After resizing, zoom in and check lettering clarity first.
Look for uniform stroke thickness. Sharp edges matter more than ever at small sizes.
Watch stitch density and needle size together. Poor fabric interaction causes thread fraying on high-density text. Confirm underlay role holds shape before running full production.
Fix Common Stitch Density Problems
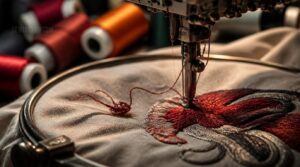
Even dialed-in settings can go wrong sometimes. Fabric shifts, thread snaps, stitches bunch up. Here’s how to spot the problem and fix it fast.
Puckering and Fabric Distortion
Ripples along your stitch lines? That’s puckering, and it starts small before ruining a whole run.
- Fabric tension balance shifts when needle thread fights bobbin thread
- Weak underlay effectiveness leaves no flat base for top fills
- Wrong grain direction turns bias runs into pucker magnets
Fix it with proper stabilizer selection and balanced density. Delicate fabrics need extra care.
Thread Breaks and Needle Damage
Snapped threads mid-run usually trace back to needle condition. A dull or bent tip frays thread fast, and burrs shred it outright.
Check needle size against thread weight first. Then look at bobbin tension, thread quality, and hoop interference. Any stitch type stitched too dense strains the needle, causing needle damage and repeated breaks.
Fabric Showing Through Fills
See color peeking through your fill stitch? Density’s too light for the job. Try 0.35 mm with 40-weight thread and proper underlay.
- Loose weaves show through faster than tight cotton
- Light thread on light fabric exaggerates the peek
- Undersized stabilizer leaves gaps underneath
Match backing color to fabric. It masks stubborn show-through fast.
Stiff, Uncomfortable Embroidery
That board-like patch on your shirt? Too many stitches, stacked too tight. Stitch layer buildup kills fabric drape fast.
Heavy underlay plus dense fill plus thick stabilizer equals rigid fabric. Thread tension pulls it tighter still.
Fix: lighten density, thin your stabilizer, match thread weight to fabric. Needle holes shouldn’t feel sharp against skin.
Uneven Fills and Gaps
Patchy fill? Your stitches lost their rhythm. Fabric tension control matters most here.
Weak stabilizer lets fabric shift mid-stitch, causing gaps near curves. Fix with underlay adjustment techniques: switch dense zigzag to soft cross underlay for smoother coverage.
Try stitch direction optimization too. Repetitive travel paths create predictable gaps. Vary angles, match thread weight to fabric, and check stitch overlap for real design clarity.
Use Digitizing Software More Effectively

Your digitizing software holds more power than most people use. Set it up right, and it does the density work for you. Here’s what to check first.
Density Controls and Presets
Presets turn guesswork into a system. Your software’s preset library holds fabric-specific density presets, ready for cotton, denim, or knits, no recalculating needed.
Build adjustable spacing profiles for recurring jobs. Save stitch parameter templates with underlay and spacing baked in.
Need an exception? Density override settings let you tweak one design without breaking your library. Small control, big consistency payoff.
Finding Hidden Stitch Overlaps
Presets set your baseline, but overlaps hide inside it. Stitch proximity analysis flags stitches under 0.1–0.25mm apart. Watch for darkening or texture buildup, that’s visual overlap inspection at work.
Set your overlap threshold at 0.15mm for light fabrics, 0.25mm for heavy ones. Keep overlaps under 60–70% of stitch length. Your stitch density stays clean, fabric flexibility intact.
Managing Layered Fill Areas
Overlaps are one problem. Layered fills are another beast entirely.
Stacking passes means checking layer fill alignment at each stage, not just the top. Poor underlay layer coordination leaves gaps between your Tatami fill and satin layers.
Balance fill density across passes instead of piling stitches into one. That’s how you protect layered fill stability without stiffening the fabric.
AI Stitch Estimation Tools
Balancing layers by hand takes patience. Machine learning density tools speed that up with real-time estimation.
They read your design file import and flag zones needing attention:
- Fabric-specific recommendations by weave
- Thread weight fitting for accuracy
- Density mapping across zones
- Smart zone analysis using distance transform logic
Estimated machine runtime updates as you edit, keeping your stitch density honest.
Predicting Stitch Count and Cost
A quote is only as good as the math behind it. Stitch count drives machine runtime, thread consumption, and digitizing cost, so software that predicts count from design size and stitch density protects your margins.
| Cost Factor | Impact |
|---|---|
| Design size | More inches, more stitches |
| Batch size | Larger runs cut unit cost |
Accurate estimates beat guesswork every time.
Test and Finalize Density Settings
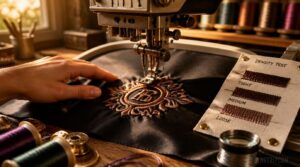
Numbers on a screen only tell half the story. Your fabric tells the rest, so let it. Here’s how to test and lock in your settings for good.
Create a Fabric Test Swatch
Never guess on final production. Cut a 3×3 inch sample swatch from matching fabric, mark it with density, stitch type, and thread weight.
Match your stabilizer to production plans. Stitch at 0.4mm baseline, then test 0.3mm or 0.5mm variations.
Document every setting for your swatch library. Plan a final test run before committing to a full panel.
Check Coverage After Washing
Once your swatch dries, run it through a real wash cycle. Fabric relaxation can drop density 1-2%, so check for gaps.
Post-wash coverage check matters most:
- Fill stays solid, no bleed
- Colorfastness verified, no transfer
- Edges show minimal pilling
- Texture matches original swatch
- Compare under bright light
Inspect Tension and Registration
Loose stitches on your swatch? That’s a tension problem, not a density one.
Check thread balance first: bobbin and needle thread should pull evenly. Then verify registration accuracy — colors and fills should align without gaps or overlap. Poor hoop alignment or weak underlay throws this off fast. Fix tension calibration before blaming your stitch density settings; clean stitchout quality depends on both working together.
Review Production Machine Speed
Your swatch passed. Now run it at production speed.
Dense fills demand Machine Speed Optimization — high density plus fast heads strains thread synchronization. Watch for skipped stitches, that’s feeding head imbalance. Sensor-based adjustments help, but heavy stabilizer still lets you push speed safely. Match speed to fabric texture and thread type before committing to full runs.
Save Finalized Density Presets
Passed the speed test? Lock it in.
Save with clear preset naming conventions: design, fabric, stitch type, timestamp. Add metadata—category, hoop size, thread weight—for fast recall.
Store backups externally. Use version control for rollback. Set access permissions before sharing.
This turns your stitch density work into a repeatable formula, ready whenever design resizing or a new fabric run comes calling.
Frequently Asked Questions (FAQs)
What is the forbidden stitch?
Picture court seamstresses working by candlelight in the Forbidden City. The Peking knot, born in Qing dynasty embroidery, used silk thread wrapping for raised texture. Legend blamed it for blindness, cementing its "forbidden" mystique despite thin evidence of real bans.
Which stitch is called the queen of embroidery?
Satin stitch earns the "queen of embroidery" title. Its long, glossy strokes create a lustrous, flat finish prized in royal court textiles. Get the density right, around 3–5 mm, and it delivers that signature smooth shine every time.
How much to charge for embroidery per 1000 stitches?
Charge $1 to $3 per 1,000 stitches, based on complexity, thread quality, and setup costs. Simple designs sit near $1, premium fills push past $ Add rush fees, bulk discounts, and profit margins to protect your bottom line.
What is the best tension setting for embroidery?
Tension is a tightrope walk between two threads. Start at 4 on a 0–9 scale, adjust for fabric texture and thread weight, then test on scrap until stitches lie flat, balanced, and secure.
How does humidity affect fabric stability during embroidery?
Humid air makes natural fibers swell, shifting fabric under the needle. Dry air shrinks them, causing puckering. Both extremes strain stabilizer performance and thread tension, so stable hooping and moderate humidity keep stitches aligned.
Conclusion
Density is the heartbeat of every stitch, steady and precise, or your design flatlines. Get it wrong, and fabric fights back with puckers and gaps. Get it right, and threads lock together like a well-built wall—solid, flexible, built to last.
The best stitch density for embroidery isn’t a fixed rule; it’s a response to fabric, thread, and design size working together. Test your swatch, trust your numbers, and let every stitch earn its place on the fabric.