This site is supported by our readers. We may earn a commission, at no cost to you, if you purchase through links.
 You’ll find endless possibilities with creative die cutting projects that transform ordinary paper into impressive crafts.
Try making custom sticker labels for your pantry or shaker gift tags that add dimension to presents. Paper flower wreaths bring a touch of spring indoors without the wilting worry, while altered boxes give old containers new life.
You can decorate gift bags with precision-cut designs or craft mini-books that fit in the palm of your hand. Die cutting isn’t just about straight lines—it’s about turning flat materials into objects with personality.
The right technique can elevate your crafts from homemade to "where did you buy that" with creative die cutting projects and impressive crafts.
Table Of Contents
Key Takeaways
- You can transform ordinary materials into custom sticker labels, shaker tags, and personalized items that’ll make people ask "where did you buy that?"
- Your die cutting machine isn’t limited to paper—you’ll get impressive results with vinyl, fabric, felt, leather, and even thin metal sheets.
- You’ll create functional and decorative pieces simultaneously, like mini-books that hold gift cards or altered boxes that provide both storage and artistic display.
- Your brand identity will pop with die-cut logos and typography, especially when you layer materials for dimension and incorporate textured elements that invite touch.
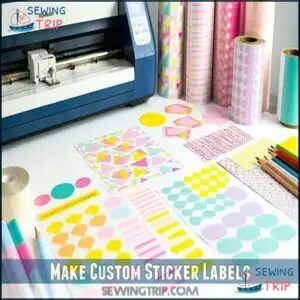
Make Custom Sticker Labels
Transform blank sheets into dozens of custom sticker labels with die cutting magic in just minutes!
Select vibrant shapes from your die collection and run them through your machine using glossy vinyl for waterproof durability or matte paper for a softer aesthetic.
Creative die cutting opens endless possibilities for personalization!
Next, add your unique touch—hand-lettering, stamping, or printed designs all work beautifully.
The secret to professional results? Run your creations through a Xyron machine for perfect adhesive application every time.
Try layering stickers for dimensional effects or experimenting with adhesive types—permanent for kitchen jars, repositionable for planners.
The vinyl selection makes all the difference; metallics pop on dark surfaces while pastels complement lighter backgrounds.
For those seeking variety, you can easily source unique label designs online.
Design personalization doesn’t stop with colors—try cutting words, monograms, or seasonal shapes.
These homemade labels transform ordinary items into personalized treasures while keeping your spaces beautifully organized!
Create Shaker Gift Tags
Shimmer and shine add a magical touch to every gift with interactive shaker tags. These eye-catching accessories will have recipients shaking their presents before even unwrapping them.
Shimmer and shine add a magical touch to every gift with interactive shaker tags. These eye-catching accessories will have recipients shaking their presents before even unwrapping them.
Creating these delightful tags is simple with your die cutting machine. Start by cutting tag shapes from cardstock, then create windows using your favorite dies. Layer transparent vellum behind the openings before adding your shaker elements.
- Combine fine glitter with tiny sequins for a snow globe effect
- Use themed die-cut confetti matching the occasion (hearts, stars, snowflakes)
- Mix metallic microbeads with colorful seed beads for texture contrast
- Add tiny paper flowers or leaves for seasonal celebration tags
- Include personalized tiny messages cut from metallic paper
Secure your shaker contents with strong adhesive tape around the window edges. Consider making photo magnets for an extra personal touch. Complete your creation with a coordinating ribbon threaded through the top.
Every shake brings your paper crafting to life—making gift-giving an interactive experience before the present is even opened! This creates a unique and memorable gift that combines the joy of unwrapping with the delight of discovery, making it a truly special and thoughtful gift.
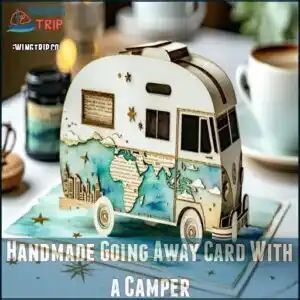
Handmade Going Away Card With a Camper
Moving from shaker gift tags, let’s explore a heartfelt offering for friends on the move.
After crafting those interactive tags, a handmade going away card with a camper theme makes a perfect farewell gift for globe-trotting pals. Die cutting brings these travel-themed designs to life with precision and charm.
These can be complemented with thoughtful and personal gifts made by hand.
| Element | Options | Difficulty |
|---|---|---|
| Base | RV, trailer, van | Easy |
| Details | Maps, compass, stars | Medium |
| Sentiment | "Happy Trails," custom message | Easy |
| Finishing | Washi tape, watercolor, foil | Medium |
Add your friend’s destination or a short inside joke to make them smile. Pair your card with a small travel token for an extra thoughtful touch.
Make a Paper Flower Wreath
While going away cards spread joy with their personalized touch, paper flower wreaths bring that same creative spirit to your home decor.
Paper flower wreaths let you showcase your die cutting skills in a project that lasts far longer than a card. Juliana of 17 Turtles created a stunning example that’ll inspire your next crafting session.
Paper wreaths bloom forever—showcasing your die cutting mastery in lasting decor that never wilts like garden flowers.
For breathtaking paper flower wreaths, you’ll need:
- Floral die selection with varied sizes for realistic dimension
- Quality cardstock in complementary color combinations
- A sturdy wreath base option (cardboard or foam work great)
- Basic tools for petal shaping like a stylus and foam mat
Layer your die-cut petals to create depth, curling edges slightly for a natural look. You can mix different flower styles or stick with one type for a cohesive design. These beautiful crafts can be created using a wide variety of materials.
These paper wreaths make perfect seasonal decorations, gifts, or year-round wall art that won’t wilt like their garden counterparts, bringing a touch of natural beauty and personalized touch to any space, with the potential to be a stunning example of your crafting skills.
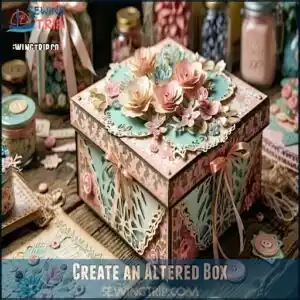
Create an Altered Box
After creating beautiful paper wreaths, let’s turn our attention to ordinary boxes with extraordinary potential.
Plain boxes become treasured keepsakes with die cutting magic. Select a simple box and elevate it using layered die cut designs that reflect your personal style. Add dimension through embossed details or mixed media elements like buttons and ribbons.
Consider browsing for unique altered box ideas to spark your creativity.
For practical storage solutions, try decoupaging die cut shapes onto craft containers. Your altered boxes will serve as both functional storage and artistic display pieces that showcase your DIY crafting skills.
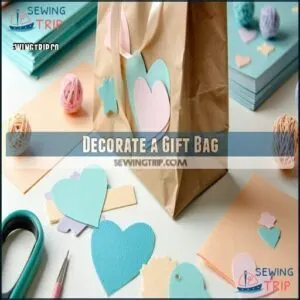
Decorate a Gift Bag
While boxes offer storage solutions, gift bags provide the perfect canvas for your die cutting creativity.
Turn ordinary gift bags into show-stopping presentations with these simple techniques:
- Layer Die Cut Shapes: Apply paper cutouts in graduated sizes for dimension, mixing patterns and colors that complement your theme integration.
- Enhance Handles and Closures: Thread ribbon through die-cut openings or create fancy closure ideas using decorative ties that match your theme.
- Mix Material Choices: Combine cardstock with felt, vinyl, or fabric embellishments for interesting texture contrasts.
- Add Personalized Tags: Create coordinating gift tags that echo your bag’s design elements.
The best part? You can customize bag embellishments for any occasion – birthdays, weddings, holidays – just by switching up your die cutting patterns and paper embellishments. Your recipients won’t believe these are DIY projects!
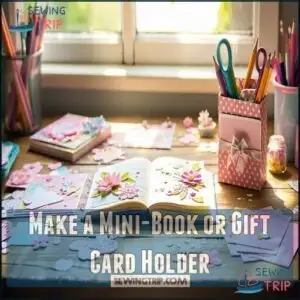
Make a Mini-Book or Gift Card Holder
While gift bags add flair to presents, mini-books and gift card holders bring personal charm to your die cutting projects.
Transform your paper scraps into thoughtful keepsakes with these simple book binding techniques:
- Choose sturdy cardstock for the outer covers and lighter weights for interior pages
- Add magnetic or ribbon closures for an elegant holder that keeps contents secure
- Include pocket variations sized perfectly for gift cards, photos, or handwritten notes
- Layer embellishments like die-cut flowers or geometric shapes for dimensional interest
You don’t need fancy tools—just your die cutting machine and creativity! For a personal touch, consider adding ribbon or trim to the edges. Experiment with different size variations from tiny keepsakes to palm-sized memory books. Your recipients won’t just appreciate the gift inside; they’ll treasure the handcrafted holder that shows you care.
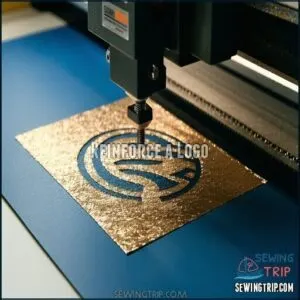
Reinforce a Logo
You’ll add instant recognition to your brand when you cut your logo from contrasting materials like metallic foil or textured paper.
This technique both makes your designs pop with dimension and creates a professional finish that’ll have friends asking if you bought it at a specialty shop.
Encourage Tactile Interaction
Every logo deserves a hands-on upgrade!
Transform your brand identity with textured die-cuts that invite touch and create memorable connections.
Layer different paper weights to create 3D elements that pop from the surface, or add embossed details using your die cutting machine’s pressure settings.
Try incorporating sensory materials like textured cardstock or vellum overlays that change appearance when handled.
Interactive mechanisms—like pull tabs or spinning elements—turn static logos into engaging paper crafts that customers won’t forget.
For a different approach, consider how chain stitch designs can add texture.
The tactile experience creates a deeper brand connection than visuals alone, making your paper crafting efforts truly worthwhile.
Form an Identifiable Object
When crafting your brand’s identity, forming identifiable objects through die cutting makes your logo leap from paper to reality.
Using die cut art transforms your brand into something customers can recognize at a glance.
Try these techniques to create memorable symbols:
- Layer colored cardstock to build 3D Vehicle Paper Models of your product
- Create Character Creation die cuts featuring your brand mascot
- Design Miniature Food Crafts if you’re in the culinary industry
This approach isn’t just about looking good—it’s about making your brand touchable. Even simple Animal Die Cuts can become powerful brand ambassadors when strategically designed as Shaped Card Ideas.
Use Die-Cutting as Typography
Anyone can elevate their branding with die-cutting typography that transforms ordinary text into eye-catching designs.
By turning flat words into dimensional elements, you’ll create marketing materials that demand attention.
Try these techniques to make your text pop:
- Letter Die Styles: Choose bold fonts that cut cleanly
- Font Layering: Stack different weights for depth
- Shadowed Text: Create offset effects for dimension
- Negative Space: Let the background become part of the message
- Mixed Fonts: Combine styles for visual interest
Whether you’re cutting a company name from textured cardstock or crafting paper lettering with intricate details, die cut typography adds personality to business cards, signage, and promotional materials, making them truly eye-catching designs with a touch of dimensional elements.
Create Functional Die-cuts
Functional die-cuts elevate your craft projects from merely decorative to genuinely useful.
With creative die cutting techniques, you’ll transform simple materials into practical masterpieces:
- Create gift card holders with sliding mechanisms that reveal surprises
- Design window box lids with intricate cutouts for peek-a-boo effects
- Craft 3D centerpieces that fold flat for storage
- Make decorative storage containers that hide clutter while showcasing your style
These functional diecuts do double duty—they’re beautiful and practical.
Remember when I made coasters that doubled as puzzle pieces? My guests couldn’t stop playing with them!
Highlight a Message
When crafting logos, die-cutting transforms your message into a stunning focal point.
You’ll create instant visual impact by layering die cut designs around text or using sentiment diecuts against contrasting backgrounds.
Try embellishment styles like shakers or textured paper to add dimension to your typography.
Font selection matters too—choose styles that complement your die cutting projects.
With smart color contrast and strategic message layering, your words won’t just speak—they’ll shout and make a lasting impression through instant visual impact.
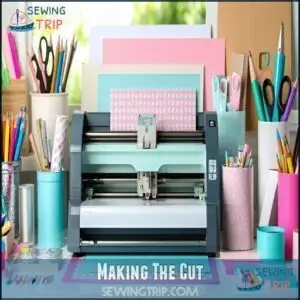
Making The Cut
You’ll transform ordinary materials into extraordinary creations with just the right cut from your die-cutting machine.
Whether you’re crafting with cardstock, vinyl, or felt, your precision cuts will bring your creative vision to life with professional-looking results every time, achieving professional-looking outcomes.
What Can I Make With a Die-cutting Machine?
A die-cutting machine transforms ordinary materials into extraordinary creations, opening up a world of crafting possibilities right at your fingertips.
You’ll be amazed at how quickly it becomes your go-to tool for precision and creativity.
Here’s what you can make with your die-cutting machine:
- Home Decor items like dimensional wall art, custom photo frames, and seasonal decorations
- Unique Gifts including personalized cards, bookmarks, and monogrammed accessories
- Party Decorations such as banners, place cards, and themed table confetti
- Fashion Embellishments like fabric appliqués, leather jewelry, and custom patches
From simple paper crafting to complex scrapbooking ideas, your die-cutting machine handles it all!
What Are The Different Ways to Use Die Cuts?
Now that you’ve seen what’s possible, let’s explore the versatile applications of die cuts in your crafting arsenal.
You’ll find die-cut layering adds dimension to flat projects, while 3D die-cutting creates pop-up elements that surprise and delight.
Try using die cuts as stencils for unique background patterns or combine them with embossing for textured effects.
The magic happens when you experiment with mixed-media die-cuts, incorporating different materials in a single project.
Die cutting techniques like partial cutting allow you to create hinged elements, while negative space designs showcase what’s beneath.
With practice, you’ll develop signature die cut designs that reflect your personal style.
What Materials Can Be Used for Die Cutting?
Now that you understand different applications for die cuts, let’s explore the materials you can transform with your machine.
Die cutting works with an impressive range of materials beyond basic cardstock types. You can cut everything from delicate vellum to sturdy chipboard, opening endless creative doors.
- Feel the satisfaction of turning leather scraps into elegant bookmarks or jewelry that friends will swear came from a boutique
- Experience the joy of watching fabric options spring to life as appliqués for quilts or personalized clothing
- Marvel at how thin metal sheets become stunning embellishments for mixed media projects
Vinyl films, acetate, and specialty papers also yield beautiful results with the right machine settings, making die cutting a versatile tool for various creative projects.
Frequently Asked Questions (FAQs)
What can I make with a die-cutting machine?
You can create custom stickers, greeting cards, gift tags, paper flower wreaths, and home décor pieces with your die-cutting machine.
It’s perfect for personalized shirts, decorative boxes, and even organizational labels for your crafting space.
What can I use die cuts for?
You can use die cuts for custom stickers, greeting cards, gift tags, paper flower wreaths, decorative boxes, and logo designs.
They’ll add dimension to your scrapbooks and help organize your crafting space beautifully.
What are the disadvantages of a die cutter?
Despite their usefulness, die cutters can be expensive to purchase, require regular replacement of cutting mats, and limited by available die designs unless you’ve got an electronic version.
They’ll also occupy significant workspace.
Do you stamp first or die cut first?
You’ll typically want to stamp first, then die cut.
This sequence prevents ink smudging and guarantees your stamped image stays perfectly centered within your die-cut shape, giving you cleaner, more professional-looking results.
What can die cutting be used for?
Die cutting transforms your craft materials into precise shapes for cards, stickers, scrapbooking, home décor, and gift tags.
You’ll love how it adds professional flair to your projects with clean edges and custom designs.
What is the best cardstock for die cutting?
Medium-weight cardstock (65-80 lb) is your golden ticket for die cutting. It’s sturdy enough to hold shape but won’t strain your machine. You’ll find it works well for most projects.
How to make die cuts without a machine?
You can create die cuts by hand using craft knives, scissors, or paper punches.
Trace your design on paper, carefully cut along the lines, and use templates for consistent shapes.
It’s surprisingly effective!
What are the different ways to use die cuts?
You can use die cuts for custom sticker labels, shaker gift tags, flower wreaths, altered boxes, card making, and logo reinforcement.
They’ll add dimension to your projects and create eye-catching visual elements.
What is the best paper to use with die cuts?
Cardstock stands as the foundation of successful die cutting—like a sturdy canvas for an artist.
You’ll find it’s versatile, holds shape well, and comes in various weights (65-110 lb) for your projects.
What materials can be used for die cutting?
You’ll find success cutting paper, cardstock, vinyl, felt, leather, fabric, thin wood, and even metal foil with your die-cutting machine. Each material brings unique possibilities to your creative projects.
Conclusion
Like a butterfly emerging from its cocoon, your crafting potential takes flight with these creative die cutting projects.
You’ll transform ordinary materials into conversation starters that showcase your personal style.
Whether you’re organizing your home, gifting treasures, or reinventing your brand, die cutting opens doors to precision and artistry you hadn’t imagined.
Don’t let your die cutting machine gather dust—it’s time to release your creativity and watch your crafts evolve from simple to simply stunning.
- https://www.theorganizedmama.com/
- http://www.20somethingonabudget.com/
- https://blog.altenew.com/fall-memory-keeping-idea/
- https://www.facebook.com/creativefabricacom/
- https://help.creativefabrica.com/hc/en-us/articles/17579366311964-Terms-Conditions-Creative-Fabrica-s-12-Days-of-Christmas-Craft-A-Thon-Prizes

