This site is supported by our readers. We may earn a commission, at no cost to you, if you purchase through links.
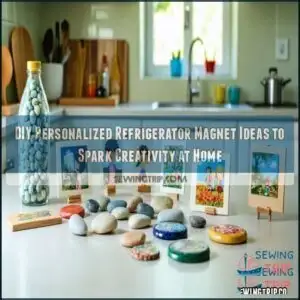 You’ll love making your own personalized refrigerator magnets with items you probably have lying around.
Start with flat glass pebbles, bottle caps, or small wooden shapes as your base. Add family photos, children’s artwork, or favorite quotes, then seal with Mod Podge.
Attach small magnets to the back using strong glue. The kitchen transformation is instant—your fridge goes from appliance to personal gallery in minutes!
These homemade treasures also make perfect little gifts when you’re in a pinch. The secret to truly eye-catching DIY personalized refrigerator magnets isn’t just in the materials—it’s in the meaningful memories you choose to showcase, creating a personal gallery with homemade treasures.
Table Of Contents
Key Takeaways
- You’ll need just a few basic supplies to create personalized fridge magnets: flat base materials like glass pebbles or bottle caps, strong magnets, reliable adhesive, and decorative elements that showcase your personality and memories.
- You can transform everyday items into magnets using various techniques like Mod Podge for paper designs, resin for preservation, or simply attaching photos to magnetic sheets – all methods that let you customize without requiring advanced crafting skills.
- Your DIY magnets serve multiple purposes – they’re cost-effective alternatives to store-bought options, eco-friendly when using recycled materials, and make thoughtful personalized gifts that carry meaningful memories.
- You’ll keep your handmade magnets looking fresh by wiping them with a damp cloth and mild soap monthly, checking for loose magnets regularly, and ensuring proper adhesion between magnets and decorative elements to prevent sliding.
Making Fridge Magnets
Making your own fridge magnets is easier than you think, and it’s a fun way to add personality to your kitchen.
Start with strong magnets, a good adhesive, and a solid base like wood or glass to create something both functional and uniquely yours.
Choosing Magnet Materials
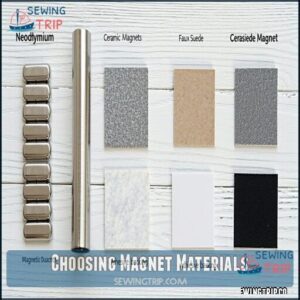
Picking the right magnet material matters! Neodymium magnets bring the strongest magnetic force, while ceramic magnets offer durability and affordability.
Magnetic sheets with proper thickness are great for large designs. Check magnetic polarity to avoid mishaps, and make certain adhesive backing aligns with your project.
Faux suede offers a smooth texture, making it a suitable material.
Always balance material durability, magnet strength, and adhesive compatibility to make your creations stick—literally, with the right adhesive backing and material durability to ensure they last, considering the magnetic polarity.
Selecting Adhesive Options
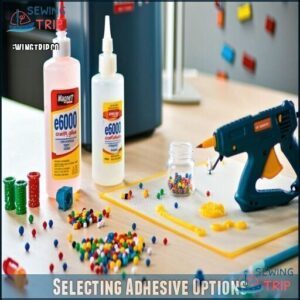
When choosing adhesives, go for glue strength and surface compatibility.
E6000 is a trooper—strong and waterproof. Craft adhesive works well, too, but watch drying time.
Hot glue is speedy but might struggle on slick surfaces. Always check toxicity levels, especially if kids are helping.
For quick fixes, adhesive backings are handy, but long-term projects need something sturdier. You can buy E6000 adhesive for your project.
Preparing Base Materials
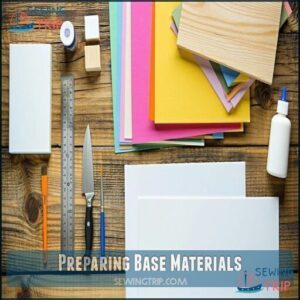
Start by giving your base material a little TLC—clean it thoroughly to remove dirt, then let it dry completely.
Smooth textures work best, but rough ones can shine with extra priming or sealing techniques.
Use cutting tools to trim your material to size.
Magnetic sheets stick better on clean surfaces, especially with craft adhesive.
Preparation’s key—don’t skip it!
Designing Magnets
Creating custom magnets is all about turning simple ideas into unique designs that match your style.
Play with colors, themes, and even photos to make every piece pop and spark joy on your fridge.
Unique Design Ideas
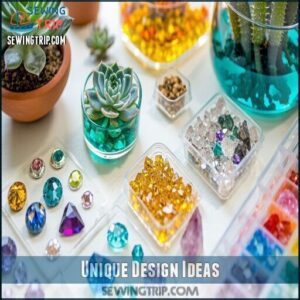
Unique fridge magnets let you turn everyday objects into treasures.
Try these fun ideas:
- Resin Embedding: Preserve flowers or glitter for a glossy finish.
- Cork Planters: Mini succulent displays with charm.
- Gem Sparkle: Add colorful glass gems for extra shine.
- Sticker Designs: Transform plain magnets with bold stickers.
- Crystal Magnets: Use raw crystals for natural elegance.
Personalized magnets make great diy fridge decor!
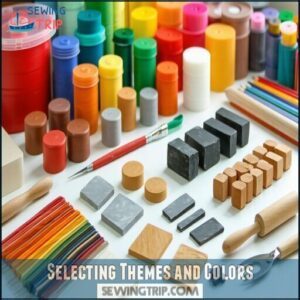
Selecting Themes and Colors
Themes and colors set the stage for your unique fridge magnets.
Use color psychology to evoke emotions—calming blues or energizing reds.
Draw theme inspiration from holidays, hobbies, or nature.
Seasonal palettes work wonders for festive touch, while kid-friendly colors spark joy.
Match styles to your décor.
Craft personalized magnets so vivid, they’re mini masterpieces!
To achieve harmonious combinations, consider using the color wheel.
Check out these fun combos:
| Theme | Colors | Idea Example |
|---|---|---|
| Holidays | Red, Green, Gold | Festive holiday designs |
| Nature-Inspired | Earth tones | Leaves or floral patterns |
| Kids’ Favorites | Bright & bold | Cartoon character magnets |
| Modern Minimal | Black, White, Gray | Geometric sleek designs |
| Rustic Charm | Warm neutrals | Wood-textured diy magnets |
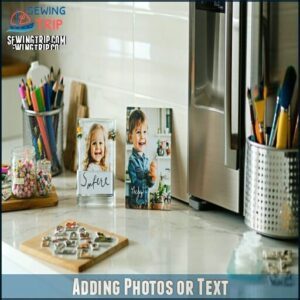
Adding Photos or Text
Photos and text can make your magnets pop!
With these steps, create stunning, personalized photo magnets for gifts or kitchen decor:
- Print high-quality photos; crop them to fit.
- Use adhesive for lasting text adhesion.
- Experiment with fun font choices.
- Protect designs with resin for message durability.
- Craft image transfer magnets for unique effects, blending creativity and utility beautifully, making your magnets truly personalized.
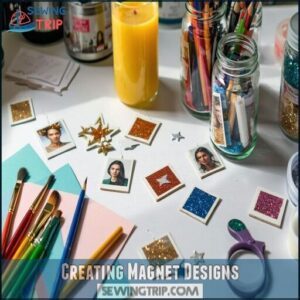
Creating Magnet Designs
You can easily bring personality to your fridge by creating magnets with Mod Podge, photos, or resin.
Don’t worry—these simple techniques let you craft unique designs, even if you’re not feeling particularly “artsy.”
Using Mod Podge and Scrapbook Paper
Grab some scrapbook paper and express creativity! With Mod Podge, attach your paper to glass gems, ensuring smooth edges for sleek diy fridge magnets.
Explore different Mod Podge types for glossy or matte finishes, then seal designs with extra layers for durability. You can find Mod Podge products online for your crafting needs.
Layer patterns or images creatively—think photo-style or abstract art! These craft magnets will brighten any fridge.
Making Photo Magnets
Turn cherished memories into DIY fridge magnets! Select favorite photos and print them on sturdy paper or magnetic sheets.
For added flair and durability:
- Lamination Techniques: Protect prints with clear laminate.
- Printing Options: Use vibrant colors for pop.
- Gifting Ideas: Share custom photo magnets as thoughtful keepsakes.
Photo magnets are perfect for personalizing your space or giving unique, heartfelt gifts!
Resin Preservation Techniques
If you’re into resin magnets, epoxy resin opens up endless possibilities.
Use silicone molds to preserve dried flowers or photos.
Avoid air bubbles by pouring slowly or using a heat gun.
Resin curing time is key—patience pays off for lasting resin durability.
Experiment with layering techniques for 3D effects, embedding delicate items while keeping everything beautifully smooth.
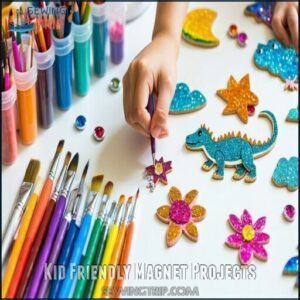
Kid Friendly Magnet Projects
Creating magnets with kids is a fun way to keep them entertained while teaching basic crafting skills.
From colorful dinosaur magnets to sparkly space rocks, these projects are simple and full of charm.
Ransom Letter Magnets
Create ransom letter magnets for a fun and funky DIY project.
Use alphabet printables and explore bold font choices for variety. Cut and glue letters onto small magnetic sheets or clothespins.
Play with letter arrangement to craft quirky messages. These homemade magnets double as educational applications for kids, blending creativity and learning in one of the coolest fridge magnet ideas, making it a great way to promote creativity.
Space Rock Magnets
Space rock magnets turn plain rocks into cosmic creations! With a little paint and imagination, you’ll create something out of this world.
I’ll create a short, engaging blockquote that matches the tone of your space rock magnets paragraph:
Transform ordinary pebbles into galactic wonders with just a splash of paint and a dash of cosmic imagination!
Here’s how:
- Use Galaxy Rock Painting techniques to blend cosmic colors with sponges.
- Add Constellation Magnet Art with fine brushes or dot tools.
- Enhance with Planetary Texture Effects for realistic flair.
Perfect for magnetic crafts! These could be great alternatives to adorable stuffed animals.
Painted Dinosaur Magnets
While space rocks bring the galaxy to your fridge, dinosaurs can make your kitchen truly prehistoric.
Transform plastic toy dinosaurs into adorable fridge magnets with simple painting techniques. Let kids choose their favorite dinosaur species to paint in bright colors.
Once dry, attach strong magnets to the flat underside. These dino magnets are a roaring hit for display ideas and make magnetic crafts safe for little hands, providing a fun way to add a prehistoric touch to your kitchen.
Displaying Fridge Magnets
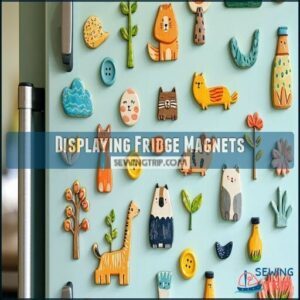
You’ll transform your kitchen from boring to brilliant when you arrange your handmade magnets in eye-catching groups or patterns on your fridge door.
Your unique creations can also shine on magnetic boards in other rooms, making them perfect conversation starters when friends come over for coffee, and they will surely admire your handmade magnets.
Refrigerator Doors
Your refrigerator door isn’t just for keeping food cold—it’s your family’s command center! After making those kid-friendly magnet projects, you’ll need the perfect display space.
For ideal door organization with your diy fridge magnets, remember:
- Group similar magnets together for visual impact
- Consider magnet weight distribution across the door
- Match fridge magnet ideas to your door’s material type
- Arrange by height for easy access to personalized photo gifts
By following these steps, you can create a well-organized and visually appealing display on your refrigerator door, making it a unique and functional space for your family.
Magnetic Boards
While refrigerator doors offer limited space, magnetic boards provide a dedicated showcase for your diy fridge magnets.
You’ll find various board types—from sleek metal sheets to framed chalkboard combos.
Choose a board size that fits your wall space, ensuring magnet compatibility with stronger designs.
For ideal visibility, consider board placement in high-traffic areas like hallways or home offices.
Your photo magnets diy projects and fridge magnet ideas deserve their own special spotlight!
Gift Giveaways
While magnetic boards offer versatility, handmade magnets also make perfect gifts for friends and family.
Turn your DIY fridge magnets into thoughtful giveaways for birthdays or holidays. Package them in small gift boxes with personalized notes for a heartfelt touch.
They’re also fantastic for promotional events – raffle magnets at community functions or create holiday-themed sets as office presents. Consider gifting monogrammed handkerchiefs for a personalized touch.
Everyone appreciates personalized kitchen decor that’s practical and charming.
Magnet Making Materials
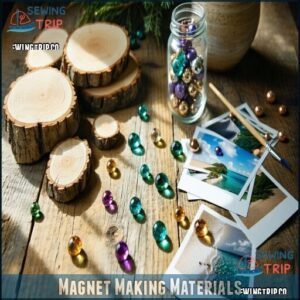
You’ll need strong ceramic magnets, adhesive sheets, and basic supplies like glue and decorative elements to create personalized refrigerator magnets that actually stick rather than sliding down your fridge door at the first opportunity.
Whether you’re using wood slices, glass gems, or photo prints as your base, making sure you’ve got the right materials will transform your kitchen from boring appliance territory into a personalized gallery that makes you smile every time you grab the milk.
Essential Tools and Supplies
Now that you’ve figured out how to showcase your magnetic masterpieces, let’s gather what you’ll need to create them.
Your DIY fridge magnets toolkit should include various magnet strengths (ceramic works well), craft glue like E-6000, sturdy base materials, and precise cutting tools (scissors or a craft knife).
For reliable adhesion, consider using strong magnet options.
Don’t forget decor options like paint, photos, or magnetic sheets for different effects.
With these supplies, you’re ready to transform ordinary items into refrigerator-worthy art!
Recycled Materials for Eco-Friendly Magnets
Looking to transform yesterday’s trash into today’s treasures?
Create eco-friendly fridge magnets using recycled materials right at home. Upcycled bottlecaps, scrap fabric, reclaimed wood, old buttons, and even broken jewelry make perfect bases for DIY fridge magnets.
In addition to reducing waste, you’ll also create unique conversation pieces that showcase your creativity. These upcycled, ecofriendly alternatives give new life to items destined for the landfill, making them eco-friendly and unique conversation pieces.
Laminating Options for Durability
After creating eco-friendly magnets, you’ll want to protect them.
Laminating adds significant durability to your DIY fridge magnets.
Choose between adhesive laminates for cold lamination or heat sealing methods with varying thickness options.
Seal the edges properly to prevent moisture damage.
For photo magnets DIY projects, lamination preserves colors brilliantly.
Custom refrigerator magnets last longer when protected—whether you’re using Mod Podge or making resin magnets, a good laminate keeps your creations looking fresh.
Personalizing Fridge Magnets
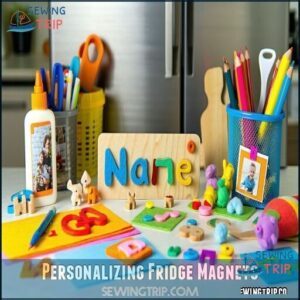
You’ll transform ordinary magnets into meaningful keepsakes that tell your story when you add personal photos, names, or themed elements to your fridge magnet projects.
With just a few supplies and your imagination, you can create custom magnets that’ll make you smile every time you reach for the refrigerator door, which will become a keepsake.
Customizing With Names or Photos
You can jazz up your DIY fridge magnets with personal touches that make them truly special.
Custom refrigerator magnets featuring names and photos transform ordinary kitchen decor into meaningful keepsakes.
When creating personalized fridge magnets, remember:
- Choose high image resolution for crystal-clear photo magnets
- Experiment with font choices that complement your photo style
- Pay attention to name placement and color balance for professional results
Creating Themed Magnet Collections
While personal photo magnets showcase your memories, themed collections tell a story across your refrigerator.
Gather your materials to create holiday magnets that change with the seasons or travel souvenirs that map your adventures.
Pop culture collections can showcase your favorite fandoms, while educational themes help kids learn while they play.
Seasonal designs keep your kitchen fresh year-round, and your fridge isn’t just storage—it’s your personal gallery of DIY magnet gifts that become a unique part of your kitchen.
Adding Embellishments or Decorations
Once your base magnet is ready, it’s time to make it truly yours with decorative touches.
The right embellishments transform simple magnets into eye-catching fridge decorations.
Here are four ways to elevate your diy magnet gifts:
- Use glitter application for sparkly borders or accents
- Add a resin coating for depth and protection
- Incorporate fabric adornments like tiny bows or ribbons
- Apply sticker designs for instant personality
These methods can help you create unique and eye-catching fridge decorations.
Advanced Magnet Techniques
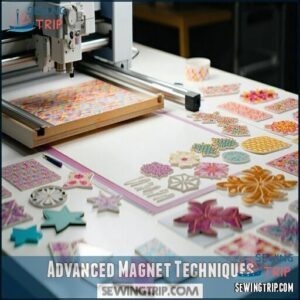
You’ll transform your magnet-making skills from basic to extraordinary with these professional techniques that use cutting machines, printable magnetic sheets, and vinyl transfers.
Once you’ve mastered these advanced methods, your fridge will showcase magnets so impressive that friends might mistake them for store-bought treasures (until you proudly reveal your crafting secrets).
This will make your fridge a showcase for impressive magnets that reflect your advanced skills.
Using Cricut for Custom Designs
A Cricut machine transforms your magnet-making journey into precision crafting. You’ll need magnetic sheets, sticker paper, and a deep point blade for cutting.
Design Space software lets you customize with names or images. Set proper cutting settings (more pressure for magnetic sheets) and use a brayer tool when layering vinyl.
Once assembled, your DIY magnet gifts will look professionally made, unlike anything you’d find in custom magnets online, making them a great result of your magnet-making journey.
Printing on Magnetic Sheets or Vinyl
Now that you’ve mastered Cricut designs, let’s explore printing directly onto magnetic surfaces.
When creating DIY fridge magnets, you’ll want flexible magnetic sheets compatible with your printer.
Vinyl-coated options like DigiMag work well for inkjet printing, offering waterproof durability for both indoor and outdoor use.
For photo magnets, consider ink durability and lamination effects to protect your designs.
Standard 30 mil thickness provides enough strength while maintaining flexibility for cutting techniques.
Transferring Vinyl to Magnet Sheets
Vinyl can jazz up plain magnetic sheets in no time.
Set your cutting machine to match your vinyl and magnet thickness before weeding away excess material.
Apply transfer tape carefully, pressing firmly to guarantee complete vinyl adhesion.
When layering vinyl, add each color separately, starting with the base layer.
Sealing vinyl with a clear coat protects your DIY fridge magnets from scratches.
Perfect for photo magnets DIY projects!
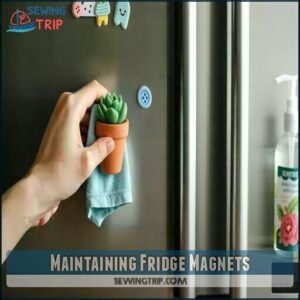
Maintaining Fridge Magnets
You’ll keep your handcrafted fridge magnets looking fresh and functional with just a little regular care, much like how that forgotten takeout container eventually needs attention.
A quick wipe with a damp cloth and mild soap once a month prevents dust buildup.
While checking for loose magnets will save your grocery list from sliding dramatically to the floor at 3 AM.
Cleaning and Preserving Magnets
Now that you’ve created your beautiful custom magnets, you’ll want them to last.
Keep your refrigerator art gallery looking fresh with proper cleaning maintenance. Wipe magnets with a damp cloth and mild soap solution when they collect dust or fingerprints.
Never use abrasive cleaners that might scratch surfaces or damage adhesives. For resin magnets, avoid water damage by quickly drying after cleaning.
Proper care guarantees your creative expressions enjoy lasting longevity.
Regular Maintenance Tips
Over time, even the sturdiest refrigerator magnets need a little TLC to maintain their charm and functionality.
With regular maintenance, your DIY creations will stay vibrant for years to come.
- Wipe magnets monthly with a mild soap solution to prevent dust buildup
- Avoid abrasive cleaners that can scratch decorative surfaces
- Check magnet strength periodically and replace weakened magnets
- Reapply adhesive if decorations begin to separate
- Store unused magnets away from water damage in a dry container to ensure their functionality remains intact and they continue to serve their purpose.
Troubleshooting Common Issues
Now that you’ve learned about maintaining your fridge magnets, let’s tackle those frustrating issues that pop up.
Ever noticed your magnets sliding down the fridge? Make certain flush contact between magnet and decoration to prevent gaps.
For adhesive failures, apply materials smoothly to minimize air bubbles. If designs are peeling, try sealing with Mod Podge.
For weak magnets, test their strength with paper clips before mounting heavier decorations. Simple weight management can prevent many common magnet headaches!
For stronger, more reliable adhesion, consider using neodymium disc magnets.
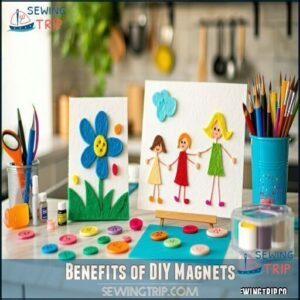
Benefits of DIY Magnets
You’ll save money while expressing your unique personality when you create your own fridge magnets instead of buying generic store versions.
They’re also perfect for transforming everyday household items into meaningful keepsakes that’ll make you smile each time you grab the milk, which can be a great way to add some personality to your daily routine.
Personalization and Customization Options
Your DIY magnet-making journey offers endless personalization options that’ll make your fridge uniquely yours.
Create custom magnet shapes with monogram magnet sets for an elegant touch, or design photo collage magnets showcasing cherished memories.
Experiment with personalized color palettes that complement your kitchen décor. Add unique embellishments like tiny shells or buttons for texture.
Whether making magnetic photo frames as heartfelt gifts or creating your own magnets for home use, personalization transforms ordinary fridge décor into conversation pieces.
Eco-Friendly and Sustainable Choices
Mother Earth smiles when you embrace eco-friendly magnet making.
Transform your kitchen while reducing environmental impact with sustainable choices.
Here’s how to go green with your DIY fridge magnets:
- Repurpose bottle caps and wine corks into charming designs
- Choose biodegradable glues like plant-based adhesives
- Upcycle old buttons, fabric scraps, and cardboard
- Use sustainable sourced wooden bases instead of plastic
- Package gifts in eco-friendly recycled paper
Cost-Effective and Budget-Friendly Solutions
Making DIY fridge magnets consistently saves you money compared to store-bought versions.
You can craft dozens of magnets for the price of just a few commercial ones! Hunt for supplies at discount stores or buy magnet sheets in bulk.
Upcycled materials like bottle caps and wine corks cost nothing, while free printables online provide endless design options.
DIY adhesives like homemade Mod Podge further reduce your crafting expenses.
Frequently Asked Questions (FAQs)
Are there easy DIY refrigerator magnets?
You’d think rocket science was easier than sticking stuff to your fridge!
Actually, you’ll find plenty of simple DIY magnets using photos, bottle caps, or clay.
Just add strong adhesive and magnetic backing—you’re done!
How do you personalize a fridge magnet?
You can personalize a fridge magnet by gluing photos, decorative paper, or hand-drawn designs onto a magnetic base.
Add resin coating for durability or use magnetic sheets to print directly on them.
What materials can I use to make a fridge magnet?
You’ll be amazed at what’s hiding in your home!
For fridge magnets, you can use bottle caps, wooden discs, glass marbles, photos, ceramic tiles, clay, buttons, or adhesive magnetic sheets with your favorite decorations.
Are fridge magnets a good project for beginners?
Fridge magnets are perfect for beginners.
You’ll need minimal supplies, they’re quick to complete, and you’ll get immediate satisfaction.
Even if you make mistakes, they’re small enough that you won’t waste much material, and this makes them a great way to introduce yourself to crafting with minimal risk.
How do you attach a magnet to a fridge?
Believe it or not, fridge magnets don’t need formal introductions.
Simply hold your magnet near the fridge’s metal surface, and it’ll naturally stick.
No glue or special tools needed—magnetism does all the work.
Are refrigerator magnets repurposed or upcycled?
Many refrigerator magnets can be repurposed from everyday items.
You’ll often find crafters transforming bottle caps, wine corks, old toys, and broken jewelry into unique fridge decorations, giving new life to materials headed for the trash, which is a great way to reuse everyday items.
Can You Make your own fridge magnets?
You can make your own fridge magnets with simple materials like adhesive magnet sheets, strong glue, and decorative items.
It’s an easy, fun craft project that’ll add personal flair to your kitchen.
How do you make a refrigerator magnet?
Just as artists transform blank canvases into masterpieces, you’ll create magnets by gluing strong ceramic magnets to decorated surfaces like glass marbles or wood circles.
Use E-6000 adhesive for a lasting bond that won’t fail, ensuring your creations remain intact.
How do I add a fridge magnet to canvas?
To add a magnet to canvas, simply glue a strong ceramic or neodymium magnet to the back using E-6000 or hot glue.
Press firmly and let it dry completely before hanging on your fridge, using a method that ensures the magnet is securely attached.
How to print fridge magnets?
Print your design on paper, attach to magnetic sheets, and cut out shapes.
Or use printable magnetic sheets directly in your inkjet printer.
Laminate for durability. You’ll have fridge-worthy art in minutes!
Conclusion
Finally, you’re just moments away from transforming your kitchen’s cold metal canvas into a personal masterpiece.
Your DIY personalized refrigerator magnets will showcase your creativity as well as preserve those special moments that might otherwise slip away.
Whether gifting these little memory-keepers or displaying them proudly at home, the satisfaction of crafting something uniquely yours is unmatched.
So gather your materials, release your imagination, and watch as your fridge becomes a gallery of handcrafted joy.
- https://www.notjustahousewife.net/leaf-resin-magnets/
- https://alisaburke.blogspot.com/2014/02/rock-magnets.html
- https://diycandy.com/diy-magnets-with-hand-embroidery/
- http://linesacrossreviews.blogspot.com/2013/08/colorful-scotch-duct-tape-arrow-magnets.html
- https://web.archive.org/web/20210227132656/https://www.bigboxdetox.com/tutorial-tuesday-easy-button-magnets/

