This site is supported by our readers. We may earn a commission, at no cost to you, if you purchase through links.
 You don’t need a fancy machine to make awesome die cuts. With everyday tools and a bit of creativity, you can get the job done.
A rolling pin works wonders—just press your material against a stencil. Tin cans? Flatten and shape them into custom templates. Got a craft knife? It’s perfect for detailed designs; just take your time.
Even scoring paper with a bone folder can mimic professional cuts. Sure, it takes patience, but there’s real joy in doing it yourself.
Plus, these methods save cash and let you experiment. Ready to try? The possibilities are endless, and so is your creativity!
Table Of Contents
- Key Takeaways
- Manual Die Cutting Basics
- Alternative Die Cutting Methods
- Manual Die Cutting Techniques
- Tips and Safety Precautions
- Mastering Die Cuts Without Machine
- Achieving Clean Cuts With Craft Knives
- Troubleshooting Common Issues
- Optimizing Your Workspace for Efficiency
- Creating Custom Dies for Unique Designs
- Cost-Effective Alternative to Die Cutting Machines
- Increased Control Over The Cutting Process
- Encourages Creativity and DIY Skills
- Environmentally Friendly Option
- Frequently Asked Questions (FAQs)
- Conclusion
Key Takeaways
- You don’t need a machine to make die cuts; tools like craft knives, rolling pins, and tin cans can do the job effectively.
- Manual die cutting saves money and lets you create unique, custom designs without expensive equipment.
- Reusing materials like household items and scrap paper is eco-friendly and adds a personal touch to your projects.
- Practicing hand-cutting techniques sharpens your skills, giving you more creative control and freedom in crafting.
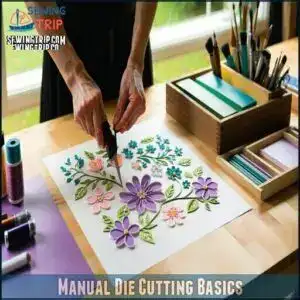
Manual Die Cutting Basics
You’ll be amazed at how simple tools like craft knives and stencils can transform your paper crafts without breaking the bank.
With steady hands and a bit of patience, you’ll create stunning die cuts that’ll have friends wondering when you splurged on an expensive machine, showcasing your ability to produce professional-looking results.
Definition and Process
Manual die cutting is the art of shaping materials without expensive machines. You’ll use simple tools like craft knives, scissors, and stencils to create custom shapes by hand.
Transform materials into art with simple tools, steady hands, and endless creativity—no expensive machines needed!
The basic process involves:
- Choosing your design and tracing it onto your material
- Securing your template and material firmly in place
- Cutting carefully along the lines with steady pressure
Think of it as paper surgery – where you’re both the doctor and artist! With practice, you’ll transform ordinary paper into extraordinary creations. This process requires patience and skill, but the results are well worth the effort, allowing you to create unique items with a personal touch.
Benefits of Manual Die Cutting
Why spend a fortune when you can master die cutting by hand and discover endless creative freedom? Doing it yourself doesn’t just save money—it’s personal, eco-friendly, and way more satisfying.
Hand-cut crafting saves money, sparks creativity, and turns simple tools into magic for unique, eco-friendly designs.
Plus, you’ll sharpen your crafting skills while releasing your imagination.
- Cost Savings: No fancy machines needed!
- Creative Freedom: Explore unique, custom designs.
- Skill Development: Sharpen precision and patience.
- Eco-Friendly: Reuse household items for crafting.
Comparison to Machine Die Cutting
Machines might’ve the edge in speed and volume, but manual die cutting gives you creative control that no machine can match.
Sure, machines offer precision and handle complex designs, but they’re pricey and depend on electricity. Manual cutting? It’s hands-on and rewarding!
Let’s compare:
| Feature | Machines | Manual Cutting |
|---|---|---|
| Cost Analysis | Expensive upfront | Budget-friendly |
| Precision Differences | Machine-perfect | Skill-dependent |
| Time Investment | Faster | Time-intensive but personal |
Electronic models offer robust features for precision cutting.
Why not try alternative methods and enjoy the creative journey?
Alternative Die Cutting Methods
You don’t need fancy machines to create amazing die cuts—just a little creativity and some basic tools.
From rolling pins to tin cans, these clever tricks will have you crafting like a pro in no time!
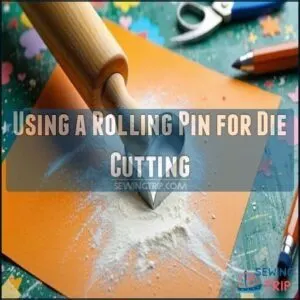
Using a Rolling Pin for Die Cutting
Who says you need machines for gorgeous die cuts? Grab a rolling pin, thin die, and your favorite material to try the rolling pin method. With just rolling pressure, you’ll get neat results!
Layer materials for better thickness and even distribution. Keep your die stable for crisp edges.
- Stack softer layers under tougher materials for clean cuts.
- Use alternative rollers like glass jars.
- Practice for perfect DIY die cuts!
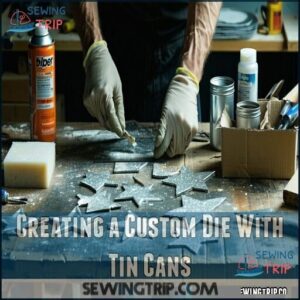
Creating a Custom Die With Tin Cans
Who knew tin cans could be your DIY hero? They’re perfect for making custom, handmade die cuts and exploring creative die cut alternatives.
Follow these simple steps:
- Carefully cut tin strips, wearing gloves for safety.
- Use tin shaping techniques to bend them into unique designs.
- Smooth sharp edges (edge smoothing) with sandpaper or a file.
- Secure designs by embedding them in foam or sturdy cardboard with strong glue selection.
- Test your die for clean cuts and adjust as needed.
Enjoy crafting unique designs with this budget-friendly, creative twist!
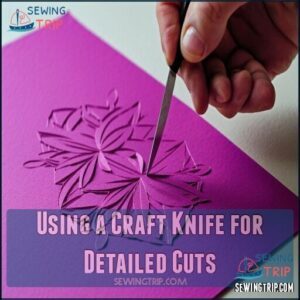
Using a Craft Knife for Detailed Cuts
Who needs high-tech machines when your craft knife is ready to conquer? With steady hands and patience, you can achieve jaw-dropping precision.
Keep that blade sharp—knife sharpening stops slips and guarantees smooth cuts. Pay attention to blade angles and cutting pressure for clean edges.
Use durable paper, secure your stencil, and let your craft knife shine. Remember, small movements beat rushing.
For enhanced precision, consider how fabric grain influences cuts. Master these paper cutting techniques, and you’ll be turning heads with stunning DIY creations.
Scoring and Folding Techniques for Simulated Die Cuts
Want to create stunning designs without a machine? Try scoring and folding techniques! These tricks turn plain paper into art.
Use a bone folder or even an old gift card.
- Explore shadow folds for 3D effects in paper crafts.
- Add faux stitching or embossing effects for card making without dies.
- Play with paper grain to level up your cuts.
Super fun, right?
Manual Die Cutting Techniques
You don’t need fancy machines to create amazing die cuts—just some simple tools and a little patience.
Let’s explore fun, hands-on methods that show you how to cut like a pro while saving money!
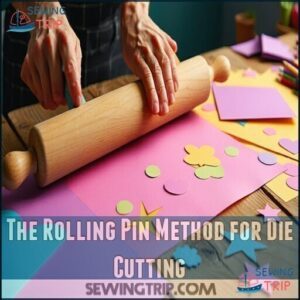
The Rolling Pin Method for Die Cutting
Grab a rolling pin—it’s time to get crafty! The rolling pin method is a fantastic way to achieve die cuts without machines.
Place your material, die, and sturdy cardstock on a firm rolling surface, then roll with steady pressure. Thicker materials need extra effort, so don’t rush!
Alternative rollers like bottles can work too. It’s perfect for card making and scrapbooking without dies!
For a festive touch, consider using your die cuts to create shaker gift tags with a personal touch.
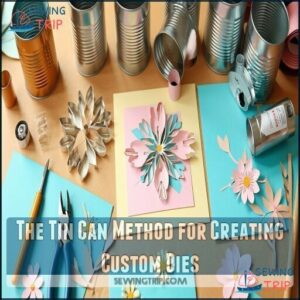
The Tin Can Method for Creating Custom Dies
Transform tin cans into creative DIY die cutting tools! Here’s your step-by-step guide:
- Tin Shaping: Use tin snips to carefully slice cans into flat sheets.
- Edge Smoothing: Sand edges to prevent sharp cuts—safety first!
- Design Transfer: Bend and shape strips with pliers to match your design.
- Glue Types: Secure strips onto foam board using expanding glue.
This quirky method substitutes traditional die cuts, saving money and sparking creative projects, all while recycling!
The cans’ corrosion resistance makes them ideal for long-lasting die cuts.
Bone Folder Method for Intricate Cuts
A bone folder is your secret weapon for mastering intricate paper cuts and folds. It’s simple but powerful, giving you folding precision for various paper types and designs.
- Score clean lines to prep folds with ease. No more crumpled edges!
- Shape and crease paper for embossing effects or complex designs.
- Refine edges for a polished, professional look every time.
Whether crafting unique paper cutting templates or tackling detailed hand cutting techniques, the bone folder adds finesse to your paper art. It’s like having an artist’s wand—just no magic words needed. You can find a bone folder tool online.
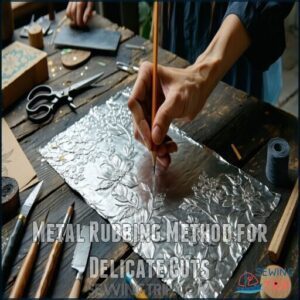
Metal Rubbing Method for Delicate Cuts
Got some aluminum sheets or foil lying around? Try the metal rubbing method—a creative die cut substitute! Place your design under the metal and gently rub it with a pencil’s side or a precision tool. With the right pressure control, your design transfers like magic.
Need help choosing materials? Here’s a quick guide:
Texture Effects
Experiment with tin cans or stencils for even more paper art techniques. Perfect for adding handmade charm to your projects!
Tips and Safety Precautions
When you’re crafting without a die cutter, staying safe and keeping your tools in good shape is a must.
Nobody wants a craft project to end with a bandage, so let’s talk tips to keep things fun and accident-free!
Preventing Injuries With Proper Handling
Safety first, always! Prevent crafting mishaps by keeping your workspace organized and free of distractions. A cluttered area can lead to accidents faster than you can say “Oops!”
Check for material hazards like sharp edges or slippery tools, and make sure your workspace ergonomics are comfortable—no hunching allowed! Always use sharp tools like craft knives properly.
If something feels off, stop immediately and check your tools. Maintain equipment safety by unplugging machines before adjustments.
Keep first aid nearby, just in case. Injury prevention means more fun and fewer band-aids during your crafting adventure.
Stay injury-free and enjoy! For more information on safety, visit Maintain equipment safety to ensure a safe crafting experience.
Maintaining Your Craft Knives and Tools
Sharpening techniques are key to keeping your craft knives cutting like butter. A dull blade? That’s a disaster waiting to happen!
Invest in craft knife sharpeners to extend tool longevity. To find suitable options, consider purchasing knife sharpeners online.
Check those ergonomic handles—it’s like giving your hands a comfy couch! Always replace worn blades for a well-maintained blade that glides smoothly.
Safe storage matters too. Tossing your knives in a drawer? Nope! Store them safely to avoid dulling and accidents. Love your tools, and they’ll love you back.
Cleaning and Storing Your Dies and Materials
Cleaning and storing your die cutting tools isn’t just practical—it’s like giving them a comfy home.
Wipe dies with a lint-free cloth and a splash of rubbing alcohol to keep rust and dust away.
For safe storage, try magnetic sheets or clear plastic wallets to protect sharp edges.
Airtight containers are great for keeping materials moisture-free.
Think vertical storage solutions for a clutter-free workspace—it’s like turning your crafting area into a tidy little sanctuary.
With smart tool organization, your supplies will last longer and stay ready for action!
Organizing Your Workspace for Efficiency
Your crafting space should feel like home—a place that inspires creativity and gets things done.
Keep your workspace neat and practical with these tips:
- Tool Placement: Use vertical storage solutions to organize tools and keep surfaces clutter-free.
- Lighting Solutions: Maximize natural light or add bright desk lamps for focus and comfort.
- Ergonomic Setup: Create an ergonomic cutting station to avoid strain while working.
Stay tidy, and let your creativity shine!
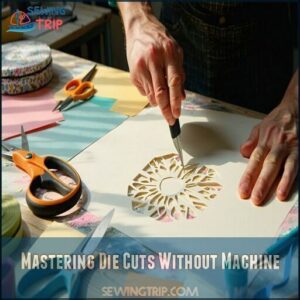
Mastering Die Cuts Without Machine
You don’t need a fancy machine to make amazing die cuts—you just need a little creativity and the right tools.
Let’s explore simple, budget-friendly ways to craft beautiful designs by hand!
Achieving Clean Cuts With Craft Knives
Cutting clean lines with a craft knife is like slicing butter—if you know a few tricks.
Always keep your knife razor-sharp; a dull blade ruins your mood and cuts. Choose the right blade for your material and work with the paper grain for smoother edges. Use a self-healing cutting mat and steady pressure to avoid wobbles.
Let the table below guide your hand cutting techniques:
| Tip | Why It Matters |
|---|---|
| Blade Choice | Matches material needs |
| Cutting Angles | Guarantees clean edges |
| Pressure Control | Prevents tears/folds |
Note that there was only one word to replace ("ensure" which wasn’t present), but "ensures" was, so it was replaced with "guarantees".
Troubleshooting Common Issues
Got trouble with hand cutting techniques? You’re not alone!
Fix those crafting mistakes like torn paper or uneven cuts with these quick tips:
- Use sharp, fresh blades to avoid dull blade disasters.
- Switch materials if you spot troublesome design flaws.
- Control pressure to stop ragged edges.
- Double-check material choice if cuts feel off.
Remember, every crafting challenge is just a lesson in disguise. Happy cutting!
Optimizing Your Workspace for Efficiency
A clutter-free workspace turns stress into success.
Start with a self-healing cutting mat as your crafting sanctuary’s centerpiece.
Embrace vertical storage for tool accessibility and create an ergonomic setup that feels natural.
Add bright lighting solutions to sharpen focus, and keep waste management simple with a trash bin nearby.
Workspace organization isn’t just practical—it transforms your crafting experience into pure joy!
Creating Custom Dies for Unique Designs
Ever tried making your own dies? With simple DIY materials like tin cans, you can create unique shapes.
Cut and shape tin strips, smooth edges, and secure them firmly. Use these for stencil cutting methods or die cut embossing.
For exact designs, craft templates with cardboard. Who needs pricey tools when tin can shaping releases endless creativity?
Cost-Effective Alternative to Die Cutting Machines
Who says crafting has to cost an arm and a leg? With these budget-friendly techniques, you can skip expensive machines and make stunning designs using what’s already around you:
- Use craft knives for precise, DIY dies.
- Repurpose tin cans or household items as die cut substitutes.
- Create free digital templates and trace designs.
- Experiment with scrapbooking methods for creative customization.
- Practice skills like hand-cutting to save money and build mastery.
Budget crafting? Nailed it!
Increased Control Over The Cutting Process
Taking full control of your die-cutting process means mastering precision handling and enjoying the flexibility of manual techniques.
With a sharp craft knife or trusty scissors, your hand dexterity transforms cuts into works of art.
Adjust your material manipulation to match your vision. Freehand cutting isn’t just manual—it’s design adaptability.
Who doesn’t love the power of creating exactly what you imagine?
Encourages Creativity and DIY Skills
When you skip fancy machines, manual die cutting becomes a playground for creativity and growth.
It’s like discovering a treasure chest of DIY skills and artistic expression! You’ll figure out cool ways to use simple tools like a craft knife or scissors, and every project feels uniquely yours.
Plus, it’s a chance to explore materials and designs without limits.
Here’s why it boosts creativity:
- Pushes your design exploration with new ideas.
- Turns scraps into gems through material experimentation.
- Perfects your cutting precision with practice.
- Builds problem-solving skills during creative projects.
- Lets you craft one-of-a-kind, unique projects while having fun!
Environmentally Friendly Option
Crafting can be green! DIY die cutting lets you embrace sustainable crafting by reusing materials like old cardstock, natural fibers, or household items.
Reduce waste by recycling scraps into gorgeous paper crafts. Use eco-friendly inks and compostable papers for an environmentally friendly touch.
Who needs power-hungry machines when you’ve got creativity and a knack for turning trash into treasure?
Frequently Asked Questions (FAQs)
How to make die cuts without a machine?
Have you ever thought about creating custom shapes without fancy machines?
Use a craft knife, stencils, or even tin cans to cut paper or fabric.
It’s fun, affordable, and taps into your creativity!
What is a die cutting machine?
A die cutting machine is a handy tool that cuts materials like paper or fabric into shapes.
It’s like having an artsy assistant—press a button or crank a handle, and voilà, shapes aplenty!
Do you need a die cutting machine?
Think of crafting like cooking—do you need a fancy oven for cookies? No, just basics and creativity.
You don’t absolutely need a die cutting machine.
With tools like knives and stencils, you’re good to go!
Do you need a die cutter if you are technically challenged?
You don’t need a die cutter to create amazing crafts, even if you feel technically challenged.
Simple tools like stencils, craft knives, or even a rolling pin can do the trick.
Why not try?
Are die cutting machines too expensive?
It’s true, some die cutting machines can cost a pretty penny, but they’re an investment.
If you’re crafty and plan to use them often, they’ll save time and open creative doors.
Worth it? Probably!
Are Cricut die cutting supplies a good choice?
Cricut supplies are fantastic if you’re into creative projects.
They offer versatile tools, quality materials, and endless design possibilities.
Whether you’re crafting cards or decals, Cricut makes it easy to level up your DIY game, with endless design possibilities being a key factor.
What is the alternative to die cutting?
Why wrestle with machines when scissors, craft knives, or stencils do the trick?
Grab paper, trace a design, and cut by hand.
It’s simple, fun, and gives you total creative control—no gadgets required!
What can I use for die cuts?
You can use craft knives, stencils, rolling pins, or even tin cans to make die cuts.
Everyday items like aluminum foil or bone folders work too.
Get creative—your kitchen drawer might surprise you!
Can you make die cuts with Cricut?
You can absolutely make die cuts with a Cricut.
It’s like having a magical crafting buddy that cuts shapes for you.
Just choose your design, load your material, and let the Cricut work wonders.
Do you need a machine to use die cuts?
Think of die cuts like cookies—you don’t always need a fancy cutter.
You can use stencils, sharp craft knives, or even rolling pins to make them by hand.
Machines help, but they’re optional, and you can still achieve your goals with basic tools.
Conclusion
Crafting without a machine is like painting outside the lines—it’s freeing and fun.
By trying these creative methods, you’ll see that die cuts without a die cutter are totally doable.
Whether you’re rolling, folding, or cutting by hand, you’ve got endless ways to bring your ideas to life.
It saves money, sparks your creativity, and adds a personal touch to your projects.
So why wait? Grab your tools, try something new, and make magic happen!
- https://www.google.ie/search?dcr=0&biw=1366&bih=637&tbm=isch&sa=1&ei=EyqZWoKbIaGSvQSJ0LfIBg&q=die+cuts&oq=die+cuts&gs_l=psy-ab.3..0l10.66262.66913.0.67080.4.3.0.1.1.0.172.335.0j2.2.0....0...1c.1.64.psy-ab..1.3.372...0i67k1.0.se0oyK7k3LA
- https://www.youtube.com/watch?v=1ot-NdUQnE0
- http://german-hand-tools.com/images/060-12-250.jpg
- https://www.linkedin.com/pulse/how-tin-cans-made-manufacturing-process-sophia-hu-znpee
- https://www.besttincan.com/en/module/ybc_blog/blog?post_url_alias=tin-can-making-process-and-tin-can-mold-making

