This site is supported by our readers. We may earn a commission, at no cost to you, if you purchase through links.
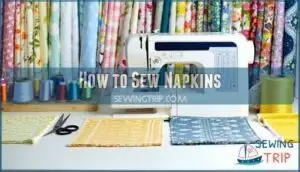
Start by cutting fabric squares about 18 inches, then create a double-fold hem by folding each edge twice. The secret lies in creating crisp mitered corners that won’t bulk up when you fold them.
Pin everything in place, then stitch around the entire perimeter with a straight stitch. Cotton or linen works best since they’re durable and wash easily.
Your first attempt might look a bit wonky, but that’s part of the charm. The real magic happens when you master the corner technique that transforms amateur-looking napkins into professional-quality linens.
Table Of Contents
Key Takeaways
- You’ll create professional-looking napkins by mastering double-fold hems and mitered corners – fold each edge twice at ¼ inch, then cut corner tips diagonally to eliminate bulk and achieve crisp, restaurant-quality edges.
- Choose your fabric wisely since cotton offers the best absorbency and easy care for everyday use, while linen adds elegance for special occasions – always pre-wash your fabric to prevent shrinkage and remove chemicals.
- Standard sizing makes a difference: cut 18×18 inches for dinner napkins, 14×14 inches for lunch napkins, and 10×10 inches for cocktail napkins, remembering to add 2 inches for hem allowance to your measurements.
- Set your sewing machine to 2.5mm stitch length with medium tension, use a universal 80/12 needle, and test your settings on fabric scraps first to avoid puckering and ensure smooth, even stitching around all edges.
Sewing Napkin Basics
You’ll need to master three key steps before you start sewing your napkins: preparing your fabric properly, measuring the right size, and cutting clean, square pieces.
Getting these basics right from the start will save you from wonky edges and frustrated do-overs later, just like how you wouldn’t bake a cake without measuring your ingredients first, which involves following a complete process.
Measure twice, sew once—your napkins will thank you for the extra attention to detail.
Fabric Preparation
Before you start cutting, proper fabric preparation sets the foundation for professional-looking napkins.
Wash your fabric first using pre-shrinking methods to prevent future surprises. Test for colorfast bleeding on a small corner.
After fabric washing and fabric drying completely, iron out every wrinkle while checking grain alignment.
This fabric preparation prevents fabric shrinkage and guarantees your napkins maintain their shape through countless dinner parties, ensuring they look professional and last for countless dinner parties.
Measuring Napkin Size
Precision matters when choosing napkin dimensions for your project.
Dinner napkin size typically measures 18×18 inches, while lunch napkin size works best at 14×14 inches.
Cocktail napkin size runs smaller at 10×10 inches.
Don’t forget your hem allowance—add 2 inches to custom dimensions for proper folding.
Mark these fabric measurements with pencil before cutting.
Cutting Fabric
Now you’ll transform your measured fabric into perfect napkin squares. Think of fabric cutting like slicing bread – you want clean, even pieces that’ll make your napkins look professionally made.
Perfect squares start with perfect cuts—your napkins are only as good as your fabric cutting skills.
Here’s how to cut fabric like a pro:
- Use a rotary cutter with a self-healing mat for razor-sharp edges that beat scissors every time
- Stack 4 fabric pieces together for efficient cutting when making multiple napkins from fabric scraps
- Align your fabric grain properly before cutting to prevent wonky, twisted napkins
- Create a sturdy template from cardboard for consistent sizing across all your napkins
- Trim corners at a 45-degree angle to reduce bulk when you’re ready for hemming
The rotary cutter becomes your best friend here – it glides through multiple fabric layers like butter. Keep that fabric selection squared up on your cutting mat, and you’ll have napkin pieces that actually look like they belong together instead of a mismatched mess.
How to Sew Napkins
Now that your fabric’s prepped, it’s time to create beautiful cloth napkins that’ll make every meal special.
The actual sewing process is surprisingly straightforward once you get the hang of it.
Here’s what makes this napkin tutorial so rewarding:
- You’ll save money – Napkin Material Costs are minimal compared to store-bought sets
- You’ll create meaningful gifts – Handmade Gift Napkin Sets show real thoughtfulness
- You’ll feel accomplished – There’s nothing like completing your first DIY napkins
Choose your Thread Color Choices wisely, consider Hemming Foot Options, and explore various Napkin Pattern Ideas for stunning fabric napkins.
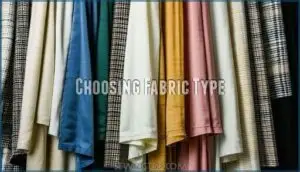
Choosing Fabric Type
You’ll want to pick the right fabric for your napkins since it affects how they look, feel, and hold up after countless washes and spills.
Cotton works great for everyday use because it’s absorbent and easy to clean, while linen adds elegance for special dinners, and quilting cotton gives you the best of both worlds with durability and softness.
Cotton Fabric Benefits
Cotton fabric wins the napkin game for good reasons.
You’ll love its natural absorbency – it soaks up spills like a champ.
The durability means your cloth napkins won’t fall apart after countless washes.
Affordability keeps your budget happy, while versatility lets you match any table setting.
Easy care makes washing fabric napkins simple – just toss them in your regular laundry cycle.
Consider exploring options for the best cotton fabric to guarantee longevity.
Linen Fabric Advantages
Beyond cotton’s reliability, linen brings sophisticated elegance to your fabric napkins collection.
This absorbent fabric offers exceptional linen durability that improves with every wash, while its elegant texture adds refined charm to any table setting.
Sustainable linen provides excellent absorbency qualities through natural weave variations, making these fabric choices perfect for both everyday use and special occasions where linen napkins truly shine.
You can find a variety of linen napkin fabrics online.
Quilting Cotton Uses
Quilting cotton brings whimsy to your sewing napkins project with its affordable price and vibrant patterns.
These colorful quilting fabrics disguise stains beautifully while offering excellent napkin durability for everyday use.
- Pre-cuts like fat quarters make DIY napkins budget-friendly
- Cotton blends resist wrinkles better than pure cotton
- Patterned napkins hide inevitable food mishaps
Consider using quilting cotton napkins for your project.
Your cloth napkins sewing tutorial just got easier!
Napkin Size Options
You’ll need to pick the right napkin size for your project, and the choice affects both how much fabric you’ll use and what your napkins will look like on the table.
Standard dinner napkins measure 18×18 inches, while smaller lunch napkins work well at 14×14 inches, and you can always customize the size to fit your specific needs or available fabric, which will also determine how your napkins will look.
Standard Napkin Sizes
Now that you’ve picked your fabric, let’s talk napkin sizes. Cocktail napkins measure 5-10 inches square for drinks and appetizers.
Lunch napkins run 14-16 inches for casual meals. Dinner napkins range from 16-20 inches for everyday use, while formal occasions call for 20-26 inch squares.
Tea napkins sit between cocktail and lunch sizes at 12-14 inches, making them a unique size for specific events.
Customizing Napkin Size
Your napkin sizes don’t need to follow cookie-cutter rules—you can tailor custom dimensions to fit your dining style perfectly.
Dinner napkin size typically runs 18-20 inches, lunch napkin size works at 14-16 inches, and cocktail napkin size stays around 10-12 inches.
Remember to add 2-inch hem allowance when planning your DIY napkins for this rewarding sewing project.
Napkin Yield Calculation
Getting the most bang for your buck means calculating how many napkins you’ll squeeze from your fabric purchase. Your fabric bolt width and chosen napkin dimensions determine your yield optimization. Smart project planning prevents material waste and keeps costs down.
Here’s your napkin fabric math cheat sheet:
- One yard of 42-inch fabric creates two 18×18-inch dinner napkins
- Same fabric yields four 14×14-inch lunch napkins
- Fat quarters trim perfectly to 17×17-inch fabric squares
- Stack multiple fabric scraps for efficient bulk cutting to achieve material waste reduction and improve cost savings with smart project planning.
Preparing Fabric
You’ll want to wash, dry, and iron your fabric before cutting to prevent shrinkage and remove any chemicals that might cause problems later.
Think of it like prepping ingredients before cooking – this extra step saves you from wonky napkins that shrink after their first trip through the washing machine.
Washing and Drying Fabric
Before you cut those perfect squares, your fabric needs some TLC.
Pre-wash benefits include shrinkage prevention and color bleeding control.
This step removes manufacturing chemicals while softening fabric for easier handling.
Here’s your fabric care roadmap:
| Washing Method | Temperature | Drying Method | Benefits |
|---|---|---|---|
| Gentle cycle | Cold water | Air dry | Prevents shrinkage, protects colors |
| Normal cycle | Warm water | Low heat | Removes chemicals, softens fabric |
| Delicate cycle | Cold water | Flat dry | Maintains fabric integrity |
| Hand wash | Cool water | Line dry | Ultimate gentleness for delicate fabrics |
Skip vigorous washing—it’s overkill.
Your napkins’ longterm durability starts with proper chemical removal during this first wash.
This initial care ensures the fabric’s quality and longterm durability.
Ironing Fabric
After washing your fabric, ironing transforms wrinkled material into a smooth canvas ready for precise cutting.
This vital step guarantees your napkins will have crisp, professional edges that’ll make your dinner guests wonder if you secretly moonlight as a seamstress.
Here’s your fabric ironing game plan:
- Set proper ironing temperatures – Cotton handles medium-high heat, while delicate fabrics need lower settings to prevent scorching
- Use steam settings wisely – Steam helps relax stubborn wrinkles, but avoid over-steaming which can stretch fabric out of shape
- Keep ironing boards stable – A wobbly surface creates uneven pressing and potential safety hazards during your ironing session
- Apply fabric protectants when needed – Use pressing cloths on delicate materials, preventing shine and protecting fabric fibers from direct heat
Squaring Fabric
Once your fabric is smooth and wrinkle-free, fabric squaring becomes your next priority.
Crooked napkins scream amateur, so let’s avoid that embarrassment.
Place your fabric on gridded mats or use a template for accuracy. Check that perpendicular edges meet at perfect right angles – no wonky corners allowed here.
| Tool | Purpose | Benefit | Tip |
|---|---|---|---|
| Gridded Mats | Guide straight cuts | Visual alignment | Use with rotary cutter |
| Template Usage | Guarantee uniform size | Consistent results | 20" x 20" works well |
| Bias Avoidance | Prevent stretching | Maintains fabric grain | Keep edges perpendicular |
| Selfhealing Mat | Protect cutting surface | Extends blade life | Replace when worn |
Hemming Techniques
You’ll discover that proper hemming transforms rough fabric edges into polished, professional-looking napkins that won’t fray after countless washes.
Mastering three key techniques—double fold hems, mitered corners, and crisp pressing—will give your homemade napkins the same quality finish you’d find in fancy restaurants.
Double Fold Hem
Master the doublefold hem technique for professional-looking DIY napkins that’ll last through countless washes.
This beginner-friendly method creates clean edges by folding fabric twice, hiding raw edges completely. Your fabric choice affects hemming durability, so choose wisely.
- Fold edges ¼ inch toward wrong side, then fold again for a clean finish
- Use proper pressing technique with your iron to set crisp, lasting creases
- Adjust stitch length slightly longer for better results when sewing cloth napkins to ensure a professional-looking finish.
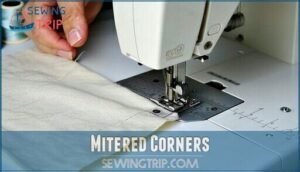
Mitered Corners
Mitered corners transform ordinary napkins into professional-looking masterpieces.
You’ll create these sharp, bulk-free angles by marking perpendicular lines where your hem folds meet.
Sew along marked lines, then trim corner tips to reduce bulk.
This sewing technique eliminates bunchy corners that fight your machine’s presser foot, giving you crisp mitered perfection every time.
| Mitered Corner Step | Purpose |
|---|---|
| Mark perpendicular lines | Creates accurate sewing guide for angle accuracy |
| Sew along marked lines | Joins hem edges for professional finish |
| Trim corner tips | Achieves bulk reduction in thick areas |
| Leave 1/8" seam allowance | Prevents fraying while maintaining clean edges |
| Repeat for all corners | Guarantees consistent napkin edges throughout |
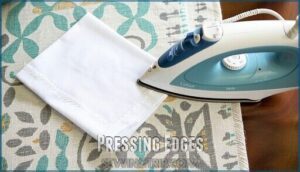
Pressing Edges
After perfecting your mitered corners, pressing creates the foundation for professional-looking napkins.
Your iron becomes your best friend here—set it to the cotton setting and let steam work its magic.
- Iron each fold twice: First at 1/4", then again for the final hem
- Use steady pressure: Hold for 3-5 seconds to set crisp creases
- Check edge alignment: Verify that corners stay sharp and hems lie flat
Sewing Napkin Edges
You’re almost there—now it’s time to sew those carefully hemmed edges and transform your fabric squares into professional-looking napkins.
Whether you choose the simple straight stitch method or want to try reversible napkins, this step brings everything together and makes your hard work pay off.
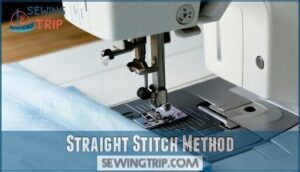
Straight Stitch Method
Once you’ve pressed those crisp hems, your sewing machine becomes your best friend for creating professional cloth napkins.
Set your stitch length to 2.5mm for lightweight fabrics, ensuring seam consistency throughout. Check your tension settings before starting—they should grip the fabric without puckering.
Begin sewing a couple inches from any corner, letting the fabric feed naturally under the presser foot. Use backstitching tips by reversing at the start and end of each seam.
This straight stitch method works perfectly for sewing beginners tackling their first sewing cloth napkins project, using a technique that ensures professional results.
Reversible Napkin Sewing
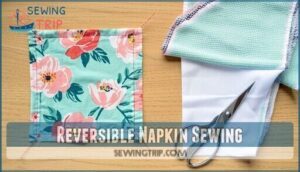
Two layers create magic when you’re sewing cloth napkins with the reversible method.
Cut two 18-inch squares from contrasting sides or pattern matching fabrics for stunning double-layer fabrics.
Pin them together and sew around all edges using a ⅜-inch seam, leaving a 4-inch gap for turning.
This inside-out method creates hidden seams that’ll make your DIY napkins look professionally made.
Clip corners, turn right-side out through the gap, then topstitch around the perimeter.
These sewing techniques eliminate bulky hems while doubling your fabric options.
Finishing Napkin Touches
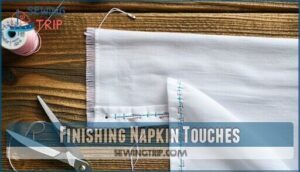
You’re almost there, but these final touches will make your napkins look store-bought instead of homemade.
Clean up those corner edges, secure any loose spots with a dab of fabric glue, and add decorative stitching if you want to show off your skills.
Trimming Corner Excess
You’ll need to trim those chunky corners before sewing to avoid that lumpy, amateur look. Think of it like giving your napkin a haircut – just enough to clean things up without going overboard.
- Use sharp fabric scissors for clean cuts at mitered corner angles
- Trim excess fabric to ⅛ inch from fold lines using corner trimming tools
- Apply bulk reduction methods by cutting diagonally across corner points
- Prevent fraying by sealing cut edges with pinking shears if needed
- Maintain consistent corner shape across all napkins for professional results
Glue Basting Corners
Beyond traditional pinning, glue basting offers superior corner accuracy when folding napkin edges.
Apply a thin layer of fabric glue to mitered corners, then fold and press with your iron for heat setting glue that creates temporary but reliable bonds.
This technique provides excellent basting durability, keeping corners perfectly positioned while you sew.
Different glue types work, but washable fabric glue delivers the best glue basting benefits for precise sewing tips.
Adding Decorative Stitches
Once your corners are secure, you can transform plain napkins into showstoppers with decorative stitching.
Your sewing machine offers up to 31 stitch patterns – try parallel rows using contrasting thread for instant style.
Test machine settings on scraps first, then add embroidery touches along edges.
Smart stitch placement and thoughtful color combinations turn basic napkins into restaurant-quality pieces.
Napkin Sewing Tips
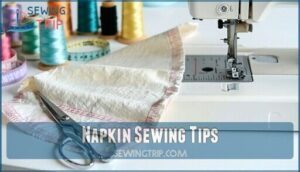
Even experienced sewers sometimes find their napkin corners bunching up or their seams looking wonky—and that’s completely normal when you’re learning the ropes.
These practical tips will help you avoid the most common mistakes while teaching you simple tricks that make your napkins look store-bought perfect.
Beginner Friendly Tools
You’ll need basic sewing tools to tackle this easy sewing project successfully.
A beginner sewing machine, rotary cutters, and cutting mats make precise cuts effortless.
Don’t forget ironing essentials for crisp edges and fabric marking tools for accurate measurements.
These beginner sewing fundamentals transform napkin-making from intimidating to enjoyable.
Quality sewing tools aren’t just helpful—they’re your ticket to professional-looking results every time, with basic sewing tools and precise cuts being essential for a great outcome.
Sewing Machine Settings
Getting your sewing machine setup right makes all the difference between frustration and success.
Here are three essential adjustments for perfect napkin stitching:
- Stitch Length: Set to 2.5-3mm for lightweight cotton fabrics
- Stitch Tension: Use medium tension (usually 3-4) to prevent puckering
- Needle Type: Choose universal 80/12 needles for most cotton napkin projects
Test these settings on fabric scraps first.
Troubleshooting Common Issues
Even with perfect sewing machine setup, problems happen.
Fabric bunching often means your stitch tension needs adjusting—test on scraps first.
Uneven hems usually come from rushing or stretching fabric while sewing seams.
Thread breakage signals a dull needle or wrong thread weight.
Corner gaps? You’re pulling too hard, so take your time, and your napkins will turn out beautifully.
Frequently Asked Questions (FAQs)
What fabric is best for making napkins?
Cotton reigns supreme as the napkin fabric champion! You’ll love its incredible absorbency and easy-wash nature.
Linen adds sophisticated elegance, while cotton blends deliver durability and softness that’ll make every meal feel special.
How many napkins will 1 yard of fabric make?
You’ll get two 18×18-inch dinner napkins or four 14×14-inch lunch napkins from one yard of 42-inch wide fabric. The exact number depends on your chosen napkin size and fabric width.
How to miter corners when sewing napkins?
Perfect timing strikes when you’re trimming corners.
Fold fabric edges 1/4" twice, then cut corner tips to the first crease.
Fold both sides to meet middle, creating clean diagonal lines that eliminate bulk.
What is the best size for homemade napkins?
You’ll want different sizes for different occasions.
Dinner napkins work best at 18×18 inches, while lunch napkins shine at 14×14 inches.
Cocktail napkins are perfect at 10×10 inches for appetizers and drinks.
What kind of thread should be used for sewing napkins?
You’ll want all-purpose thread in a neutral color like white, cream, or beige that matches your fabric.
Polyester thread works great since it’s strong and won’t shrink like cotton thread might, making polyester a good choice.
How do you make napkins more absorbent?
Why settle for napkins that barely soak up spills?
Choose 100% cotton fabric for maximum absorption, pre-wash to remove sizing chemicals.
Avoid fabric softener which creates a water-repelling coating that reduces your napkin’s thirsty power.
What’s the best way to hem napkins with a sewing machine?
Fold fabric edges twice—first ¼ inch, then another ¼ inch toward the wrong side. Press with iron, then straight stitch close to the inner fold edge, backstitching at corners for durability.
How can you add interest to plain napkins with embellishments?
Transform your napkins into conversation starters by adding decorative stitching, appliqué patches, or embroidered monograms.
You can also sew on lace trim, attach fabric flowers, or use contrasting thread for topstitching around edges.
What are some tips for sewing napkins with children?
Let kids choose colorful fabrics and handle simple tasks like pressing seams.
Use safety scissors, keep fingers away from needles, and celebrate small wins.
Their enthusiasm makes up for wobbly stitches—patience creates memories.
How do you store finished napkins properly?
Your beautifully crafted napkins deserve royal treatment.
Stack them flat in a drawer, roll them in a basket, or hang them on a towel bar.
Keep them away from moisture and direct sunlight to preserve their perfect appearance.
Conclusion
Picture yourself setting the table with crisp, handmade napkins that make guests ask, "Where did you buy these?"
Now you know exactly how to sew napkins that rival any store-bought version. Those perfectly mitered corners and professional-looking hems aren’t accidents – they’re the result of following proper technique.
Your sewing machine skills have just expanded beyond basic projects. Every meal becomes a little more special when you’ve crafted the details yourself, with professional-looking hems and a touch of personal style, making it a truly special experience.
- https://pages.applegreencottage.com/qsg-sewprettyhome-inline
- https://sondeflor.com/blogs/all-about-linen/benefits-of-wearing-linen?srsltid=AfmBOorIhXnXRq7kfYDdCTUnccOnaNAOTeAnrgKfGMl4GcIJMTHmCEVQ
- https://dresslemuse.com/blogs/blog/benefits-of-linen-clothing?srsltid=AfmBOooUkVFSARECBkwqC5zQ_UJSt41cusInPAnR1BYqin5Vw2Vs5lT-
- https://wildlinens.com/pages/benefits-of-linen?srsltid=AfmBOoqoiNz7TLc_ZEryIqx_4GwrRI6YjxfmAzr0ksZeN5V-oJqRppvR
- https://www.longancraft.com/blogs/fabric-knowledge/best-fabric-for-napkins?srsltid=AfmBOoorvCX0i3YyKZTiyq7C0q1kWYgMyJtbeY37cfq2oaZKWqNi7EzP

