This site is supported by our readers. We may earn a commission, at no cost to you, if you purchase through links.

Start by cutting rectangular pieces for the sides, top, and bottom. Sew the zipper to the top panel first—this part’s like threading a needle in the dark until you get the hang of it.
Next, attach all panels together using straight stitches, creating that boxy shape that makes packing cubes so effective. The trick lies in getting those corners crisp and sturdy.
Once you master the basic technique, you can customize sizes for your specific travel needs and discover some game-changing shortcuts.
Table Of Contents
Key Takeaways
- You’ll save money and get better customization by making your own packing cubes with basic materials like ripstop nylon or cotton canvas, quality zippers, and standard sewing supplies that cost a fraction of store-bought versions.
- You’ll need to master zipper installation first since it’s the trickiest part – use a zipper foot, align carefully, and practice on scraps before working on your actual cube to avoid frustrating mistakes.
- You’ll create professional-looking cubes by cutting precise rectangular pieces, sewing straight seams, and boxing the corners with perpendicular stitches to form that essential cube shape that makes packing so effective.
- You’ll get maximum travel benefit by making different sizes for specific needs – small cubes for underwear and socks, medium for shirts, and large for bulky items like sweaters, helping you organize and compress your luggage efficiently.
Why Sew Your Own Packing Cubes?
Instead of shelling out cash for store-bought organizers, you can create stunning DIY packing cubes that’ll make your luggage the envy of fellow travelers.
Transform your luggage into a work of art with handmade packing cubes that outshine any store-bought option.
The cost savings alone make this project worthwhile – homemade packing cubes cost a fraction of retail prices while offering superior customization options.
You’ll develop valuable sewing skills through this therapeutic sewing project that doubles as stress relief. Choose fabrics that reflect your personality, from bold prints to eco-friendly materials that support your green lifestyle values.
This eco-friendliness extends beyond fabric choice – you’re reducing plastic waste by creating reusable alternatives to disposable bags.
When you sew travel organizers yourself, you control every detail. Make them exactly the right size for your needs, add mesh windows for visibility, or create themed sets for different family members.
This sewing tutorial transforms basic materials into professional-quality fabric packing cubes that’ll organize your adventures for years to come.
Supplies Needed for DIY Packing Cubes
Before you start cutting and stitching, you’ll need to gather a few basic supplies that’ll turn your fabric scraps into travel-ready organizers.
Don’t worry if you’re missing something – most of these materials are probably hiding in your sewing box already, and the rest won’t break the bank, as you’ll be working with complete concepts and likely finding most in your sewing box.
Fabric
Your fabric choice sets the foundation for packing cubes that’ll survive countless adventures. Cotton duck canvas offers excellent fabric durability with its tight weave density, making it perfect for heavy-duty travel gear.
Built to last, cotton duck canvas transforms simple fabric into adventure-ready travel companions that won’t quit on you.
For privacy, choose opaque options that keep your unmentionables hidden from prying eyes. Consider ripstop nylon for ultralight backpacking – it’s surprisingly tough despite feeling delicate. Many prefer ripstop nylon for its resistance to tearing.
Always prewash your durable fabric before cutting to prevent post-construction surprises. Nobody wants shrinking cubes!
- Ripstop nylon: Your lightweight travel companion that laughs at snags
- Cotton canvas: The reliable workhorse that handles anything you throw at it
- Waterproof PUL: Your moisture-fighting superhero for wet climates
- Ventilation mesh: Breathable panels that keep clothes fresh during long trips
- Quilting cotton: Beautiful patterns that make packing feel less like a chore
Zippers
Strong, reliable zippers form the backbone of any well-made packing cube.
You’ll want heavy-duty zipper types with metal sliders that won’t break mid-trip. Look for #5 coil zippers or YKK brands for superior zipper durability.
Need to buy more? Check out some options for coil zippers. A zipper foot attachment makes zipper installation smooth and professional-looking.
Practice your zipper technique on scraps first – trust me, it’s worth it! Choose zipper pulls that won’t snag on fabric. For zippered pouch construction, consider adding zipper maintenance to your travel routine.
Quality zippers transform ordinary fabric into organized travel companions that’ll serve you for years.
Thread
Why struggle with weak thread that breaks mid-seam? Your thread choice makes or breaks your packing cube project.
Quality polyester thread like Coats & Clark Dual Duty XP delivers the strength you need for heavy-duty travel gear. It won’t snap under pressure when you’re stuffing those cubes full.
Almost 90% of ready-to-wear apparel uses serger thread and needles for finishing.
Here’s your thread shopping list:
- Thread Types: Choose polyester over cotton for durability
- Thread Weight: Use all-purpose weight for most fabrics
- Color Matching: Pick colors that complement your fabric choices
- Thread Tension: Test tension settings before sewing
- Specialty Threads: Consider topstitching thread for decorative seams
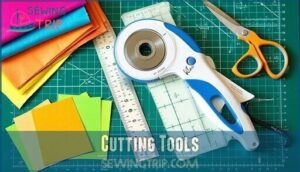
Cutting Tools
Sharp cutting tools make all the difference when creating professional-looking packing cubes.
You’ll need a rotary cutter, self-healing cutting mat, and acrylic ruler for precise cuts. Kai scissors work perfectly for detail work and trimming threads.
Keep your rotary cutter blade sharp—dull blades create jagged edges and can damage fabric. A quality self-healing mat protects your work surface and extends blade life.
Consider purchasing rotary cutters for your sewing needs. These tools might seem like an investment, but they’ll serve you well for countless sewing projects.
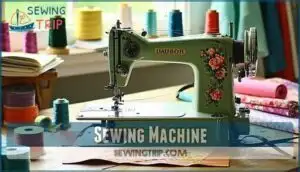
Sewing Machine
You’ll need a reliable sewing machine that handles multiple fabric layers without breaking a sweat.
A lightweight Brother model works perfectly for beginner sewing projects like packing cubes.
Focus on Machine Maintenance by keeping it clean and oiled.
Choose proper Needle Selection – 80/12 for lightweight fabrics, 90/14 for heavier materials.
Adjust Stitch Settings to 3mm length for durability.
Use zipper Foot Attachments for clean installation.
Check Tension Adjustment regularly during your sewing tutorial to prevent puckering.
Packing Cube Pattern and Instructions
You’ll find everything you need to create perfect packing cubes right here, from a free printable pattern to detailed photos that walk you through each step.
This serves as your sewing GPS – no more getting lost halfway through wondering if that corner looks right or if you’ve attached the zipper backwards, making it a valuable resource for ensuring your packing cubes turn out perfectly, with detailed photos to guide you.
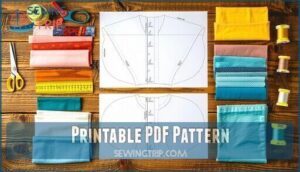
Printable PDF Pattern
When you download the printable PDF pattern, you’re getting your roadmap to packing cube success.
This digital treasure offers pattern accuracy that takes the guesswork out of cutting fabric pieces.
You’ll find scaling options for three different sizes, plus clear printing instructions to confirm your pattern prints at the correct dimensions.
The pattern customization features let you adjust measurements for your specific travel needs. Digital adjustments are simple – just resize before printing.
Your packing cubes sewing tutorial starts here, with precise measurements and cutting guides that make this packing cube pattern foolproof for any skill level.
Step-by-Step Photo Tutorial
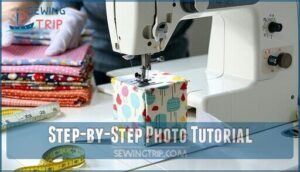
With your pattern ready, let’s walk through each sewing step with clear photos showing the process. You’ll see exactly how cutting fabric works, from measuring to making clean cuts with your rotary cutter.
The step-by-step photo tutorial breaks down zipper techniques, showing you how to pin and stitch without puckering. Corner boxing might seem tricky, but the pictures make it simple – just align those points carefully when pinning.
Pay attention to seam allowances throughout each step. The photos show proper 1/4-inch spacing that keeps your DIY packing cubes sturdy. Topstitching seams adds that professional finish you’ll love.
This sewing tutorial covers three sizes, so you’ll master the packing cube pattern regardless of which version you choose first. Understanding pattern making basics is helpful for projects like this.
Sewing Tips for Packing Cubes
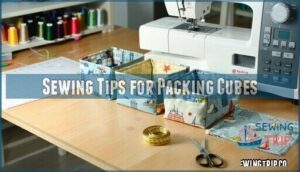
You’ve got your pattern ready, but the right sewing techniques can make the difference between flimsy cubes that fall apart after one trip and sturdy organizers that’ll last for years.
These smart tricks will help you avoid common mistakes like puckered seams and wonky zippers that can turn your DIY project into a travel nightmare.
Fabric Type
Choosing the right fabric type makes all the difference in your packing cube’s performance.
Cotton canvas delivers excellent fabric durability while remaining lightweight for travel.
Ripstop nylon offers superior water resistance and won’t tear easily in your luggage.
For breathability, quilting cotton works well but lacks moisture protection.
Opaque fabrics keep your belongings private, while mesh ventilation panels let you see contents at a glance.
Consider synthetic fiber options for enhanced performance.
Pick durable fabric that matches your travel style – your cubes will thank you, and provide superior water resistance with the right choice, ensuring excellent fabric durability.
Stitch Length
In regards to fabric thickness and your sewing machine, adjusting stitch length makes all the difference.
For heavy materials like canvas or vinyl, bump your stitch length up to 3mm—this prevents seam popping under pressure.
Think of it like building a bridge: longer stitches distribute stress better than tiny ones bunched together.
Thin fabrics need shorter stitches around 2.5mm for control. Your sewing techniques should match the fabric type you’re working with.
Ideal length settings keep seams strong while preventing thread breakage.
Test different stitch length adjustments on scraps first—it’s like trying on shoes before buying them to ensure the best fit and prevent breakage.
Zipper Installation
You’ll master zipper installation with patience and the right approach. Think of it like threading a needle – rushing leads to frustration, but steady hands create perfection.
- Position your zipper foot and align zipper teeth precisely with fabric edges
- Center zippers carefully by marking quarters on both fabric and zipper tape
- Create zipper tabs by folding scrap fabric around zipper ends for clean finishes
- Use double-sided zippers for easier access when packing cubes are stuffed full
- Align zipper pulls near corners on long sides for maximum functionality
With proper zipper foot usage and these zipper installation tips, your packing cubes will open smoothly every time.
Get Inspired With Packing Cube Ideas
You’ve mastered the basic packing cube construction, but now it’s time to make them uniquely yours.
Whether you’re dreaming up fun fabric combinations or adding personal touches that’ll make airport security guards smile, these customization ideas will transform your cubes from boring boxes into travel companions you’ll actually enjoy using.
They will help you create travel companions that are personalized and enjoyable to use.
Size Variations
Think of packing cubes like puzzle pieces – you’ll want different sizes to fit your travel picture perfectly.
Small cubes (around 8" x 8") handle underwear and socks for short trips. Medium options (14" x 10") store 3-5 days of shirts and pants. Large cubes (16" x 12" x 6") accommodate bulky sweaters for week-long adventures.
Capacity planning becomes simple when you match cube dimensions to garment types and travel duration. Custom-sized variations let you maximize storage needs efficiently.
For organizing smaller items, consider using clear containers for better visibility. Whether you’re packing for a weekend getaway or month-long expedition, size variations guarantee every inch of suitcase space works harder to ensure a more efficient travel experience with maximize storage needs and better visibility.
Custom Prints
Your packing cubes deserve a personal touch that screams "you". Start with design software to create digital patterns, ensuring proper image resolution for crisp fabric printing results. Whether you’re channeling vintage florals or geometric masterpieces, high-quality prints transform basic cubes into conversation starters.
Consider color matching your existing luggage or go bold with contrasting hues that’ll make airport security smile. Print durability matters – choose fabrics that’ll survive countless wash cycles without fading.
Cotton canvas takes custom prints beautifully while maintaining that sturdy structure your sewing machine loves. Mix solid colors with printed panels for sophisticated color blocking, or go all-out with coordinated pattern families.
Your fabric choices become the star of the show, turning ordinary packing cubes into personalized travel companions that spark joy every time you unzip them. They can be made with high-quality prints and proper image resolution to ensure a unique and lasting product.
Add Labels or Trim
Beyond custom prints, you can turn ordinary packing cubes into showstoppers with thoughtful labels and trim.
Smart Label Materials like iron-on vinyl or fabric markers help identify contents instantly. Strategic Trim Placement along edges adds flair without bulk.
Consider these Personalization Ideas:
- Colorful ribbon loops for easy grabbing and Color Coordination with your luggage
- Mesh windows positioned strategically for quick visibility
- Contrasting topstitching using decorative thread patterns
When sewing these embellishments, remember that Ribbon Options range from grosgrain to satin. Your trim choices transform basic rectangles into organized travel companions that reflect your style.
Frequently Asked Questions (FAQs)
How do you sew a packing cube?
Start by cutting fabric pieces for the main body, zipper panel, and base.
Install the zipper first, then sew the sides together.
Box the corners by stitching perpendicular seams, creating depth for your cube.
Can you sew your own Packing cubes?
Like building your own travel toolkit, you can absolutely sew your own packing cubes.
With basic sewing skills, fabric, zippers, and a pattern, you’ll create custom organizers that fit your exact needs and style preferences perfectly.
How do you make a packing cube?
Cut fabric panels and zippers to size, then stitch sides together with zipper placement.
Box corners by stitching perpendicular seams, creating a cube shape.
Turn right-side out and you’ve got your travel organizer!
What is a packing cube?
Picture an old-fashioned trunk’s compartments—that’s your packing cube’s DNA.
You’re looking at fabric containers with zippers that organize clothes in your suitcase.
They compress items, separate outfits, and keep everything tidy during travel adventures, which makes them useful for organizing your luggage, and they are also good at keeping everything tidy.
Can you make a packing cube with a zipper?
You’ll need durable fabric, a sturdy zipper, and basic sewing skills. Install the zipper first, then construct the cube’s sides and bottom. Reinforce corners with double stitching for travel-ready durability.
Are DIY Packing cubes a good travel companion?
Seasoned travelers use 40% fewer ziplock bags when they switch to reusable packing cubes.
You’ll love how DIY versions organize your suitcase, compress clothing efficiently, and replace wasteful plastic bags while saving money on expensive store-bought alternatives.
What Fabrics Work Best for Sewing Packing Cubes?
Ripstop nylon wins hands down—it’s lightweight, tough, and won’t tear easily.
Cotton duck canvas offers durability for heavy packers.
For budget-friendly options, try quilting cotton or waterproof vinyl shower curtains.
How Do I Sew Corners Neatly When Making Packing Cubes?
Watch your fabric dance around the machine like it’s avoiding responsibility – that’s corner chaos.
Pin bottom edges first, then align corners flat before stitching.
Use clips instead of pins, and turn carefully to avoid fabric tears.
Can I Make Packing Cubes Without a Sewing Machine?
Yes, you can hand-sew packing cubes, though it’s time-consuming.
Use thicker fabrics for easier handling and employ a ladder stitch for the bottom seam.
Thread your needle along fold lines, alternating sides for durability.
What fabrics work best for sewing packing cubes?
You’ll want durable cotton duck canvas or ripstop nylon for the main body, plus mesh fabric for visibility windows.
Cotton’s sturdy and easy to work with, while ripstop nylon offers lightweight water resistance perfect for travel gear, and mesh fabric is used for visibility windows.
Conclusion
Statistics show travelers save 30% more luggage space with packing cubes versus traditional folding methods.
Now you’ve learned how to sew packing cubes that’ll transform your travel game forever.
Your custom-made cubes will outlast store-bought versions while costing half the price.
Start with one basic cube to practice your technique, then create a whole set in different sizes.
You’ll wonder why you ever traveled without these organizational powerhouses. Pack smart, travel light, and enjoy your perfectly organized suitcase with custom-made cubes.

