This site is supported by our readers. We may earn a commission, at no cost to you, if you purchase through links.

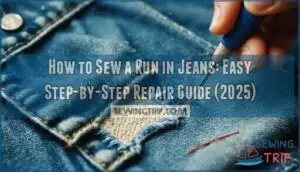
First, cut a patch slightly larger than the run from similar denim or sturdy fabric. Position it behind the tear and pin it in place.
Thread your needle with matching thread and start stitching around the edges using small, tight stitches. Work your way around the entire patch, creating a secure border.
For extra strength, add a few cross-stitches over the run itself. This method works like a bandage for your jeans, keeping the tear from spreading. The secret lies in choosing the right stitch pattern for maximum durability, which is the key to a successful repair with maximum durability.
Table Of Contents
Key Takeaways
- Use a matching denim patch that’s slightly larger than the tear, and pin it securely behind the run to prevent shifting.
- Sew around the patch edges using durable stitches, and reinforce the tear with cross-stitches for extra strength.
- Match your patch’s grain and stretch direction with your jeans for a natural look and maximum comfort.
- Pre-wash your jeans and select a heavy-duty denim needle with polyester or nylon thread for a secure and lasting repair.
What You’ll Need
Gathering your jeans repair arsenal doesn’t require breaking the bank or hunting down specialty items. You’ll need a sturdy needle – size 90/14 or 100/16 works perfectly for denim’s thick weave.
Your denim rescue mission starts with the right needle – no fancy gear required, just smart choices.
Thread strength matters here, so grab polyester or heavy-duty thread that matches your jeans’ color. Sharp fabric scissors are essential for clean cuts, while a rotary cutter gives you precision if you’ve got one handy.
For patch fabric, save denim scraps from old hemming projects or find matching material at craft stores. Reinforcement options include fusible interfacing or iron-on patches that’ll give your repair extra staying power.
Don’t forget pins to hold everything in place and an iron to prep your work area. For accurate pattern adjustments, consider using tailor’s chalk to mark alterations. These basics will handle most sewing emergencies and provide a good foundation for your jeans repair arsenal with the right thread.
Step 1: Cut Out The Patch and Pin On
Now that you’ve got your materials ready, it’s time to start the actual repair process. First, you’ll need to cut your patch material about 1.5 inches larger than the hole on all sides – this extra fabric gives you room to work and guarantees complete coverage. Think of it like putting a bandage on a cut; you wouldn’t want it barely covering the wound, right?
When selecting your patch, fabric matching is key for a seamless repair. Choose denim that’s similar in weight and color to your jeans. Next comes grain alignment – match the fabric’s grain direction with your jeans for the most natural look. For stretchy jeans, it’s important to take into account the patch material properties to guarantee a comfortable fit.
For patch securing, start with pin placement at strategic points:
- Pin the top center first to anchor the patch
- Add pins to each corner, working outward
- Space remaining pins evenly around the edges
This methodical approach prevents shifting during sewing and creates a professional-looking jeans repair.
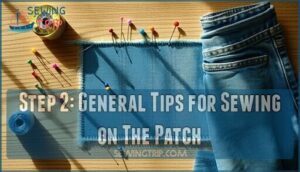
Step 2: General Tips for Sewing on The Patch
Now that you’ve got your patch ready, let’s talk about setting yourself up for success. Think of this as laying the groundwork – a few smart moves here will save you headaches later.
Here are three key things to keep in mind:
- Patch color-matching matters more than you think – Hold your patch up to different parts of your jeans under good lighting. Denim can vary in shade even on the same pair.
- Pin placement should be generous but strategic – Use more pins than you think you need, especially around curves. Space them about an inch apart for secure hold.
- Consider fabric nap and stretch direction – Match the grain of your patch to your jeans. If your denim stretches horizontally, make sure your patch does too.
To keep the patch in place, consider using a temporary adhesive. Pro tip: Test your sewing machine settings on scrap denim first. Heavy fabric can be finicky, and you don’t want surprises mid-repair.
Step 3: Sew Around The Edges!
Now that your patch is perfectly positioned, it’s time to secure it with professional-looking stitches. Start by threading your sewing machine with durable thread that matches your jeans’ color. Adjust your stitch length to 3.5 for ideal balance between strength and appearance.
Begin stitching approximately 0.5 inches from the hole’s edge, following the patch perimeter. Keep your thread tension moderate to prevent puckering. Use a denim needle (size 90/14 or 100/16) for smooth fabric penetration.
To prevent fraying, consider applying Fray Check along the edges after stitching.
| Stitch Component | Setting/Choice | Why It Matters |
|---|---|---|
| Needle Choice | Denim 90/14-100/16 | Pierces thick fabric cleanly |
| Thread Tension | Medium (3-4) | Prevents puckering |
| Stitch Length | 3.5mm | Balances strength and appearance |
| Edge Stitching | 0.5" from hole | Provides secure attachment |
| Seam Reinforcement | Double-pass corners | Prevents future tearing |
Take your time with corners, pivoting carefully. This edge stitching creates the foundation for a lasting repair that’ll handle whatever life throws at your favorite jeans.
Step 4: Reinforce The Hole
Now comes the vital part – making your patch bulletproof. Think of this as building a fortress around your jeans hole repair.
Start stitching horizontally across the patched area, keeping your stitches about 1/4 inch from the hole’s edge. This stitch reinforcement creates a safety net that prevents future tears.
Keep your thread tension consistent – not too tight or you’ll pucker the fabric, not too loose or it won’t hold. Focus on patch stability by extending your stitches onto the surrounding denim for extra grip.
Use small, tight stitches for preventing fraying, and don’t forget to secure each row with a knot on the inside. For larger holes, consider patching from underneath for a more discreet and durable repair.
This securing stitches technique guarantees your mend jeans effort lasts for years. Your denim repair will thank you when it survives countless washes and wear cycles ahead.
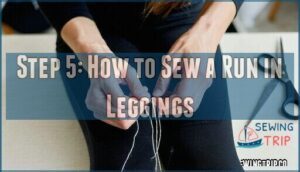
Step 5: How to Sew a Run in Leggings
When you spot a run in your favorite leggings, don’t panic—you can fix it with some simple sewing skills.
First, gather thread that matches your leggings material and a needle that won’t snag the fabric. Using a darning technique, weave back and forth across the run like you’re creating a tiny fabric web. A running stitch is a simple way to start.
Here’s what makes leggings repair tricky:
- Stretch factor: Regular thread won’t work—you need polyester or nylon thread that moves with the fabric
- Stitch types: Use a ladder stitch or blanket stitch to maintain elasticity
- Run prevention: Seal the edges with clear nail polish before sewing to stop further damage.
This repair method guarantees your leggings stay flexible and comfortable.
Step 6: How to Sew a Tear in Jeans
When life hands you a torn pair of favorite jeans, don’t panic—you’ve got this! Start by ironing the hem along the tear for easier mending, then carefully pin those stubborn edges together.
Don’t let a ripped seam ruin your day—grab your needle and show that tear who’s boss!
Here’s your game plan for flawless denim repair:
- Cut a patch from matching denim that’s at least 1 inch wider than the hole
- Pin the patch inside over the hole, aligning the grain perfectly
- Use whipstitch around the hole through both layers for solid reinforcement methods
- Knot inside and bury thread ends between layers for ultimate patch concealment
Smart thread matching and hidden stitch techniques make your mending clothes project nearly invisible. For a discreet fix, remember to match the denim color.
Back tack at start and end for security—your repair clothing skills will shine!
Frequently Asked Questions (FAQs)
What is the best stitch to repair a tear in jeans?
Don’t worry if you’re intimidated by sewing—the blanket stitch is your best friend for jean tears.
It prevents fraying while reinforcing edges.
Use matching thread and keep stitches small and tight for durability.
How to properly sew a hole in jeans?
Cut a patch slightly larger than the hole, place it underneath, and secure with pins.
Use matching thread to stitch around the edges with small, tight stitches, keeping knots hidden inside.
How to fix a rip in jeans without sewing?
You can fix rips using iron-on patches, fabric glue, or fusible interfacing.
Just clean the area, apply your chosen fix, and press firmly.
These no-sew methods work great for small tears, and are a complete solution for quick repairs.
How to sew a hole without it showing?
Choose thread that matches your denim’s exact color, place a patch underneath the hole, and use tiny whipstitches around the edges.
Keep your stitches small and tight for an invisible repair.
What type of needle should I use when sewing denim?
Denim needles break 70% more often than regular ones when sewn incorrectly. You’ll need a heavy-duty denim needle, size 90/14 to 100/18, designed specifically for thick fabrics to prevent skipped stitches and breakage.
Can you repair runs without removing jeans?
Yes, you can absolutely repair runs without taking your jeans off.
Simply slip a piece of cardboard inside the leg to create a stable work surface, then patch and stitch the run easily.
What thread weight works best for runs?
Heavy-duty polyester or nylon thread in weight 40-50 works perfectly for run repairs.
You’ll want something with stretch that matches your denim’s color closely – it’ll hold strong and blend seamlessly.
It will provide the necessary durability and appearance for the repair.
How do you prevent runs from spreading?
Catch runs early by reinforcing them with small, tight stitches around the edges.
Apply clear nail polish or fabric glue to stop fraying threads.
Don’t stretch the fabric while working—you’ll only make things worse, as this can lead to further fraying.
Should you pre-wash jeans before repairing runs?
Pre-washing your jeans before fixing runs is smart—it prevents shrinkage that could stress your repair work later.
Wash in warm water, then dry flat to avoid creating new weak spots around your mended area.
Do runs require different needles than holes?
Think of needles as tools with personalities—runs need a gentler touch. Use a fine, sharp needle (size 70/10 or 80/12) to avoid stressing the fabric, unlike tougher needles for patching holes.
Conclusion
Think of your repaired jeans as a story—you’ve patched up the plot and made it stronger than before.
Now that you know how to sew a run in jeans, you can tackle future mishaps with confidence.
Whether you’re adding a patch, reinforcing a tear, or experimenting with stitch patterns, the key is patience and precision.
With a little effort, your favorite pair will last longer, look amazing, and keep on being your go-to for everyday adventures.
- https://www.homedepot.com/p/1-8-in-x-4-ft-x-8-ft-Utility-Panel-Actual-0-106-in-x-48-in-x-96-in-833096/100543684
- https://whip-stitch.com/vintage-barbie-clothes-made-by-someone-elses-grandma/
- http://www.madamsew.com/
- https://blog.closetcorepatterns.com/just-make-it-already-how-to-boost-your-sewing-confidance/
- https://www.blackbirdfabrics.com/en-us/blogs/resources/get-to-know-the-new-denim-project


