This site is supported by our readers. We may earn a commission, at no cost to you, if you purchase through links.
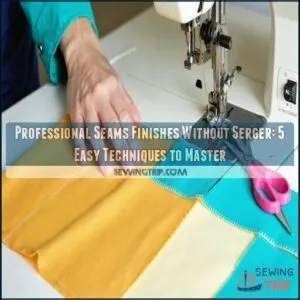
For a sturdier option, try a zigzag stitch; most sewing machines have this built-in, and it’s perfect for lightweight fabrics.
Want something truly polished? French seams are your go-to, hiding raw edges entirely (great for sheer fabrics).
Overcasting with a special foot mimics a serger, while bias-bound seams add a clean, refined touch. Each method has its charm, so pick what fits your fabric and style.
Ready to up your sewing game? There’s more to explore with these techniques!
Table Of Contents
Key Takeaways
- You don’t need a serger—simple tools like pinking shears or a zigzag stitch can keep your seams neat and fray-free.
- French seams and bias-bound seams give a polished, professional look, especially for lightweight or unlined fabrics.
- Adjust your sewing machine’s stitch settings and tension for smooth finishes, and always test on scrap fabric first.
- Pressing seams after each step and trimming excess fabric are essential for clean, durable results.
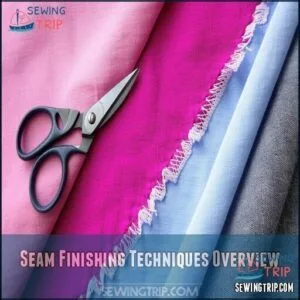
Seam Finishing Techniques Overview
You don’t need a fancy serger to get clean, professional-looking seams.
A fancy serger isn’t required—simple techniques can give your seams a clean, professional, and fray-free finish.
With a few simple techniques, like pinking shears or French seams, you can keep your projects neat and fray-free.
Pinking Shears Method
Pinking shears are a quick, beginner-friendly way to finish seams without a serger.
Pinking shears keep seams neat and fray-free with a simple zigzag cut—perfect for quick, no-fuss sewing projects!
Their zigzag edges reduce fabric fraying, making them perfect for medium-weight fabrics. Not all shear types work on delicate or stretchy materials, so test first!
For added edge durability, pair with other sewing techniques. They’re a great serger alternative when you need simple, effective seam finishes.
Zigzag Stitch Method
A zigzag stitch is a lifesaver when you’re skipping the serger.
Adjust your sewing machine’s stitch width and length for the fabric type—too tight, and it puckers; too loose, and it frays.
Keep tension settings balanced and use a sharp needle for smooth fabric feed.
This simple sewing technique creates clean seam finishes, perfect for quick, durable projects.
French Seams Method
If zigzag stitches are quick fixes, French seams are the VIP treatment. They’re perfect for durability and a clean finish on lightweight fabrics.
Here’s how to achieve professional sewing magic with French seams:
- Sew fabric wrong sides together.
- Trim seam allowance to reduce bulk.
- Press, fold right sides together.
- Sew again, enclosing raw edges.
- Voilà—enclosed seams, no fraying, professional sewing magic!
By following these steps, you’ll be able to create a clean finish on your lightweight fabrics with French seams.
Overcasting Foot Method
An overcasting foot is your secret weapon for clean seam finishes without a serger.
It works wonders on curved seams and tricky edges.
Use zigzag stitch settings, adjust fabric feed, and practice tension control for smooth results.
This foot type mimics professional serger alternatives, giving you polished seams with just your sewing machine.
Perfect for beginners aiming for pro-level finishes!
Hong Kong or Bound Seams Method
The Hong Kong seam, also called a bound edge finish, adds a polished touch to your projects.
By wrapping raw edges with bias tape, you’ll get clean finish seams that look professional inside and out. It’s perfect for unlined jackets or tricky curves.
Choose durable bias tape types, and practice corner techniques for sharp edges. Your fabric choice matters!
Choosing The Right Seam Finish
Picking the right seam finish can feel like choosing the perfect topping for your pizza—it depends on what you’re working with.
Think about your fabric, the look you want, and how much wear and tear the seams will face.
Fabric Compatibility Considerations
Choosing seam finishes depends on fabric types.
Lightweight fabrics can pucker if the weave density is loose, while heavyweights need durable finishes.
Woven fabrics fray easily, so securing fabric edges is key. Knits, with their stretch and knit stability, need flexibility.
Always test a small piece first—sewing without a serger means understanding your fabric’s quirks! For delicate materials, consider using French Seams.
Seam Finish Characteristics
When picking seam finishes, think about durability, fabric type, and aesthetics. Some finishes, like a flat felled seam, are tough but time-intensive.
Others, like a bias tape finish, shine on unlined garments. French seams? Gorgeous but tricky for alterations.
Here’s the breakdown:
- Durability and wear
- Fabric type impact
- Aesthetic considerations
- Cost effectiveness
- Alteration ease
Zigzag Seam Finish Applications
In the context of sewing without a serger, a zigzag finish is your go-to for quick edge protection.
This method works wonders on mid-weight fabrics, offering solid fabric stability.
Avoid using it on curved seams or lightweight materials, as they might pucker.
Adjust stitch density for knit fabrics, and you’ll have one of the easiest seam finishing methods mastered!
French Seam Finish Applications
French seams are perfect for lightweight fabrics like silk or chiffon, giving you a clean seam finish that’s both durable and professional.
They’re great for curved applications too, though watch for bulk on heavier materials.
With two stitches to encase raw edges, this method balances durability factors with aesthetic variations.
It’s a bit time-consuming, but totally worth it for a clean seam finish that’s both durable and professional.
Seam Finishing Methods Without a Serger
You don’t need a fancy serger to give your seams a clean, professional finish.
With a few simple techniques and tools you probably already have, you can keep those raw edges neat and fray-free!
Reorganized text with improved readability and a key phrase highlighted in bold.
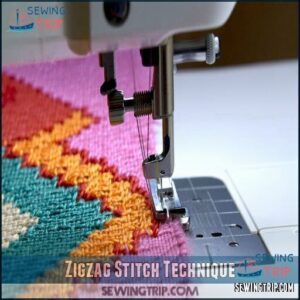
Zigzag Stitch Technique
A zigzag stitch is your go-to for sewing without a serger.
Adjust the stitch width and length to suit your woven fabrics—wider for durability, shorter for tight spots.
Keep tension settings balanced, and use a sharp needle type for clean results.
Let the fabric feed naturally to avoid puckering, and watch those raw edges vanish like magic!
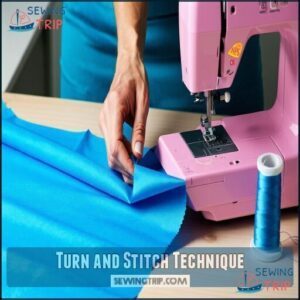
Turn and Stitch Technique
The turn and stitch technique is perfect for woven fabrics, especially when durability concerns arise.
Simply fold the raw edges under, press, and stitch them down—voilà, no fraying.
It works wonders on curved seams too, reducing bulk for a smoother finish.
Play around with stitch variations to match your project, and enjoy a polished, professional look every time.
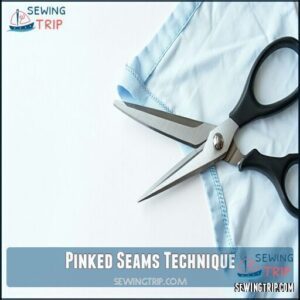
Pinked Seams Technique
Pinking shears are your best friend for quick, no-fuss seam finishes.
Their zigzag blades prevent raw edges from fraying, offering decent edge durability. Perfect for mid-weight fabrics, they’re great when pattern matching isn’t critical.
Keep those blades sharp—dull ones can snag! It’s an easy, beginner-friendly way to master sewing without a serger.
Fiskars shears provide precise cuts. Just snip and go!
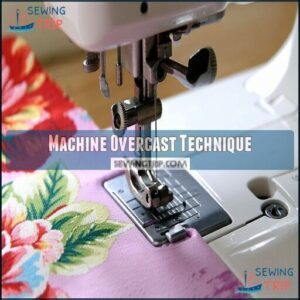
Machine Overcast Technique
Mastering the machine overcast technique is a game-changer for sewing without a serger.
Use an overcast foot to guide fabric edges, selecting a stitch setting that suits your material. Keep tension adjustments in check for smooth fabric feed control.
For tricky curved seams, go slow! This zigzag-like stitch prevents fraying, offering professional finishes with your sewing machine stitches, and is a key part of achieving a professional finish.
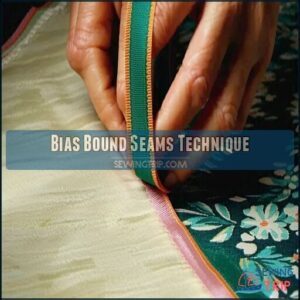
Bias Bound Seams Technique
If you’re ready to elevate your sewing game, bias bound seams are a game-changer.
Using bias tape, you’ll encase raw edges for a polished, couture look.
Choose bias tape types based on your fabric choice—lightweight for delicate fabrics, sturdier for thicker ones.
Practice curve binding and corner techniques for smooth, bound edges.
Think Hong Kong bound seam elegance, no serger required!
Tools and Materials for Seam Finishing
You don’t need a fancy serger to get professional-looking seams.
Having the right tools makes all the difference. Grab some pinking shears, a sewing machine with zigzag options, or even bias tape, and you’re ready to tackle those raw edges like a pro!
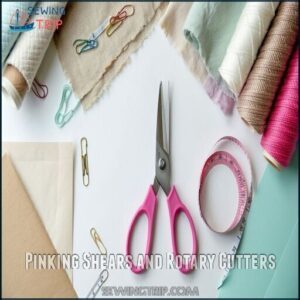
Pinking Shears and Rotary Cutters
If you’re sewing without a serger, pinking shears and a rotary cutter are lifesavers.
Pinking shears create zigzag edges, keeping raw edges from fraying—perfect for quick fixes.
Rotary cutters? They’re all about rotary precision, slicing cleanly through fabric types.
For best results, consider fabric preparation techniques before using pinking shears.
Choose ergonomic handles for comfort, and don’t skip blade maintenance.
These sewing tools make seam finishing simple and fuss-free!
Sewing Machines With Zigzag Capabilities
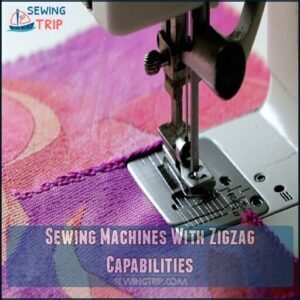
A zigzag stitch is your go-to for sewing without a serger.
Adjust your sewing machine settings for stitch width variations and tension adjustments. Check needle plate considerations to avoid fabric snags. Verify machine foot compatibility for smooth stitching.
Many sewers find success using zigzag sewing products for this technique.
- Use zigzag stitch settings for durability
- Test different sewing machine feet
- Experiment with tension adjustments
- Keep stitch width balanced
Overcasting Foot and Accessories
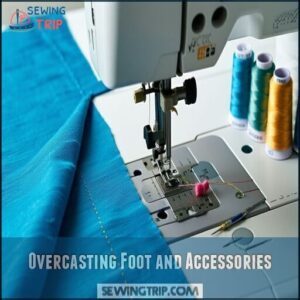
Using an overcasting foot is like having a mini serger on your sewing machine.
It’s perfect for sewing without a serger, giving raw edges a clean, professional look.
Adjust stitch settings and tension control for smooth fabric feed.
Pair it with a zig zag stitch for sturdy seams.
An overcasting foot purchase can greatly improve your seam finishing.
Don’t forget proper needle selection—different fabrics need different sewing machine feet!
Bias Tape and Interfacing Materials
Bias tape is your go-to for neat, bound edges, especially when sewing without a serger.
Choose from single or double-fold bias tape types, depending on your project.
Fusible interfacing adds structure, while non-fusible works for delicate fabrics.
Seam binding with bias tape hides raw edges beautifully. You can discover various bias tape options online.
Experiment with interfacing weights to match fabric thickness, ensuring a polished finish every time.
Seam Finish Characteristics and Applications
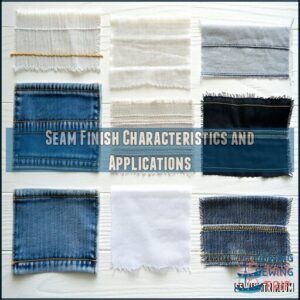
Picking the right seam finish isn’t just about looks—it’s about making your project last.
You’ll want to match the finish to your fabric and purpose, so your seams stay neat and strong.
Zig-zag Finish for Mid-weight Fabrics
When tackling midweight fabrics, a zig zag stitch is your go-to for fray prevention and fabric stability.
Adjust tension settings and stitch width for smooth results.
Here’s how to nail it:
- Choose a sharp needle for woven fabrics.
- Test on scraps to avoid fabric raveling.
- Keep edges aligned while sewing without a serger.
- Finish with consistent stitching.
For small projects, consider applying anti-fraying liquid for a clean finish.
French Seams for Professional Finishes
French seams give your sewing projects a polished, professional finish. They’re perfect for lightweight fabrics but can be tricky for frequent alterations due to the enclosed edges.
While the time investment is higher, their durability and couture applications make them worth it. Think of them as the “slow-cooked meal” of sewing—effortful but rewarding!
| Feature | Benefit | Challenge |
|---|---|---|
| French Seam Durability | Long-lasting, clean edges | Time-consuming |
| Fabric Suitability | Ideal for lightweight fabrics | Limited for thick fabrics |
| Alteration Challenges | Neat finish, hard to adjust | Less practical for changes |
Flat Felled Seams for Heavy-duty Garments
Flat felled seams are your go-to for garment durability and a professional finish. They’re perfect for heavy-duty projects like jeans or jackets.
Here’s why they shine:
- Seam Strength: Encased edges prevent fraying.
- Fabric Thickness: Handles medium to heavyweight woven fabrics beautifully.
- Topstitching Options: Add a sporty or polished look.
- Durability Testing: Ideal for industrial applications or everyday wear.
Try it—you’ll love the results!
Bias Bound Seams for Unlined Jackets
A bias bound seam is your go-to for unlined jackets when you want a clean, durable finish. It’s like giving your seams a stylish jacket of their own! Use bias tape to encase raw edges, perfect for decorative bias binding or jacket lining alternatives.
Master corner mitering techniques for those tricky spots. Here’s a quick comparison:
| Feature | Benefit | Tools Needed | Tips |
|---|---|---|---|
| Durable seam construction | Prevents fraying | Bias tape, scissors | Test fabric weight for tape width |
| Decorative bias binding | Adds visual interest | Bias tape maker | Match tape to garment color |
| Jacket lining alternatives | No lining required | Sewing machine | Press seams for a polished look |
| Corner mitering techniques | Neat, precise corners | Pins, iron | Practice on scrap fabric first |
The key to a successful bias bound seam is to ensure that the seam construction is durable and the bias binding is decorative, which can be achieved by using the right tools and following the provided tips.
Turn and Stitch for Simple Finishes
Turned and stitched seams are a lifesaver when sewing without a serger. By folding the raw edges under and stitching them down, you get a clean, simple finish.
It’s great for reducing bulk, especially on curved seams.
- **Durability concerns?
** Use a shorter stitch length for stronger seams.
- **Fabric choice matters.
** Lightweight fabrics work best.
- Seam allowance tip: Press carefully for neat edges.
Mastering Professional Seam Finishes
You don’t need a fancy serger to make your seams look clean and professional.
With a little practice and the right techniques, you’ll be sewing like a pro in no time!
Tips for Achieving Neat Seams
Neat seams start with accurate cutting—wobbly edges make sewing harder.
Keep your seam allowance even by marking it lightly beforehand.
Master consistent stitching by practicing on scrap fabric, and check your thread tension to avoid puckering.
Don’t skip pressing techniques; a quick press after each step works wonders.
Handle fabric gently, especially for delicate projects like a french seam or flat felled seam.
Common Mistakes to Avoid
Skipping pressing or trimming excess can mess up your seams fast.
Watch for these common mistakes:
- Fabric Choice: Picking the wrong fabric can lead to puckering.
- Tension Issues: Uneven stitching? Check your machine tension.
- Stitch Length: Too short, and your fabric might bunch.
- Pressing Mistakes: Always press seams flat before sewing.
Simple fixes, big payoff!
Practice Exercises for Uniform Finishes
Practice makes perfect, especially when sewing without a serger!
Start with scrap fabric to master stitch consistency and tension control.
Practice straight seams, then tackle curve practice and cornering techniques.
Try a french seam for precision or work on keeping your seam allowance even.
These sewing tips will sharpen your fabric handling and boost your sewing skills in no time!
Troubleshooting Common Seam Finishing Issues
If your seams look messy, don’t panic—it happens to everyone!
For fraying prevention, trim raw edges neatly or use pinking shears.
Puckering solutions? Loosen your sewing machine tension.
Bulk reduction is easy: trim seam allowance layers evenly.
Stitch looping? Check thread tension and rethread.
Uneven edges? Slow down and guide fabric steadily.
These sewing tips save headaches!
Advanced Seam Finishing Techniques
Let’s level up! Advanced techniques like Couture Seams and Bound Edge Variations bring a high-end touch.
Use bias tape for a mock serged edge or try Sergerless Rolled Hems for delicate fabrics.
Flatlock Alternatives and Advanced Facings add strength and style. Mastering a french seam with precise seam allowance transforms any project into a professional finish.
Frequently Asked Questions (FAQs)
How can I finish seams on stretchy fabrics?
For stretchy fabrics, use a zigzag stitch or a stretch stitch to finish seams.
These stitches move with the fabric, preventing breaks.
Pair with an overcasting foot for a clean, professional look.
What are alternatives to bias tape for binding?
You can swap bias tape for fabric strips cut on the grain or knit binding for stretchy fabrics.
Ribbon works too, but avoid stiff ones.
Just make sure your alternative suits the fabric’s weight and stretch!
Can hand sewing achieve professional seam finishes?
You might think hand sewing can’t look professional, but it absolutely can!
Techniques like French seams or a clean backstitch create polished finishes.
Just take your time, use fine thread, and practice patience.
How do I prevent puckering on delicate fabrics?
Use a fine needle, lightweight thread, and a smaller stitch length to prevent puckering.
Hold the fabric taut but don’t stretch it.
Test on scraps first—your fabric’s quirks are like its personality!
What is the best seam finish for leather?
For leather, a clean edge is key.
Try a glued seam finish using leather adhesive, then trim excess with a rotary cutter.
It’s simple, strong, and avoids the bulk stitching can create.
Conclusion
Think of your seams as the backbone of your sewing projects—strong, polished, and ready to shine.
Mastering professional seam finishes without a serger isn’t just doable; it’s fun!
Whether you’re snipping with pinking shears, zigzagging your way to fray-free edges, or creating elegant French seams, each technique adds a unique touch.
Experiment, practice, and match your finish to your fabric.
With these tricks up your sleeve, your sewing game’s about to level up big time!

