This site is supported by our readers. We may earn a commission, at no cost to you, if you purchase through links.

Pin the fabric layers together, matching the marked lines exactly—this alignment makes or breaks your dart’s success.
When you’re ready to sew, start from the wide end and gradually taper to nothing at the point, creating that smooth progression that transforms flat fabric into body-hugging curves.
Don’t rush the pressing step afterward; it’s what creates those crisp, professional-looking lines that separate homemade from haute couture.
The devil’s in the details, and those details will revolutionize your garment’s fit.
Table Of Contents
Key Takeaways
- Mark dart legs precisely using tailor’s chalk or tracing paper to outline from the wide base to the pointed tip—accurate marking makes or breaks your dart’s success.
- Pin fabric layers together with pins perpendicular to marked lines, matching dart legs exactly to prevent shifting during sewing and ensure professional alignment.
- Sew from wide end to point with a gradual taper, starting with standard stitch length and reducing to 1.5mm near the apex, then tie off threads instead of backstitching to avoid bulk.
- Press darts properly after clipping close to the seam line—press horizontal darts downward and vertical ones toward the center using appropriate heat for your fabric type to create crisp, professional lines.
What Are Darts and Why Are They Important?
Darts are triangular tucks sewn into fabric that transform flat material into three-dimensional shapes that fit your body’s curves.
They’re essential for creating well-fitted garments that don’t look boxy or loose, especially around the bust, waist, and hips where your body naturally curves.
Definition and Purpose of Darts
Darts are the secret weapon of garment construction, transforming flat fabric into three-dimensional shapes that hug your body perfectly.
Transform flat fabric into perfectly fitted curves with these strategic triangular tucks that make your garments hug every contour.
These strategic folds create custom curves at your bust, waist, and back, mastering the art of fabric manipulation.
Think of dart basics as your foundation in sewing fundamentals – they’re essential tailoring tools that prevent baggy, ill-fitting clothes.
Whether you’re learning dart marking techniques or exploring advanced garment shaping methods, understanding darts in sewing opens doors to professional-quality results that’ll make you feel like a tailoring wizard.
Master darts and transform fabric into perfectly fitted garments that hug your curves like magic.
Importance of Darts in Garment Construction
When you’re crafting a garment, think of darts as your secret weapon for achieving that perfect fit.
These essential sewing techniques transform flat fabric into three-dimensional shapes that hug your body’s curves beautifully.
Without proper dart manipulation during garment construction, you’ll end up with boxy, ill-fitting clothes that lack professional polish.
Mastering dart basics guarantees your fabric selection works harmoniously with your body’s contours, creating the customized look you’re after.
Gathering Supplies for Dart Sewing
Before you start marking and sewing your darts, you’ll need to gather the right tools and materials for the job.
Having quality supplies on hand makes the difference between professional-looking results and frustrating do-overs that’ll have you questioning your sanity.
Essential Tools for Dart Sewing
Setting up your dart sewing workspace requires gathering specific marking tools and equipment. You’ll need tailors chalk or fabric-safe markers for clear, removable lines on your fabric.
Perfect dart placement starts with the right tools—no shortcuts, no guesswork, just precision that transforms flat fabric into fitted perfection.
A tracing wheel paired with carbon paper creates precise dotted guidelines that won’t damage delicate materials. Your measuring rulers guarantee accurate dart placement, while quality pins secure fabric layers during construction.
Sewing machines with adjustable stitch lengths handle various dart types effectively. Ironing boards provide flat surfaces for initial fabric preparation, though you’ll want pressing tools for final shaping.
Smart pinning techniques prevent fabric shifting – place pins perpendicular to your marked lines for best results. Having these tools ready transforms dart construction from guesswork into precision crafting.
For superior results, using proper tailors chalk tools is essential for creating clear markings, which is a key part of dart construction and requires quality pins and a good tracing wheel to ensure accurate dart placement and clear markings.
Choosing The Right Fabric for Dart Sewing
Your fabric selection sets the foundation for dart success.
Woven fabrics like cotton and linen excel at dart sewing because they hold their shape without stretching out of place.
Weight consideration matters too—medium-weight fabrics provide structure while lightweight ones need gentler handling.
Stretch factors eliminate dart necessity in knits since they naturally conform to curves.
Fiber choice affects texture impact on marking and pressing techniques.
To master dart sewing, understanding sewing darts is essential for achieving perfect garment shaping with the right fabric selection.
Marking The Dart Legs
Accurate dart marking transforms flat fabric into perfectly fitted garments that hug your body’s curves.
You’ll need to transfer those pattern lines to your fabric using either tailor’s chalk or tracing paper—both methods work like magic when done right.
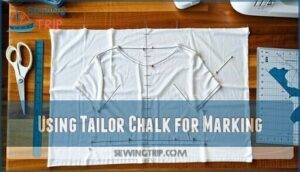
Using Tailor Chalk for Marking
After gathering your supplies, you’ll reach for tailor chalk as your trusted marking tool. This waxy or clay-based tool creates sharp, precise lines that guide your sewing with confidence. Start by testing the chalk on a fabric scrap to verify it removes easily without staining.
Clean and iron your fabric before marking to avoid distortion. Secure your pattern pieces with pins, then mark the dart apex with a small dot using contrasting chalk color for visibility. Connect the dart legs with a ruler, applying light pressure to create clear but removable lines. Work on the fabric’s wrong side to keep marks hidden.
- Watch your fabric transform from flat to three-dimensional with each precise mark
- Feel the satisfaction of creating perfectly aligned dart legs that shape your garment beautifully
- Experience the confidence that comes from mastering professional marking techniques
For thick fabrics, stabilize layers before marking to prevent shifting. Sharp chalk pencils work best for detailed work, while chalk sticks handle general marking tasks efficiently. Using precise sewing pattern cutting techniques is essential for achieving professional results.
Using Tracing Paper for Marking
When you need more precision than chalk offers, tracing paper becomes your go-to marking tool.
This translucent paper slips between your pattern and fabric, creating dotted lines that won’t fade or smudge. Place the tracing paper with its colored side facing your fabric’s wrong side.
Position your pattern piece on top, then roll the tracing wheel firmly along each dart leg. The wheel’s teeth transfer precise marks through the paper onto your fabric.
You’ll get clean, accurate lines that guide your stitching perfectly. This technique works especially well on smooth fabrics where chalk might brush off.
Always test on a fabric scrap first to confirm the marks will show clearly without bleeding through to the right side. For the best results, use high quality tracing paper products to achieve precise markings.
Pinning The Darts
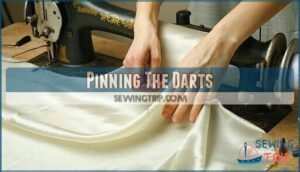
Once you’ve marked your dart legs, you’ll need to fold and pin them precisely before sewing.
Proper pinning prevents fabric from shifting and guarantees your darts create smooth, professional-looking curves in your garment.
Proper Placement and Alignment of Pins
Pin placement determines your dart’s success from the start.
Place pins perpendicular to dart legs, spacing them every half-inch along traced lines.
This pinning technique maintains fabric tension and prevents shifting during sewing.
Position pins with points facing the dart apex for easy removal while stitching.
Proper dart alignment requires matching dart legs precisely before pinning.
Your sewing accuracy depends on this pinning precision and careful dart placement.
To achieve professional results, understanding the pinning tools is essential for mastering various sewing techniques, which involves complete concepts and separate lines of thought, ultimately leading to successful outcomes.
Securing Dart Legs for Sewing Accuracy
Once you’ve aligned your dart legs properly, securing them becomes your next mission for achieving flawless seam accuracy. Think of this step as locking in your precision—one slip here and your entire dart can go sideways.
Here’s how to lock down those dart legs like a pro:
- Dart Alignment Check: Double-check that your dart leg alignment matches perfectly before pinning. Misaligned legs create wonky seams that’ll haunt your finished garment.
- Pin Placement Strategy: Insert pins perpendicular to your marked dart lines, spacing them about 1-2 inches apart. This pin placement prevents fabric shifting and maintains fabric tension during sewing.
- Dart Leg Security Test: Give your pinned dart a gentle tug to confirm it won’t budge. Properly secured dart legs won’t shift under normal sewing machine pressure.
Remember, pinning precision directly impacts your stitch control. When you’ve mastered dart leg security, you’re setting yourself up for professional-looking results. These dart sewing techniques might seem small, but they’re the foundation of accurate dart construction.
Sewing The Darts
Now you’re ready to transform those carefully marked dart legs into perfectly shaped seams that bring your garment to life.
The key is starting at the fabric edge and stitching toward the point with confidence—your pins have already done the hard work of keeping everything aligned.
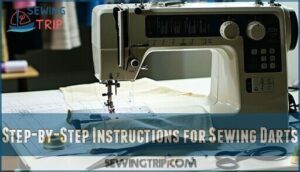
Step-by-Step Instructions for Sewing Darts
Now you’re ready to sew darts with precision and confidence. Start by folding dart folds along marked lines, matching dart legs exactly. Secure with pins perpendicular to the seam line.
| Step | Action | Sewing Tips |
|---|---|---|
| 1 | Start sewing from wide end | Use 2.5mm stitch length |
| 2 | Maintain steady speed | Keep fabric taut but not stretched |
| 3 | Reduce stitch length near apex | Switch to 1.5mm for last inch |
| 4 | Curve stitching at dart point | Follow fabric’s natural curve |
| 5 | Tie off threads at apex | Avoid backstitching to prevent bulk |
These sewing techniques guarantee smooth dart manipulation across different fabric types. Your dart marking translates into professional results through careful stitching and proper fabric selection, ensuring a successful and confident sewing experience.
Sewing Techniques for Different Fabric Types
Different fabric types require specific sewing techniques for perfect dart construction. Your approach depends on the fabric’s weight, texture, and stretch properties.
Woven Fabrics: Use sharp needles and standard stitch length (2.5mm) for cotton and linen. For Denim Darts, increase needle size to accommodate thickness and backstitch securely at dart beginnings.
Knit Fabrics: Knit Darting requires ballpoint needles and slightly longer stitches to prevent skipped stitches. Stretch as you sew to maintain fabric elasticity.
Delicate Materials: Silk Darts need fine needles and shortened stitch length (1.5-2.0mm). Use tissue paper underneath for stability during sewing.
Specialty Fabrics: Leather Darts require leather needles and clips instead of pins. Velvet Darts need careful pressing with minimal heat to avoid crushing the pile.
Here are four key sewing techniques for beginners:
- Test your stitch settings on fabric scraps before sewing actual darts
- Adjust thread tension based on fabric weight and stretch
- Use appropriate needle types for each fabric category
- Practice dart sewing techniques** on sample pieces first
Marking darts accurately guarantees professional results regardless of fabric type. Mastering sewing dart tools is essential for achieving precise and clean dart constructions.
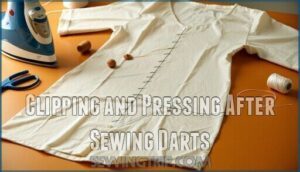
Clipping and Pressing After Sewing Darts
Once you’ve sewn your darts, you’ll need to clip and press them to achieve professional-looking results.
These finishing steps transform your sewn darts from bulky seams into smooth, shaped elements that enhance your garment’s fit and appearance.
Clipping Dart Legs for Smooth Finishing
After dart sewing, clipping dart legs guarantees smooth edges and professional finishing.
Cut close to your stitching line—about 1/8 inch away—without cutting through your seam.
This dart clipping technique prevents fabric bulk and creates clean dart shaping.
Proper fabric cutting here prevents fraying and maintains your garment’s integrity.
Your dart legs will lay flat, creating the smooth contours you’ve worked hard to achieve.
Mastering the art of sewing darts techniques is essential for achieving professional-looking results in garment construction.
| Dart Type | Clipping Distance | Fabric Consideration |
|---|---|---|
| Single Dart | 1/8 inch from seam | Light fabrics need minimal clipping |
| Double Dart | 1/4 inch from center | Heavy fabrics require more trimming |
| Curved Dart | Graduated clips | Stretch fabrics need careful handling |
| Deep Dart | Multiple small clips | Delicate fabrics use pinking shears |
The provided sewing darts techniques is a valuable resource for further learning.
It offers detailed guidance on how to mark and sew darts for a professional finish.
By following these techniques and considering the type of dart and fabric, you can achieve a high-quality garment with smooth contours and clean dart shaping.
Pressing Darts to Create Clean Lines
After clipping, proper pressing transforms your darts into professional-looking seams.
Heat your iron to the fabric’s recommended temperature and press from the dart’s base toward the point.
Use a pressing ham or rolled towel underneath curved areas for smooth fabric shaping.
Press horizontal darts downward and vertical ones toward the center to achieve a polished finish.
These pressing techniques guarantee your garment construction achieves that finished finish you’re after.
Sewing Double Darts and Variations
Double darts, also known as fisheye darts, create enhanced shaping by tapering from both ends toward a center point.
You’ll use these sophisticated darts when you need maximum contouring around curved areas like the waist and bust.
Sewing Double Darts for Added Shape
Once you’ve mastered pressing and clipping, double darts reveal advanced shaping possibilities.
These fisheye darts create sophisticated contours by tapering at both ends, perfect for asymmetrical sewing projects.
You’ll mark two dart points instead of one, then sew from the center outward to each end.
Double dart placement requires careful dart manipulation – space them evenly for balanced shaping.
This dart variation transforms flat fabric into sculpted silhouettes, giving you professional-level control over your garment’s three-dimensional form.
Exploring Alternative Dart Designs
You can break free from traditional dart patterns by experimenting with unconventional designs that add personality to your garments.
French darts create elegant diagonal lines, while fisheye darts offer dramatic double-pointed shaping.
- Asymmetrical darts create striking visual interest in modern designs
- Curved darts follow natural body contours for superior fit
- Decorative dart manipulation transforms functional elements into design features.
These alternative dart designs and dart manipulation ideas expand your fabric shaping possibilities beyond basic techniques.
Frequently Asked Questions (FAQs)
How do you fix puckered darts?
Picture fabric bunching like a frustrated accordion—you’ve hit a snag.
Rip out the stitches, reduce stitch length to 5 near the apex, and tie thread tails instead of backstitching.
Press over a ham for smooth curves.
What causes darts to pull or distort?
Darts pull or distort when you’ve got uneven tension, incorrect stitch length, or poor pressing technique.
You’ll also see distortion from sewing too fast, using the wrong thread weight, or not properly matching your dart legs during construction, which can be caused by several factors including uneven tension.
Can you move dart placement on patterns?
Yes, you can move dart placement on patterns.
Most patterns allow shifting darts within reason – typically 1-2 inches from original position.
However, major relocations may require redrafting the entire pattern piece to maintain proper fit and silhouette.
How do you sew darts in stretch fabrics?
Use a ballpoint needle and slightly longer stitch length when sewing stretch fabric darts.
Don’t pull the fabric while stitching—let the machine’s feed dogs do the work.
Press gently with steam instead of direct heat.
Whats the difference between curved and straight darts?
Straight darts create clean, angular lines from fabric edge to point, while curved darts follow your body’s natural contours with a gentle arc, offering more flattering shaping for fitted garments.
Conclusion
Despite what you might think, learning how to mark and sew darts isn’t rocket science—it’s actually quite straightforward once you master the basics.
You’ve now got all the tools and techniques needed to create perfectly shaped garments that fit like they were custom-made for you.
Remember, precision in marking and patience in sewing are your best friends here.
Don’t get discouraged if your first few attempts aren’t perfect; even experienced seamstresses had to practice.
With these fundamentals under your belt, you’ll transform flat fabric into beautifully crafted pieces that enhance your figure and boost your confidence in no time.


