This site is supported by our readers. We may earn a commission, at no cost to you, if you purchase through links.

Start by threading your needle with matching thread, then position the torn edges together. For clean rips, use a simple running stitch along the tear line, keeping stitches small and even.
When dealing with holes, you’ll need to patch from behind or use a darning technique to weave new threads across the gap. The key is matching your thread color and maintaining consistent tension—too tight and you’ll pucker the fabric, too loose and it won’t hold.
With practice, you’ll master invisible repairs that make tears disappear like magic, plus discover specialized techniques for different fabric types and damage patterns.
Table Of Contents
Key Takeaways
- You’ll need to assess your damage first – determine if it’s a clean rip, hole, or seam tear, since each requires different repair techniques and tools.
- Thread selection and tension control are crucial – match your thread color precisely to the fabric and maintain consistent tension to prevent puckering or loose stitches.
- Use the right stitch for each situation – the backstitch provides the strongest hold for seams, while the running stitch works for basic repairs and the ladder stitch creates invisible mends.
- Proper preparation prevents failed repairs – trim loose threads, align fabric edges correctly, and extend your stitching beyond the tear endpoints to reinforce weak spots.
How to Sew a Rip Tutorial
Don’t let a torn favorite shirt become closet clutter when you can master these essential fabric repair techniques. Learning how to rip sew transforms you from helpless to handy in minutes.
Master these essential fabric repair techniques and transform from helpless to handy in minutes.
First, assess your damage. Clean rips with intact edges need different sewing techniques than holes requiring patches. Gather your sewing tools: sharp scissors, matching thread, sturdy needles, and pins. Thread selection matters—cotton thread for cotton fabrics, polyester for synthetics.
For basic rip fix methods, start by trimming loose threads and pressing the area flat. Position torn edges together, then secure with pins. Use a straight stitch for machine repairs or backstitch for hand sewing. Reinforce weak spots with fusible interfacing before stitching.
These sewing basics work for most tear repair fabric situations. Practice on scraps first to perfect your technique. With proper rip prevention through quality thread and correct needle size, you’ll extend your clothing’s lifespan substantially. Master these fundamentals, and you’ll tackle any fabric emergency with confidence.
How to Sew a Clean Rip
Clean rips are the easiest tears to fix because the fabric edges can be brought together without any missing pieces.
Clean rips offer the perfect starting point for beginners to master essential mending skills.
You’ll simply align the torn edges and stitch them back together using either machine or hand sewing techniques, which makes it a relatively straightforward process to repair clean rips.
Machine Stitching
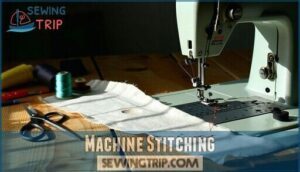
Mastering machine stitching transforms torn garments into strengthened masterpieces. Your sewing machine becomes a precision tool when you understand proper techniques for clean rip repairs.
Start by adjusting your machine settings for ideal control. Set a moderate sewing speed to maintain accuracy while traversing the damaged area. Thread tension should create balanced stitches without puckering—too tight causes fabric distortion, too loose creates unstable seams.
Follow this systematic approach for professional results:
- Stitch Length Adjustment: Use shorter stitches (1.5-2mm) for stronger reinforcement around the rip
- Fabric Feed Control: Engage your machine’s even feed mechanism to prevent stretching during repair
- Zigzag Stitch Application: Apply over the rip edges to seal fraying and add durability
- Straight Stitch Reinforcement: Run parallel lines along both sides of the tear for added strength
- Seam Ripper Use: Clean any imperfect stitches immediately for flawless finishing
Multiple passes with different sewing machine techniques create virtually invisible repairs that withstand daily wear. For more delicate or complex tears, consider using seam repair techniques to guarantee a lasting fix.
Hand Stitching
While machine stitching offers speed, hand stitching provides precision and control for delicate repairs.
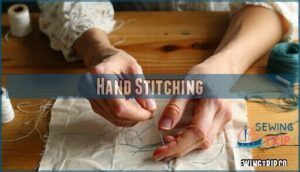
Thread your needle with doubled thread, matching your fabric color, and tie a secure knot.
Begin at the rip’s base with small, even stitches using running stitch or backstitch for stronger hold.
Keep stitch tension consistent to prevent puckering.
A thimble protects your finger during extended work.
Proper fabric prep includes trimming loose threads and stabilizing the area.
Use backstitch for high-stress areas, as it creates the most durable invisible stitch.
Practice creates smooth, professional-looking mends.
For successful hand stitching, selecting the right sewing needle types is essential to achieve the desired results.
How to Sew a Hole
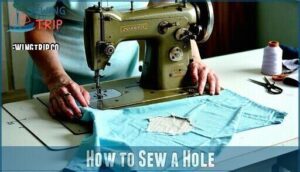
A torn garment doesn’t have to mean goodbye forever. When tackling hole repair, start by pressing the damaged area flat and trimming any loose threads without enlarging the opening. Choose a fabric patch that matches your garment’s weight, color, and texture for the best results.
Cut your patch slightly larger than the hole, then position it underneath the damaged area. Pin or baste it securely in place, ensuring any patterns align perfectly. For machine sewing, use a zigzag or straight stitch around the hole’s edges. Hand sewers can opt for running stitch, backstitch, or blanket stitch depending on fabric type and desired finish.
Your thread choice matters – select colors that blend seamlessly with your fabric. Once stitching is complete, trim excess patch material from the back to prevent bulk. Press the repaired area for a professional finish. To achieve a nearly invisible repair, consider using fusible web techniques.
Key hole repair tips:
- Match patch fabric weight and type to original garment
- Trim patch close to stitching to avoid bulk
- Secure knots properly for lasting repairs
How to Sew a Rip in a Clothing Seam
Clothing seam rips happen when fabric pulls apart at stitched joints. Turn your garment inside out and align the frayed edges – this prevents 90% of repair visibility issues. Match your thread selection to the fabric color for seamless results.
Here’s your seam repair roadmap:
- Pin from center outward – keeps fabric straight during mending
- Choose backstitch for durability – 20% stronger than running stitch
- Extend stitching 1-2 cm beyond the rip – reinforces weak spots
- Press with iron after sewing – flattens stitches and reduces bulk
- Double-knot thread ends – prevents 90% of unraveling incidents
Use appropriate sewing tools: mid-size needles for heavy fabrics, fine needles for delicate materials. Your stitch types matter – backstitch offers superior hold for high-stress seams, while ladder stitch provides invisible finishing. This fabric seam repair technique works perfectly for torn seams in jackets, pants, and shirts.
How to Sew a Rip in a Toy Seam
Beloved stuffed animals and playthings deserve careful attention when their seams split from enthusiastic play. Toy seam repair requires specific techniques that preserve both strength and appearance while accommodating different fabric selection needs.
Thread choices matter substantially for lasting repairs. Match your thread color closely to the original fabric, and consider using slightly stronger thread for high-stress areas. Quality sewing tools including sharp needles and good scissors guarantee clean work.
Invisible stitches create professional-looking repairs:
- Ladder stitch – Creates nearly invisible seams that mimic original construction
- Whip stitch – Provides extra strength for active toys that endure rough handling
- Slip stitch – Perfect for delicate materials like fur without damaging fragile fibers
- Reinforcement stitching – Add extra support at joints and high-tension stress points
These sewing rip repair techniques help you mend torn fabric effectively. When you’re ready to fabric tear fix those cherished toys, remember that proper sewing torn seams preserves memories while teaching valuable skills.
Tips for Sewing Rips
Success hinges on mastering these fundamental repair principles. When approaching sewing rip repair, your fabric preparation sets the foundation for invisible mending. Start with thorough rip assessment to determine the best approach for each tear type.
Having a complete sewing kit is essential for any sewing project.
Here are five essential tips for flawless repairs:
- Thread selection matters – Match your thread color precisely to reduce visible repair lines by 90%
- Choose proper sewing tools – Sharp needles sized for your fabric prevent additional fraying
- Master stitch techniques – Backstitch provides nearly invisible seam repairs while blanket stitch works for 70% of casual projects
- Overlap stitches beyond tear endpoints – Extend 0.5-1 cm past damage to increase longevity by 35%
- Double-knot at start and finish – Secure your work to prevent unraveling
When you mend torn fabric or fix torn seams, remember that gentle pressure prevents puckering while maintaining structural integrity for lasting results.
Common Mistakes to Avoid When Sewing Rips
Several costly mistakes can derail your tear sewing repair efforts.
Poor planning leads to frustration and wasted materials when you rush into repairs without proper assessment.
| Common Mistake | Quick Fix |
|---|---|
| Wrong needle size for fabric | Match needle to fabric weight |
| Skipping fabric pre-wash | Always pre-wash to prevent fabric shrinkage |
| Ignoring thread tension settings | Test stitch consistency on scraps first |
You’ll face needle breakage if you sew too fast over thick seams.
Maintain steady sewing speed for better control.
Poor stitch consistency happens when you don’t backstitch at seam ends—your repairs will unravel quickly.
Master these sewing repair techniques: align fabric grain properly, use quality interfacing, and press seams before stitching.
When learning how to rip sew effectively, remember that patience beats speed every time.
Your fabric tear repair will last longer with proper preparation.
Frequently Asked Questions (FAQs)
How do you sew a rip?
First, assess your rip type: clean, open hole, or seam tear.
Match thread color to fabric. Use appropriate needle thickness.
Secure loose threads, align fabric edges, and stitch using straight or backstitch technique.
Tie off securely.
How do you sew a tear rip?
Unlike small holes that beg for patches, tear rips demand decisive action.
First, trim any frayed edges clean. Next, align the torn fabric pieces perfectly together.
Then, reinforce with interfacing if needed. Finally, stitch using a straight or zig-zag stitch, securing with backstitches at each end.
Can you sew a rip on a seam?
Yes, you can definitely sew a rip on a seam.
Turn the garment inside out, align the torn edges, and stitch along the original seam line using a backstitch or straight stitch.
Then press flat.
How do you sew a hole Rip?
You’ll need to tidy the hole first, then select an appropriate patch that matches your fabric. Position it carefully, stitch around the edges, and trim excess.
How do you sew a toy seam Rip?
Unlike regular fabric tears, toy seam rips demand double thread and inside-out access.
Insert your needle from the toy’s interior, use cross-stitch technique across the gap, then pull tight to close.
Apply invisible stitching to secure the repair seamlessly.
How do you mend a ripped seam?
Turn your item inside out, locate the opened seam, and stitch along the original seam line using a backstitch or running stitch. Reinforce with double thread for durability.
How do I pick the right needle for the material I’m sewing?
Choose thicker needles for heavy fabrics like denim, thinner ones for delicate materials like silk. Check needle packaging for fabric recommendations—universal needles work for most projects.
Is ripstop easy to sew?
Ripstop fabric can be tricky to sew due to its slippery texture and tendency to pucker. You’ll need sharp needles, quality thread, and slower stitching speeds for best results.
What fabrics are hardest to repair?
Like battling a hydra, certain fabrics resist your repair efforts with surprising stubbornness.
You’ll find silk, leather, and stretchy knits most challenging—they fray, tear further, or won’t hold stitches properly, demanding specialized techniques beyond basic mending skills.
Can you sew rips in leather?
Yes, you can sew leather rips, but it’s trickier than fabric.
Use heavy-duty needles, strong thread like polyester or nylon, and leather-specific techniques.
Small tears work best—larger holes need patches.
Conclusion
Mastering how to rip sew turns you into a fabric hero, rescuing garments from the donation pile with confidence.
You’ve learned essential techniques for clean tears, holes, and seam repairs using both hand and machine methods.
Remember to match your thread, maintain proper tension, and choose the right stitch for each situation.
Practice these skills regularly—they’ll save you money and extend your clothing’s lifespan.
With patience and these proven methods, you’ll transform ripped items into perfectly restored pieces every time.
- https://www.wawak.com/cutting-measuring/cutting/seam-rippers/
- https://www.target.com/p/fiskars-seam-ripper-and-tape-measure/-/A-81535758
- https://www.reddit.com/r/sewing/comments/rh9vt8/what_are_your_sewing_mistakes/
- https://www.instructables.com/The-Best-Way-to-Rip-Out-Stitches/
- https://thecraftyquilter.com/2020/04/quick-seam-ripper-technique-and-video/


