This site is supported by our readers. We may earn a commission, at no cost to you, if you purchase through links.
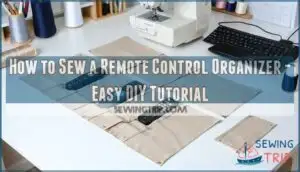
Cut smaller pocket pieces—try 10"x6"—and hem the top edges. Layer pockets on the main fabric, aligning bottoms, and stitch vertical lines to form compartments.
Place right sides together, sew around the edges, and turn right side out. Add binding tape for a neat finish. For extra grip, attach gripper fabric to the back.
Suddenly, your remotes aren’t playing hide-and-seek anymore. Curious about customizing pockets or adding flair? There’s more to organizing your living room than meets the eye.
Table Of Contents
- Key Takeaways
- Getting Started: Materials and Tools Needed
- Cutting The Fabric and Preparing The Binding
- Sewing The Pocket for The Remote Controls
- Attaching The Pocket to The Main Fabric Piece
- Adding The Gripper Fabric for Stability
- Sewing The Binding Onto The Remote Control Organizer
- Optional: Personalizing and Customizing The Organizer
- Tips for Sewing Success
- Enjoying Your Handmade Remote Control Organizer
- Frequently Asked Questions (FAQs)
- Conclusion
Key Takeaways
- You’ll need basic materials – Cut two 18"x10" cotton fabric rectangles, add interfacing for sturdiness, and gather mesh fabric for see-through compartments that let you spot remotes instantly.
- Create functional pockets – Hem smaller pocket pieces (10"x6"), layer them on the main fabric, and stitch vertical lines to form separate compartments that prevent remotes from bunching together.
- Add stability with gripper fabric – Attach non-slip gripper material to the back so your organizer won’t slide around on furniture surfaces, transforming it from a simple caddy into a professional-grade solution.
- Finish professionally with binding – Sew bias binding around all edges for a polished look, and press seams between each step to create crisp edges that elevate your organizer from homemade to handcrafted quality.
Getting Started: Materials and Tools Needed
Before diving into this project, gather your fabric selection and sewing tools like a craftsperson preparing for their masterpiece. You’ll need sturdy materials that can handle daily use and frequent handling.
Start with your fabric selection: choose medium-weight cotton, canvas, or home décor fabric for durability. You’ll need half a yard for the main piece and quarter yard for binding. Don’t forget foam stabilizer – this flexible backing gives your remote control holder structure and padding.
Quality fabric selection sets the foundation for a remote organizer that withstands daily family life.
Mesh options work perfectly for creating see-through compartments that let you spot your remotes instantly. Essential sewing supplies include matching thread, sharp fabric scissors, and measuring tape for precise cuts.
A rotary cutter and cutting mat make quick work of straight lines. Remember to get fabric scissors that are only used for fabric to keep them sharp. Add gripper fabric to your shopping list – this non-slip material keeps your organizer anchored in place on furniture arms.
Your sewing tools arsenal should include pins or Wonderclips, a fabric marking pen, and fold-over elastic for finishing edges. With these materials ready, you’re equipped to create a custom organizer that’ll end your remote-hunting days forever.
Cutting The Fabric and Preparing The Binding
Measure twice, cut once—this old sewing wisdom becomes your roadmap to success. Start by preshrinking fabric through washing and drying to prevent future disappointment when your finished organizer shrinks after its first wash. Once dry, iron everything smooth and grab your rotary cutter for precision that scissors can’t match.
To guarantee accurate pattern placement, it’s important to align directional arrows. Your cutting list demands attention to fabric grain direction:
- Main piece: Cut one rectangle measuring 14" wide by 40" long, following the straight grain
- Pocket sections: Cut one piece at 14" by 5½" and another at 14" by 4" for the edging
- Bias binding: Cut strips 1¼" wide across the diagonal grain, then join end-to-end with diagonal seams
Accurate cutting sets the foundation for professional results. Take time measuring each piece—rushing here creates headaches during assembly. Your bias binding needs that diagonal cut to curve smoothly around corners without puckering.
Sewing The Pocket for The Remote Controls
With your fabric pieces ready, it’s time to create the functional heart of your remote control organizer. Start by taking your 8" x 14" pocket piece and folding the top edge down by 1/2 inch, then another 1/2 inch to create a clean finished hem. Press this fold with your iron and topstitch close to the inner fold.
For mesh dividers, cut your mesh fabric into a 6" x 14" rectangle. This creates those handy compartments that keep different remotes separated. Sew fold-over elastic along the top edge, creating natural divisions every 4-5 inches. To guarantee a professional finish, consider using a serger or pinking shears to finish raw edges before sewing.
| Step | Measurement | Purpose |
|---|---|---|
| Hem fold | 1/2" double | Clean edge |
| Mesh width | 6" x 14" | Divider sections |
| Elastic spacing | 4-5" apart | Remote separation |
| Pocket depth | 5-6" | Adequate storage |
| Reinforcement | 1/4" seam | Durability |
Create pocket reinforcement by adding a second row of stitching along stress points. Angled pockets work better than straight ones – they naturally cradle your remotes. Add elastic loops for smaller devices like Apple TV remotes. This step ensures durability and adequate storage for your remote control organizer, making it a functional and practical solution.
Attaching The Pocket to The Main Fabric Piece
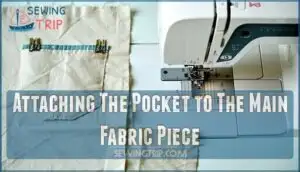
Position your completed pocket on the main fabric piece with precision—this step determines your organizer’s functionality. Proper pocket placement maintains easy access while maintaining the overall design balance.
Precision in pocket placement transforms chaos into organized convenience—your remote’s new permanent address.
Here’s your step-by-step attachment process:
- Measure pocket placement – Position the pocket 13 inches from the left edge of your main fabric piece
- Pin securely – Use Wonder clips or pins to hold the pocket in place before sewing
- Set seam allowance – Maintain a consistent 1/4 inch seam allowance around pocket edges
- Apply topstitching – Reinforce pocket sides and base with decorative topstitching for durability
- Create pocket division – Sew vertical lines to divide the pocket based on your remote control sizes
Start by aligning the pocket’s bottom edge with your marked placement line. This sewing project requires careful attention to reinforcement stitching—your remote control organizer will see daily use.
For added durability, consider reinforcing pocket openings with backstitching at the corners. Topstitching options include contrasting thread colors for a decorative touch. Remember, accurate pocket division creates organized compartments that prevent remotes from bunching together in this practical sewing tutorial.
Adding The Gripper Fabric for Stability
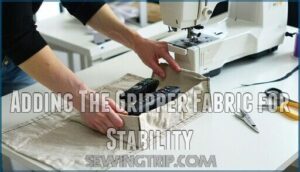
Now you’ll add the nonslip gripper fabric that keeps your remote control organizer firmly in place.
This step transforms your project from a simple fabric caddy into a stable, professional-grade organizer that won’t slide around on smooth furniture surfaces.
Cut your gripper fabric to match the exact dimensions of your main fabric piece. Different gripper fabric types offer varying levels of grip – cotton-based options with dot patterns work well for lightweight use, while PVC-coated varieties provide extra durability.
Placement importance can’t be overstated: position the gripper fabric on what’ll become the underside of your organizer, ensuring complete coverage for maximum stability. For ideal placement, consider how the bed caddy functions between the mattress and box springs.
Pin or clip the gripper fabric to your main piece, aligning all edges carefully. When securing gripper fabric, use a sharp needle and consider using wax paper under your presser foot if the material sticks.
Baste around the perimeter at 1/8-inch from the edge, preventing slippage during final construction. This simple addition eliminates the frustration of constantly repositioning your organizer, giving you the control and convenience you deserve.
Sewing The Binding Onto The Remote Control Organizer
Now you’re ready to create a polished finish that’ll make your organizer look store-bought. Cut your binding strips 2.25 inches wide at a 45-degree angle to the fabric grain—this diagonal cut gives you the flexibility needed for smooth curves and corners.
Start by pressing your binding strips in half lengthwise, wrong sides together. Pin the raw edges of the binding to your organizer’s edge, matching them perfectly. Sew with a quarter-inch seam allowance, keeping your stitches straight and even.
Here’s where binding techniques shine: stop stitching a quarter-inch before each corner, fold the binding up at a 45-degree angle, then fold it back down to create those crisp mitered corners. This professional touch separates amateur work from expert craftsmanship. To protect the raw edges, consider using machine quilt binding for a durable finish.
Continue around the entire organizer, overlapping your binding ends by about four inches. Trim excess fabric and join the ends with a diagonal seam to minimize bulk. Flip the binding to the back and hand-stitch it down, ensuring it completely covers your machine stitching line for those hidden seams that scream quality.
Optional: Personalizing and Customizing The Organizer
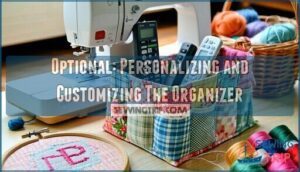
With your binding complete, you can now transform this functional organizer into a truly personal statement piece. Fabric choices open up endless possibilities for matching your room’s aesthetic or creating handmade gifts that reflect the recipient’s personality.
Consider these personalization options to make your organizer uniquely yours:
- Monogramming with embroidery or heat-transfer vinyl adds elegance while helping identify ownership
- Embellishment options like decorative trims, appliqué designs, or contrasting piping create visual interest along pocket edges
- Stitch patterns using decorative machine stitches can transform plain seams into design features
Upcycling projects become especially rewarding when you incorporate fabric scraps from previous sewing projects. Mix coordinating prints or create patchwork panels that tell a story. Size adjustments are simple – just scale your cutting measurements up or down to accommodate different furniture or storage needs. For smaller items, consider using a 3-tier rolling cart for accessible storage.
Whether you’re crafting themed organizers with sports motifs or elegant pieces with vintage fabrics, these personal touches elevate your creation from basic utility to treasured accessory that perfectly complements your space.
Tips for Sewing Success
Through smart preparation and the right techniques, you’ll create professional-looking remote organizers that last. Mastering these fundamental sewing skills transforms fabric into functional home accessories with confidence.
Here are three essential tips for sewing success:
- Needle Selection and Thread Tension: Use universal needles in sizes 80/12 or 90/14 for cotton fabrics. Check your thread tension regularly—improper tension creates puckered seams or loose stitches that compromise durability.
- Accurate Seams and Fabric Choice: Maintain consistent 1/4" seam allowances using seam guides. Choose quality polyester thread over cheap alternatives that break frequently, and select appropriate fabrics for each component.
- Pressing Matters: Press seams flat between each step using a hot iron. This simple technique sets stitches and creates crisp edges that elevate your finished organizer from homemade to handcrafted.
A smooth, strong thread is essential, so remember that thread conditioning prevents tangling. These sewing techniques build your sewing skills gradually. Each organizer you complete strengthens your foundation for future sewing tutorials and projects, making this beginner-friendly craft increasingly rewarding.
Enjoying Your Handmade Remote Control Organizer
Your remote control organizer transforms chaotic living spaces into organized havens. Now you can say goodbye to frantic searches between couch cushions and hello to effortless entertainment access.
Organizer Placement matters for maximum convenience. Position your sewing creation on armrests, between mattress and boxspring, or alongside your favorite reading chair. The non-slip gripper fabric guarantees it stays put exactly where you need it.
Fabric Durability shines through daily use. Quality cotton withstands regular handling while maintaining its professional appearance. For Cleaning Methods, spot-clean with mild detergent or machine wash on gentle cycle.
This DIY organizer makes an exceptional housewarming or holiday gift. Gift Potential soars when you customize colors to match recipients’ décor preferences.
Customization Ideas include decorative topstitching, contrasting binding, or themed fabrics reflecting personal interests. Create multiple versions for different rooms or entertainment zones.
Your handmade remote control organizer delivers practical home organization that guests notice and appreciate. Consider using a 3-tier rolling cart to keep your sewing tools nearby. These clever storage solutions prove that functional doesn’t mean boring when you craft with purpose.
Frequently Asked Questions (FAQs)
Can you sew a remote control holder?
Yes, you can absolutely sew a remote control holder.
Cut fabric to 14" x 40", create pockets using mesh and binding, attach non-slip gripper underneath.
Finish edges with bias tape for a professional look.
How do you make a remote control organizer?
Cutting through clutter like scissors through fabric, you’ll cut main fabric 14"×40", create pockets from 14"×5" pieces, sew pockets to base fabric, add binding edges, and attach non-slip gripper underneath for stability.
What is a DIY remote control holder?
A DIY remote control holder is a fabric organizer you’ll craft to keep TV remotes and small gadgets accessible.
It drapes over furniture arms or tucks between cushions, featuring multiple pockets for organization and convenience.
How to keep remote controls organized & accessible?
Like scattered puzzle pieces longing for their rightful home, you’ll create a couch caddy with large padded pockets and mesh compartments.
Sew it using cotton fabric, foam stabilizer, and non-slip gripper material to keep everything within arm’s reach.
How do you make a fabric remote control holder?
Cut main fabric 14"x40", pocket fabric 14"x5". Fold pocket edges, press, and stitch.
Attach pocket to main piece 13" from left edge. Hem three sides with double ¼" folds.
Divide pocket into remote-sized sections by sewing vertical lines. This step is crucial for organizing the pocket space, and it involves sewing to create separate sections.
How to make a fabric remote holder sewing tutorial?
Studies show 71% of people spend 8 minutes daily hunting for misplaced remotes.
You’ll cut fabric pieces, sew pockets with binding, attach to a quilted base, and add non-slip gripper underneath for stability.
How to organize remote controls?
Create designated spots using baskets, trays, or a DIY fabric organizer.
Keep frequently used remotes in arm’s reach near your main seating.
Store extras in a drawer with labels for easy identification, and consider frequently used items when deciding what to keep in easy reach.
What do I do with old remote controls?
Don’t toss those old remotes in the trash—they’re treasure waiting to happen.
Repurpose broken ones as drawer organizers, donate working units to thrift stores, or recycle them at electronics drop-off centers for responsible disposal.
How to keep track of your remote control?
You’ll never lose your remote again by creating a designated spot.
Designate a specific tray or basket near your couch where remotes always live.
Train yourself to return them immediately after use.
How do you wash the finished organizer?
You’ll want to spot-clean your finished remote organizer with a damp cloth and mild soap.
For deeper cleaning, remove stuffing first, then machine wash on gentle cycle and air dry completely.
Conclusion
Sarah’s living room coffee table looked like a tech graveyard – five remotes scattered everywhere until she learned how to sew a remote control organizer.
Now you’ve got the skills to create your own solution. With basic stitching techniques and cotton fabric, you’ve transformed chaos into order.
Your handmade organizer keeps remotes accessible yet tidy. The gripper backing prevents sliding, while custom pockets fit each device perfectly.
You’ve mastered practical sewing that actually improves daily life, with a project that is both useful and aesthetically pleasing.

