This site is supported by our readers. We may earn a commission, at no cost to you, if you purchase through links.
 To sew joggers, you’ll need stretchy fabric like cotton jersey, a pattern, and basic sewing supplies.
Start by cutting your fabric pieces using measurements or a purchased pattern. Sew the leg seams using a zigzag or serger stitch to handle stretch.
Create a waistband with elastic or drawstring closure, then attach it to the pants. Add ribbed cuffs at the ankles for that classic jogger look.
The key is choosing the right stretch fabric and using proper stitches that won’t snap when the fabric moves. Most beginners can complete their first pair in an afternoon. The real magic happens when you discover the perfect fabric-to-fit ratio.
Table Of Contents
Key Takeaways
- Choose the right fabric – You’ll need stretchy materials like cotton jersey or fleece with at least 15-20% stretch for comfort and movement.
- Use proper stitches for knits – You should use zigzag or stretch stitches instead of straight stitches to prevent seams from breaking when the fabric stretches.
- Master the waistband construction – You’ll create a casing for elastic or drawstring, which requires careful measuring and stretching the waistband while sewing for a proper fit.
- Focus on accurate measurements and fitting – You need to take precise waist, hip, and inseam measurements, and consider making a muslin mockup to test the fit before cutting your final fabric.
Sewing Joggers Basics
Before you start cutting fabric and threading your machine, you need the right foundation for success.
Getting your tools, fabric, and measurements sorted upfront will save you from headaches and fitting disasters later.
Essential Tools and Materials
Several key sewing supplies will set you up for success when you’re ready to sew joggers.
Quality sewing machines handle stretch fabrics better than basic models.
Your toolkit needs these essentials:
- Sharp fabric scissors and rotary cutters with cutting mats
- Measuring tools like tape measures and clear rulers
- Sewing machines with ballpoint needles for knits
- Thread colors that match your chosen fabric types
- Pins and seam rippers for precise assembly
These sewing tools make sewing joggers for beginners much smoother.
To guarantee the best results, consider using a sewing pattern guide for your project.
Choosing The Right Fabric
Choose fabrics with at least 15% stretch for comfortable movement.
Stretch fabric is your secret weapon for joggers that move with you, not against you.
Cotton fleece and French terry offer breathability for casual wear.
Polyester blends provide durability and moisture-wicking for active use.
Spandex additions guarantee shape retention.
Consider bamboo or TENCEL for eco-friendly options with superior softness.
Different fabric types affect your jogger’s performance and comfort substantially.
For best results, consider the fabric guide recommendations when selecting materials.
Measuring and Fitting
Accurate measurements form the foundation of well-fitting jogger pants.
Take your waist, hip, inseam, and thigh measurements carefully.
Create muslin mockups to test your jogger sewing pattern before cutting expensive fabric.
Add proper ease allowance for comfort and movement.
Consider your body shape when making fitting adjustments to guarantee your joggers sewing tutorial produces pants that flatter your figure perfectly, ensuring a great fit with accurate measurements.
How to Sew Joggers
Sewing joggers transforms your fabric stash into custom comfort wear. This joggers sewing tutorial breaks down the process into manageable steps. Your DIY joggers start with proper preparation and technique.
Here’s your roadmap for how to sew pants success:
- Pre-wash your fabric – prevents shrinkage disasters later
- Set up your workspace – clear cutting area and functioning machine
- Gather all supplies – thread, scissors, pins, and measuring tools ready
Your jogger sewing pattern becomes your blueprint. Fabric selection tips matter here – knits work best for stretch and comfort. Consider drawstring alternatives like elastic waistbands for easier construction. Pocket variations and cuff styles add personal flair. Plan jogger embellishments before cutting to avoid placement mistakes.
Jogger Pattern Creation
Creating your own jogger pattern gives you complete control over fit and style.
You’ll start by printing and assembling the pattern pieces, then make adjustments to guarantee the perfect fit for your body measurements.
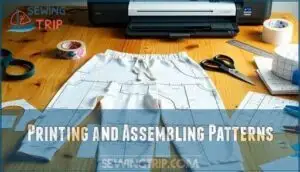
Printing and Assembling Patterns
First things first: download your pattern at the correct scale to avoid size mishaps. Check Pattern Scaling settings before hitting print – most home printers default to "fit to page" which shrinks everything.
Print the test square first to verify Tiling Accuracy. When assembling sewing patterns, match Cutting Lines precisely using Paper Alignment marks.
Trim excess margins before taping pieces together. Consider using online software for advanced pattern design to further refine your jogger pattern.
Store completed patterns flat in folders for future sewing projects and DIY joggers adventures, ensuring you maintain proper organization.
Adjusting Fit and Sizing
Pattern fit starts with your measurements. Take waist and hip measurements carefully using flexible tape. Most jogger pants sewing patterns use these two key measurements for sizing.
Good measurements are the foundation of joggers that actually fit your body.
If your waist and hip measurements fall into different sizes, you’ll need grading sizes by blending the pattern lines.
Muslin mockups help test fit before cutting your final fabric. Check inseam length and rise alterations against your body measurements for proper ease adjustments.
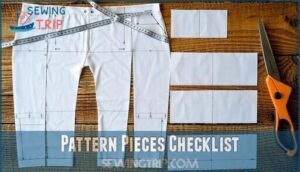
Pattern Pieces Checklist
Before cutting fabric, confirm your pattern inventory includes all required pieces for jogger pants sewing.
Check piece orientation against grainline direction markers on each pattern piece. Verify notch matching points align properly between corresponding pieces.
Double-check seam allowance measurements around all edges. This systematic approach prevents costly mistakes when you sew your own joggers using your DIY sewing pattern.
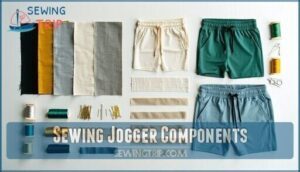
Sewing Jogger Components
Now you’ll assemble the individual components to create your finished joggers. This step transforms separate fabric pieces into comfortable pants that fit your body perfectly.
Making The Pant Legs
Begin at the side seams to create your jogger’s foundation.
Pin the front and back pieces together along the side seams and inseam length.
When sewing jogger pants, mark your crotch curve carefully for proper fit.
The leg taper determines your jogger’s silhouette from hip to ankle.
Consider various hemming options like ribbed cuffs or simple hems.
These jogger sewing tips guarantee professional results when you sew your own joggers.
Creating The Waistband
With your pant legs complete you’ll craft the waistband that holds everything together.
Cut your waistband piece from knit fabrics for stretch and comfort. Consider waistband height based on your style preference.
Create a casing by folding the fabric edge down leaving space for waistband elastic. For maximum comfort, select appropriate elastic widths.
Plan drawstring placement if you want adjustable fit. This jogger sewing guide step sets up your sewing jogger pants project perfectly.
Adding The Pockets
With your waistband complete, you’ll add pockets that blend function with style.
Your pocket placement determines comfort while pocket styles affect the overall look.
Here’s your pocket-adding roadmap:
- Cut pocket pieces – Use matching fabric for seamless integration
- Position pockets – Place 15 inches below waistband for ideal access
- Attach with reinforcement stitching – Secure corners to prevent tearing
- Finish raw edges – Serge or zigzag to prevent fraying
Choose in-seam pockets for clean lines or patch pockets for casual appeal.
Consider adding embellishments; even creative topstitching adds flair.
Sewing techniques like understitching keep pocket bags hidden while proper fabric choices prevent bulging in your custom joggers.
Attaching The Waistband
Now you’ll connect the waistband to your jogger body. Pin the waistband’s raw edge to the pant’s waist opening with right sides together. Stretch the waistband slightly while sewing to accommodate your hips.
| Step | Action |
|---|---|
| Pin | Align waistband to pant opening |
| Stretch | Pull waistband 10-15% while sewing |
| Stitch | Use zigzag or serger stitch |
| Press | Iron seam toward waistband |
Use a ballpoint needle for Waistband Elasticity. Apply Topstitching Options for a professional finish. Proper Waistband Reinforcement prevents stretching out during wear.
Finishing With Pant Cuffs
Cuffs give your joggers that polished look you’re after.
Start by measuring your ankle circumference and adding two inches for comfort. Cut knit cuff fabrics double the desired finished width plus seam allowances.
Consider cuff elastic options like fold-over elastic or ribbing for stretch.
Matching cuff color creates a cohesive appearance while contrasting adds visual interest.
Experiment with cuff width variations and decorative cuff styles for custom joggers that reflect your personal style.
Customizing and Finishing Joggers
You’re ready to add the finishing touches that transform your sewn jogger pieces into polished, wearable pants.
These final steps include installing elastic or drawstrings, perfecting your seams and hems, and making any needed adjustments for the perfect fit.
Adding Elastic or Drawstrings
With elastic types ranging from braided to knitted options, you’ll transform your joggers into perfectly fitted pants.
Choose drawstring materials like cotton cord or twill tape for adjustability options that suit your style.
- Measure elastic loosely around your waist, adding 1-inch seam allowance for proper fit
- Create buttonholes with interfacing reinforcement at center front for cord stoppers
- Thread safety pin through casing construction to guide elastic without losing ends
- Overlap elastic ends by half-inch, securing with zigzag stitch for durability
- Knot drawstring ends to prevent fraying and make certain they won’t retreat into casing
Sewing Seams and Hems
Now that your elastic sits perfectly, focus on creating professional-looking seams and hems.
Use French seams or serged edges for seam finishes that prevent fraying.
Try blind hems for invisible leg finishes or topstitching techniques for a sporty look.
Navigate curved hems at the crotch carefully with small clips.
These sewing skills transform homemade joggers into polished garments worthy of your wardrobe.
Adding Labels or Embellishments
Your finished joggers deserve personal touches that make them uniquely yours.
Custom labeling and embellishments transform basic sewing casual wear into signature pieces that showcase your creativity and skill in beginner sewing projects.
- Custom Labeling – Add woven labels or fabric markers to claim your handmade creation
- Embroidery Options – Use decorative stitching for names, patterns, or motivational phrases
- Fabric Appliqués – Attach fun shapes or designs using zigzag stitching techniques
- Iron-on Designs – Apply heat-transfer vinyl or patches for instant personalization
- Decorative Stitching – Create topstitching details along seams for professional finishing touches
Consider various jogger decoration options for further inspiration.
Final Fitting and Alterations
Try on your finished joggers and walk around to check for fitting issues.
Pin any loose areas or mark spots that need adjustment. Test sitting and bending movements to confirm comfort.
| Common Adjustments | Alteration Techniques |
|---|---|
| Waist too loose | Take in side seams or adjust elastic |
| Legs too baggy | Taper from ankle to crotch |
| Length too long | Hem and reattach cuffs |
| Cuffs too tight | Replace elastic or widen opening |
Use muslin mockups for major changes before altering your final fabric.
Addressing pants crotch fitting issues can greatly improve comfort and appearance. This saves time and prevents mistakes when personalizing fit for sewing custom joggers.
Frequently Asked Questions (FAQs)
Can you sew joggers?
While store-bought joggers hang loose and shapeless, your handmade version can hug curves perfectly.
You’ll need stretchy knit fabric, elastic waistband, and basic sewing skills.
Cut pattern pieces, sew seams, attach waistband, and hem legs for custom-fit comfort.
What material can I use to sew joggers?
You’ll want stretchy fabrics like cotton jersey, fleece, or ponte knit. French terry works great too. Choose fabrics with at least 20% stretch for comfort and movement.
How to turn any pants into joggers?
Converting regular pants into cozy joggers isn’t rocket science.
Replace the existing hem with ribbed cuffs by cutting off the bottom and sewing elastic waistband material.
Add drawstrings to complete the transformation effortlessly.
What makes joggers different from sweatpants?
Joggers feature tapered legs with elastic cuffs that gather at your ankles, while sweatpants have straight legs.
You’ll also find joggers typically use lighter fabrics and offer a more fitted silhouette compared to sweatpants’ loose, relaxed fit, which can be described as a relaxed fit.
Can you sew joggers without a serger machine?
Yes, you can sew joggers without a serger.
Use a regular sewing machine with a stretch stitch or zigzag stitch for seams.
A twin needle creates professional-looking hems that stretch with the fabric.
How long does it take to sew joggers?
Speedy stitching sessions typically take two to four hours for basic joggers. You’ll finish faster with experience and simpler designs. Complex details like pockets add time.
Whats the best stitch for stretchy fabrics?
A zigzag stitch works best for stretchy fabrics because it moves with the material without breaking. You can also use a stretch stitch or twin needle for professional-looking seams.
Can beginners successfully sew their first joggers?
You’ll conquer your first joggers faster than a speedy zigzag stitch.
Start with forgiving knit fabrics and simple patterns.
Use a stretch needle and twin needle for hems.
Don’t overthink it—joggers are basically fancy sweatpants that’ll forgive your beginner mistakes beautifully.
How do you prevent fabric from curling edges?
Use a serger or overlock stitch to seal raw edges before they curl.
Apply spray starch while pressing seams flat.
Choose pre-shrunk fabrics and press with steam iron immediately after cutting.
Conclusion
Ready to wear your handmade joggers? You’ve mastered the essential steps for how to sew joggers from fabric selection to final fitting.
Your new pants combine comfort with personal style. The stretchy fabric moves with you. The elastic waistband provides perfect fit.
Ribbed cuffs complete the classic look. These skills transfer to other garments too. You can adjust patterns for different styles.
Your sewing machine awaits the next project, where you can apply your skills to create something new with personal style.


