This site is supported by our readers. We may earn a commission, at no cost to you, if you purchase through links.

You’ll position this water-soluble support behind your fabric, then stitch directly through both layers during construction.
The stabilizer prevents stretching, puckering, and distortion while you’re working with delicate fabrics like silk or challenging materials like knits.
After completing your project, simply wash it in warm water—the stabilizer dissolves completely, leaving your fabric with its original drape and softness.
This technique works exceptionally well for buttonholes, zippers, and detailed embroidery where precision matters most.
The key lies in choosing the right weight stabilizer and proper removal timing.
Table Of Contents
Key Takeaways
- Match your stabilizer weight to your fabric type – you’ll need lightweight options for delicate materials like silk, while heavy fabrics require robust stabilizers to prevent puckering and distortion during stitching.
- Cut stabilizer 2-3 inches larger than your design area – this ensures adequate support beyond all stitching boundaries and prevents fabric shifting while you’re working on detailed embroidery or buttonholes.
- Baste the stabilizer properly before stitching – use large, loose hand stitches around the perimeter or temporary adhesives to secure placement without creating permanent marks on your fabric.
- Remove excess stabilizer carefully after completion – trim close to stitching lines with sharp scissors, then wash away any water-soluble residue in lukewarm water to maintain your fabric’s original drape and softness.
Sew in Stabilizer Basics
Sew-in stabilizers provide the foundation your embroidery projects need to prevent puckering, distortion, and thread breakage during stitching.
Understanding the different types and their applications will transform your embroidery results from amateur to professional quality, with complete concepts being crucial for achieving this transformation.
What is Sew-in Stabilizer
A sew in stabilizer is a supportive material that you permanently attach to fabric during sewing projects.
This fabric stabilizer prevents distortion, puckering, and stretching while maintaining structural integrity throughout your work.
Here are five key characteristics of sew in stabilizers:
- Stabilizer Composition – Made from non-woven fibers or woven materials that provide dimensional stability
- Material Properties – Designed to match fabric weight and stretch characteristics for ideal support
- Manufacturing Process – Engineered through controlled fiber bonding or weaving techniques for consistent performance
- Environmental Impact – Available in biodegradable options that reduce waste in sewing projects
- Historical Overview – Evolved from basic interfacing materials to specialized stabilizer types for modern fabric support needs
Benefits of Sew-in Stabilizer
With proper fabric support, you’ll achieve embroidery precision while preventing distortion that ruins your hard work.
Sew in stabilizer provides versatile support for various sewing projects, delivering professional finish results.
This fabric stabilizer offers cost reduction by eliminating do-overs and wasted materials.
Smart stabilizer uses transform amateur attempts into polished creations, giving your fabric the backbone it needs to handle dense stitching without puckering or shifting during the embroidery process, providing the necessary support for a successful outcome with dense stitching.
Types of Sew-in Stabilizers
Understanding these fabric stabilization options helps you tackle any sewing project with confidence.
Tear-away uses include patches and light embroidery on woven materials. Cut-away benefits shine with stretchy knits and dense designs requiring permanent support.
Wash-away fabrics work perfectly for delicate materials and free-standing lace. Fusible applications bond with heat for firm foundations.
Non-woven projects dominate the market, offering versatility across multiple sewing techniques and supplies.
For machine embroidery, it’s essential to select the right machine embroidery stabilizer to prevent puckering.
Using Sew in Stabilizer
Mastering sew in stabilizer transforms your fabric handling from guesswork into precision craftsmanship.
This foundation layer prevents puckering, distortion, and thread breaks while supporting dense embroidery designs.
Your machine settings work harmoniously with proper stabilizer selection, creating professional results that won’t disappoint.
Success depends on understanding how stabilizer alternatives complement different sewing techniques:
- Hoopless Embroidery: Baste stabilizer directly to fabric without traditional hooping methods
- Design Density: Match stabilizer weight to thread count and stitch complexity
- Thread Compatibility: Confirm stabilizer supports your chosen thread type and tension
- Machine Settings: Adjust stitch speed and needle pressure for ideal fabric stabilization
- Layering Techniques: Combine multiple stabilizer types for challenging projects
The key lies in treating stabilizer as your fabric’s best friend rather than an afterthought.
Each project demands specific consideration of fabric weight, design complexity, and intended use.
Stabilizer weight should be matched to fabric; otherwise, consider using tear away options.
Your stabilizer choice directly impacts thread tension, stitch quality, and final appearance.
Choosing Right Stabilizer
Selecting the right stabilizer determines whether your embroidery project succeeds or fails.
You’ll need to match stabilizer type to your fabric weight, thread density, and intended use to achieve professional results.
Fabric Type and Weight Considerations
Your fabric type dictates stabilizer pairing success.
Knit fabric requires flexible stabilizers that won’t restrict stretch, while heavy fabrics need robust support during sewing techniques.
Delicate fabrics pair with lightweight options to prevent puckering.
Fabric blends demand careful stabilizer weight matching—too heavy stiffens lightweight materials, too light fails supporting dense weaves.
Proper fabric preparation includes testing compatibility before full construction.
Different designs need specific stabilizer requirements depending on their density, which is crucial for successful sewing techniques and overall fabric preparation.
Stabilizer Thickness and Density
Thickness creates the foundation for your project’s success, while density levels determine how much support you’ll actually get.
Match your stabilizer weight to your fabric’s needs – lightweight fabrics require thin stabilizers, heavy materials need thicker options.
Understanding stabilizer thickness density is essential for selecting the right product.
Consider needle size compatibility when selecting density, as dense stabilizers demand larger needles.
Higher stitch density projects benefit from denser embroidery stabilizer for ideal fabric compatibility.
Project Specific Stabilizer Selection
Why settle for generic stabilizer choices when your project deserves precision? Different embroidery design complexity, fabric content, and stitch density require customized stabilizer combinations to achieve professional results. **High-quality stabilizers guarantee consistent results.
- Dense embroidery designs on knits need cut-away embroidery stabilizer for lasting support
- Light decorative stitching on wovens works well with tear-away sew-in stabilizer options
- Delicate fabrics like silk require wash-away stabilizers to prevent visible residue
- Heavy stitch density projects benefit from layered stabilizer combinations for extra strength
- Frequent-wash items need permanent sewing tools that maintain stability through multiple laundering cycles
Applying Sew in Stabilizer
Now that you’ve selected the right stabilizer for your project, you’ll need to apply it properly to achieve professional embroidery results.
The application process involves four critical steps that determine whether your stabilizer provides adequate support throughout stitching.
Prewashing Fabric
Prewashing your fabric before applying stabilizer prevents unexpected shrinkage allowance issues and color bleeding that could ruin your embroidery project.
This essential step removes manufacturing chemicals while addressing fabric softening and wrinkle prevention needs.
Most sewing supplies benefit from this treatment, though delicate fabrics may experience texture changes.
Following proper sewing techniques guarantees your stabilizer adheres correctly without shifting during stitching, ensuring a successful project with proper stabilizer adhesion and sewing techniques.
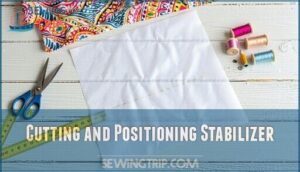
Cutting and Positioning Stabilizer
Proper stabilizer cutting and positioning sets the foundation for professional embroidery results.
Cut your sew in stabilizer 2-3 inches larger than your design area, ensuring adequate stabilizer overlap beyond all stitching boundaries.
Match the stabilizer’s grain alignment with your fabric’s weave direction to prevent distortion during stitching.
When using layering techniques with multiple stabilizers, position the heaviest weight closest to the fabric.
Template use helps achieve consistent placement across multiple projects.
Secure placement requires smooth, wrinkle-free positioning before proceeding with attachment methods.
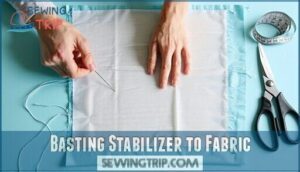
Basting Stabilizer to Fabric
How do you secure your stabilizer without creating permanent marks? Basting stitches offer the perfect solution for temporarily attaching sew in stabilizer to fabric.
Use large, loose hand stitches around the project’s perimeter, maintaining quarter-inch seam allowances to prevent fabric distortion. Alternatively, temporary adhesives provide quick stabilizer layering for smaller pieces.
For hoopless basting techniques, position your stabilizer beneath the fabric and create diagonal basting lines across the surface. These sewing techniques for beginners guarantee proper fabric alignment while allowing easy removal after embroidery completion.
When working with sew in stabilizer, understanding proper stabilizer selection is vital for achieving the desired results.
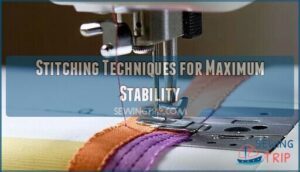
Stitching Techniques for Maximum Stability
Once your sew in stabilizer is properly basted, adjust your sewing machine settings for superior results.
Use shorter stitch lengths (1.5-2.0mm) to prevent fabric stretch and maintain thread tension control.
Select universal needles sized 70/10-90/14 based on stabilizer thickness.
These stitching techniques guarantee your embroidery projects maintain structural integrity while preventing puckering and distortion throughout the sewing process, ensuring a result with superior results.
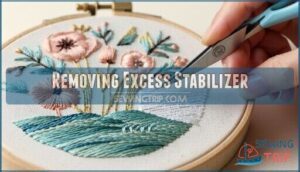
Removing Excess Stabilizer
Once you complete your sewing project, you’ll need to remove the excess stabilizer to achieve a professional finish.
This final step requires careful attention to preserve your embroidery while eliminating unnecessary bulk from the fabric, ensuring a clean and complete removal process.
Trimming Excess Stabilizer
After completing your embroidery project, carefully examine areas where sew in stabilizer extends beyond the stitched design.
Use sharp fabric scissors or specialized trimming tools for precise cutting techniques near seam lines. Remove excess fabric and stabilizer material gradually, leaving approximately quarter-inch margins around dense stitching areas.
Watch for stabilizer residue that might affect your project’s finish during this pivotal stabilizer removal step, ensuring a clean and professional outcome with careful trimming techniques.
Washing and Laundering Finished Projects
After completing your embroidery project, washing becomes essential for removing any wash away stabilizer residue.
Use lukewarm water and gentle hand washing techniques for ideal fabric care.
Place finished pieces in mesh laundry bags when machine washing, selecting cold gentle cycles.
Skip harsh detergents during this important step.
Always lay projects flat on towels for proper drying methods, preventing distortion while maintaining your sewing essentials’ integrity throughout this important stabilizer guide process.
To achieve professional results, understanding water soluble stabilizers is vital for preventing fabric puckering and ensuring a clean finish.
Tips for Successful Stabilizer Removal
Mastering stabilizer removal transforms your embroidery from amateur to professional.
Follow these essential steps for flawless fabric care:
- Test stitch tension on scraps before removing tear away stabilizer from your main project
- Grade cut away stabilizer close to stitching without cutting embroidery threads during thread management
- Dissolve wash away stabilizer completely in lukewarm water following manufacturer’s embroidery tips
Perfect sewing stabilizer removal requires patience and proper technique for lasting results.
Frequently Asked Questions (FAQs)
How do you use sew-in interfacing?
Don’t put the cart before the horse—proper preparation makes all the difference.
Cut your interfacing slightly smaller than the fabric piece, then baste it to the wrong side before stitching.
When to use stabilizer when sewing?
Use stabilizer when embroidering delicate fabrics, working with stretchy knits, creating dense designs, or preventing fabric distortion. It’s essential for maintaining stitch quality and preventing puckering during machine embroidery projects.
Can stabilizer cause needle breaking during stitching?
Stabilizer stiffness substantially strains sewing machine needles, potentially causing breakage.
You’ll face needle snapping when using thick stabilizers with inappropriate needle sizes.
Choose proper needle weight – heavier stabilizers require size 90/14 or larger needles to handle the density without breaking, and this is crucial for preventing needle breakage.
How to store unused stabilizer properly long-term?
Store your stabilizer flat in a dry, cool area away from direct sunlight.
Keep it sealed in original packaging or airtight containers to prevent moisture absorption and dust accumulation, which can compromise adhesive properties and structural integrity over time, ensuring the preservation of its adhesive properties.
What stabilizer works best for metallic threads?
Metallic threads experience 40% more breakage than standard threads, making stabilizer choice essential.
You’ll want cut-away stabilizer for metallic threads since it provides permanent support, preventing thread breakage and maintaining tension throughout stitching for professional results.
Can you reuse cut-away stabilizer pieces effectively?
You can reuse cut-away stabilizer pieces, but they’ll lose some structural integrity after the first use.
Smaller scraps work well for lightweight embroidery projects or as additional backing layers when you need extra support.
Does stabilizer affect embroidery hoop tension settings?
Like adding layers to a sandwich, stabilizer thickness directly affects your hoop tension settings.
You’ll need to loosen tension slightly when using thicker cut-away or multiple stabilizer layers to prevent fabric puckering and guarantee smooth embroidery stitching.
Conclusion
Mastering how to use sew in stabilizer turns you from amateur seamstress into fabric whisperer—because apparently, even textiles need emotional support these days.
You’ve learned proper selection, application, and removal techniques that prevent construction disasters.
Your buttonholes won’t buckle, zippers won’t zigzag, and delicate fabrics won’t throw tantrums mid-project.
Remember to match stabilizer weight to your fabric, baste thoroughly, and wash completely for removal, achieving professional results every time you sew, and with these skills, you’ll tackle any challenging project confidently.
- https://docs.google.com/forms/d/1GAQr3Kn1cURCVHUA82hAga1Wv8DCH0IuqDLRUrOpN7M/viewform?ts=63f4f653&entry.1515682415=https://www.merriam-webster.com/dictionary%2Fuse
- https://premium.britannica.com/mw-unabridged/?utm_source=mw&utm_medium=inline-def&utm_campaign=evergreen
- https://dictionary.cambridge.org/dictionary/english/adopt?topic=using-and-misusing
- https://www.thesaurus.com/browse/use
- https://idioms.thefreedictionary.com/avail+(oneself)+of


