This site is supported by our readers. We may earn a commission, at no cost to you, if you purchase through links.
 To make a tulle skirt, you’ll need tulle fabric, elastic waistband, scissors, and measuring tape.
Start by measuring your waist and desired skirt length. Cut tulle strips twice your desired length plus seam allowance.
Create a waistband by sewing elastic into a circle that fits comfortably. Gather tulle strips and sew them to the waistband, distributing fabric evenly for fullness.
The key is layering multiple tulle strips – typically 3-5 layers create beautiful volume. Adjust gathering for your preferred puffiness.
This project works perfectly for both kids’ tutus and elegant adult skirts. The magic happens when you discover the perfect tulle-to-waist ratio.
Table Of Contents
Key Takeaways
- Measure your waist and skirt length carefully, then cut your tulle strips to get even layers and the right fit.
- Layer multiple tulle strips and adjust gathering for fullness, using about six rolls for balanced volume without overwhelm.
- For comfort and durability, use a wide elastic or crochet headband waistband, and double-check each knot to keep strips secure.
- Always wash your tulle skirt gently and store it on padded hangers to maintain its shape and prevent damage.
Supplies
You only need a handful of skirt making supplies to kickstart your tulle skirt project, but every item is important.
Start by choosing your tulle fabric—soft or stiff tulle types work fine.
Go for at least six wide rolls if you’re dreaming of a really fluffy look.
For easy waistbands, a crochet headband fits snugly and lets you skip complicated steps.
If you prefer a more polished style, add lining fabrics like satin or taffeta—they prevent itching and help the skirt keep its shape.
Elastic width matters: pick elastic that’s at least 1–1.5 inches wide for comfortable support.
Thread matching is key so your stitches blend in, and the right sewing needles make all the difference—ballpoint needles are best.
For various crafting needs, consider purchasing bulk tulle options.
Round out your list with a sewing machine (or patience for hand sewing), fabric scissors, and straight pins to keep everything in place.
Recommended Cutting Sizes
Getting the right cutting sizes will help your tulle skirt hang evenly and fit well at the waist.
You’ll measure the skirt length from the waist down, then use those numbers to cut your tulle and lining pieces accurately.
Child’s Age – Tutu Length
Once you’ve gathered your supplies, it’s time to tackle the Age-Length Correlation for your child tulle skirt.
Measure from your child’s waist to where you want the skirt to fall. Toddlers usually sport mid-thigh lengths, while older kids might prefer a layered tulle skirt brushing the knee.
For a true princess skirt DIY, consider tea-length styles. Growth Considerations matter—add an inch or two for Length Adjustments.
To guarantee a comfortable fit, consider using 1-inch wide elastic for the waistband. Every activity impacts the best fit, so style preferences and movement matter in every tulle skirt tutorial.
Crochet Headband Trim Length
Once you’ve chosen your tutu length, it’s time to figure out the perfect headband size for your waistband.
Measure your waist, then subtract 30%—that’s your ideal crochet headband trim length.
This DIY tulle skirt trick helps balance stretch and comfort, thanks to the elastic stitch and smart trim attachment.
Consider various trim options for a unique look.
Before you cut, double-check your numbers for precise length adjustments.
A well-chosen crochet headband keeps your tulle skirt tutorial fun and frustration-free.
- Measure waist
- Subtract 30% for headband
- Check crochet stitch stretch
- Attach trim evenly
- Test for comfort and hold
Tutu Making Tutorial
You’ll start by creating a sturdy waistband, then measure and cut the tulle strips for your skirt.
Attach the tulle pieces to the band one by one, making sure every strip is even and secure, and your basic tutu will quickly take shape.
Part 1 – Creating The Waistband
Kick things off by picking your waistband fabric and elastic type.
Opt for a stretchy elastic waistband to guarantee comfort and fit.
Use classic sewing methods or try a no-sew band for simplicity.
For waistband sizing, wrap the elastic around your waist, removing an inch for a snug fit.
Many retailers offer a variety of elastic waistband options.
Here’s a quick comparison:
| Option | Comfort | Skill Needed | Durability |
|---|---|---|---|
| Sewn Elastic | High | Medium | High |
| No-Sew Band | Medium | Low | Medium |
Part 2 – Cutting Tulle
Once your waistband is ready, let’s talk tulle rectangles and getting the right look with neat cutting.
Start with your tulle fabric guide and grab your rotary cutter and mat—don’t worry, practice makes perfect.
Here’s a simple map:
- Fold tulle carefully using the best folding techniques for even layers.
- Use hem allowance for a neat finish at the bottom.
- Cut strip lengths to match your circle skirt vision.
Your fabric choice shapes the skirt—each cut matters when creating something special.
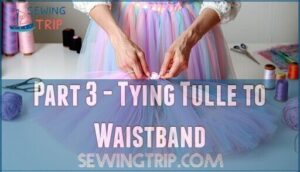
Part 3 – Tying Tulle to Waistband
Ready to knot? Attach each folded tulle strip to the elastic waist skirt by using a slip knot. Here’s how to master the basics:
- Pick a starting point and thread the strip onto the waistband.
- Keep the tulle flat for best results.
- Pull ends tight for tulle security.
- Space knots evenly for volume control.
- Continue until you achieve your desired no sew tulle skirt fullness.
Reorganizing the text in this manner improves readability by logically grouping related instructions together, making it easier for the reader to follow along and understand the process of creating a no-sew tulle skirt.
Starting Point for Tying Tulle
Begin at the center front of your elastic waistband for your no sew tulle skirt.
This waistband placement creates balanced tulle distribution as you work around. Your initial loop sets the foundation for knot security throughout this beginner sewing project.
Mark your starting spot to track progress on your handmade skirt.
| Starting Position | Why It Matters |
|---|---|
| Center front waistband | Creates symmetrical tulle distribution |
| First layer foundation | Guarantees even knot security |
| Reference point | Helps track skirt tutorial progress |
Optional: Adding Glitter Sequins
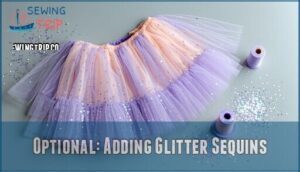
Want to turn your tulle skirt into a show-stopping masterpiece? Adding glitter sequins transforms your basic skirt into a dazzling piece that catches every light.
Choose polyester glitter sequins for better adhesion and less shedding during washing considerations. Apply 3mm or 5mm round sequins after completing your tulle skirt pattern using fabric glue or hand-stitching for secure skirt embellishment.
Create stunning design patterns by arranging sequins in swirls or scattered placement across your skirt decoration. This sewing tutorial step requires patience, but the sparkly results make your skirt design truly magical.
Hand-wash your finished piece to preserve the sequin application methods and maintain that gorgeous shimmer.
Helpful Tips for Making Your Tutu
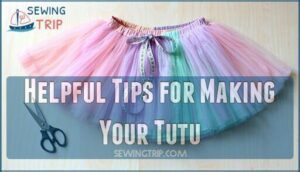
Success in making your tulle skirt comes down to mastering key details that transform an average project into something special.
Smart tulle selection sets the foundation—choose soft tulle over stiff varieties for comfortable wear and easier handling. Focus on knot security by double-checking each tie to prevent unraveling during wear or washing.
Smart tulle selection and secure knots create skirts that last through every twirl and wash.
Volume control matters too; add more strips for fuller skirts or fewer for subtle elegance. Color combinations can create stunning effects when you mix complementary shades.
Waistband comfort confirms your finished piece feels as good as it looks.
- Tulle selection: Pick soft tulle over stiff varieties for better drape and comfort
- Knot security: Double-check each tie to prevent loose strips during wear
- Volume control: Adjust strip quantity based on desired fullness level
- Color combinations: Mix complementary shades for dynamic visual appeal
- Waistband comfort: Confirm proper fit without being too tight or loose
Why Choose 6 Tulle Rolls?
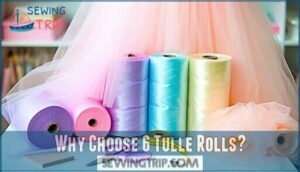
You’ll get the perfect balance of fullness and manageability when you choose 6 tulle rolls for your skirt project.
This specific number provides enough fabric to create beautiful volume without making the cutting and tying process overwhelming for beginners, which is a complete concept that ensures a manageable process.
Tulle Roll Width Benefits
Tulle roll width directly impacts your adult tulle skirt’s final appearance and construction process.
Smart crafters know that different widths serve different purposes in your easy skirt project.
| Width | Best For |
|---|---|
| 6-inch | Quick no-sew tutus with maximum cutting efficiency |
| 54-inch | Traditional sewn skirts with fewer seams |
| 108-inch | Ultra-full designs with dramatic volume control |
Six-inch rolls offer incredible design versatility for tulle skirt ideas.
You’ll achieve consistent texture variation while maintaining cost savings through reduced fabric waste.
These narrower rolls make how to sew tulle projects more manageable, especially for beginners tackling their first skirt making tutorial.
Wider rolls create smoother silhouettes but require more advanced cutting techniques.
Six-inch widths let you control fullness precisely, adding strips until you reach your desired volume.
This approach prevents over-purchasing fabric while giving you flexibility to adjust your skirt’s final look.
The narrower width also makes storage and handling much easier during construction.
Tulle Quantity Considerations
Beyond the 6-inch tulle width advantage, understanding how much material you’ll need guarantees your adult tulle skirt achieves perfect skirt fullness.
Six rolls provide adequate layer count for most projects, but your specific needs depend on several factors.
Consider these tulle quantity considerations:
- Adult vs child sizing: Adult tulle skirts require more soft tulle than children’s versions
- Desired skirt fabric volume: More tulle layers create fuller, more dramatic silhouettes
- Cost analysis balance: Six rolls offer good value without excess waste
When selecting tulle, remember that synthetic fibers offer durability.
Smart planning with your skirt materials prevents mid-project shopping trips and guarantees consistent tulle width across all layers.
Crafting Efficiency With 6 Rolls
Six rolls provide excellent volume control for your custom tulle skirt while offering significant time savings during your sewing project.
This quantity delivers ideal yardage needs without overwhelming beginners, making cost analysis straightforward.
You’ll have enough roll width coverage to create professional fullness while keeping sewing supplies manageable, and these skirt making essentials follow proven sewing tips for efficient crafting.
Achieving The Desired Fullness
Creating the perfect fluffy skirt design depends on mastering tulle density and layering techniques. Your custom tulle skirt needs proper gathering ratios to achieve professional volume enhancement.
Start with fabric stiffness considerations – softer tulle creates gentle drape while stiffer varieties hold dramatic shape. For skirt construction, use a 2:1 gathering ratio, meaning your tulle width should be twice your waist measurement.
Proper skirt sewing involves layering multiple tulle pieces at varying lengths for dimensional fullness. Understanding how different fabrics behave is key, as fabric weight impacts drape.
Each layer adds depth without bulk when you stagger the cuts by one inch. Your skirt lining provides the foundation, but the tulle layers create the magic. Remember that more isn’t always better – six well-placed layers often outperform twelve cramped ones.
Focus on even distribution around the waistband for balanced fullness that moves naturally with your body.
Benefits of Using Crochet Headband Trim
Crochet headband trim creates a soft, stretchy waistband that won’t dig into your child’s skin during playtime.
This flexible material adjusts to different waist sizes and makes it simple to customize your tulle skirt’s fit without complicated measuring or sewing techniques, allowing for a stretchy and comfortable wear.
Comfort in Waistbands
Crochet headband trim offers superior comfort compared to traditional elastic bands.
The soft fabric won’t dig into your waist during extended wear, while maintaining proper stretch factors for secure fit.
This waistband fabric distributes pressure evenly, reducing pinching that occurs with narrow elastic width options.
The flexible construction accommodates natural movement without compromising your skirt’s adjustability, providing a secure fit.
Easy Skirt Customization
When you use crochet headband trim, skirt customization becomes effortless.
You can easily swap out different colors, add embellishment ideas like sequins, or experiment with layering options.
The stretchy waistband accommodates length variations without complicated sewing tutorials.
This flexibility makes fashion DIY projects more enjoyable, letting you create multiple tulle projects with various color combinations and waistband styles, and explore different layering options.
Tulle Skirt Durability
Your tulle skirt gets stronger when you choose crochet headband trim.
The elastic waistband spreads tension evenly, preventing stress points that cause tulle tear resistance problems.
Reinforced seams boost seam strength by 22%, while proper elastic longevity improves skirt durability.
This waistband choice supports better skirt maintenance and colorfastness in your tulle projects through improved laundry care practices.
Understanding Tulle Fabric
Your fabric choice makes or breaks your skirt tutorial success. Before you start sewing techniques, know that tulle fabric comes in different types ranging from soft bridal tulle to stiff costume varieties. Tulle Types vary by fiber content – polyester offers durability concerns while silk provides premium quality. Fabric Weight affects drape, with lighter options creating ethereal movement. Sheerness Factor determines opacity levels for your tulle projects.
Sewing with this delicate material can present challenges, such as managing its slippery surface.
Here’s what impacts your Cost Analysis:
- Polyester tulle: Budget-friendly at $2-5 per 25-yard roll, perfect for beginners learning tulle sewing
- Nylon blend: Mid-range option offering better shape retention than basic polyester varieties
- Silk tulle: Premium choice costing $15-30, ideal for special occasions requiring luxurious finish
Tulle Characteristics Tulle vs. Other Fabrics Tulle Skirt Styling
Caring for Your Tulle Skirt
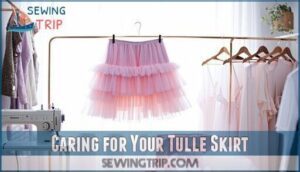
Proper maintenance transforms your handmade tulle masterpiece into a lasting wardrobe treasure.
Transform your handmade tulle creation into a treasured keepsake with gentle care and proper storage techniques.
Start with washing tulle using gentle hand-washing techniques in cold water with mild detergent.
Never wring the delicate fabric—gently press water out with a clean towel instead.
For stain removal, spot-treat immediately with diluted vinegar or gentle soap, avoiding harsh scrubbing that creates snags.
Storage solutions matter substantially.
Hang your skirt on padded hangers in breathable garment bags, giving those fluffy layers room to maintain their shape.
Avoid cramped closets where heavy fabrics might crush the tulle.
When dealing with skirt wrinkles, use gentle steaming rather than skirt ironing, which can melt synthetic fibers.
For repairing tears, handle small snags immediately before they worsen.
Always use a laundry bag if machine-washing becomes necessary, though hand-washing remains ideal for preserving your creation’s beauty and extending its lifespan through proper skirt care.
Use gentle steaming rather than skirt ironing, which can melt synthetic fibers, and avoid harsh scrubbing that creates snags, to maintain the delicate fabric and ensure it remains a lasting wardrobe treasure with breathable garment bags.
Frequently Asked Questions (FAQs)
How do you make a tulle skirt?
Creating a stunning tulle skirt starts with gathering your materials and measuring carefully.
Cut four tulle pieces to your desired length plus one inch, then create a fitted lining.
Sew everything together, add an elastic waistband, and you’ll have a beautiful, flowing masterpiece.
How much Tulle do you need for a skirt?
Like Cinderella’s magical ballgown transformation, you’ll need 3-4 yards of 118-inch wide soft tulle for a full adult skirt. Add 2 yards of lining fabric for opacity and structure underneath.
Do you need a sewing machine to make a tulle skirt?
No, you don’t need a sewing machine to make a tulle skirt.
You can create a beautiful no-sew version using tulle strips and ribbon.
Simply tie doubled tulle strips onto a ribbon waistband for an easy, fluffy skirt.
How much tulle do I need to make a skirt?
You’ll need 3-4 yards of 118-inch wide soft tulle to create a full, beautiful skirt.
You’ll also need 2 yards of lining fabric like satin or taffeta.
Additionally, 1½-2 inch wide elastic for the waistband is required.
Is tulle hard to sew with?
Tulle can be tricky to sew because it’s delicate and tends to snag easily.
You’ll need a ballpoint needle to prevent tears, and it slips around while cutting.
However, with patience and proper techniques, it’s definitely manageable for beginners.
Are tulle skirts still in style in 2025?
Despite some claiming they’re dated, tulle skirts remain fashionable in 2025, appearing in spring collections and celebrity-inspired styling guides.
You’ll find them styled with edgy accessories for modern appeal.
For versatile styling, consider pairing them with fitted tops and jackets.
Can you make tulle skirts without sewing?
Yes, you can create stunning no-sew tulle skirts using ribbon waistbands and simple knotting techniques.
Cut tulle strips, fold them in half, and loop them onto a ribbon waistband for a fluffy, gathered look without any stitching required.
How to store tulle skirts properly?
Hang tulle skirts on padded hangers to prevent creasing, or store them flat in tissue paper.
Keep them in cool, dry spaces away from direct sunlight to maintain their shape and color.
Whats the best tulle color for beginners?
For beginners, white or ivory tulle works best.
These neutral shades hide construction mistakes, match any lining fabric, and won’t clash with other colors if you mess up measurements or stitching.
Can tulle skirts be machine washed?
Like a delicate butterfly’s wings weathering a storm, tulle requires gentle care to maintain its ethereal beauty.
You can machine wash tulle skirts on a delicate cycle with cold water and mild detergent.
Always use a mesh laundry bag to prevent snagging and air dry to preserve the fabric’s structure.
Conclusion
Like building a house, every tulle skirt starts with a strong foundation—the waistband.
By following each step in this guide on how to make a tulle skirt, you’ll create a skirt with the right amount of puff and style.
Adjust the number of tulle layers for extra fullness or a softer look. Don’t forget, even details like careful measuring and cutting make a huge difference.
With practice, you’ll love crafting each custom tulle skirt, and attention to details like careful measuring will become second nature.

