This site is supported by our readers. We may earn a commission, at no cost to you, if you purchase through links.
 To sew a perfect tutu, gather the essentials: soft tulle fabric, cotton or satin for the waistband, satin ribbon trim, 1-inch wide elastic, and basic sewing tools.
Measure your skirt length (waist to desired length + 4 inches) and natural waistline (+1 inch). Cut the tulle into strips and the waistband fabric to the required dimensions.
Fold the tulle sections for easy cutting. Use a sewing machine with a ruffling foot to gather the tulle, adjusting to fit the waistband.
Assemble the tutu by sewing the tulle layers and attaching them to the waistband.
Want specific step-by-step details? Keep going!
Table Of Contents
Key Takeaways
- Dive into the world of twirling enchantment with this easy-to-follow guide to crafting a custom-fitted tutu.
- Gather your tulle, elastic, and creativity, and let’s dance our way through the steps of tutu-making magic.
- With a little patience and a dash of determination, you’ll have a tutu that’s the perfect fit for your twirling adventures.
- Remember, even if your gathers aren’t as even as a ballerina’s line, your tutu will still be a unique expression of your creativity.
Materials Needed
To create your dream tutu, you’ll need a yard of soft tulle fabric for that essential tulle softness.
For the waistband, choose cotton for the ultimate comfort or satin for sheer elegance.
Don’t forget the satin ribbon trim for optional embellishments that add pizzazz.
Find a one-inch wide elastic for a secure fit.
Gather your sewing machine, sewing needle, matching thread, fabric scissors, sewing pins, and a sewing gauge.
With these materials, your tutu will be both beautiful and comfortable.
Taking Measurements
To begin sewing your tutu, you need to measure the skirt length and waist accurately. Use a measuring tape to determine the desired length of the skirt and the waist circumference, adding four inches to the waist measurement for ease and seam allowance .
Skirt Length
When determining your tutu skirt length, consider your personal style, body proportions, and the occasion. A shorter tutu adds a playful touch, while a longer one can appear elegant.
- Measure from your waist to the desired length making sure it’s appropriate for the occasion.
- Mark the desired length on your tulle fabric.
- Cut the tulle layers to your marked length for consistency.
- Decide on the fullness by adding more or fewer tulle layers.
This makes sure a perfect fit for any tutu skirt .
Waist Measurement
Next, measure your waist. This measurement is crucial since it guarantees the tutu fits perfectly. Use a flexible measuring tape around your natural waistline, where you’d like the skirt to sit. Add an inch to this measurement to allow for comfort and easy movement.
The waistband material you choose should match your elastic size, generally about 1 inch wide, and balance the tulle width for the best ruffle density. Accurate waist measurements are essential for a comfortable and secure fitting tutu .
Cutting the Fabric
To begin cutting the fabric for your tutu, you’ll need to accurately measure and cut the tulle layers, the waistband fabric, and any ribbon or trim you plan to use. Make certain each piece is cut to the precise width and length according to your measurements to achieve a perfect fit.
Tulle Layers
Cutting tulle layers involves precision and care. Here’s how you do it:
- Choose tulle types: Opt for varieties like soft tulle.
- Measure fabric density: Make sure it suits your desired layered looks.
- Cut into strips: Each strip should fit your skirt length.
- Consider color combinations: Mix hues for a vibrant aesthetic.
Optimize your pieces for easy gathering!
Waistband Fabric
When choosing waistband fabric, consider cotton, satin, or jersey for comfort and stretch. Cut the fabric to your hip size plus 4 inches wide, and 3 1/2 inches tall. Make sure it complements your tutu’s look while providing the best gathering ratio.
| Fabric Option | Stretchability | Comfort Level |
|---|---|---|
| Cotton | Medium | High |
| Satin | Low | Medium |
| Jersey | High | High |
Ribbon or Trim
When cutting the fabric for the ribbon or trim, measure and mark the desired ribbon length. Opt for a ribbon color that complements your tulle type. Consider adding lace details or other embellishment options to enhance tutu fullness. Use a safety pin to help guide the ribbon through the waistband casing.
Preparing the Tulle
To prepare the tulle, start by cutting the tulle sections to your desired width and length. Then, fold the layers in half twice to make the cutting process easier and guarantee smooth edges with a rotary cutter (Source).
Cutting Tulle Sections
Now it’s time to cut your tulle into sections. You’ll need to cut at least 10 sections, depending on the desired length of your tutu.
Make sure to use a rotary cutter for smooth edges. The size of each section will depend on the material and length you’re aiming for. For a standard tutu, cut each section to around 118 inches wide and 10 inches tall.
Remember to handle the tulle gently to prevent it from fraying or tangling.
Folding for Easier Cutting
To achieve even cutting for your tutu, practice effective fabric folding techniques. Start by folding the cut tulle dimensions in half twice; this compacts the fabric, making it easier to handle.
Using a rotary cutter enhances cutting efficiency, ensuring smooth edges. This method allows for precision, ensuring all layers are identical in size.
Efficient fabric folding techniques streamline the process, making your tutu project both swift and accurate.
These steps are essential for creating a professional-looking tutu .
Gathering the Tulle
When gathering the tulle, use a sewing machine with either a ruffling foot or a longer stitch length for a tighter gather. Feed each tulle section into the machine sequentially, ensuring smooth and even gathering .
Using a Sewing Machine
To gather tulle fabric using a sewing machine, first set your machine to a long, loose stitch. Feed each tulle section carefully, ensuring consistent tension. Use gathering techniques to create even ruffles:
- Secure the stitches to prevent unraveling.
- Adjust gathers to fit your waistband dimensions.
- Press the tulle to maintain the gathered form.
- Proceed with waistband construction and elastic insertion.
Mastering these steps evokes the elegance of a Disney princess, perfect for a flower girl tutu .
Ruffling/Gathering Foot
Now it’s time to gather those tulle layers! Attach the ruffling/gathering foot to your sewing machine. This specialized foot helps you gather fabric evenly, creating a beautiful, full tutu.
Feed each tulle section into the machine, using a long, loose stitch length. Gather the tulle tightly, adjusting the stitch length as needed. You’ll be amazed at how quickly you can gather your tulle layers, creating a stunning, child-sized tutu skirt that’s sure to impress!
Sewing the Tulle Layers
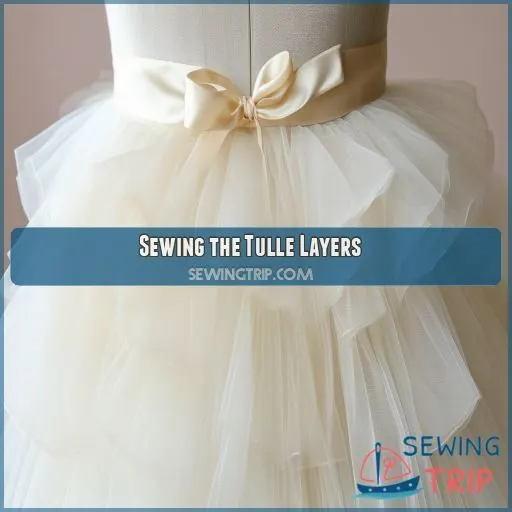
When sewing the tulle layers, start by stitching the side seams of each layer to create a continuous loop. Then, attach the layers together by aligning and sewing the gathered edges to create an even and full appearance .
Sewing Side Seams
Now that you’ve gathered your tulle layers, it’s time to sew the side seams.
To prevent fabric fraying, use a 1/4-inch seam allowance. Set your sewing machine to a short stitch length and sew the tulle layers together, starting from the bottom and working your way up.
Make sure to backstitch at the beginning and end of each seam to secure it. Use your iron to press the seams flat, and you’ll be ready to move on to the next step.
Attaching Tulle Layers Together
Now that you’ve sewn the side seams, it’s time to attach the tulle layers together. Align the gathered edges of the tulle layers, making sure they’re stacked evenly. Use your sewing machine to stitch the layers together, maintaining a consistent seam allowance. This will create a voluminous, cohesive skirt.
- Key Steps:
- Secure gathered edges with pins.
- Use a straight stitch for durability.
- Make sure gathers are evenly distributed.
You’ll achieve a polished look, ready for the waistband attachment.
Creating the Waistband
To create the waistband, first cut the waistband fabric to the required measurements based on your hip size. Then, sew the waistband to the top edge of the gathered tulle layers, ensuring a snug and even attachment .
Cutting Waistband Fabric
Now that you’ve sewn your tulle layers together, it’s time to create the waistband. Cut a piece of cotton or satin fabric to the desired width and length, keeping in mind your waist measurement plus 4 inches.
The waistband should be about 3 1/2 inches tall. Choose a fabric that complements your tutu’s color scheme and has some elasticity to ensure a comfortable fit.
Make sure to cut the fabric accurately, as this will affect the overall fit of your tutu.
Sewing Waistband to Skirt
Now that you’ve cut your waistband fabric, it’s time to attach it to the skirt. Position the waistband fabric choice carefully, ensuring the right side faces inward. Use sewing pins to keep the waistband placement steady. Sew the waistband to the skirt, ensuring the elastic width fits snugly inside. For a polished look, add a waistband trim.
- Double-check measurements
- Use a zipper foot
- Avoid fabric curl
- Use a gentle cycle for washing
- Air dry and iron on a low heat setting
Inserting the Elastic
To guarantee a proper fit, first measure and cut the elastic to match your waist measurement plus an extra inch. Then, insert the elastic into the waistband casing, ensuring it evenly gathers the tulle layers while maintaining a snug fit around your waist.
Measuring and Cutting Elastic
To measure and cut your elastic, start by choosing an elastic width of 1 inch for a cozy fit. Measure your waist, subtract 2 inches for the elastic length, ensuring it provides a snug but comfortable fit without excessive tension.
Cut the elastic to this length.
Elastic type matters; choose a strong, durable one for lasting elasticity perfect for birthday parties and dance recitals.
Inserting Elastic Into Waistband
After measuring and cutting the elastic, you’ll need to insert it into the waistband. Start by pinning one end of the elastic to the opening of the casing. Use a safety pin attached to the other end to thread it through.
- Make sure the elastic is evenly distributed.
- Secure the ends of the elastic by stitching them together.
- Close the opening in the waistband with a straight stitch.
- Stretch the waistband to confirm the elastic sits flat and taut.
This method guarantees a snug, comfortable fit.
Finishing Touches
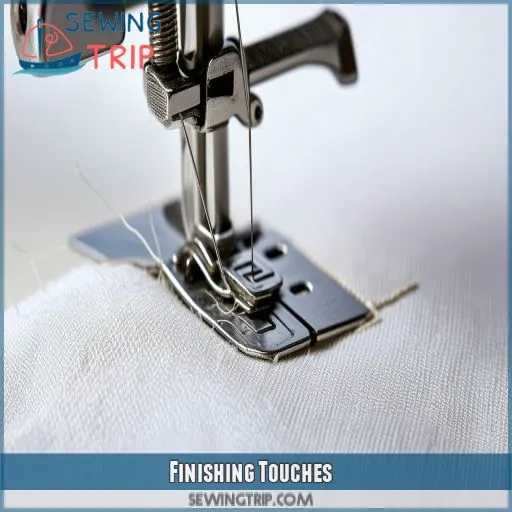
Now that the elastic is in place, it’s time to add some finishing touches to your tutu. You can enhance the look by attaching a satin ribbon trim and hemming any raw edges to give it a polished, professional appearance.
Adding Ribbon Trim
To add the perfect finishing touch, choose a ribbon fabric that complements your tutu’s aesthetic. Measure the ribbon width to make sure it matches the skirt’s design.
Select a ribbon color that enhances the tulle’s shade. Carefully decide on ribbon placement, aligning it along the waistband or skirt hem.
Pin the ribbon in place and sew it using a matching thread. This step adds a touch of elegance and sophistication to your creation, making it truly stand out.
Hemming Edges
Now that you’ve added the ribbon trim, it’s time to focus on hemming the edges of your tutu. To prevent fabric fraying, use a serger or a narrow hem to finish the edges.
You can also use a rolled hem or a chain-stitch to add a decorative touch. Choose a hem type that complements your tutu’s style and fabric.
Care Instructions
To make sure your tutu stays in top shape, hand-wash or put it in a laundry bag for machine washing, then let it dry in the air. Iron on a low heat setting to get rid of any wrinkles .
Washing
For washing your tutu, either hand wash or machine wash using a laundry bag to protect it from damage. Always choose a gentle cycle if machine washing. After washing, let the tutu air dry naturally. If needed, you can carefully iron it on a low heat setting to avoid any wrinkles.
Drying
After washing, it’s imperative to dry your tutu correctly to preserve its shape and fabric integrity. Opt for air drying to prevent damage.
- Air drying: Lay flat on a clean towel.
- No tumble drying: Avoid using the dryer as it can warp the elastic.
- Avoid direct sunlight: Prolonged exposure can discolor colors.
- Check heat settings: If tumble drying is necessary, use low heat settings to prevent shrinking.
Ironing
When ironing your tutu, set the iron to a low-heat setting to prevent fabric damage. Use a clean, smooth ironing surface. Gently press for short ironing times, avoiding prolonged contact. Here’s a handy reference table:
| Ironing Settings | Temperature | Time |
|---|---|---|
| Low Heat | < 110°C | 5-10 seconds |
| Medium Heat | 110-150°C | 3-5 seconds |
| High Heat (Avoid) | > 150°C | Don’t use |
Keep these tips in mind for a flawless finish .
Frequently Asked Questions (FAQs)
How do you make a tutu no sew?
To make a no-sew tutu, cut tulle strips, tie them around an elastic waistband, knotting securely. Continue until the waistband is full. Adjust length as needed, and wear over leggings or a dress for extra fluffiness.
Can you sew a tutu skirt?
Creating a tutu skirt is like crafting a fluffy cloud. Stitch tulle layers, gather them to fit a waistband, attach the waistband, and insert elastic. Finish with optional ribbon trim. Easy and delightful!
How to make a tutu?
To make a tutu, cut and gather sections of tulle, attach them to a waistband, and insert elastic. Consider adding a ribbon trim for extra flair and guarantee proper finishing for a professional look.
Can you make a tutu skirt with tulle?
Yes, you can make a tutu skirt with tulle. Simply cut and gather tulle layers, attach them to a waistband casing, insert elastic, and sew. Optionally, add ribbon trim for extra flair (Source).
Do you need a sewing machine to make a tutu?
You don’t need a sewing machine to make a tutu. You can use hand-gathering and tying methods with elastic. However, a sewing machine simplifies the process and results in a more professional and durable finish .
How do you make a no-sew Tutu?
To make a no-sew tutu, cut tulle into strips, fold each strip in half, create a loop, and pull the ends through the loop around an elastic waistband. Repeat until the tutu reaches desired fullness.
How do I prevent tulle from puckering?
Use a ballpoint or jersey needle, size 70/10, to prevent tulle from puckering. Lower your sewing machine speed, hold the fabric taut, and use a short straight stitch while gently guiding the fabric .
Can I hand-sew the entire tutu?
Where there’s a will, there’s a way. Yes, you can hand-sew the entire tutu. Use small, even stitches to sew the tulle layers, gather the fabric, and attach the waistband and elastic for a sturdy finish.
What other fabrics work well with tulle?
You can pair tulle with fabrics like satin, organza, cotton, or chiffon. These fabrics complement tulle’s light, airy feel, adding structure or further enhancing the tutu’s elegant, whimsical appearance (Source).
How do I fix uneven gathers in the tulle?
Imagine sculpting waves of tulle, but the gathers aren’t cooperating. Smooth them by spreading the fabric evenly and use sewing pins to secure it. Then, adjust the tension on your machine and re-gather as needed for uniformity.
Can I add lining to a tulle tutu?
Yes, you can add lining to a tulle tutu. Simply cut the lining shorter than the tulle, gather it to the waist measurement plus extra inches, and stack it under the tulle before stitching them together.
Conclusion
Creating a tutu is like weaving a dream into reality, offering practicality and elegance in one piece. Follow this tutorial on how to sew a tutu step by step, using your precise measurements and quality materials.
Assemble the layers, add the elastic, and finish with a ribbon trim for the perfect look. By adhering to these instructions, you’ll craft a beautiful, custom-fit tutu that will bring joy with every twirl. Happy sewing!

