This site is supported by our readers. We may earn a commission, at no cost to you, if you purchase through links.
Next, bury the thread by taking the needle under the stitches on the wrong side, pulling it through, and trimming the excess.
For an extra polished look, tie off the thread by making a few small stitches in the same spot before cutting.
With these simple hand sewing techniques, you’ll achieve a flawless finish that showcases your sewing skills. Keep reading to discover more advanced sewing tips and tricks.
Table Of Contents
Key Takeaways
- Start by ending your stitch neatly by tying off the thread and burying it between layers of fabric or weaving it through stitches or fabric.
- Use a twin needle or zigzag stitch for a professional finish when working with knits.
- Secure your stitches by using a knot, single-thread needle, felt, or backstitch.
- Hand sewing is a versatile skill that can be used for a variety of crafts and mending techniques, and is suitable for a wide range of fabrics.
How to Finish a Sew?
To finish a seam, you can use a zig-zag stitch, which is a commonly used seam finish for thick or bulky fabrics. This method involves stitching over the raw edges of the fabric to prevent fraying.
If you don’t have a serger, you can use a zig-zag stitch close to the edge to secure the seam allowances and prevent seam slitting.
Additionally, you can experiment with stitch length and width to find the best combination for your fabric weight and desired seam appearance.
Ending a Stitch by Hand
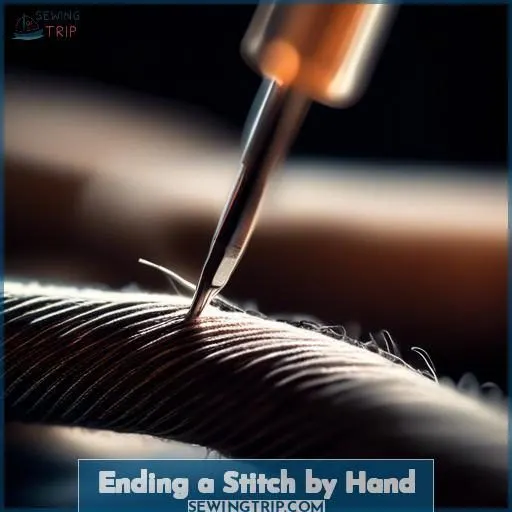
To end a stitch by hand, turn the material over** so the wrong side faces you. Insert your needle under the stitch closest to your thread and pull it through the other side. Bring the needle over the loop to form a closed circle.
If using thick fabric or for extra security, insert the needle through the same stitch to make another loop. Cut close to the knot with sharp scissors.
Hand sewing techniques vary based on thread types, needle sizes, fabric weaves, and stitch variations. Always leave enough thread to tie off and hide the knot by burying it between layers of fabric or weaving it through stitches or fabric.
Bury the Thread
After ending your stitches, it’s time to bury the thread for a polished look. Burying the thread between fabric layers or weaving it through existing stitches helps conceal the ends and prevents unraveling.
How to Bury the Thread
Once you’ve tied off your stitch, it’s time to make it disappear with some savvy burying methods. Slip your needle between the fabric layers, ensuring your hidden stitches stay out of sight. Weaving techniques are your secret weapon here, reducing thread visibility to nil.
- Glide the needle through existing stitches
- Tuck the thread end neatly away
- Choose a needle that slips in easily
- Opt for a thread color that blends
- Master the art of seamless sewing
Helpful Notions for Finishing Knits
To finish a knit seam, consider using a twin needle for a professional look. For a more versatile finish, try the zig-zag stitch. If working with knits, use Heat&Bond Soft Stretch for a seamless finish. Chrome ballpoint or stretch needles are ideal for knits. Experiment with twin needles and zig-zag stitches to find your preference.
Tying Off
Completing your sewing project requires securing your stitches. Here are four methods to achieve this:
- Securing with a knot: Create a knot at the thread’s end and interlace it through the stitches or fabric to fasten it.
- Securing with a single thread needle: Knot the thread’s end and insert the needle through the stitches or fabric to fasten it.
- Securing on felt: Position the knot on a piece of felt and pierce the needle through the felt to secure the thread.
- Securing without a knot: Utilize a backstitch or interlace the thread through the stitches to fasten it without creating a knot.
Hand Sewing for Beginners
Hand sewing is a fundamental skill that every sewer should have in their repertoire. It allows you to sew in tight spaces, work with delicate fabrics, and even mend your clothes when your sewing machine isn’t an option. Here’s a beginner’s guide to hand sewing techniques, fabric types, needle selection, thread weight, and stitch length.
- Fabric Types: Hand sewing is suitable for a wide range of fabrics, including cottons, linens, silks, and even leather. The choice of fabric will depend on the project you’re working on.
- Needle Selection: Different hand sewing needles are designed for specific tasks. For example, sharp needles are ideal for general-purpose sewing, while chenille needles are better for embroidery with thicker threads on linen.
- Thread Weight: The weight of the thread you use will depend on the fabric you’re working with. Heavier threads like 12-18 wt. are suitable for hand stitching or heavy topstitching, while lighter threads like 50 wt. are more commonly used for general-purpose sewing.
- Stitch Length: The length of your stitches will also depend on the fabric and the type of project you’re working on. For example, long stitches are suitable for hand quilting, while shorter stitches are better for mending.
- Stitch Types: There are several hand sewing stitches you should master as a beginner. These include the running stitch, backstitch, ladder stitch, and whip stitch. Each stitch has its own unique application and can be used for various projects.
Projects With Hand Sewing
Hand sewing is a versatile skill that can be used for a variety of crafts and mending techniques. Here are four hand sewing projects you can try:
- Hand Sew a Round Pillow Cover with Fringe Trim: This project is perfect for adding a touch of elegance to your home decor. Use your favorite fabric and sew a round pillow cover with a fringe trim for a stylish and unique look.
- Sew a Square Pillow Cover with Pom Pom Trim: Create a cozy and playful pillow cover with pom pom trim. This project is perfect for those who love a bit of whimsy in their home.
- How to Sew a Fabric Yo-Yo: Yo-yos are a fun and easy hand sewing project that can be used as decorative embellishments. Sew a fabric yo-yo and attach it to a piece of clothing or a bag for a personalized touch.
- How to Sew a Tic-Tac-Toe Board: This project is perfect for a fun and engaging activity. Sew a tic-tac-toe board using your favorite fabrics and play with friends and family.
Embroidery Books
Embroidery books are a treasure trove of knowledge for anyone interested in this ancient art form. From historical embroidery to modern techniques, these books offer a wealth of information on embroidery patterns, stitches, and methods. Here are four reasons why you should add embroidery books to your library:
- Learn the Basics: Start with a beginner’s guide that covers the fundamentals of embroidery, such as thread selection, needle types, and basic stitches.
- Explore Different Techniques: Discover various embroidery styles and techniques, from traditional hand embroidery to contemporary machine embroidery.
- Find Inspiration: Browse through collections of embroidery patterns and designs, ranging from simple to complex, to find inspiration for your own projects.
- Expand Your Skills: Advanced embroidery books can help you master new stitches and techniques, allowing you to create intricate and beautiful embroidery pieces.
Some recommended embroidery books include ‘Know Your Needles’ by Liz Kettle and ‘The Ultimate Thread Guide’ by Becky Goldsmith. These books offer practical tips, step-by-step instructions, and stunning visuals to guide you on your embroidery journey.
More Sewing Education
To become a skilled sewer, it’s crucial to broaden your knowledge past the fundamentals. Here are three resources that can aid you in developing your sewing abilities:
- Sewing Techniques Masterclass: This thorough guide encompasses a vast array of sewing techniques, from inserting thread into your sewing machine to mastering intricate stitches like mitered corners.
- Embroidery Books: For those drawn to embroidery, books such as Know Your Needles by Liz Kettle and The Ultimate Thread Guide by Becky Goldsmith can offer valuable knowledge and advice.
- Sewing Machines: If you’re considering purchasing a sewing machine, resources like The Complete Guide to Sewing Machines can assist you in making an educated decision.
Frequently Asked Questions (FAQs)
How to adjust tension for different fabrics?
Adjusting your tension’s a breeze – just tweak the dial based on your fabric thickness. For light fabrics, loosen it up; for heavy ones, tighten it down. Play around ’til you find that sweet spot!
Can you automate the backstitching process?
You can absolutely automate the backstitching process! Just program your machine to retrace the last few stitches at the end. Piece o’ cake – it’s like having a built-in personal assistant stitching for you.
What are the best methods for seam reinforcement?
For sturdy seams, try backstitching – it interlocks stitches for reinforcement. Or opt for a zigzag stitch – it stretches with the fabric and prevents puckering. Experiment to find your preferred technique and settings.
How to prevent fabric puckering during sewing?
With over 580,000 views, this topic is a sewing treasure! To prevent puckering, reduce tension by adjusting your machine’s thread tension, consider a walking foot, and tack seams before stitching. Conquering these techniques unlocks your sewing brilliance!
What are the alternatives to backstitching for durability?
You can try secure knots, overlapping stitches, or zigzag stitching to reinforce your seams. These alternatives to backstitching offer durable finishes that’ll hold up beautifully, whether you’re sewing by hand or machine.
Conclusion
With these straightforward hand sewing techniques, you’ll achieve a polished, professional-looking finish that showcases your sewing skills. Picture your project, perfectly stitched with secure knots and neatly buried threads – a true evidence of your craftsmanship.
Whether you’re a beginner or an experienced sewist, mastering how to finish a sew will elevate the quality of your handmade creations, leaving you with a sense of pride and accomplishment.
Keep these steps in mind, and your sewing projects will boast a flawless, professional-grade finish every time.

