This site is supported by our readers. We may earn a commission, at no cost to you, if you purchase through links.
Select the right needle type – universal for most fabrics, ballpoint for knits, or jeans needles for heavy materials. Insert the new needle with the flat side facing back, pushing it up until it stops. Tighten the screw snugly and test on scrap fabric. The right needle transforms your stitching quality instantly, which is crucial for a successful project, and it is a key factor in preventing thread breaks.
Table Of Contents
- Key Takeaways
- Turn Off Your Sewing Machine
- Raise The Presser Foot and Prepare The Workspace
- Remove The Old Needle
- Select The Correct Needle for Your Project
- Insert The New Needle
- Secure The New Needle in Place
- Check The Needle Placement
- Lower The Presser Foot and Thread The Machine
- Test The Stitching on Scrap Fabric
- Properly Dispose of The Old Needle
- Frequently Asked Questions (FAQs)
- Conclusion
Key Takeaways
- Always power down your machine completely before changing needles – this prevents accidents and protects your equipment from damage during the replacement process.
- Match your needle type to your fabric – use universal needles for most materials, ballpoint for knits, and jeans needles for heavy fabrics to prevent skipped stitches and thread breaks.
- Replace needles every 8-10 hours of sewing or when you notice poor stitch quality – dull needles cause 70% of common sewing problems and can damage expensive fabrics.
- Insert the new needle with the flat side facing back and push it up until it stops completely before tightening the clamp screw snugly but not overly tight.
Turn Off Your Sewing Machine
Step one starts with the most important machine safety tip: always power down your sewing machine completely before changing the needle. This simple electrical precaution prevents accidental injuries and protects your equipment from damage during needle replacement. Unplugging your machine isn’t just about accident prevention—it’s smart equipment maintenance that extends your sewing machine’s life.
Safety first: power down completely before any needle work begins
When you’re working on delicate components like the needle clamp, you don’t want any surprise movements from the motor. Think of it like changing a light bulb. You wouldn’t leave the power on, right? The same logic applies to sewing machine troubleshooting and maintenance.
A powered-down machine creates a safe workspace where you can focus on proper needle replacement without worrying about electrical hazards. This power shutdown step takes just seconds but sets the foundation for successful sewing machine maintenance. Once you’ve confirmed the machine is completely off and unplugged, you’re ready to proceed with confidence, knowing you’ve prioritized safety first.
Raise The Presser Foot and Prepare The Workspace
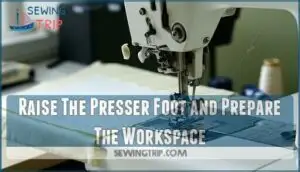
Preparation sets the foundation for a smooth needle replacement process. Start by raising the presser foot using the lever, which you’ll typically find on the right side of your sewing machine. This simple action creates the workspace clearance you need to maneuver around the needle area safely.
Next, place a small piece of fabric or paper underneath the presser foot before lowering it back down. This safety precaution prevents the old needle from accidentally falling into your machine’s internal mechanisms during removal. Think of it as a safety net that catches any dropped parts.
Take a moment to verify your machine stability by checking that it sits securely on a flat, stable surface. Clear away any clutter from your workspace organization to give yourself plenty of room to work. Having your tools within easy reach makes the entire process smoother.
Remove The Old Needle
Now it’s time to tackle the removal itself. This needle change process requires a steady hand and the right technique to avoid dropping parts into your machine. Start by raising the needle to its highest position using the handwheel. Turn it toward you until the marks align – this gives you the best access for needle clamp release.
Next, you’ll need to loosen the needle clamp screw, which holds everything in place. Here are the essential needle removal tips:
- Hold the old needle firmly with one hand while loosening the screw
- Turn the screw counterclockwise (toward you) using gentle, controlled movements
- Pull the needle straight down once the clamp loosens
- Don’t remove the screw completely – just loosen it enough for needle extraction methods.
These screw loosening techniques prevent the needle from falling into your machine’s internal mechanisms. Keep that old needle handy for proper disposal once you’ve completed your needle replacement. The key is maintaining control throughout these needle change instructions.
Select The Correct Needle for Your Project
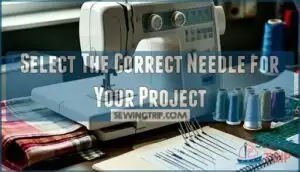
Choosing the right needle makes the difference between professional-looking stitches and a frustrating sewing experience.
You’ll want to match your needle type and size to both your fabric weight and your specific project needs, which involves considering the fabric weight.
Needle Selection for Fabrics
Your fabric choice drives your Needle Selection strategy. Universal needles suit most Fabric Types, while ballpoint needles prevent runs in knits. Match Needle Sizes to fabric weight: 60/8 for silk, 90/14 for cotton, 110/18 for denim.
Heavy fabrics need jeans needles for Material Compatibility. Consider Thread Choices too—metallic threads require special Sewing Machine Needles with larger eyes for smooth Sewing Projects.
For optimal results, understanding needle sizing guides is vital to achieve the best fabric and thread combination.
Importance of Regular Changes
Beyond the basics of needle selection, you’ll discover that changing needles regularly transforms your sewing experience from frustrating to flawless. Fresh needles every 8-10 hours prevent costly mistakes and maintain professional results.
Regular needle replacement protects against:
- Fabric damage – preventing snags, pulls, and holes in expensive materials
- Machine breakdowns – avoiding costly repairs to timing and bobbin mechanisms
- Project failures – eliminating skipped stitches and thread breakage
- Safety hazards – reducing needle breaks and potential injuries
By following proper needle change procedures, you can guarantee superior sewing performance and prevent common issues.
Proper Needle Placement
Needle alignment directly impacts your sewing accuracy and machine calibration. When you change the needle, proper needle installation guarantees the flat side faces back on most machines. Insert it fully until it stops, then tighten the needle clamp screw securely.
This needle replacement step affects thread tension and fabric guidance, preventing skipped stitches during operation. Understanding the correct sewing machine needles is vital for achieving professional results with sewing machine needles.
Insert The New Needle
Now you’ll carefully insert your new needle into the clamp. Hold the needle with the flat side facing toward the back of your machine – this flat side alignment is critical for proper needle orientation. Push the needle up into the needle clamp until it stops completely against the needle bar. This guarantees proper needle seating and prevents wobbling during sewing.
Here’s your needle installation checklist:
- Push upward firmly – The needle should sit flush against the internal stop
- Verify flat side placement – It must face the back of your domestic machine
- Check for secure positioning – No gaps should exist between needle and clamp
Don’t worry if you need to adjust the needle’s position slightly. Getting the needle set screw area ready comes next, but first focus on achieving perfect needle seating. When you change the needle correctly from the start, you’ll avoid frustrating threading issues later. The needle clamp screw will hold everything in place once you’ve confirmed proper positioning. Proper needle changing techniques are essential for maintaining your sewing machine’s performance and extending its lifespan.
Secure The New Needle in Place
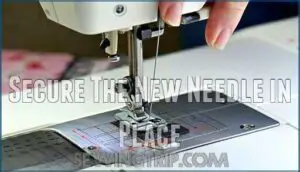
With your new needle properly positioned, it’s time to lock it into place. Hold the needle steady with one hand while you tighten the needle clamp screw clockwise using your screwdriver. You’ll want to make it snug but don’t overdo it—think firm handshake, not death grip. Too much force can strip the threads or damage the clamp mechanism.
The key to proper needle installation lies in achieving perfect needle stability without overdoing the screw tightening. Your needle set screw should be secure enough that the needle won’t budge when you gently wiggle it, but not so tight that you risk damaging the delicate components. This clamp security directly affects your thread tension and overall stitch quality.
Once tightened, give the needle a gentle test wiggle to confirm needle alignment is perfect. A properly secured needle shouldn’t move at all when you change the needle position or apply light pressure. This final check confirms your needle installation is complete and ready for testing.
Check The Needle Placement
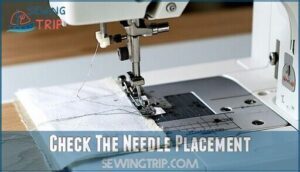
After securing your new sewing machine needle, it’s time to verify everything’s properly aligned for superior stitch quality. This vital step confirms your needle installation was successful and prevents potential sewing problems down the road.
Take a moment to inspect these key elements:
- Needle alignment – The needle should sit perfectly straight in the needle clamp screw
- Needle depth – Push the needle up until it reaches the natural stop point
- Machine calibration – Verify the flat side faces the back of your machine
- Fabric tension – Check that the needle clamp screw holds firmly without overtightening
- Needle screw – Ensure it’s snug but not stripped from excessive force
Gently wiggle the needle to test its stability. If it moves or feels loose, you’ll need to adjust the needle clamp screw slightly. A properly installed needle shouldn’t budge when lightly touched. This final check prevents skipped stitches and confirms your change sewing machine needle process was completed correctly, setting you up for smooth sewing ahead.
Lower The Presser Foot and Thread The Machine
Once you’ve confirmed the needle sits perfectly straight and secure, it’s time to get your machine back in working order. Lower the presser foot using the foot lever, which puts your machine in its ready-to-sew position. This simple step engages the thread tension mechanism and prepares your machine for proper stitching.
Now you’ll need to thread your machine according to your model’s threading path. Start with the bobbin management – verify your bobbin is properly wound and inserted. Then guide your thread through each tension disc and guide, paying attention to thread tension settings. The needle alignment you just completed works hand-in-hand with proper threading for smooth operation.
Don’t rush this step – machine calibration depends on correct threading. Take your time following the threading diagram in your manual, as each sewing machine needle change requires fresh threading to prevent old thread from causing issues during your next project.
Test The Stitching on Scrap Fabric
With your presser foot down and machine threaded, it’s time to put your new sewing machine needle to the test. Think of this step as a dress rehearsal before the main performance—you wouldn’t want any surprises during your actual project.
Grab some scrap fabric that matches your upcoming project and run a few test stitches. This simple check can save you hours of frustration later. Here’s what to evaluate during your test run:
A few quick test stitches now can save you from project disasters later
- Fabric tension – Look for balanced, even stitches without puckering
- Thread quality – Check for smooth thread flow without breaks or snags
- Stitch length – Verify your sewing machine settings produce the desired stitch size
- Sewing accuracy – Make certain the needle pierces cleanly through the fabric
- Thread tension adjustment – Make sure top and bottom threads lock properly
If your stitch quality looks uneven or the fabric bunches up, don’t panic. Minor adjustments to your sewing machine settings usually solve these issues. Remember, taking time to test on scrap fabric now prevents having to change the needle again later.
Properly Dispose of The Old Needle
After you’ve confirmed your stitching runs smoothly, don’t just toss that old needle in the trash. Sharp Object Handling requires proper Waste Management Tips to protect sanitation workers and your family. Instead of risking needle-stick injuries, use Safe Needle Storage methods like dropping the used Sewing Machine Needle into a rigid plastic bottle with a screw-on cap.
Label it "SHARPS" clearly, and when it’s full, seal it tight before disposal. Some areas offer Needle Recycling programs or designated drop-off points for Eco Friendly Disposal. This simple step in Sewing Machine Maintenance keeps everyone safe while you master Changing Sewing Needles.
Proper Needle Storage and Organization isn’t just about new needles—it’s about responsibly handling the old ones too.
Frequently Asked Questions (FAQs)
How do you change a sewing machine needle?
Ready to swap out that dull needle? Turn off your machine, raise the presser foot, and position the needle at its highest point.
Loosen the needle screw counterclockwise, remove the old needle, insert the new one with the flat side facing back, then tighten securely.
How do I replace the needle?
Turn off your machine and raise the presser foot. Push the needle up using the handwheel, then loosen the clamp screw counterclockwise.
Remove the old needle and insert the new one with the flat side facing back. Tighten securely, ensuring the new needle is in place correctly with the flat side facing back.
How do you remove a needle from a sewing machine?
Practice makes perfect – first you’ll raise the needle to its highest position using the handwheel.
Then loosen the needle clamp screw counterclockwise while holding the needle, and pull it straight down to remove it completely.
How often should I change my sewing machine needle?
You’ll want to replace your sewing machine needle every 8-10 hours of stitching or after completing each project.
Dull needles cause skipped stitches, thread breaks, and fabric damage, so don’t wait until problems appear.
What are the different types of needles and when should I use them?
Choose universal needles for most fabrics, ballpoint for knits, jeans needles for denim, leather needles for tough materials, and quilting needles for multiple layers. Match needle size to fabric weight.
Can I use the same needle for different types of fabric?
While you could technically use one needle for different fabrics, you shouldn’t—it’s like wearing the same shoes for hiking and dancing.
Universal needles work for many woven and knit fabrics, but switching needle types prevents damage and guarantees better stitches.
Switching to the correct needle type is crucial, as universal needles work for many woven and knit fabrics.
How do I know if my needle is dull or damaged?
You’ll spot a dull or damaged needle when you see skipped stitches, puckered fabric, or hear unusual sounds while sewing. Check if the needle’s bent by placing it flat.
Are there any special precautions I should take when disposing of old needles?
Always dispose of old sewing needles safely in a sturdy container like a pill bottle or needle disposal box.
Never throw them loose in trash where they can injure sanitation workers or family members.
How often should I change my needle?
Change your needle after every 8-10 hours of sewing or when you notice skipped stitches, thread breakage, or dull performance. Heavy fabrics wear needles faster than lightweight ones.
Can I use any needle brand?
Like knights of old wouldn’t swap their trusty swords, you shouldn’t mix needle brands carelessly. Most quality brands work fine, but you’ll want to match your machine’s needle system.
Check your manual for compatibility—some machines prefer specific brands for superior performance, to ensure superior performance.
Conclusion
Research shows that 70% of sewing problems stem from dull or incorrect needles. Now you’ve mastered how to change a sewing machine needle using these nine straightforward steps. You’ll prevent thread breaks, skipped stitches, and fabric damage that ruin projects.
Regular needle changes every 8-10 hours of sewing keeps your machine running smoothly. Remember to match needle types to fabric weights and dispose of old needles safely. With practice, this essential skill becomes second nature and transforms your sewing quality.
- https://www.sewing.org/files/guidelines/22_115_sewing_machine_needle_charts.pdf
- https://www.sewessential.co.uk/blog/how-to-choose-the-right-sewing-machine-needle/
- https://www.schmetzneedles.com/pages/needle-guide
- https://www.singer.com/pages/choosing-the-perfect-singer-machine-needles-for-your-sewing-project
- https://www.whaleys-bradford.ltd.uk/news-guides/types-of-sewing-machine-needles/

