This site is supported by our readers. We may earn a commission, at no cost to you, if you purchase through links.
 If you’re wondering how to sew prefold cloth diapers, start with sturdy cotton for absorbency and durability—think old flannel sheets or cotton towels if you’re feeling thrifty. Cut your fabric to size, layer for thickness, and stitch with a basic sewing machine using polyester thread. Zigzag those edges to keep fraying at bay.
Avoid thin or worn-out material; nobody wants a leaky diaper disaster. Sizing matters, so check your baby’s age and growth chart before snipping away. With the right tools and a steady hand, you’ll have homemade diapers that stand up to life’s little messes.
Ready for more clever tricks?
Table Of Contents
Key Takeaways
- Choose sturdy cotton or similar absorbent fabrics and avoid thin, worn-out material to prevent leaks.
- Pre-wash and accurately measure your fabric before cutting to guarantee a proper fit and minimize shrinkage.
- Use a zigzag stitch or serger to finish edges and keep fraying at bay, even if you do not have advanced equipment.
- Build your stash with 24-36 prefolds, adding extra layers for nighttime, and skip fabric softener to keep absorbency strong.
Choosing Fabrics and Materials for Prefolds
Selecting the right fabric is essential for creating absorbent, durable prefold diapers that’ll last through countless washes and changes.
The fabric you choose is the secret to diapers that stay soft and strong, wash after wash
You’ll want to focus on materials that balance softness against baby’s skin with the heavy-duty performance needed for this important job, which requires heavy-duty performance.
Best Fabrics for Absorbency and Durability
Which fabrics deliver the best bang for your buck when sewing prefold diapers? Cotton leads the pack with unbeatable durability and 27x water absorption. Hemp blends offer superior longevity for heavy wetters, while bamboo provides antimicrobial benefits.
Consider fabric weight (8-12 oz), weave structure, and fiber content when selecting diaper materials. Test durability by stretching samples—quality fabrics bounce back without distortion. For ideal results, consider using eco friendly fabrics that balance performance and sustainability.
Repurposing Household Textiles (e.g., Sheets, Towels)
Three words can transform your diaper budget: textile recycling magic. Old flannel sheets make excellent prefold outer layers, while worn microfiber towels create absorbent inserts.
This sustainable sewing approach turns household castoffs into functional diapers. Check fabric weight and condition before repurposing—avoid thin or damaged materials that won’t withstand repeated washing and daily use, utilizing sustainable sewing approach and considering absorbent inserts.
Microfiber Vs. Cotton Vs. Flannel
When choosing between these materials for prefold cloth diapers, cotton wins for durability and skin safety, lasting 200+ wash cycles without irritation. Microfiber towels absorb quickly but leak under pressure and can irritate sensitive skin.
Flannel offers softness but shrinks and weakens faster. Cotton’s weave density and thread count provide superior material durability, making it the gold standard for cloth diaper construction despite slower drying times.
Sizing Prefold Diapers for Babies and Toddlers
Getting the diaper fit right means measuring your little one and matching those baby measurements to standard prefold sizes. Small prefolds work for newborns, medium for growing babies, and large for toddlers.
Growth charts help predict when you’ll need custom adjustments. Making prefold diapers in multiple sizes saves money as your child grows through different stages.
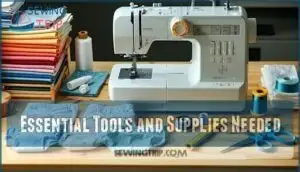
Essential Tools and Supplies Needed
Getting the right tools before you start makes sewing prefold diapers much easier and safer for your little one.
You don’t need every gadget in the sewing store, but a few quality basics will save you headaches and help create diapers that actually work.
Selecting a Beginner-friendly Sewing Machine
Your sewing machine becomes your trusted partner in this cloth diaper journey. Look for beginner sewing machines with straightforward machine controls and clear user interfaces. You’ll want basic stitch options like straight and zigzag stitches, plus automatic tension to handle multiple fabric layers.
Adjustable sewing speed helps you master your sewing skills without racing through seams. Test different sewing machines for beginners before buying—comfort matters when you’re learning to sew. When selecting a machine, consider the features of beginner machines to guarantee you find the best fit for your needs.
Must-have Sewing Tools (scissors, Pins, Needles)
Quality sewing tools make all the difference between a frustrating project and a successful one. You’ll need sharp fabric scissors (never use them on paper!), fine pins that glide through fabric, and machine needles suited for cotton weight.
Add hand-sewing needles for finishing touches, measuring tools for accuracy, and an ironing board for crisp seams. Having the right sewing scissors, such as those found in sewing equipment, is essential for a good sewing experience.
Recommended Threads and Notions
High-quality polyester all-purpose thread in neutral colors like white, black, and gray works best for diaper construction. You’ll need universal sewing needles (size 80/12) for cotton fabrics and ballpoint needles for stretchy materials. Stock up on sharp fabric scissors, fine pins, and a seam ripper for corrections.
Consider interfacing options for added durability around stress points, ensuring proper stitch reinforcement throughout your project. Understanding the importance of sewing notions can help you make informed decisions about the tools and supplies needed for your sewing projects.
Preparing and Cutting Fabric for Prefolds
Getting your fabric ready is where the magic begins—proper prep work now saves you from wonky-sized diapers later.
Start strong: a little extra prep means perfectly sized diapers every single time
You’ll need to pre-wash, measure carefully, and cut precisely to create prefolds that actually fit your little one, which is the result of prefolds that actually fit.
Pre-washing and Ironing Fabric
Why skip fabric preparation when it’s your diaper’s foundation? Pre-wash fabric three times in hot water to prevent fabric shrinkage after sewing. Hot water removes chemicals and achieves maximum weave density changes upfront.
Press fabric on your ironing board using medium heat—wrinkled fabric throws off measurements. This fabric preparation step builds essential sewing skills for successful cloth diapering projects.
Proper fabric preparation involves understanding fabric preparation methods to guarantee a strong and durable diaper. It is about having a strong and durable diaper through careful planning and execution of the preparation process, which ultimately relies on a good understanding of the foundation of the diaper, which is fabric preparation.
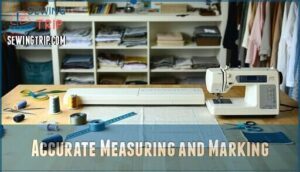
Accurate Measuring and Marking
Once your fabric is prepped and pressed, grab your measuring tape and get ready for some precision work.
Fabric Measurement accuracy determines whether your Making Prefold Diapers fit properly or become expensive burp cloths.
Use a clear ruler for Pattern Marking straight lines, and always double-check measurements before marking.
Remember the old carpenter’s rule: measure twice, cut once.
Your sewing machine will thank you later when everything lines up perfectly during assembly.
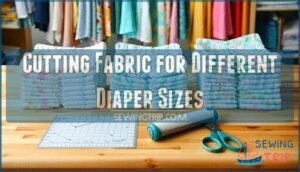
Cutting Fabric for Different Diaper Sizes
Now that you’ve marked your measurements, it’s time to cut your fabric with precision. Proper cutting techniques and fabric measurement accuracy determine your prefold diapers’ final fit and performance.
Here are the standard diaper sizing dimensions for cutting:
- Small (newborn-infant): Cut 12.5" x 21" rectangles for compact absorption
- Medium (6-18 months): Cut 14.5" x 27" pieces for growing babies
- Large (toddler): Cut 16" x 29" sections for maximum coverage
Use precision tools like rotary cutters and quilting rulers for clean, straight edges. Fabric optimization means planning your cuts to minimize waste—sketch your layout first. Sharp fabric scissors work too, but they’re slower for multiple diaper materials. Remember, accurate cutting now saves headaches during assembly.
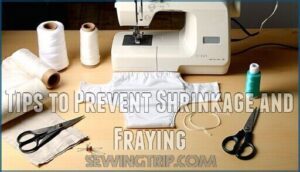
Tips to Prevent Shrinkage and Fraying
You’ll want to tackle shrinkage control and fraying prevention before your first stitch hits fabric. Pre-wash cotton materials three to five times in hot water—this fabric treatment prevents up to 10% shrinkage later.
Apply fabric sealants like Fray Check along cut edges, then reinforce with zig zag stitch or serging for bulletproof seam reinforcement using quality thread selection. To minimize damage, consider using techniques for fabric fraying prevention when working with delicate materials.
Step-by-Step Guide to Sewing Prefold Diapers
Now that you’ve prepared your fabric, it’s time to assemble your prefold diapers using basic sewing techniques that’ll create durable, leak-proof protection.
You’ll work through each step methodically, from creating absorbent layers to finishing edges that can withstand countless washes and wiggly babies, utilizing leak-proof protection.
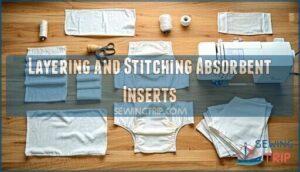
Layering and Stitching Absorbent Inserts
How can you create the perfect balance between absorption and comfort? Start with your insert materials positioned strategically for maximum effectiveness.
- Layer microfiber towels or terry cloth between flannel pieces for superior absorbency
- Position absorbent layers in the center third of your prefold diaper layout
- Use a wide zig zag stitch to secure the center pad without creating bulk
- Verify microfiber placement doesn’t extend beyond the flannel edges
- Test stitch patterns on fabric scraps before sewing prefold diapers permanently
To ensure the best results, it is essential to follow these guidelines carefully, considering the importance of maximum effectiveness in the design and construction of prefold diapers.
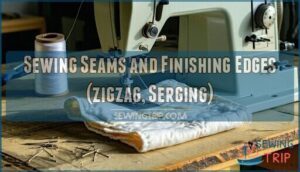
Sewing Seams and Finishing Edges (zigzag, Serging)
Perfect timing is everything when sewing seams and finishing edges. Your zigzag stitching will save these diapers from fraying disasters, while serging creates bulletproof edges that’ll outlast your little one’s diaper days.
| Technique | Best For | Durability | Equipment Needed | Difficulty |
|---|---|---|---|---|
| Zigzag Stitching | Cotton/flannel edges | Good | Regular sewing machine | Beginner |
| Edge Serging | All fabric types | Excellent | Serger/overlock machine | Intermediate |
| Overlock Techniques | Heavy-duty prefolds | Superior | Serger with multiple threads | Advanced |
Use 3-3.5mm zigzag width for most fabrics—half on fabric, half "in the air" to wrap those raw edges properly. Sergers trim while they sew, giving professional results.
Adding Fasteners or Closures
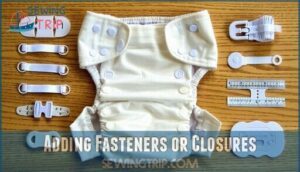
Once your edges are finished, you’ll want to think about closure options for your prefold diapers. While traditional prefolds don’t require built-in fasteners, adding them can make diaper changes smoother and give you more flexibility in how you use your handmade diapers.
Here are your main closure options for DIY Diaper Making:
- Snap Fasteners – Sew metal or plastic snaps directly onto the diaper corners for quick, secure fastening that won’t poke baby’s skin
- Diaper Clips – Use separate plastic clips that attach to the diaper without permanent modifications, perfect for testing different Closure Types
- Snappi Fastener – This stretchy T-shaped tool grips fabric without pins, making it ideal for Prefold Diaper Construction without adding bulk
- Adjustable Straps – Attach elastic bands with snaps or velcro for a custom fit that grows with your child
- Secure Tabs – Add fabric tabs with snaps or hook-and-loop tape to the sides for easy wrapping when Sewing Prefold Diapers
Understanding various sewing fasteners types can help you choose the best closure option for your DIY diaper project. Remember, many parents prefer keeping prefolds simple and using separate fasteners – this approach means less sewing work and more versatility in your Sewing Own Diapers project.
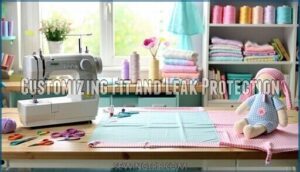
Customizing Fit and Leak Protection
For a foolproof fit, test your prefold diapers before declaring victory. Fold techniques like the newspaper fold or bikini twist help contain messes, while custom sizing guarantees snug coverage around those chunky baby thighs.
Add elastic adjustment to leg openings for extra security, and shape center panels for better absorption where it counts most, utilizing techniques like the bikini twist.
Caring for and Using Homemade Prefold Diapers
Once you’ve finished sewing your prefold diapers, proper preparation and care will guarantee they last through countless diaper changes while keeping your little one comfortable and dry.
Getting the care routine right from day one means fewer leaks, less wear and tear, and diapers that can handle whatever your baby throws at them, which is a result of countless diaper changes.
Prepping Diapers for First Use
After completing your sewing project, you’ll need to prep these prefold diapers properly before they’re baby-ready. Think of it like breaking in new shoes – they need some TLC first. Your freshly sewn cloth diapers won’t reach their full absorbency potential right out of the gate.
Here’s your initial washing roadmap:
- Sanitizing Methods – Wash in hot water (140°F) with regular detergent to eliminate any manufacturing residues
- Shrinkage Control – Complete 3-5 hot wash cycles to prevent future size changes during regular use
- Absorbency Testing – Each washing cycle increases absorption capacity until maximum performance is achieved
Skip fabric softening entirely during this prep phase – it creates a barrier that blocks moisture absorption. Your homemade prefold diapers will gradually fluff up and become more absorbent with each wash cycle, reaching peak performance after about five washes.
Washing and Drying Tips for Longevity
Once you’ve prepped your homemade prefolds, proper washing keeps them working like new for years. Smart Washing and Drying Cycle Optimization makes all the difference in cloth diapering success.
Wash every 2-3 days using warm water (40-60°C) for Water Temperature Control without damaging fibers. Choose liquid detergent over powder – it rinses cleaner and prevents buildup. Skip fabric softeners completely; they’re absorbency killers. Instead, try Fabric Softener Alternatives like white vinegar in the rinse cycle.
| Washing Best Practices | Drying Best Practices |
|---|---|
| Warm water cycles (40-60°C) | Line dry in direct sunlight |
| Double rinse for residue removal | Low heat tumble dry setting |
| Heavy-duty cycle for soil removal | Rotate position during air drying |
For Laundry Sanitizing Techniques, sun-drying beats high heat every time. The UV rays naturally sanitize while preserving fabric integrity. When machine drying, use low heat – high temperatures cause shrinkage and break down elastic fibers faster than a toddler’s attention span.
Your Eco Friendly Diapering investment deserves this extra care. These simple Stain Removal Methods and gentle cycles help cloth diapers outlast disposables while keeping diaper materials and fabrics in peak condition. The cloth diaper benefits multiply when you treat them right from day one. Understanding fabric care basics is essential for maintaining the quality and longevity of your homemade prefold diapers.
Avoiding Common Issues (staining, Buildup, Fraying)
Proper care prevents most diaper disasters. Skip fabric softener—it blocks absorbency like putting plastic wrap on a sponge. Your sewing skills created these prefolds, so protect your investment with smart maintenance.
- Stain removal: Rinse immediately in cold water, then sun-dry for natural bleaching
- Fray prevention: Zigzag stitch edges during construction and avoid harsh detergents
- Odor control: Wash every two days maximum to prevent bacteria buildup
- Diaper sanitizing: Hot water wash with powder detergent works better than liquid
- Thread protection: Air-dry when possible—heat destroys fabric fibers faster
Storage and Daily Care Recommendations
Beyond preventing stains and buildup, smart storage and daily care routines keep your cloth diapers ready for action. Organization makes diaper changes smoother—you won’t fumble around when baby’s crying at 3 AM.
| Storage Solutions | Daily Routines |
|---|---|
| Stackable bins for clean prefolds | Check diaper stash twice weekly |
| Mesh laundry bags for washing | Rotate oldest diapers to front |
| Airtight containers for sewing supplies | Pre-stuff night diapers after dinner |
Keep your diaper organization system simple. Store clean cloth diapers in breathable containers—plastic tubs work great. Your cloth diapering success depends on having sanitizing methods down pat and following consistent laundry tips for maximum absorbency.
Frequently Asked Questions (FAQs)
Can prefold cloth diapers be used for newborns?
Did you know newborns can go through 10-12 diapers a day?
You can absolutely use prefold cloth diapers for them—just pick the right size, fold for a snug fit, and skip fabric softener for max absorbency.
How many layers of fabric should I use for the absorbent layers?
You’ll want three to four layers of absorbent fabric for the center panel—think microfiber, terry, or flannel. Too few and you’ll risk leaks, too many and you’ll have a diaper that rivals a pillow!
What type of thread is best for sewing prefold diapers?
Ever had a thread snap mid-stitch? You’ll want high-quality polyester all-purpose thread—think white, black, gray, or beige. It’s strong, resists shrinkage, and keeps those diapers holding up, wash after wash.
Safety first, messes last! You can rely on strong thread for your needs.
How many prefold diapers should I make for a full stash?
You’ll need about 24-36 prefold diapers for a full stash, enough to keep the laundry beast at bay.
It’s like packing snacks for a road trip—better to have extras than run short!
How can I make prefolds more eco-friendly?
Pick plant-based fabrics, prewash with eco-friendly soap, and skip synthetic threads—nature’s nod to nappies!
Reuse old flannel shirts, air dry in sunshine, and avoid fabric softeners.
Your stash stays sustainable, safe, and snuggly.
Are homemade prefolds suitable for nighttime use?
You can use homemade prefolds for nighttime, but double up on absorbent layers—think microfiber or extra flannel.
Skip fabric softener, and check for leaks before bedtime. It’s better to overbuild than wake up to a soggy surprise!
What is the best way to store unused prefolds?
Store unused prefolds in a clean, dry bin with a lid—think of it like keeping cookies fresh.
Skip airtight containers; diapers need to breathe.
Toss in a lavender sachet if you want to dodge musty smells.
Can I sew prefolds without a serger?
Ever felt stuck without a serger? Relax, you’re still in business.
A zigzag stitch on your sewing machine keeps edges tidy and safe. It’s like putting up a fence—keeps fraying out, absorbency in.
How do I travel with homemade cloth diapers?
Traveling with homemade cloth diapers means packing extras, a wet bag for used ones, and a stain remover pen. Skip fabric softeners, and don’t forget your sense of humor—leaks happen, but you’ll handle it like a pro.
Conclusion
Funny how you stumbled on how to sew prefold cloth diapers just as your little one’s outgrowing store-bought options, right? You’ve got the know-how to keep your baby dry and comfy, plus you’ll dodge those diaper leaks like a pro.
Just remember, sturdy cotton and solid stitching are your best friends. Take care with sizing and washing, and don’t stress over a crooked seam—babies don’t judge. You’re ready for messes, savings, and a cleaner, safer diaper routine.
- https://www.youtube.com/playlist?list=PLGzz3_VP9G-fNrK19lTTH_vvbkKBrJcYE
- http://diaperpages.com/pf_folds.php
- https://clothdiaper.com/pages/prefolds
- https://superbottoms.com/blogs/diapering/bamboo-vs-cotton-diapers-inserts
- https://www.reddit.com/r/clothdiaps/comments/1jezysx/most_comfortable_prefold_materials/

